Note
●Reception takes anywhere from
about 30 seconds to about two
minutes.
●It can take as long as 13 minutes
when leap second information is
included.
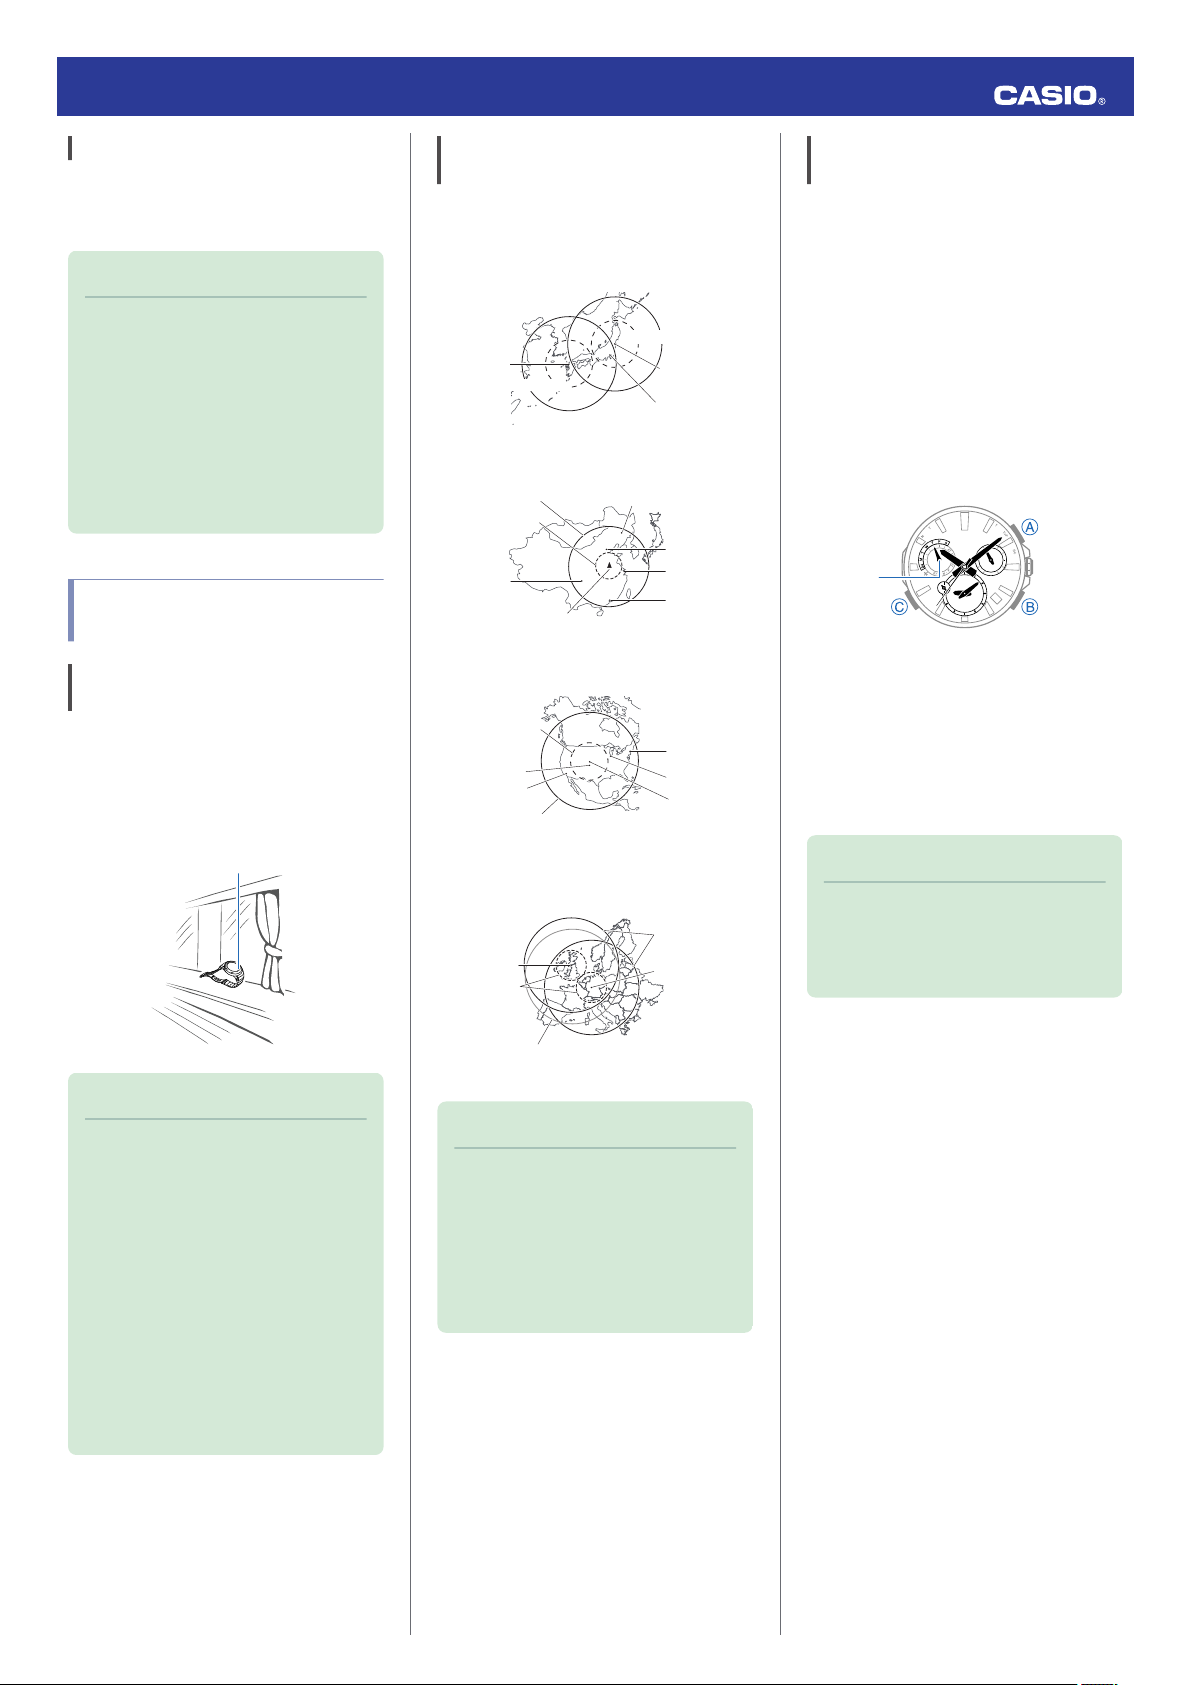
●You may experience location
information acquisition problems
when you are in the vicinity of a time
zone borderline.
The watch’s time and day will not be
indicated correctly if the Home City
(Time Zone) setting is not right for
your location. Perform position
information acquisition in a
representative city in your time zone
or in a location that is well within the
time zone. Or you can perform a time
information receive operation to
adjust time and day settings after
configuring Home City (Time Zone)
and summer time settings manually.
l Selecting a Time Zone
l Acquiring GPS Time Information
Manually
Acquiring GPS Time Information
Manually
You can use a button operation on the watch
to receive GPS signal time information. When
the receive operation is successful, the
watch’s Home City (time zone), day, and time
settings will be adjusted accordingly.
Note
●GPS signal reception requires large
amounts of power. Perform it only
when necessary.
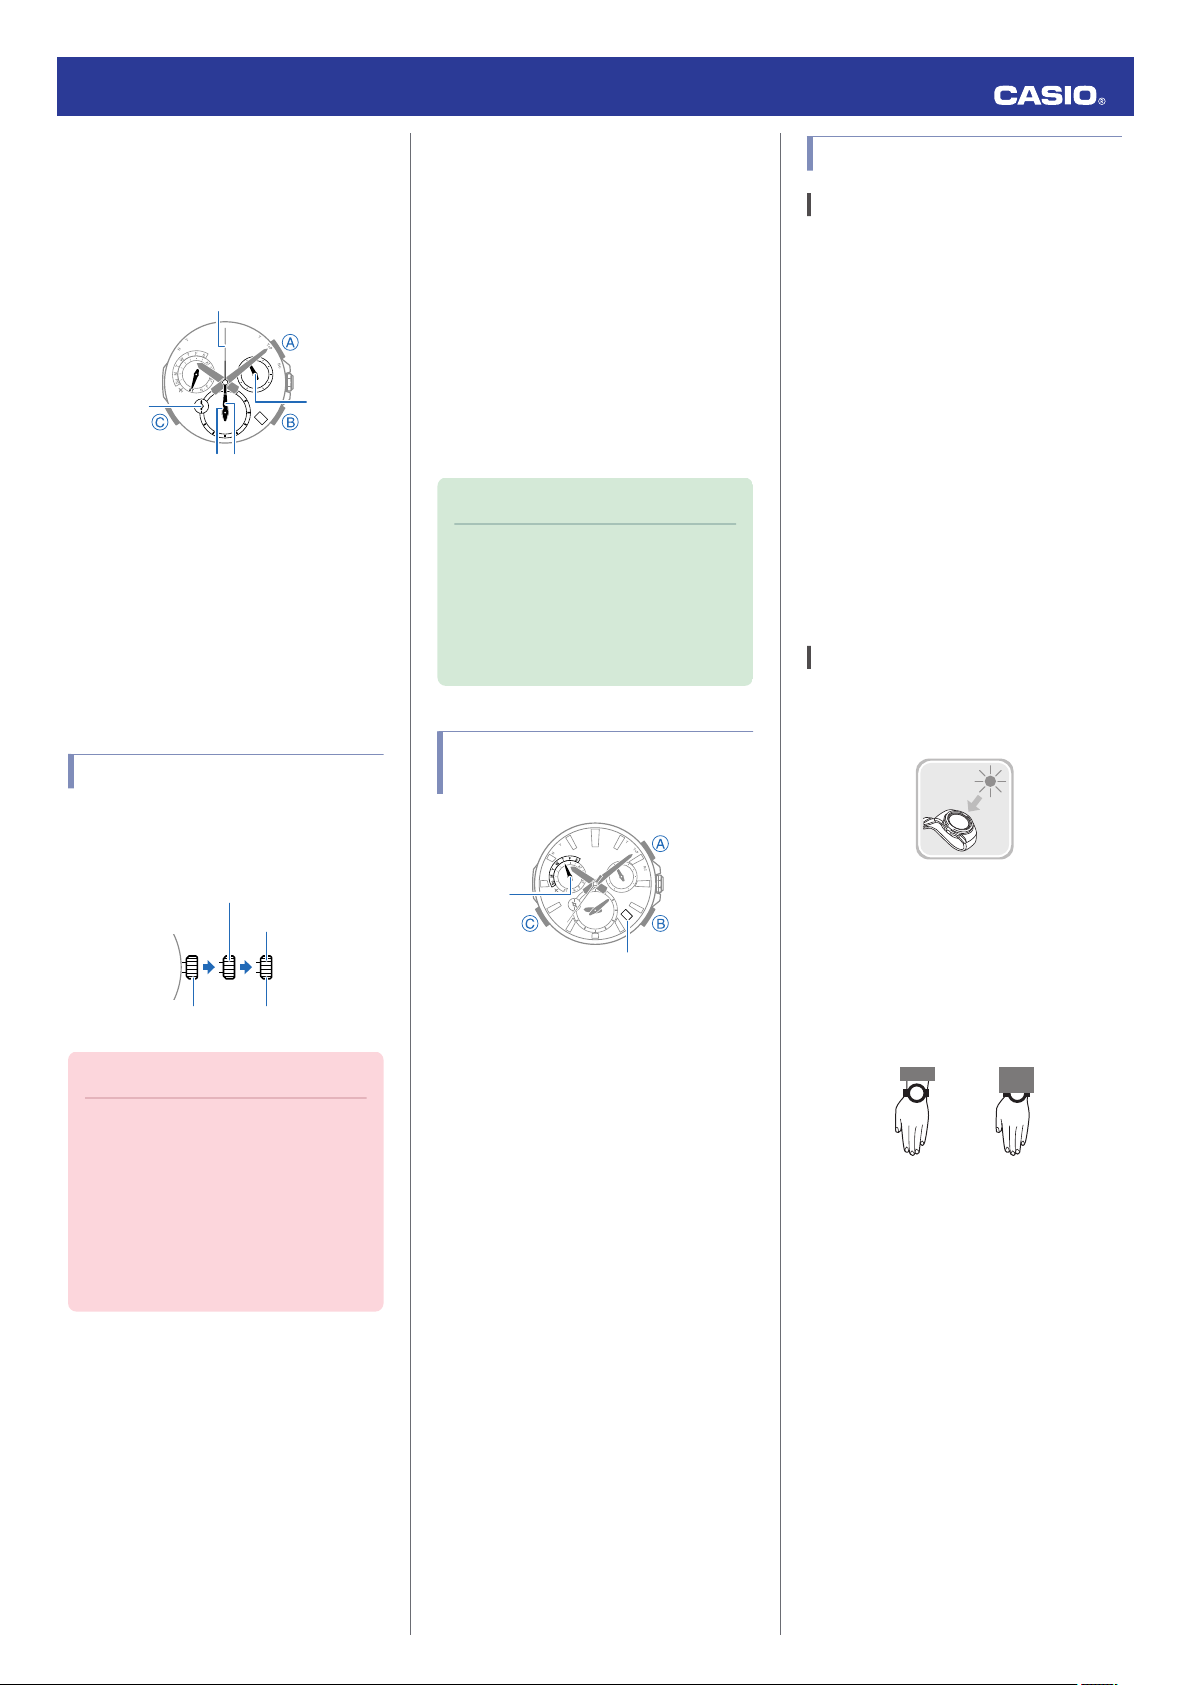
Getting ready
The receive operation is performed only while
the watch is in the Timekeeping Mode (normal
timekeeping).
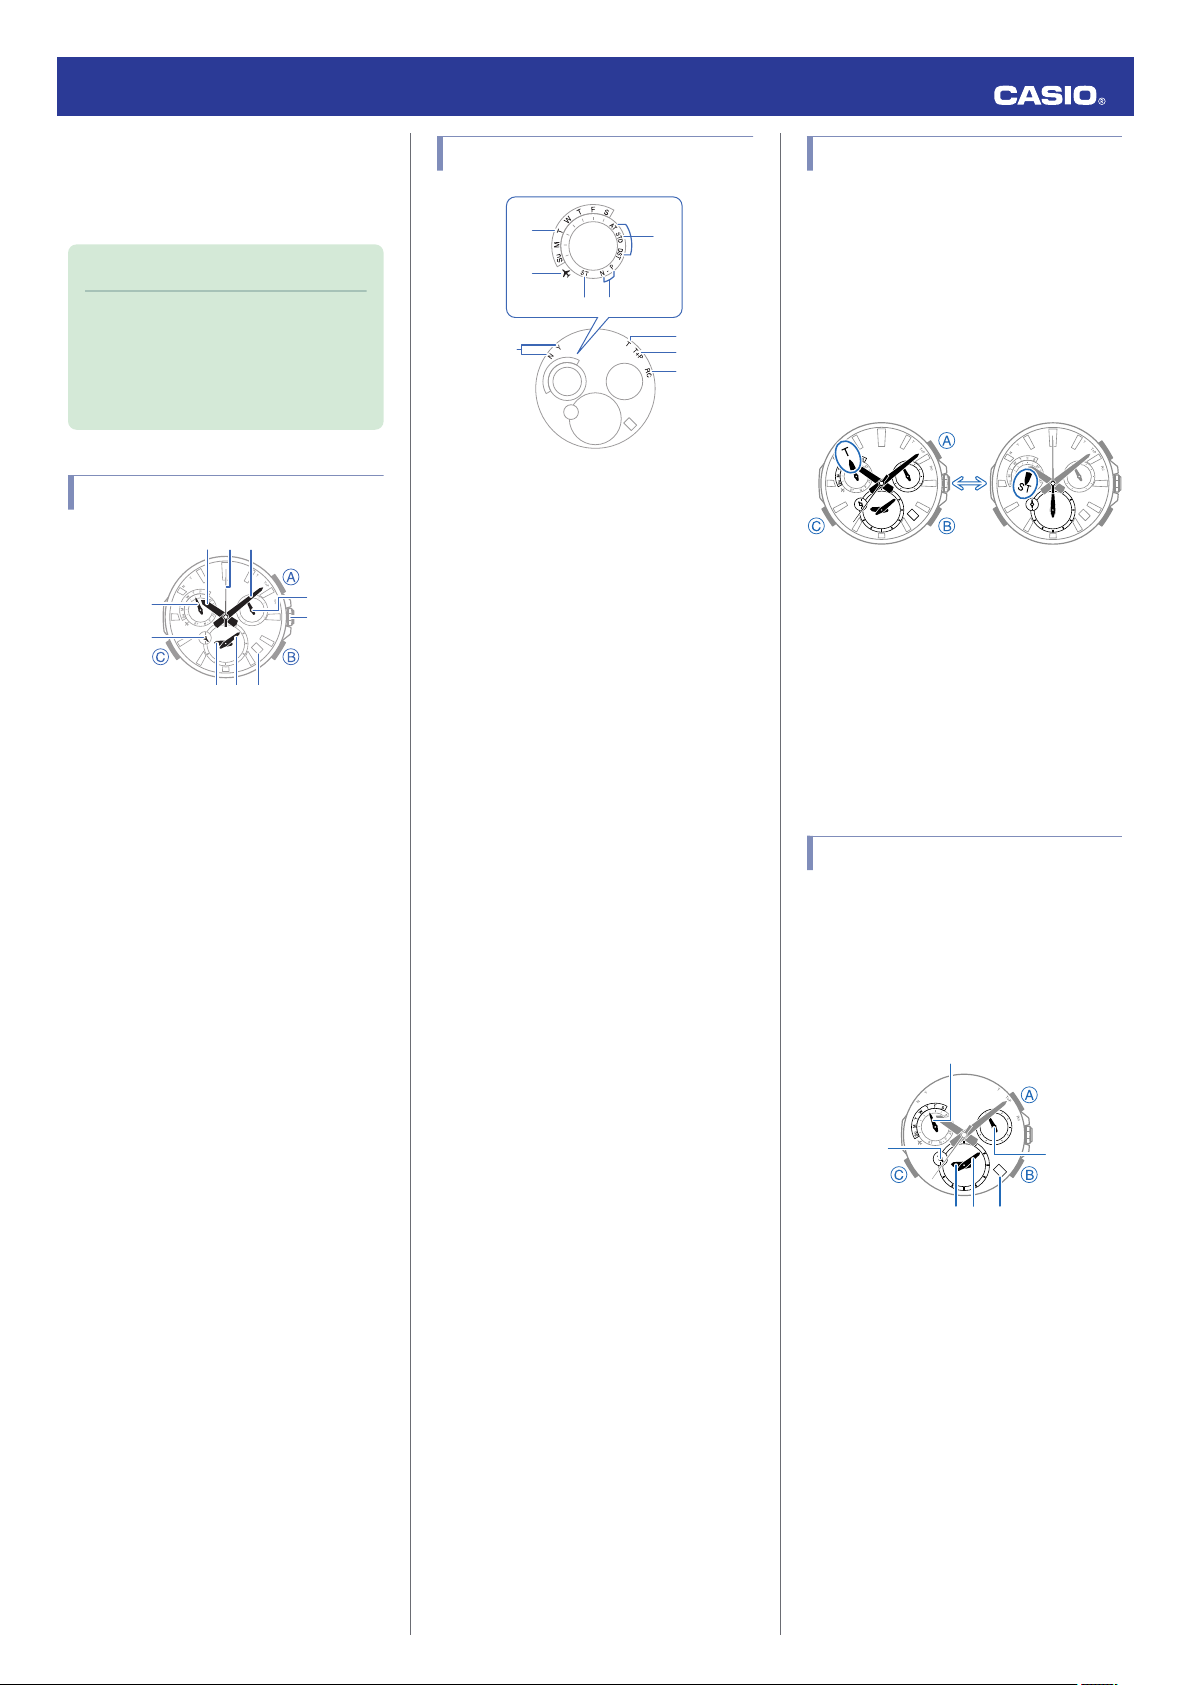
●Normally the mode hand points to the
current day of the week.
l Navigating Between Modes
1. Move to a location appropriate for signal
reception and orient the watch so its
display is pointed straight up at the sky.
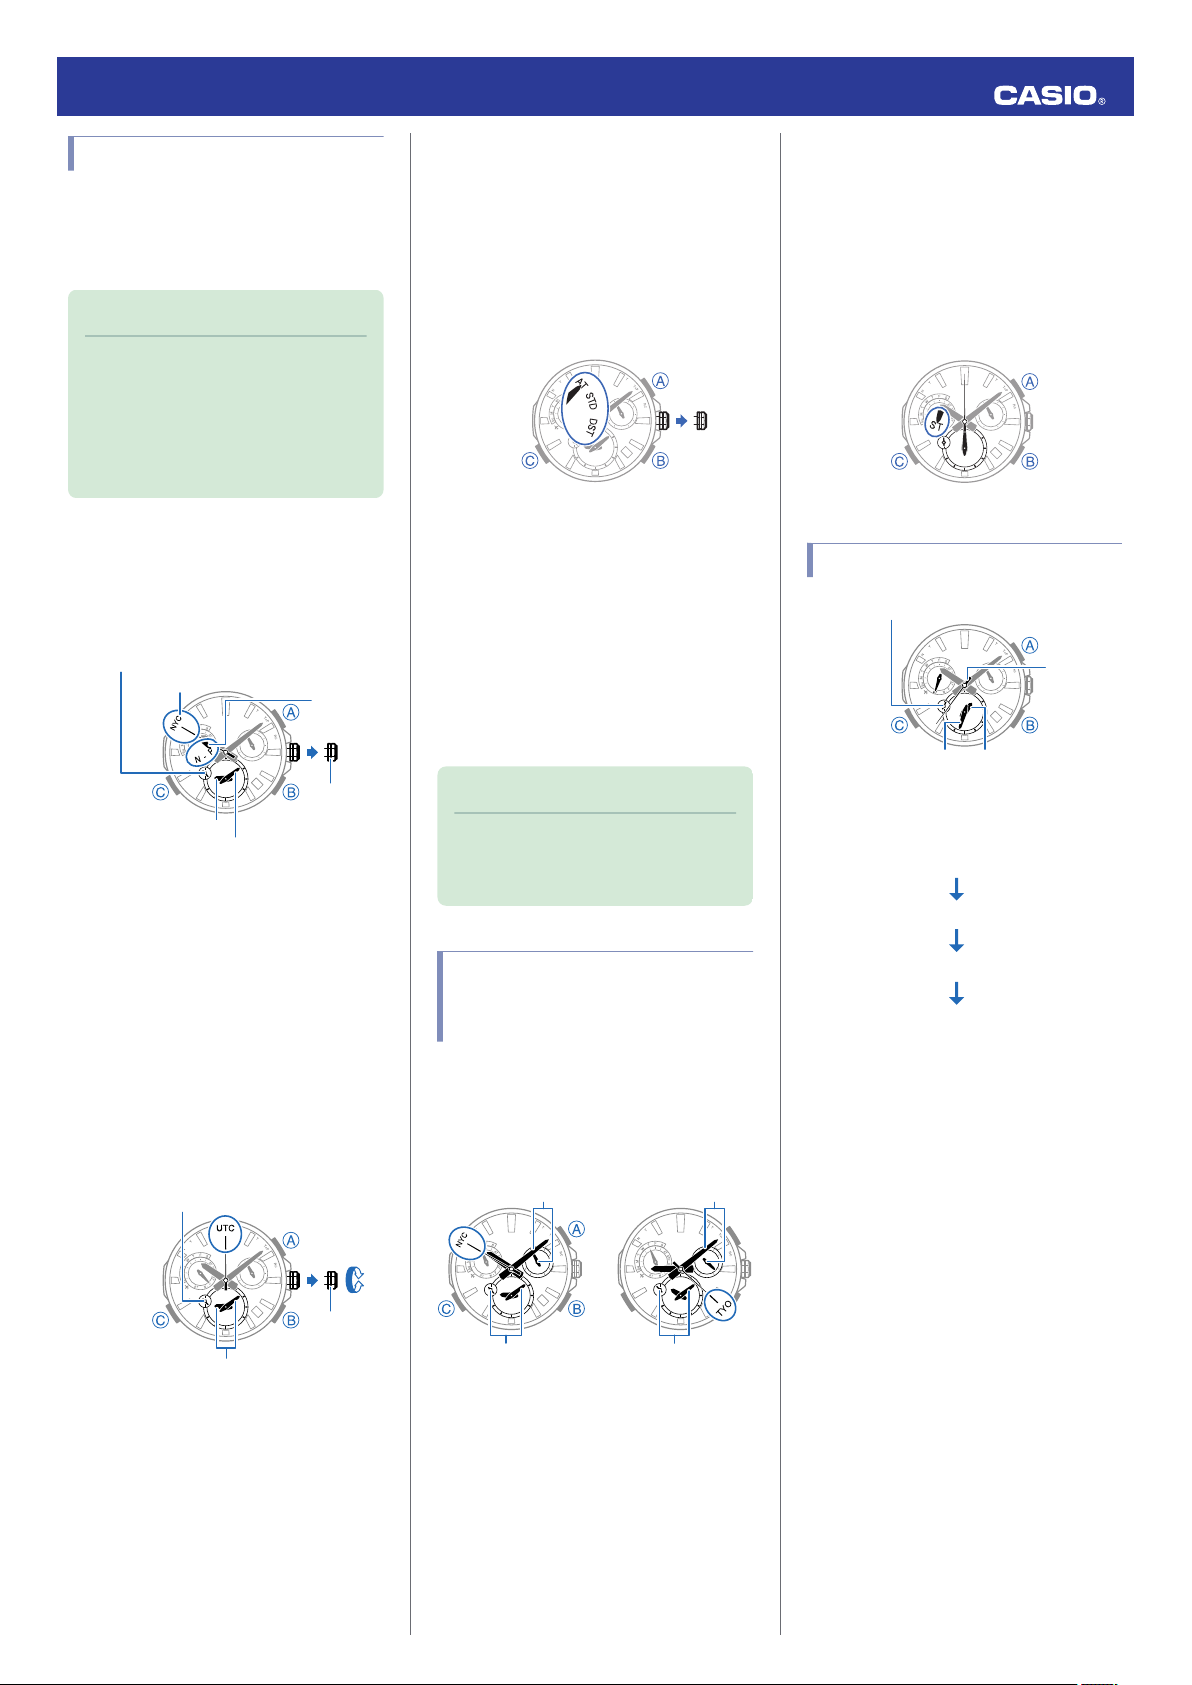
2. Hold down (B) for at least one second.
Release the button as soon as the second
hand points to “T (TIME)”.
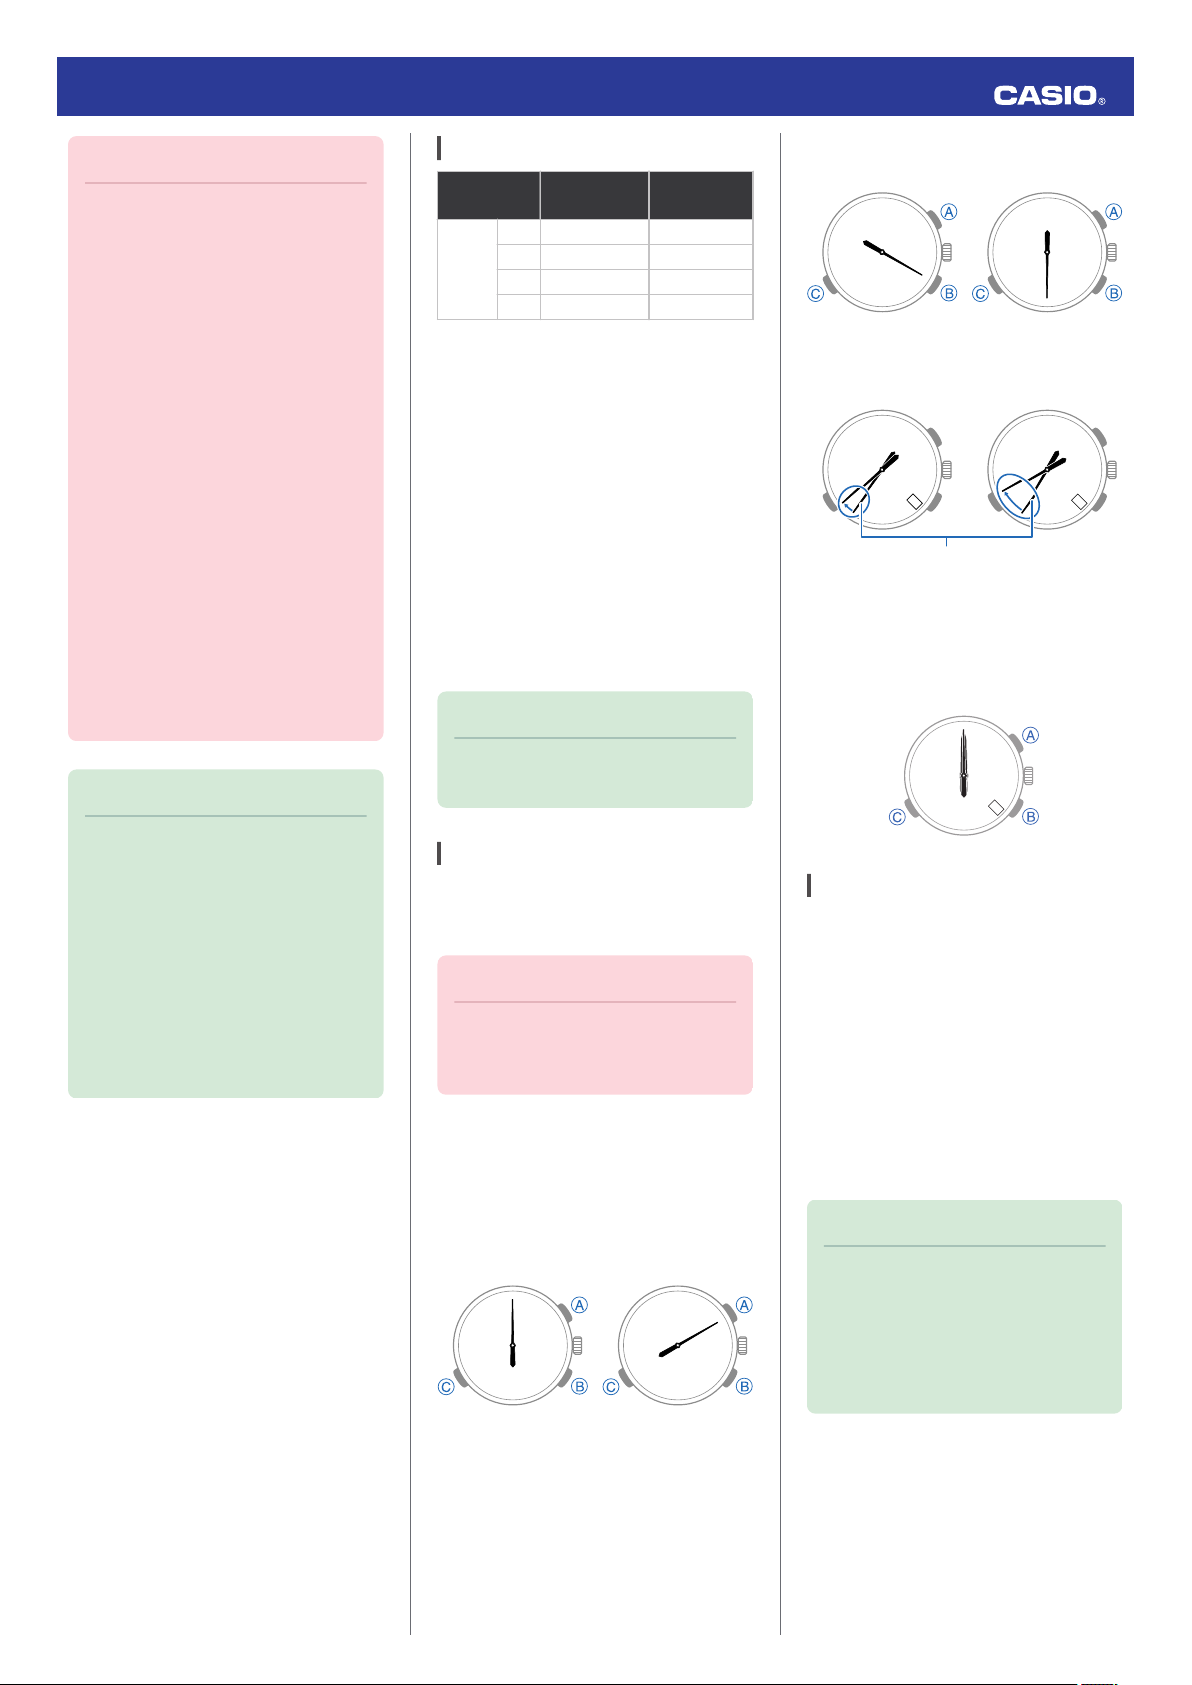
●The second hand will move in the
following sequence: “Y(YES)” or
“N(NO)” n “T (TIME)”.
●This indicates that time information
receipt has started.
●If information acquisition is successful,
the second hand will move to “Y(YES)”,
and then the watch will automatically
adjust its time and day settings.
●If reception fails for some reason, the
second hand will move to “N(NO)” and
then the watch will indicate the current
time and day without adjusting them.
Note
●Reception takes anywhere from
about seven seconds to about one
minute.
●It can take as long as 13 minutes
when leap second information is
included.
Auto GPS Signal Receive
When the conditions below are satisfied, the
watch will automatically receive a GPS signal.
If any time information receive is successful,
the watch will no longer attempt to receive a
signal for the rest of the day.
●Time information
●Watch in the Timekeeping Mode (normal
timekeeping)
●Current time is between 6:00 a.m. and 10:00
p.m.
●Light (near a window on a clear day)
continually shining on the face of the watch
for about one to two minutes.
●Time calibration signal reception was not
successful during the previous evening.
●Position information
●Watch in the Timekeeping Mode (normal
timekeeping)
●The watch exited the Airplane Mode.
●Current time is between 6:00 a.m. and 10:00
p.m.
●Light (near a window on a clear day)
continually shining on the face of the watch
for about one to two minutes.
Note
●The time information receive
operation takes anywhere from
about seven seconds to one minute,
while position information
acquisition takes anywhere from
about 30 seconds to two minutes.
●The receive operation can take as
long as 13 minutes when leap
second information is included.
Operation Guide 5454
5