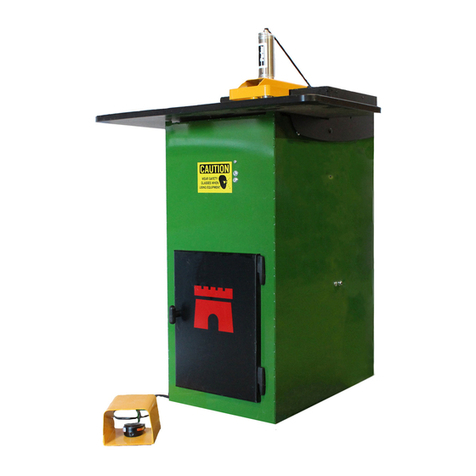
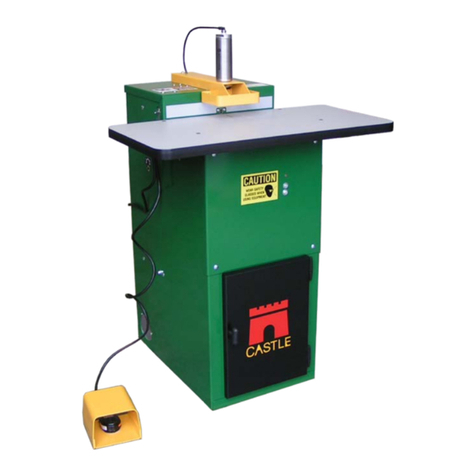
CASTLE TSM-21 User manual

CASTLE INC
Diagnostic
Manual
TSM-21

Castle Inc TSM-21 Diagnostic Manual v2 Page 2 of 63
Table of Contents
1.............................................................................................................................4INTRODUCTION
1.1 ........................................................................................................5HOW TO USE THIS MANUAL
2...................................................................................................6DRY CYCLE TESTING 21.95
2.1 ..................................................................................................................................6PURPOSE
2.2 ....................................................................................................................6DRY TEST TSM-21
3.................................................................................................................................8DEFINITIONS
4....................................................................................................10DIAGNOSTIC DESCRIPTIONS
4.1 ..................................................................................................................10CLAMP OPERATION
4.2 ................................................................................................................12ROUTER OPERATION
4.3 ....................................................................................................................13DRILL OPERATION
4.4 .......................................................14OVERALL MACHINE OPERATION AND POCKET ADJUSTMENT
5.............................................................................................................................16PROCEDURES
5.1 ...........................................................16CLAMP FOOT PAD OR CYLINDER REPLACEMENT 21.01
5.2 ..........................................................................17UNCLOGGING THE CLAMP SOLENOID 21.10
5.3 ........................................................................................18CLAMP SOLENOID CHECK 21.11
5.4 .........................................................................................19CLAMP CYLINDER CHECK 21.12
5.5 .......................................................................21PILOT VALVE,CLAMP EXHAUST CHECK 21.13
5.6 ....................................................................22PILOT VALVE CHECK AND REPLACEMENT 21.14
5.7 ...................................................................................24ROUTER MOTOR OPERATION 21.20
5.8 ...............................................................26ADJUSTING THE WEB,ROUTER STOP PLATE 21.21
5.9 ....................................................................................27ROUTER STOP SWITCH (NC) 21.22
5.10 ........................................................................29UNCLOGGING THE ROUTER SOLENOID 21.30
5.11 .......................................................................................30ROUTER CHECK SOLENOID 21.31
5.12 .............................................................................31ROUTER FEED RATE ADJUSTMENT 21.32
5.13 .......................................................................................33DRILL MOTOR OPERATION 21.40
5.14 ...............................................................................34DRILL SETTINGS AND BIT DEPTH 21.41
5.15 ...............................................................................36DRILL SINGLE COIL BAR SPRING 21.42
5.16 .......................................................................................37DRILL STOP SWITCH (NC) 21.43
5.17 ...........................................................................38UNCLOGGING THE DRILL SOLENOID 21.50
5.18 ..........................................................................................40DRILL SOLENOID CHECK 21.51
5.19 ..........................................................................................41DRIVE CYLINDER CHECK 21.60

Castle Inc TSM-21 Diagnostic Manual v2 Page 3 of 63
5.20 .................................................43DRIVE CYLINDER SQE (SUPER QUICK EXHAUST)VALVE 21.61
5.21 ...........................................................................................45PILOT HOLE ALIGNMENT 21.72
5.22 ................................................................................................45FOOT SWITCH (NO) 21.80
5.23 ........................................................................................47RESETTING THE MACHINE 21.81
5.24 .....................................................................47SAFETY SWITCH/SAFETY BUTTONS (NO) 21.82
5.25 .........................................................................49TOOLING CHECK AND REPLACEMENT 21.83
5.26 ........................................................................51AIR PRESSURE REGULATOR SETTING 21.90
5.27 .................................................................................52REPLACING SOLENOID VALVES 21.91
5.28 ..........................................................................................54ATTACHING AIR SUPPLY 21.92
6.................................................................................55APPENDIX A – MACHINE SAFETY 21.80
6.1 ................................................................55GENERAL SAFETY RULES FOR MACHINE OPERATORS
7................................................................................57APPENDIX B – WIRING DIAGRAM 21.84
8.......................................................................58APPENDIX C – CONTROL BOX WORKS 21.93
9......................................................59APPENDIX D – SOLENOID, PNEUMATIC DIAGRAM 21.94
10 ....................................................................60APPENDIX E – CONTROL BOX WORKS 21.93
11 ..................................................61APPENDIX F – SOLENOID, PNEUMATIC DIAGRAM 21.94
12 .............................................................................................................62APPENDIX G – INDEX

Castle Inc TSM-21 Diagnostic Manual v2 Page 4 of 63
1 Introduction
Thank you for making the Castle TSM-21 Screw Pocket Machine a vital part of your shop.
The TSM-21 is designed for use on a wide variety of materials including hardwoods, softwoods,
melamine, particleboard and MDF.
This manual is intended for anyone working with, or performing maintenance or service on the
TSM-21.
If trouble occurs, in most cases one of the major components is either not starting its function or
not completing its function. This may lead to a skip or stall in the operational sequence.
Troubleshooting the TSM-21 is greatly aided by understanding the machine’s operational
sequence which occurs in this order:
1. The Clamp extends to secure the work piece
2. The Router creates the pocket then retracts
3. The Drill creates the Pilot screw Hole then retracts
4. The Clamp releases the work piece

Castle Inc TSM-21 Diagnostic Manual v2 Page 5 of 63
1.1 How to Use This Manual
1. Closely observe the behavior of the machine noting which component is involved and
when in the operational sequence the problem is occurring.
2. Go to Section IV-Diagnostic Descriptions, which is organized by the operational
sequence of the machine.
3. Find the description which most closely matches the problem and systematically perform
the Diagnostic Procedures listed, checking them off as you go.
Example:
PageProcedure
Clamp comes down as soon as air is attached…with Machine power OFF:
□Check clamp Solenoid for function or blockage 12-13 21.11
Note: If you are unsure of your observations or if the fault behaviour seems irregular you
should “Dry Cycle” test the machine. See Procedure 21.95, page 4.

Castle Inc TSM-21 Diagnostic Manual v2 Page 6 of 63
2 Dry Cycle Testing 21.95
2.1 Purpose
Dry Cycle testing allows observation of the TSM-21’s mechanical, electrical, and pneumatic
functions without routing pockets or drilling holes.
Caution: Careful observation is essential when troubleshooting or seeking Technical
Support.
2.2 Dry Test TSM-21
1. Locate the ON/OFF switches on the Router and Drill and turn them both off, or unplug
both motors at the Control Box outlet.
2. Connect air and power to the machine. Turn the machine’s MAIN Power Switch ON.
3. Depress one of the Safety Buttons with a piece of scrap wood positioned out of the path
of both the router and drill bits. Position yourself to see both the Router and Drill bits
when they extend.
4. Press the Foot Pedal and observe the following actions in this order.
1. The Clamp extends to secure the scrap wood
2. The Router extends then retracts
3. The Drill extends then retracts
4. The Clamp releases the scrap wood
Total elapsed time should be approximately two seconds.
If the cycle does not begin, check the Air Supply, the Foot Switch, and the Safety
Switch:
Procedures 21.92, 21.80 and 21.82
If the cycle stalls with the router extended or if the cycle skips over the router stroke
entirely, check the Router Stop Switch: Procedure 21.22

Castle Inc TSM-21 Diagnostic Manual v2 Page 7 of 63
If the cycle stalls with the drill extended or if the cycle skips over the drill stroke
entirely, check the Drill Stop Switch: Procedure 21.43
If the complete cycle takes significantly longer than two seconds, check the Air
Supply, the Pressure Regulator, and the Router Feed Rate: Procedures 21.92, 21.90
and 21.32
If the Dry Cycle is successful, but a regular cycle fails when routing actual pockets
and drilling holes, check the Tooling, the Motor Operation, and the Drive Cylinder:
Procedures 21.83, 21.20 and 21.60
Note: For comprehensive diagnostic descriptions and procedures refer to Section IV.
After testing is complete, turn the MAIN Power Switch OFF and switch both motors back ON or
plug them both back into the Control Box outlet.

Castle Inc TSM-21 Diagnostic Manual v2 Page 8 of 63
3 Definitions
Term Definition
Air Pressure
Regulator Used to set the main operational speed of the machine. Factory set at
approximately 75 PSI. / approximately 6 full clockwise turns from stop.
Bar Spring Provides pressure to return the Motor Carriage to neutral after the
Pilot Drill stroke.
Continuity Testing “Visual Indicator” type testers use batteries and a light
bulb.
“Audible Indicator” type testers use batteries and a
beeper or buzzer.
Normally OPEN (NO) switches read no continuity at rest, IE; NO light
or sound from tester.
Normally CLOSED (NC) switches read continuity at rest, IE: light or
sound from tester.
Drill Motor Porter Cable 7301 Trimmer motor used to drill the Pilot Hole.
Drive Cylinder A double acting air cylinder which moves the Motor Carriage
backwards for the Pocket Router stroke and forwards for the Pilot Drill
stroke.
Pilot Hole The Screw hole drilled by the Drill motor.
Pilot Valve Provides full pressure to the Clamp cylinder. It is controlled by the
Clamp Solenoid.
Note: Used up to machine SN: 61076 only
Pocket The pocket cut in the material by the Pocket Router motor.
Router Motor Porter Cable 6902 used to cut the Pocket.
Router Feed Rate
Valve Controls the speed at which the Pocket Router moves through the
material when cutting the Pocket.
Note: Should be adjusted AFTER the main operational speed of
the machine has been set with the Air Pressure Regulator.

Castle Inc TSM-21 Diagnostic Manual v2 Page 9 of 63
Solenoids Electrically controlled air valves which send pressurized air to the
Clamp Cylinder and Drive Cylinder.
See Appendix C & E for illustrations.
SQE Super Quick Exhaust valves which release air pressure from the drive
cylinder after the Router and Drill strokes.
Note: Used up to machine SN: 62481 only.
Switches Normally OPEN (NO) switches
Foot Switch
Safety Switch
Normally CLOSED (NC) switches
Router Stop Switch
Drill Stop Switch
Web The distance between the deepest part of the pocket and the edge of
the material.

Castle Inc TSM-21 Diagnostic Manual v2 Page 10 of 63
4 Diagnostic Descriptions
4.1 Clamp Operation
Page Procedure
Clamp doesn’t come down, but Machine Routs and Drills:
□Check Clamp cylinder air line for leakage………………………… 19-20 21.12
□Check Clamp Solenoid for blockage.……………………………… 17-18 21.10
□Check Pilot Valve for function or blockage………………………..
(up to machine sn: 61076 Only)
22-24 21.14
Clamp comes down and STAYS DOWN as soon as air is attached…with Machine power OFF:
□Check Clamp Solenoid for function………………………………... 18-19 21.11
Clamp comes down, but immediately retracts…Machine does not Rout or Drill:
□Check Drill Stop Switch……………………………………………... 37-38 21.43
Clamp doesn’t hold stock securely:
□Clamp footpad replacement………………………………………… 16 21.01
□Internal Air Pressure too low, adjust Pressure regulator………… 51-52 21.90
□Router Feed Speed too fast, adjust Router Feed Rate………….. 31-32 21.32
□Check Tooling, may be dull………………………………………… 49-50 21.83
□Check Pilot Valve for function or blockage………………………..
(up to machine sn: 61076 Only)
22-24 21.14

Castle Inc TSM-21 Diagnostic Manual v2 Page 11 of 63
Page Procedure
Clamp releases slowly, Machine Routs and Drills:
□Check Clamp cylinder and air line…………………………………. 19-20 21.12
□Check Pilot Valve exhaust port……………………………………..
(up to machine sn: 61076 Only)
21-22 21.13
□Check Pilot Valve for function or blockage………………………..
(up to machine sn: 61076 Only)
22-24 21.14
□Check Clamp Solenoid for blockage………………………………. 11 21.10
Clamp doesn’t release…Machine Routs, and Drills:
□Adjust internal Air Pressure………………………………………… 51-52 21.90
□Check Pilot Valve for function or blockage………………………..
(up to machine sn: 61076 Only)
22-24 21.14
□Check Drill Stop Switch……………………………………………... 37-38 21.43
□Check Foot Switch…………………………………………………... 45-46 21.80
Clamp doesn’t release…Machine Routs, DOES NOT Drill:
□Check Pilot Valve for function or blockage………………………..
(up to machine sn: 61076 Only)
22-24 21.14
□Check Drill Solenoid for function or blockage…………………….. 40-41 21.51
Clamp doesn’t release…Machine Routs but Router DOES NOT retract, DOES NOT Drill:
□Router Stop switch…………………………………………………... 27-29 21.22

Castle Inc TSM-21 Diagnostic Manual v2 Page 12 of 63
4.2 Router Operation
Page Procedure
Router doesn’t cut pocket…Machine Clamps and Drills, but Clamp DOES NOT release:
□Check Router Feed Rate may be turned all the way down……... 31-32 21.32
□Check Router Solenoid for function or blockage…………………. 30-31 21.31
□Unclog Router Solenoid…………………………………………….. 29-30 21.30
□Router Motor Operation…………………………………………….. 24-26 21.20
□Check Router SQE Valve …………………………………………..
(or Solenoid exhaust port ) for leakage
43-44 21.61
□Check Drill SQE Valve……………………………………………….
(or Solenoid exhaust port ) for leakage
43-44 21.61
Router doesn’t cut pocket… Machine Clamps, Drills and releases:
□Check Router Stop Switch for function or adjustment…………… 27-29 21.22
Router comes up and STAYS UP as soon as air is attached…..with Machine power OFF:
□Check Router Solenoid for function or blockage…………………. 30-31 21.31
□Unclog Router Solenoid…………………………………………….. 29-30 21.30
Router cuts pocket and STAYS UP, Drill doesn’t come out and Clamp doesn’t release:
□Check Router Stop Switch for function or adjustment…………… 27-29 21.22
Router cuts pocket, Drill doesn’t come out and Clamp doesn’t release:
□Check Drill Solenoid for function or blockage…………………….. 38-39 21.50
Router advances too aggressively:
□Adjust internal Air Pressure………………………………………… 51-52 21.90
□Adjust the Router Feed Rate……………………………………….. 31-32 21.32

Castle Inc TSM-21 Diagnostic Manual v2 Page 13 of 63
4.3 Drill Operation
Page Procedure
Drill DOES NOT come out, Machine Routs, Clamp DOES NOT release:
□Check Drill Solenoid for function or blockage…………………….. 40-41 21.51
□Unclog Drill Solenoid………………………………………………… 38-39 21.50
Drill comes out and stays out as soon as air is attached…with Machine power OFF:
Machine DOES NOT finish cycle when carriage is pushed forward by hand:
□Check Drill Motor is On……………………………………………… 33-34 21.40
□Check Drill Stop Switch for function or adjustment………………. 37-38 21.43
Drill comes out and stops, Router cuts pocket and Clamp DOES NOT release:
Machine DOES finish cycle when carriage is pushed forward by hand:
□Adjust Air pressure, may be too low……………………………….. 51-52 21.90
□Check Drill Solenoid for function or blockage…………………….. 40-41 21.51
□Unclog Drill Solenoid………………………………………………… 28-39 21.50
□Check Router SQE Valve……………………………………………
(or Solenoid exhaust port ) for leakage
43-44 21.61
□Check Drill SQE Valve……………………………………………….
(or Solenoid exhaust port ) for leakage
43-44 21.61
Drill bit not completing pilot hole into Pocket:
□Adjust air pressure, Machine cycling too slowly………………….. 51-52 21.90
□Bit mounted too deep into collet……………………………………. 34-35 21.41
Drill bit separating from the shank:
□Adjust air pressure, Machine cycling too slowly………………….. 51-52 21.90
□Bit mounted too deep into collet……………………………………. 34-35 21.41

Castle Inc TSM-21 Diagnostic Manual v2 Page 14 of 63
Page Procedure
Drill bit breaking:
□Adjust air pressure, Machine cycling too fast…………………….. 51-52 21.90
□Bit extended too far out of collet…………………………………… 34-35 21.41
□Check Drill T-Handle bolt…………………………………………… 33-34 21.40
4.4 Overall Machine Operation and Pocket Adjustment
Page Procedure
Machine will not start cycle…motors are running:
□Check Air Supply, minimum 85 PSI required…………………….. 54 21.92
□Check Safety Switch………………………………………………… 47-48 21.82
□Check Foot Switch…………………………………………………... 45-46 21.80
Machine can be cycled with no stock in place:
□Check the Safety Switch……………………………………………. 47-48 21.82
Machine cycling too slowly
Note: A normal cycle is approximately 2 seconds
□Adjust Air Pressure Regulator……………………………………… 51-52 21.90
□Check Drive cylinder for air leak…………………………………… 41-42 21.60
□Check for other air driven machines on the same line…………... 51-52 21.90

Castle Inc TSM-21 Diagnostic Manual v2 Page 15 of 63
Page Procedure
Pocket ragged or crooked:
□Adjust Router Feed Rate, may be too fast………………………... 31-32 21.32
□Check Clamp footpad, may need replacement…………………... 16 21.01
□Check Tooling, may be dull………………………………………… 49-50 21.83
Pocket burned or smoking:
□Adjust Router Feed Rate, may be too slow………………………. 31-32 21.32
□Check Tooling, may be dull………………………………………… 49-50 21.83
Pocket misaligned with pilot hole:
□Adjust Pilot Hole alignment…………………………………………. 45 21.72
□Check Drill motor mounting………………………………………… 33-34 21.40
Pocket too close or too far from the edge of the stock, WEB adjustment:
□Adjust Web with Router Stop Plate………………………………... 26-27 21.21

5 Procedures
5.1 Clamp Foot Pad or Cylinder Replacement 21.01
5.1.1 TO REPLACE THE CLAMP FOOT PAD:
1. The Clamp Foot Pad is not attached by adhesive. While the Clamp Foot is still attached
to the machine, use a flat blade screwdriver to remove the old Pad by carefully levering it
out of its seat.
2. The rim of the new Pad must be bent and popped into place. Insert an edge of the new
pad into the Clamp Foot and use a flat blade screwdriver to wedge the rest of the Foot
Pad into the Clamp Foot.
5.1.2 TO REPLACE THE CLAMP FOOT OR CLAMP CYLINDER:
1. Connect 85 PSI directly to the Clamp Cylinder to manually actuate it.
2. With the shaft fully extended, hold the shaft stationary with a ½” wrench and loosen the
jamb nut with a ¾” wrench. Continue holding the shaft stationary with the ½” wrench and
use large slip-joint pliers to turn the Clamp Foot and break it free of thread lock com-
pound. See Fig 1.
Jamb Nut
Clamp Foot
Foot Pad
Fig 1
Castle Inc TSM-21 Diagnostic Manual v2 Page 16 of 63

Castle Inc TSM-21 Diagnostic Manual v2 Page 17 of 63
3. The Clamp foot can now be removed for replacement, or to allow for removal of the
Clamp Cylinder assembly.
5.2 Unclogging the Clamp Solenoid 21.10
Note: All Solenoid Air Fittings are “Push In” connections. To remove an air line, push in the
plastic or metal rim of the fitting and pull the air line out. To re-install, push the air
line in until it meets resistance and then push in another 1/2'”.
The appearance of the solenoids may differ. See Appendix E, page 51 for equivalent illustration
on machines SN: 61076 and above.
1. Disconnect power and air from the machine. Remove both air lines from the Clamp So-
lenoid. See Fig 2.
“Push In” rim while pulling out
air line
Air OUT Line
Clamp Solenoid
Air IN Line
Fig 2
2. Reconnect air to the machine and the “Air In” line will now be flowing with about 85 PSI.
Use the “Air In” line to clean out both open ports on the Clamp solenoid.
3. Disconnect the air supply and reinsert the “Air In” line back into the “Air In” port of the
solenoid.
4. Un-plug or turn off both routers.

Castle Inc TSM-21 Diagnostic Manual v2 Page 18 of 63
5. Reconnect power and air to the machine, and turn the Power Switch ON.
6. Place a board against the Safety Buttons and depress the Foot Pedal. Air should now
be flowing from the “Air Out” port of the solenoid.
7. Turn the Power Switch OFF and repeat steps 5 and 6 several times to ensure all con-
taminants are expelled, then reinsert the remaining hose back into the “Air Out” port of
the Clamp Solenoid.
8. Turn the routers back on and cut a test pocket.
Note: If this procedure does not correct the problem, the Clamp Solenoid will need to be
replaced. Refer to Procedure 21.91, “Replacing Solenoids” page 47-48
5.3 Clamp Solenoid Check 21.11
The Clamp Solenoid signals the Pilot Valve to provide full air pressure to the Clamp. If the
Clamp Solenoid has failed open the clamp will come down as soon as air is attached to the
machine, without the power being turned on.
The appearance of the solenoids may differ. See Appendix E, page 51 for equivalent illustration
for machines SN: 61076 and above.
5.3.1 Troubleshooting Steps:
1. Disconnect air supply from the machine.
2. Swap the "Air Out" lines between the Clamp Solenoid and the Router Solenoid. See Fig
3.

Castle Inc TSM-21 Diagnostic Manual v2 Page 19 of 63
Pilot Valve, up to
SN: 61076
Clamp Exhaust
Clamp Solenoid
Router Solenoid
Drill Solenoid
Air OUT lines
Air IN lines
Regulator Knob
Router Feed Rate
knob
Fig 3
3. Reconnect the air supply to the machine and see if the router now actuates instead of
the clamp. If it does the Clamp Solenoid has stuck open.
4. Swap the air lines back again.
5. Perform procedure 21.10, “Unclogging the Clamp Solenoid”.
5.4 Clamp Cylinder Check 21.12
If the Clamp Cylinder clamps or retracts slowly it is having trouble filling or exhausting, or it may
be faulty. If the clamp operates normally with an external air supply, look for a crimp in the black
¼” air line from the Clamp Cylinder to the Pilot Valve (up to machine SN: 61076) or from the
Clamp Cylinder to the Clamp Solenoid (machine SN: 61076 and up).

5.4.1 TROUBLESHOOTING STEPS:
1. Disconnect power and air from the machine.
2. Disconnect the air line from the “push in” fitting of the Clamp Cylinder.
3. Connect an external air supply directly to the “push in” air fitting. See Fig 4.
Air Fitting
Clamp Air line
Clamp Cylinder
Fig 4
4. The Clamp Foot should fully extend quickly. Remove the external air supply and the
Clamp Foot should fully retract quickly.
5. If both clamp actions are smooth and quick the Clamp Cylinder is operating properly.
Continue troubleshooting the Clamp Cylinder Air Line, the Pilot Valve (on Mead solenoid
machines) and the Clamp Solenoid. See Fig 5.
Castle Inc TSM-21 Diagnostic Manual v2 Page 20 of 63
Other manuals for TSM-21
2
Table of contents
Other CASTLE Cutter manuals
Popular Cutter manuals by other brands

Hitachi
Hitachi VB 16Y Technical data and service manual

Greenlee
Greenlee ES20LXR instruction manual

ARIES INDUSTRIES
ARIES INDUSTRIES CT1750 Operation and maintenance manual

Bush Hog
Bush Hog 4815RR1 Operator's manual

Hypertherm
Hypertherm HyPerformance Plasma HPR400 instruction manual

BorMann
BorMann Technik BBS4000 owner's manual