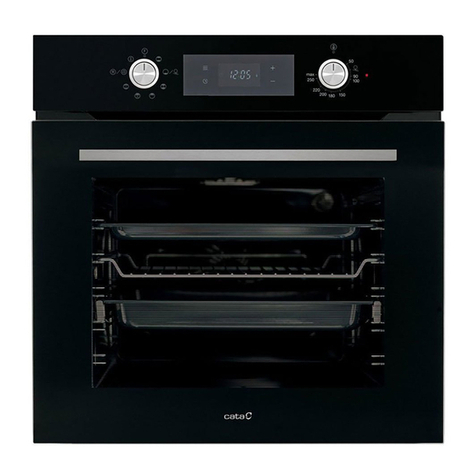
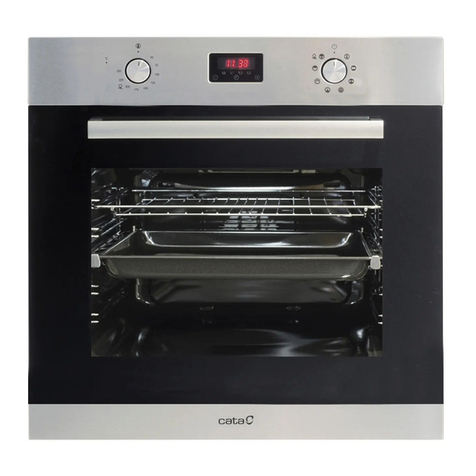
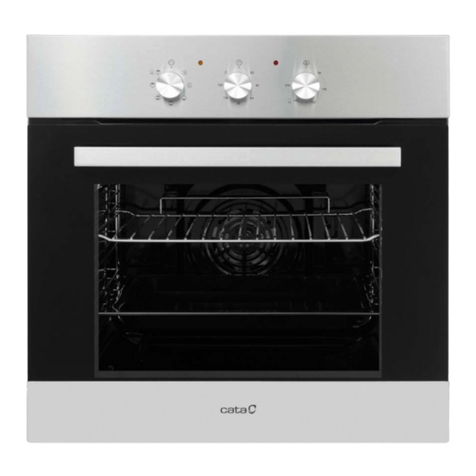
Cata EOS60SS2 User manual

EOS60SS2/ EOSV2 v3c
Barcode 8422248603348 / 8422248600262
GB IE
EOSV2 - EOS60SS2
CONVENTIONAL OVEN

[01] x 1
[02] x 1
[03] x 1
[04] x 1
[05] x 1
[06] x 4
[07] x 4
(Ø3.9 x 32 mm)

3
GB IE Built In Conventional Oven 04
Installation 28
EOS60SS2 - EOSV2

4
GB IE
Let's
get started...
Getting started... 05
Before you start 06
Safety 09
In more detail... 11
Product functions
Operation
Care and maintenance
Troubleshooting
Recycling and disposal
Technical and legal information
Guarantee
CE Declaration of conformity
12
14
16
20
21
22
25
27
Appendix
28
Installation

5
Getting
Started...
Getting started...
GB IE
Before you start 06
Safety 09

6
Getting started...
GB IE
Before you start
To avoid the risks that are always present when you use
an electrical appliance it is important that this appliance is
installed correctly and that you read the safety instructions
carefully to avoid misuse and hazards. Please keep this
instruction booklet for future reference and pass it on to any
future owners. After unpacking the appliance please check
that it is not damaged. If in doubt, do not use the appliance
but contact Customer Services on 0844 800 1128 (UK), 1
800 535542 (Ireland) and 01 56 48 02 60 (France).
Check the package and make sure you have all of the
parts listed.
Decide on the appropriate location for your product.
If this product contains glass please take care when tting
or handling to prevent personal injury or damage to the
product.
The specications plate is available on this appliance. This
plate displays all the necessary identication information for
ordering replacement parts.
If you sell the appliance, give it away, or leave it behind
when you move house, make sure you also pass on this
manual so that the new owner can become familiar with the
appliance and its safety warnings.
Before you start

7
Getting started...
GB IE
Instructions
This user manual must be kept for future reference and use
by someone who is not familiar with the appliance.
Before using the oven, carefully clean the inside with a
non-abrasive detergent and warm water. Position the grill
and tray in their respective runners. Once the operation is
complete, turn the oven on to the maximum temperature
for approximately 20 minutes to remove any traces of
manufacturing grease, oil or resins which may cause
unpleasant odours when cooking.
Prior to start up of the appliance
WARNING: During this rst use some smoke or unpleasant
odours may appear. Should this happen ventilate the room
suitably until the rst operation is nalised.
Once this simple operation has been carried out the oven is
ready to use for cooking.
This appliance is exclusively for domestic use.
Use the oven to cook food only.
Before cooking, make sure all oven accessories that are
not required are removed from the oven.
Pre-heat the oven to the cooking temperature before using it.
Place the cooking trays in the centre of the oven and leave
space in between when using more than one, so that the
air can circulate.
Do not put oven trays on the base of the oven or cover it
with aluminium foil. This will cause thermal accumulation.
The cooking and roasting times will not coincide and the
enamel may be damaged.
Try to open the oven door as little as possible to see the
food (the oven light remains on during cooking).
Take care when opening the door to avoid contact with hot
parts and steam.
Before you start

8
Getting started...
GB IE
Before you start
Tools Required
We advise when installing
this appliance two people are
recommended.

9
Getting started...
GB IE
Safety
These instructions are for your safety. Please read through
them thoroughly prior to installation and retain them for
future reference.
This appliance complies with all current European safety legislation,
however, the Manufacturer must emphasise that this compliance does
not prevent the surfaces of the appliance from heating up during use and
remaining hot during its operation.
Accessible parts may become hot during use. Young children should be kept
away. Care should be taken to avoid touching the appliance (e.g hob, cooker).
The Manufacturer highly recommends that this appliance be kept out of the
reach of babies and small children.
Children should be supervised to ensure that they do not play with the
appliance.
This appliance is not intended for use by persons (including children) with
reduced physical sensory, or mental capabilities, or by those who lack
experience and knowledge, unless they have been given supervision and
instruction concerning the use of the appliance by a person responsible for
their safety.
Means for disconnection must be incorporated in the xed wiring in
accordance with the wiring rules. An all-pole disconnection switch having
a contact separation of at least 3 mm in all poles should be connected in
xed wiring.
Do not allow the electric cables to touch the hot parts of the appliance.
Make sure that the power cord is not caught under or in the appliance and
avoid damage to the power cable.
Do not install the appliance outdoors in a damp place or in an area which
may be prone to water leaks such as under or near a sink unit. In the event
of a water leak allow the machine to dry naturally.
Please dispose of the packing material carefully.
Do not use ammable sprays in close vicinity to the appliance.
• All installation work must be carried out by a
competent person or qualied electrician.
• This appliance must be installed correctly by a
suitably qualied person, strictly following the
manufacturer’s instructions.
10
Getting started...
GB IE
Safety
We also recommend that great care be taken during use and cleaning.
Read the cleaning and maintenance sections for this appliance carefully.
A steam cleaner is not to be used.
The appliance is not intended to be operated by means of external timer or
separated remote-control system.
The appliance is for domestic use only.
Do not place heavy objects on this oven or lean on the door when opening
it, as this may damage the hinges.
Do not leave hot oil or fats unattended as they may catch light.
Do not place oven dishes or trays of the base part of the oven or cover it in
aluminium foil.
Do not install the appliance near curtains or upholstered furniture.
Do not try to lift or move kitchen appliances by pulling any door or handle as
this may cause damage.
If the oven seal is very dirty, the door will not close properly when the oven
is working. The fronts of neighbouring furniture may be damaged. Keep the
oven seal clean.
Open the oven carefully as hot steam may escape.
Do not pour water inside a very hot oven. The enamel may be damaged.
Heat, vapour and humidity are produced during use, avoid all kinds of
personal damage and ensure that the room is suitably ventilated. If used for
a prolonged period of time, additional ventilation may be necessary. Consult
a qualied installer if you have any doubts about the necessary volume.
The Manufacturer declines all liability for personal or material damage as a
result of misuse or incorrect installation of this appliance.

11
In more detail...
GB IE
In more
detail...
Product functions 12
Operation 12
Care and maintenance 16
Troubleshooting 20
Recycling and disposal 21
Technical and legal information 22
Guarantee 25
CE Declaration of conformity 27

12
In more detail...
GB IE
Product Functions
Product functions
> The oven is controlled by a thermostat between 50 ºC and 250 ºC,
depending on the temperature required. The thermostat pilot light turns
on and off to indicate the temperature control during use.
> The required cooking mode is selected using the multi-functional control
button. The functions that may be selected are:
Oven Light
Turning control knob to this setting, the oven
light will illuminate in the oven cavity, and
will operate on all selected functions.
Conventional
Upper and lower heating element come on.
Heat is distributed by natural convection
and this means the top half of the oven is
warmer than the bottom half, food should
be placed on a higher shelf if the food is
to be crisped. It is recommended that the
oven is pre-heated for 10-15 minutes before
commencing cooking.
Lower Element
Lower element comes on, heat radiates
by natural convection from the base of the
oven.
Grill Grill element comes on and is dispersed by
radiant heat.
> Oven door should be open when using grill function
> Read the information of the food packaging for the cooking
temperatures and times. Once familiar with the performance of the
appliance, the temperatures and times may be varied to adapt them to
your personal tastes.
> Check that frozen food is completely thawed before cooking, unless
indicated otherwise.
The information given in the following charts is intended only
as a guide. Select the lowest temperature quoted and check
the food at the end of the shortest duration quoted.

13
In more detail...
GB IE
Cooking instructions
CONVENTIONAL
Cakes/Biscuits Temperature °C Shelf Position
(Recommended)
from the bottom
Cooking Time
in min.
Cake Mixture Desserts in Moulds
Sponge cake 150 – 170 1 60 – 70
Marble, nut cake (tin) 150 – 170 1 60 – 80
Fresh fruit cake (tray) 170 – 190 2 45 – 50
Flan base 170 – 190 1 20 – 25
Biscuits (tray) 170 – 190 2 20 – 20
Sponge cake
(3 to 6 eggs) 3)
170 – 190 1 20 – 35
Swiss roll 180 – 200 1 12 – 16
Short Pastry Dessert in Moulds
Tart / an base 170 – 190 2 15 – 20
Streusel cake 170 – 190 2 45 – 55
Cheesecake 170 – 190 2 10 – 20
Apple pie 170 – 190 1 90 – 90
Apricot tart with topping 170 – 190 1 55 – 75
Raised Dough Dessert in Moulds
Streusel cake 170 – 190 1 35 – 45
White bread 180 – 200 1 40 – 50
Pizza (tray) 190 – 210 1 35 – 45
Onion tart 180 – 200 1 25 – 35
Apple turnovers 160 – 180 2 25 – 30
Choux pastry, Eclairs 180 – 200 2 25 – 35
Puff Pastry 190 – 210 2 15 – 25
Meringues, Macaroons 120 – 140 2 25 – 50
> Pre-heat the oven for 10 mins.
Operation

14
In more detail...
GB IE
Operation
CONVENTIONAL
Food Recommended
shelf level
from the bottom
Temperature °C
Time in min.
Roast beef, approx. 1 kg 1 190 – 210 100 – 120
Beef llet, approx. 1 kg 1 200 – 220 45 – 55
Venison, approx. 1 kg 1 190 – 210 90 – 120
Pork joint, approx. 1 kg 1 200 – 220 100 – 120
Pork joint, approx. 2 kg 1 180 – 200 120 – 150
Ham joint, approx. 1 kg 1 200 – 220 60 – 70
Meat loaf, approx. 1 kg 1 190 – 210 70 – 80
Veal, approx. 1.5 kg 1 190 – 210 100 – 120
Leg of lamb, approx. 1.5 kg 1 220 – 220 90 – 120
Rack of lamb, approx. 1.5 1 190 – 210 50 – 60
Poultry, 0.8 – 1 kg 1 190 – 210 60 – 70
Poultry, approx. 2 kg 1 190 – 210 90 – 110
Poultry stuffed, approx. 2 1 190 – 210 110 – 130
Poultry, approx. 4 kg 1 180 – 200 150 – 180
Fish, whole, approx. 1.5 kg 1 190 – 210 35 – 55

15
In more detail...
GB IE
Operation
GRILL
Food Recommended
shelf level
from the bottom
Temperature
Setting
Total grilling
Time in min.
Thin cuts
Steak 3 or 4 maximum 10 – 16
Kebabs 3 maximum 25 – 30
Chicken kebabs 3 maximum 20 – 25
Cutlets/Schnitzel 3 or 4 maximum 12 – 18
Liver 3 or 4 maximum 8 – 12
Burgers 3 or 4 maximum 14 – 20
Sausages 3 or 4 maximum 10 – 15
Fish llet 3 or 4 maximum 12 – 16
Trout 3 or 4 maximum 16 – 20
Toast 3 or 4 maximum 2 – 4
Cheese toast 3 or 4 maximum 7 – 9
Tomatoes 3 or 4 maximum 6 – 8
Peaches 2 maximum 6 – 8
Thicker cuts
Chicken (approx. 1 kg) 1 maximum 50 – 60
Rolled meat, 7 cm,
(approx. 1 kg)
1 maximum 75 – 85
Pork (approx. 1 kg) 1 maximum 100 – 120
Sirloin (approx. 1 kg) 1 – –
> Turn half way through the grilling time.
> Select the appropriate shelf level for the thickness of the food.
> If you use the grill function, the door has to be kept slightly opened.
> The grill power can be regulated by the temperature control knob.
CAUTION
The oven door becomes hot during use of the grill.

16
In more detail...
GB IE
Using The Mechanical Timer (Fig 1)
Once the thermostat controls are in the desired position, turn the knob
clockwise to the maximum position and then turn it anti-clockwise to the
desired time; at the end of this set time the buzzer will sound. The timer only
indicates the end of the set time, but it does not stop the function being
used.
0
30
40
50 10
20
FIG 1
Operation

17
In more detail...
GB IE
Care and maintenance
IMPORTANT !
As a safety precaution, before beginning to clean the
appliance always switch off at the mains switch.
1Cleaning an oven that does not feature self-cleaning
panels must be done after use, when it is switched off but
still warm, not hot, so that the lm of grease produced by
the cooking vapours on the walls is still easy to remove,
as well as the drips and splashes of fat that are not yet
hard and dry.
2To clean the stainless steel external parts, use a soft cloth
with soap and water; do not use any powdered products
that contain abrasive substances.
Normally, wiping with a damp soft cloth and warm detergent is enough, but
for stubborn stains the following is recommended:
Cleaning the oven cavity
> Spray a proprietary oven cleaner inside your oven and leave it to work
for the time specied in the manufacturers instructions.Then use a clean
sponge to wipe off the foam residue.
> Wear rubber gloves to prevent the cleaner coming into contact with your
skin and make sure the kitchen is well-ventilated to disperse the fumes
produced by the cleaner. Repeat if necessary.
> Also avoid the use of acid or alkaline substances (lemon juice, vinegar,
salt, tomatoes, etc.). Avoid using products containing chlorine, acid or
abrasive substances specially for cleaning the varnished walls. Do not
use thick steel wool or hard utensils, as they can damage the surface
nishes.
> Do not use high pressure cleaners or steam appliances for cleaning the
oven.
> Only use a recommended cleaner for this type of material – avoid
chloride-based products such as bleach.
FUSE
OFF
Warning
Always switch off the electricity supply before
performing maintenance work. In the event of a fault,
contact customer services.

18
In more detail...
GB IE
Removing the door from the oven (Fig.1)
> To simplify cleaning the interior of the oven, the door can be removed.
The process of removing the door is shown below:
> Open the door fully to position “C”
Lift the two mobile links "A" of the hinges, until xing at point “B”.
> Then close the door to the half-way position.
> Next, lift the door upwards and remove it, sliding it outwards; hold the
door by the sides close to the hinges when doing this.
> To replace the door, rst slide the hinges into their grooves and open the
door completely.
> Remember to turn the two moving links "B" used to engage the two
hinges before closing the door (Fig.1).
WARNING
• Take care not to remove the hinge locking system when taking off the
door, as the hinge mechanism can spring back suddenly.
• Never submerge the door in water for any reason.
Care and maintenance
A
B
C
FIG. 1

19
In more detail...
GB IE
Care and maintenance
Cleaning the glass door (Fig.2)
> If possible, remove the oven door glass following the manufacturer's
instructions. Use warm water with a little detergent to clean the glass
sections of the door.
> Do not use abrasive products which could damage the glass. Remember
that if the surface of the glass panel becomes scratched, it could cause a
dangerous failure.
> To simplify the cleaning, the inner glass panel can be taken out of the
door. The method for removing the glass from the door is shown below.
> After removing the screws xing the glass, located on the inner face of
the door, lift the glass out carefully. In versions with three glasses the
intermediate glass can also be removed. The procedure is the same as
above.
FIG.2
2
2
1
Fig. 4

20
In more detail...
GB IE
Care and maintenance
Replacement of the oven light bulb (Fig. 3)
> Not covered by the appliance guarantee.
The oven has a light with the following characteristics:
> 15 W or 25 W, 300 ºC and type E-14
1. During use the appliance becomes hot. Care should be taken to avoid
touching heating elements inside the oven
2. WARNING: Ensure that the appliance is switched off before replacing
the lamp to avoid the possibility of electric shock
3. Remove the glass cover that protects the light bulb by turning it
anti-clockwise.
4. Unscrew the old light bulb and dispose of it safely and ecologically,
change it for one as specied in the "Technical data" and replace
the cover.
Note: The glass cover may be tight and, therefore, may need a grip to
release it.
90’
FIG.3
WARNING: Disconnect the appliance from the electricity
supply, open the oven door remove the oven shelves.
This manual suits for next models
1
Table of contents
Other Cata Oven manuals

Cata
Cata MD7010BK User manual

Cata
Cata CMD 9208 BK User manual

Cata
Cata MDS 7208 X Quick start guide

Cata
Cata EFGM60SS2 User manual

Cata
Cata OVG60SS User manual

Cata
Cata HMD7010 User manual

Cata
Cata MDS 7205 X Quick start guide

Cata
Cata me-910 Manual

Cata
Cata CD 790 Pyro Operating manual

Cata
Cata 65DME40113 User manual
Popular Oven manuals by other brands

Lamona
Lamona LAM3803 Instructions and installation

LG
LG WDEP9423 Series owner's manual

Whirlpool
Whirlpool CS1250 Health & Safety, Use & Care, Installation Guide and Online Warranty Registration Information

IKEA
IKEA NUTID OV 9 user manual

Vitek
Vitek VT-1277 Manual instruction

Ariston
Ariston MP796IXA Daily reference guide