manuals.online logo
Brands
  1. Home
  2. •
  3. Brands
  4. •
  5. Cavius
  6. •
  7. Smoke Alarm
  8. •
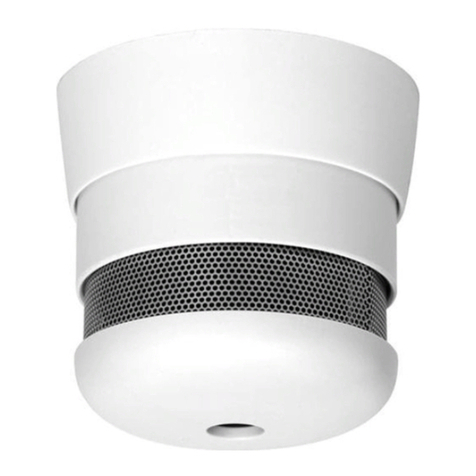
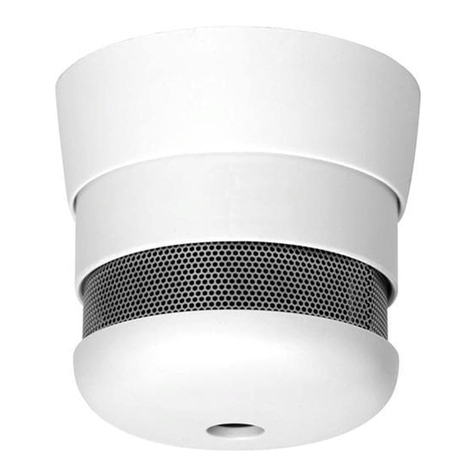
  9. Cavius 4002-001 User manual

Cavius 4002-001 User manual

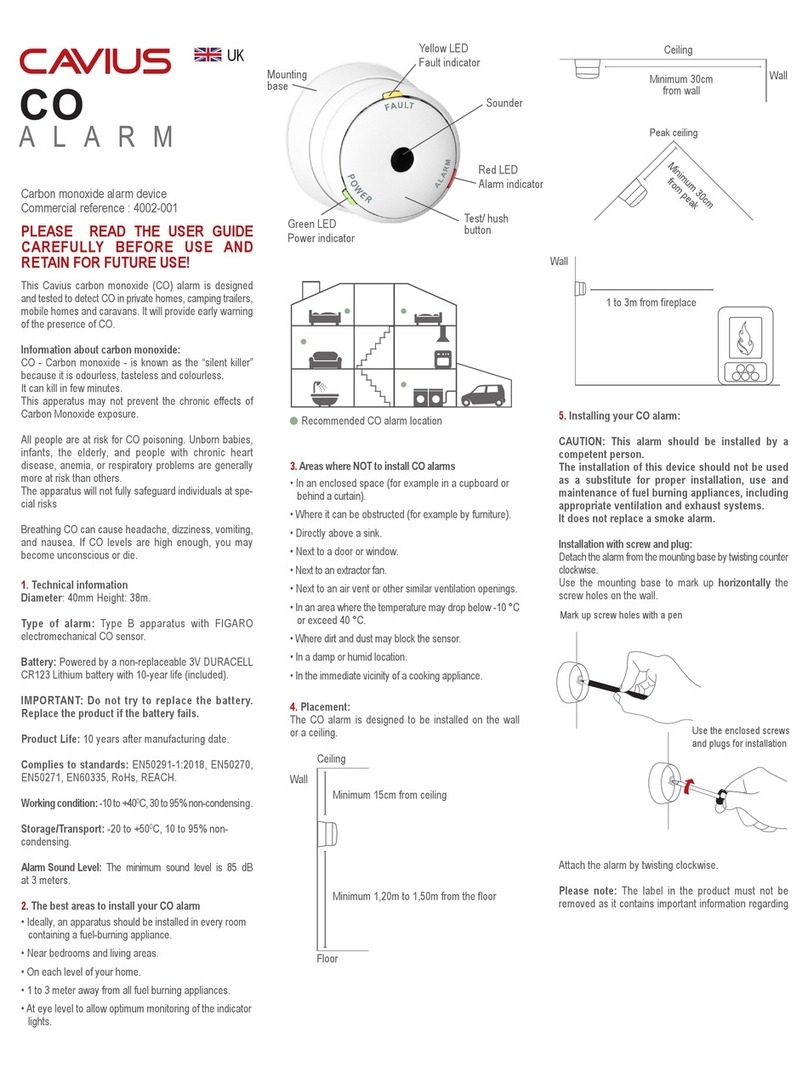
3. Areas where NOT to install CO alarms
• In an enclosed space (for example in a cupboard or
behind a curtain).
• Where it can be obstructed (for example by furniture).
• Directly above a sink.
• Next to a door or window.
• Next to an extractor fan.
• Next to an air vent or other similar ventilation openings.
• In an area where the temperature may drop below -10 °C
or exceed 40 °C.
• Where dirt and dust may block the sensor.
• In a damp or humid location.
• In the immediate vicinity of a cooking appliance.
4. Placement:
The CO alarm is designed to be installed on the wall
or a ceiling.
5. Installing your CO alarm:
CAUTION: This alarm should be installed by a
competent person.
The installation of this device should not be used
as a substitute for proper installation, use and
maintenance of fuel burning appliances, including
appropriate ventilation and exhaust systems.
It does not replace a smoke alarm.
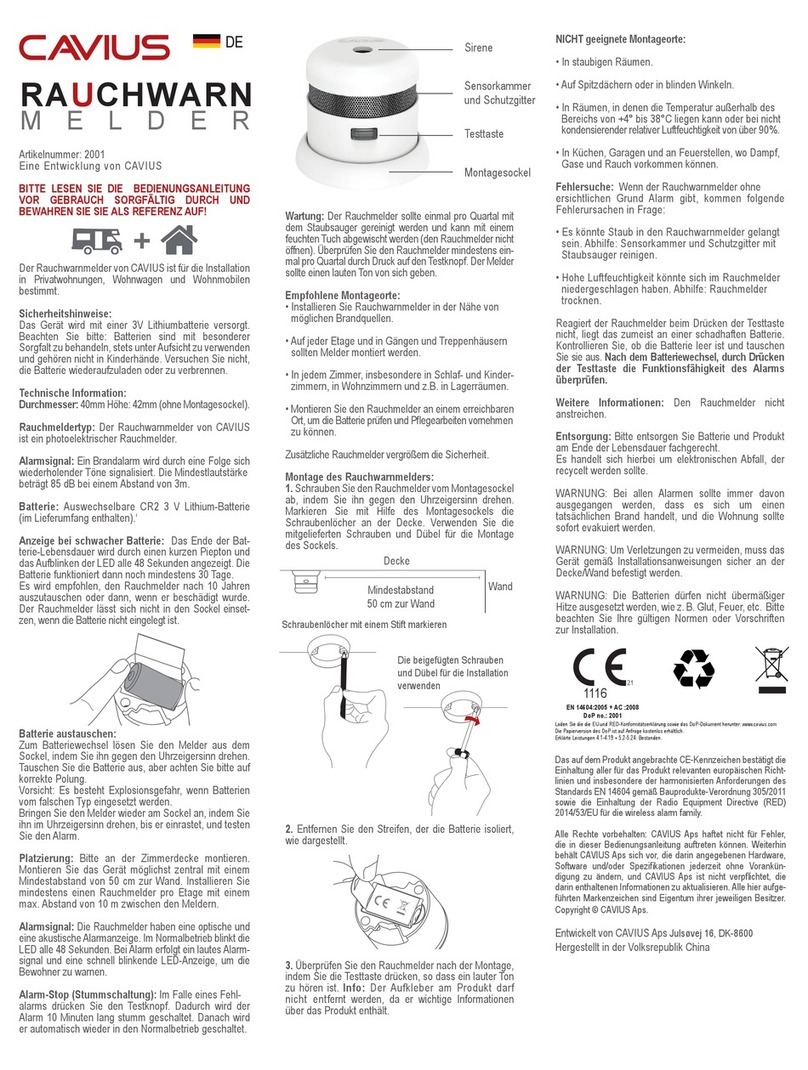
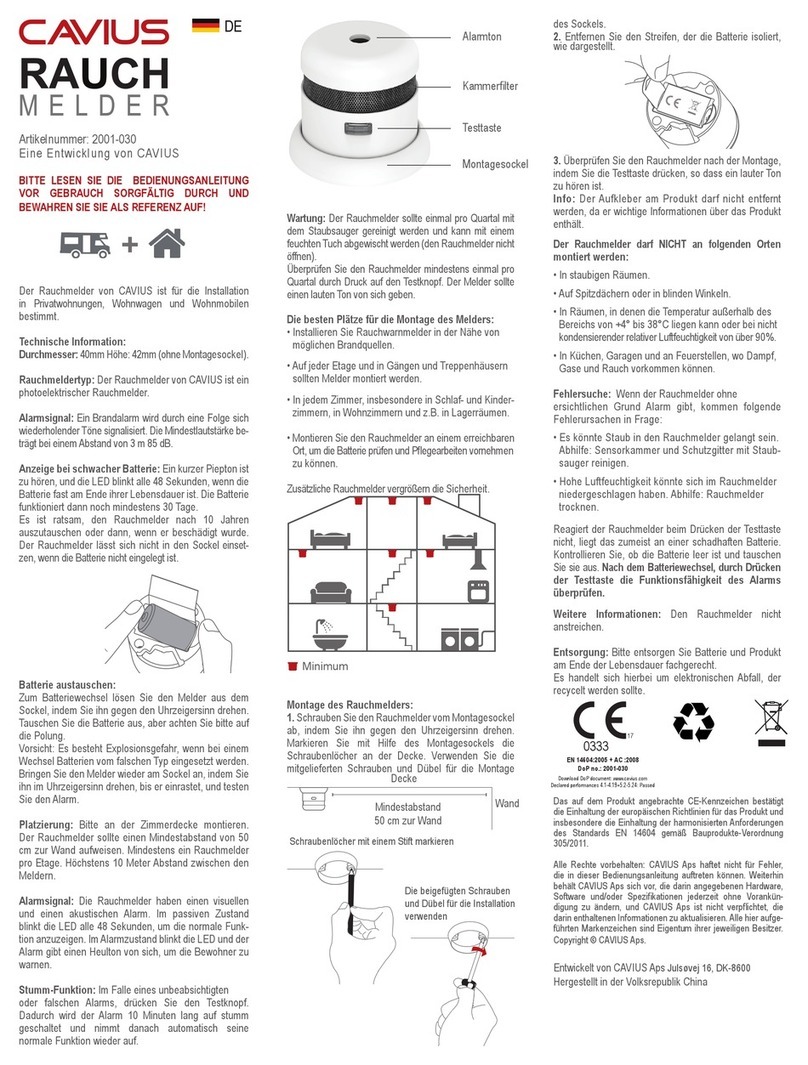
Installation with screw and plug:
Detach the alarm from the mounting base by twisting counter
clockwise.
Use the mounting base to mark up horizontally the
screw holes on the wall.
Attach the alarm by twisting clockwise.
Please note: The label in the product must not be
removed as it contains important information regarding
the product.
UK
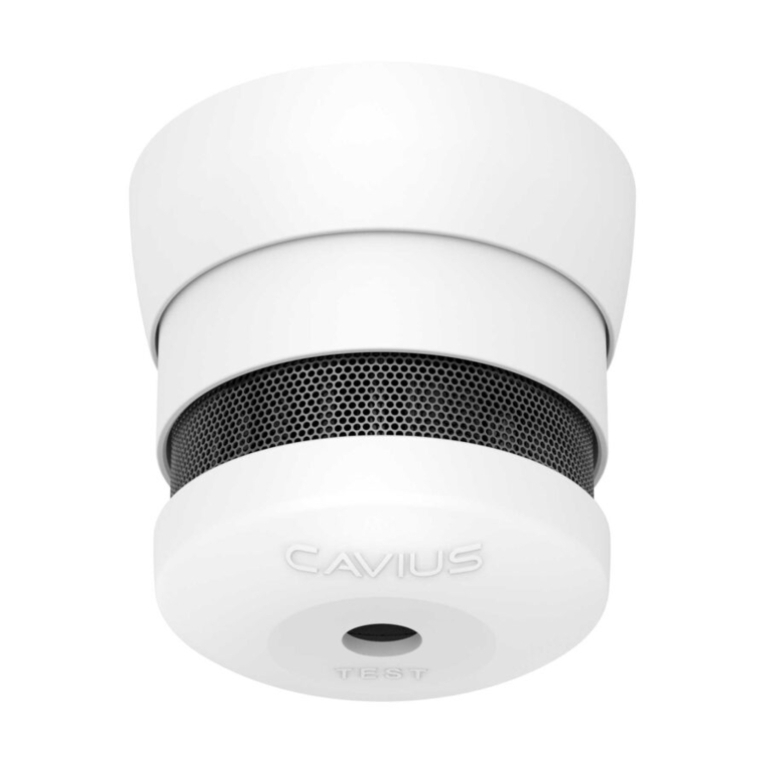
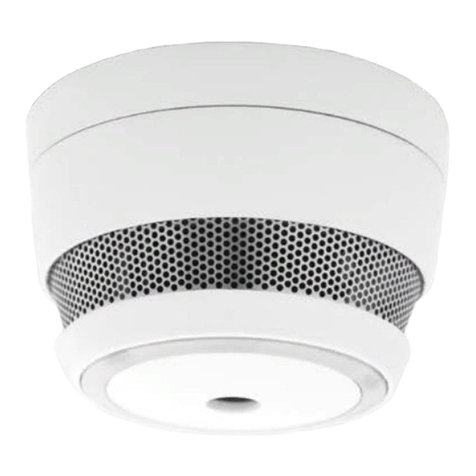
Carbon monoxide alarm device
Commercial reference : 4002-001
PLEASE READ THE USER GUIDE
CAREFULLY BEFORE USE AND
RETAIN FOR FUTURE USE!
This Cavius carbon monoxide (CO) alarm is designed
and tested to detect CO in private homes, camping trailers,
mobile homes and caravans. It will provide early warning
of the presence of CO.
Information about carbon monoxide:
CO - Carbon monoxide - is known as the “silent killer”
because it is odourless, tasteless and colourless.
It can kill in few minutes.
This apparatus may not prevent the chronic effects of
Carbon Monoxide exposure.
All people are at risk for CO poisoning. Unborn babies,
infants, the elderly, and people with chronic heart
disease, anemia, or respiratory problems are generally
more at risk than others.
The apparatus will not fully safeguard individuals at spe-
cial risks
Breathing CO can cause headache, dizziness, vomiting,
and nausea. If CO levels are high enough, you may
become unconscious or die.
1. Technical information
Diameter: 40mm Height: 38m.
Type of alarm: Type B apparatus with electro-chem-
ical CO sensor.
Battery: Powered by a non-replaceable 3V CR123 Lith-
ium battery with 10-year life (included).
IMPORTANT: Do not try to replace the battery.
Replace the product if the battery fails.
Product Life: 10 years after manufacturing date.
Complies to standards: EN50291-1:2018, EN50270,
EN50271, EN60335, RoHs, REACH.
Working condition: -10 to +400C, 30 to 95% non-condensing.
Storage/Transport: -20 to +500C, 10 to 95% non-
condensing.
Alarm Sound Level: The minimum sound level is 85 dB
at 3 meters.
2. The best areas to install your CO alarm
• Ideally, an apparatus should be installed in every room
containing a fuel-burning appliance.
• Near bedrooms and living areas.
• On each level of your home.
• 1 to 3 meter away from all fuel burning appliances.
• At eye level to allow optimum monitoring of the indicator
lights.
Peak ceiling
Minimum 30cm
from peak
Mark up screw holes with a pen
Use the enclosed screws
and plugs for installation
Minimum 30cm
from wall
Wall
Ceiling
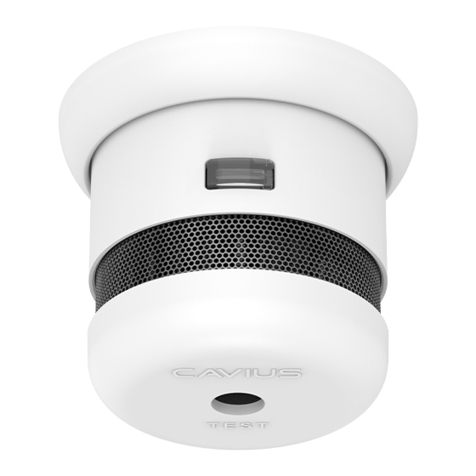
Sounder
Red LED
Alarm indicator
Yellow LED
Fault indicator
Test/ hush
button
Mounting
base
Green LED
Power indicator
Minimum 15cm from ceiling
Wall
Ceiling
Minimum 1,20m to 1,50m from the oor
Floor
Recommended CO alarm location
1 to 3m from replace
Wall
Developed by CAVIUS Aps Julsøvej 16, DK-8600
Manufactured in P.R.C.
The CE mark affixed to this product confirms its com-
pliance with the European Directives which apply to
the product.
All Rights reserved: CAVIUS Aps assumes no respon-
sibility for any errors, which may appear in this manual.
Furthermore, CAVIUS Aps reserves the right to alter the
hardware, software, and/or specications detailed herein
at any time without notice, and CAVIUS Aps does not
make any commitment to update the information con-
tained herein. All the trademarks listed herein are owned
by their respective owners. Copyright © CAVIUS Aps.
127290rev2
Installation with adhesive tape (EXTRA):
1. Choose a suitable spot. Make sure that the mounting
area is stable, dry and free of dust and grease. Check
that the surface is at. Once xated, the alarm can not
be removed or repositioned.
2. Remove the protective foil from the adhesive tape.
3. Mount the alarm to the wall or ceiling by applying light
pressure.
6. Test function:
After installation and at least once per quarter, test your
alarm to make sure it is operating correctly.
It is recommended to check visually every week if the
green LED ashes correctly (every minute)
When the top button is pressed the alarm sounder will
sound, and when the button is released, the alarm will
make a self-test of the sensor and battery for approxi-
mately 9 seconds. During this delay the three LEDs will
be ashed in sequence. The result of the test will be indi-
cated after the test has been completed.
If the test passes, the green LED will emit for 3 sec. If the
test fails, a fault indication will be given (See section 11).
After the test function is performed, the alarm will need to
recover for one minute before the next test can be done
(to allow the sensor chamber to re-settle after the test
current is applied).
The alarm will also do a self-test every 24 hour and test
the sensor for faulty sensor, drift or short circuit.
TIP: It is safe to cover the sound output hole with your
nger during the testing to minimize the sound level
emitted.
7. Normal mode:
In normal mode, POWER indicator (Green LED) will
ash every 60 seconds
8. Alarm mode:
When a dangerous concentration of CO is detected, the
CO alarm will go into ‘Alarm Mode’. It will be indicated
by a series of repeated tones and the red LED will ash
every 0.5 second.
9. What to do if the alarm sounds:
• Keep calm and open all doors and windows.
• If the alarm continues to be activated, then evacuate the
premises.
• Get medical help for anyone suffering the effects of
carbon monoxide poisoning.
• Call the appropriate emergency central
10. Hush function:
Hush of the alarm is only possible under a level of
200ppm. If you cannot hush the alarm, please refer to
section 9.
When the alarm is under CO alarm warning, it can be
silenced for about 10 minutes by pressing the TEST/
HUSH button.
When battery fault the indication can also be silenced
for up to 8 hours by a short press on the TEST/HUSH
button. This function can only be carried out once during
a fault.
11. Fault warnings:
Battery fault: Battery low condition is indicated by a
very short tone burst “beep” every 60 seconds with
yellow LED flashing. Your CO alarm battery is low
voltage.
Sensor fault: Sensor fault is indicated by two very short
tone burst “beeps” every 60 seconds with yellow LED
ashing. Your CO alarm will not respond to CO.
End of life: End of sensor life is indicated by three very
short tone burst “beeps” every 60 seconds with yellow
LED ashing. Your CO alarm needs to be replaced.
12. Maintenance:
• Check if the alarm sounds and indicators flash
properly by pressing TEST/HUSH button at least once
per quarter.
• Your alarm should be vacuum cleaned once per
quarter to remove dust and dirt. It can be wiped with
a damped cloth. Never use detergents or other solvents
to clean the unit.
• Never attempt to disassemble the unit or clean inside.
• Commonly occurring materials, vapours or gases, e.g.
in cleaning uids, polishes, paints, cooking operations,
etc., may affect the reliability of the alarm in the short
or long term.
• When household cleaning supplies or similar contaminants
are used, the area should be ventilated.
• Please do not expose to rain or moisture and do not
knock or drop the detector. Open or tamper with the
alarm could cause malfunction.
Visual and sound patterns:
13. Other information:
Do not paint the alarm.
Note the local country regulations regarding installation.
Disposal: Please dispose the product properly at the
end of life. This is electronic waste which should be
handled properly.
Normal mode
Alarm mode
Test pass
Battery fault
Sensor fault
End of life of
sensor
Short ash green
LED every 60sec
Sound sweep
with red LED
Green LED will emit for
3sec
1 beep every 60sec with
yellow LED
2 beeps every 60sec
with yellow LED
3 beeps every 60sec
with yellow LED --- --- --- ---
- - - -
- - - -
-- -- -- --
EN50291-1:2018
EN50291-2:2010
www.cavius.com
Other manuals for 4002-001

2

Other Cavius Smoke Alarm manuals

Cavius 2001-030 User manual

Cavius

Cavius 2001-030 User manual

Cavius 4002-001 User manual

Cavius

Cavius 4002-001 User manual

Cavius 2203-002 User manual

Cavius

Cavius 2203-002 User manual

Cavius 2208 User manual

Cavius

Cavius 2208 User manual

Cavius RAUCHWARN MELDER User manual

Cavius

Cavius RAUCHWARN MELDER User manual

Cavius 2107-001 User manual

Cavius

Cavius 2107-001 User manual

Cavius 2203-002 User manual

Cavius

Cavius 2203-002 User manual

Cavius 2103-002 User manual

Cavius

Cavius 2103-002 User manual

Cavius 2107-001 User manual

Cavius

Cavius 2107-001 User manual

Cavius 2007-003 User manual

Cavius

Cavius 2007-003 User manual

Cavius 2103 User manual

Cavius

Cavius 2103 User manual

Cavius 2104-001 User manual

Cavius

Cavius 2104-001 User manual

Cavius 3002-TK001 User manual

Cavius

Cavius 3002-TK001 User manual

Cavius LUMI-PLUGIN LP120 User manual

Cavius

Cavius LUMI-PLUGIN LP120 User manual

Cavius 2201-003 User manual

Cavius

Cavius 2201-003 User manual

Cavius 2106-003 User manual

Cavius

Cavius 2106-003 User manual

Cavius 3103-002 User manual

Cavius

Cavius 3103-002 User manual

Cavius 3104-001 User manual

Cavius

Cavius 3104-001 User manual

Cavius 2008-002 User manual

Cavius

Cavius 2008-002 User manual

Cavius 2008-001 User manual

Cavius

Cavius 2008-001 User manual

Popular Smoke Alarm manuals by other brands

Innogy WSD-2.0 manual

Innogy

Innogy WSD-2.0 manual

Honeywell 5800COMBO Installation and setup guide

Honeywell

Honeywell 5800COMBO Installation and setup guide

First Alert PC900V user manual

First Alert

First Alert PC900V user manual

Regin SDD-S65 instruction manual

Regin

Regin SDD-S65 instruction manual

Televes Integra 7658 manual

Televes Integra

Televes Integra 7658 manual

Perenio PECSS01 Installation and operation manual

Perenio

Perenio PECSS01 Installation and operation manual

Kidde 1276 user guide

Kidde

Kidde 1276 user guide

Emerald EP-RANG-10 user manual

Emerald

Emerald EP-RANG-10 user manual

Kidde P4010DCSCO-W user guide

Kidde

Kidde P4010DCSCO-W user guide

HST HP101U Installation and operation manual

HST

HST HP101U Installation and operation manual

Kidde 10SCO user guide

Kidde

Kidde 10SCO user guide

Bosch FERION 3000 O user guide

Bosch

Bosch FERION 3000 O user guide

Edwards Signaling SuperDuct ESD-2W manual

Edwards Signaling

Edwards Signaling SuperDuct ESD-2W manual

First Alert ONELINK user manual

First Alert

First Alert ONELINK user manual

Arton DL user manual

Arton

Arton DL user manual

Kidde RF-SM-DC user guide

Kidde

Kidde RF-SM-DC user guide

GE Security FireShield FS302 Technical reference manual

GE Security

GE Security FireShield FS302 Technical reference manual

SEBSON GS526 manual

SEBSON

SEBSON GS526 manual

manuals.online logo
manuals.online logoBrands
  • About & Mission
  • Contact us
  • Privacy Policy
  • Terms and Conditions

Copyright 2025 Manuals.Online. All Rights Reserved.