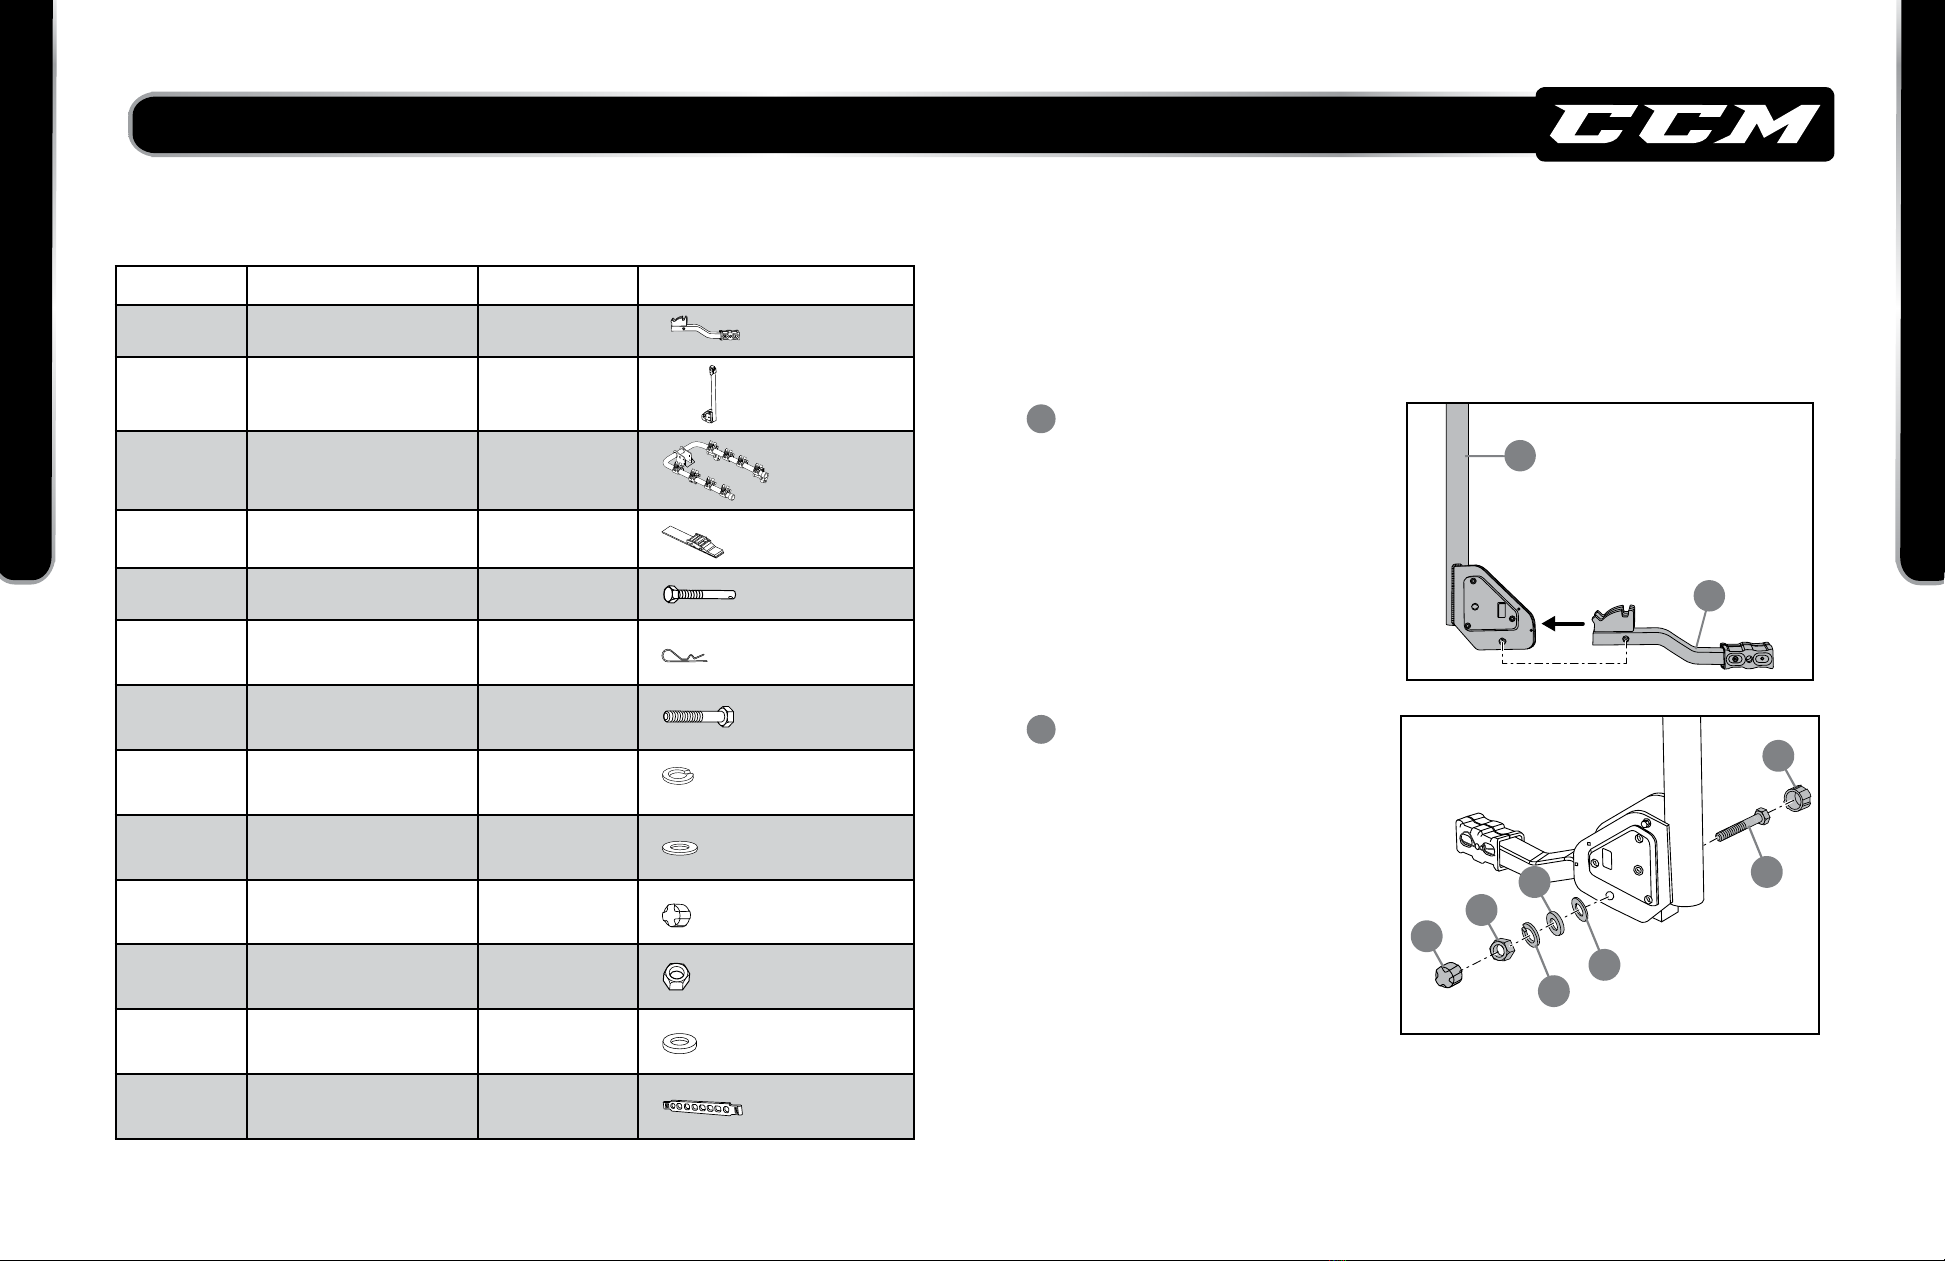
model no. 040-1192-0
WARRANTY/ GARANTIE
SAFETY INSTRUCTIONS
WARNING
• Do not use the bike carrier for off-road purposes.
• Do not load tandems or recumbents on this bike carrier.
• Do not install this bike carrier on a trailer or other towed vehicles.
• Inspect the bike carrier before and after loading the bicycles for damaged or missing components. If
problems are detected, discontinue use and seek repair or replacement parts prior to use.
• Check for tightness of the straps at regular intervals, as the bicycle may shift during travel. Inspect
more frequently when travelling on bumpy roads.
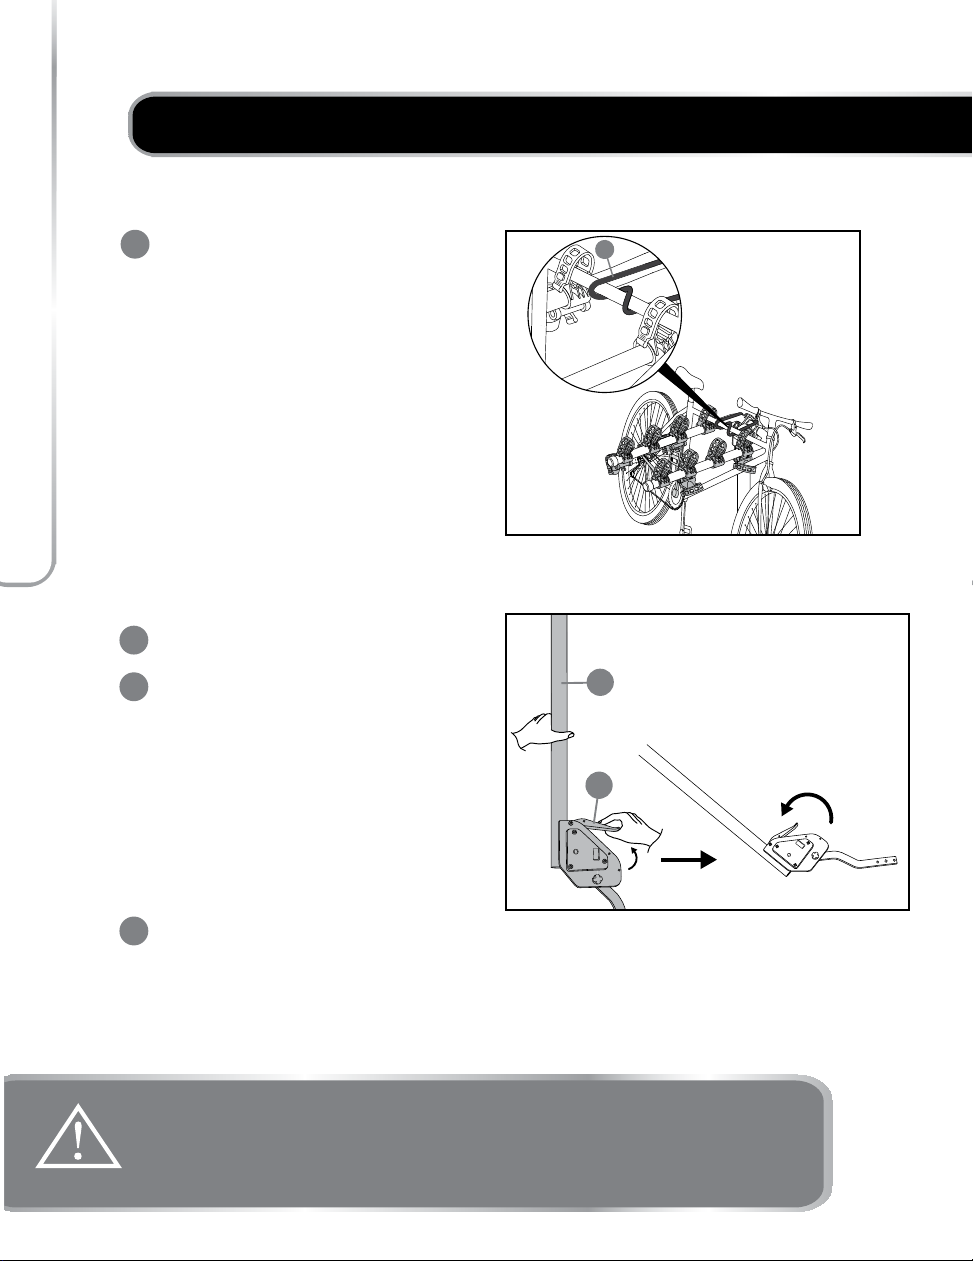
• After loading the bicycles, do not attempt to remove the safety clip inserted at the centre mast or pull
the quick-release lever. Doing so may cause tilting of the bike carrier, which would lead to damage of
the vehicle carrying the bike carrier, vehicles moving behind or bicycles.
• Some states/provinces may not allow the licence plate to be obstructed.
Please check with the local ministry of transportation for more information.
• This bike carrier may not be suitable for use on vehicles equipped with a rear-mounted spare tire, as
this carrier requires clearance from the vehicle 14" (36 cm) beyond the hitch receiver pin opening of
the vehicle.
• Do not wash the vehicle or use an automated car wash while the bike carrier is mounted.
IT IS USER'S RESPONSIBILITY TO ENSURE THE SAFE AND PROPER USE OF THIS PRODUCT.
Improper attachment or misuse of the bike carrier may damage the bike carrier, bicycles loaded on the carrier,
the vehicle carrying the carrier, or vehicles moving behind, and may result in HAZARDOUS situations due to possible
collision or swerving of the vehicle.
READ AND FOLLOW THE SAFETY INSTRUCTIONS BEFORE USING THE BIKE CARRIER.
NEVER EXCEED THE MAXIMUM LOAD CAPACITY OF THE BIKE CARRIER.
WEIGHT LIMIT: 180 lb (80 kg) total or 45 lb (20 kg) per cradle pair.
WARRANTY/ GARANTIE
LIMITED WARRANTY
This product has a one (1) year limited warranty from the original date of purchase against defects in material
or workmanship.
EXCLUSIONS
The warranty will not apply if the product is modified, damaged or misused. Any and all implicit warranties,
including any implied warranty of merchantability or fitness for a particular purpose, shall not exceed in
duration the term of limited warranty. In no event shall the manufacturer or the distributor be liable for
incidental or consequential damages.
WARRANTY CLEANING AND STORAGE
• Wipe the bike carrier with a damp cloth and mild detergent after every use and before storage.
• Remove the safety clip and fold the rack arms down for compact storage of the bike carrier.
• Store the bike carrier indoors and in a cool, dry place.
CLEANING
STORAGE
23
CAUTION
Some vehicles may not support the bike carrier.
This bike carrier is designed in such a way that the paint of the vehicle will not be damaged if the
carrier is properly mounted on the vehicle.
• Always secure the bicycle(s) to the bike carrier using straps, ropes or shock cords (not included).
• Never load more than four bicycles (totalling 180 lb [80 kg]) on the bike carrier.
• Do not use worn or damaged straps.
• Do not allow the bicycle tires to hang near the exhaust pipe of the vehicle. The hot exhaust could
melt and destroy the tires.
• To prolong the life of the bike carrier, remove the bike carrier from the vehicle when not in use.