Before Starting Work 4.0
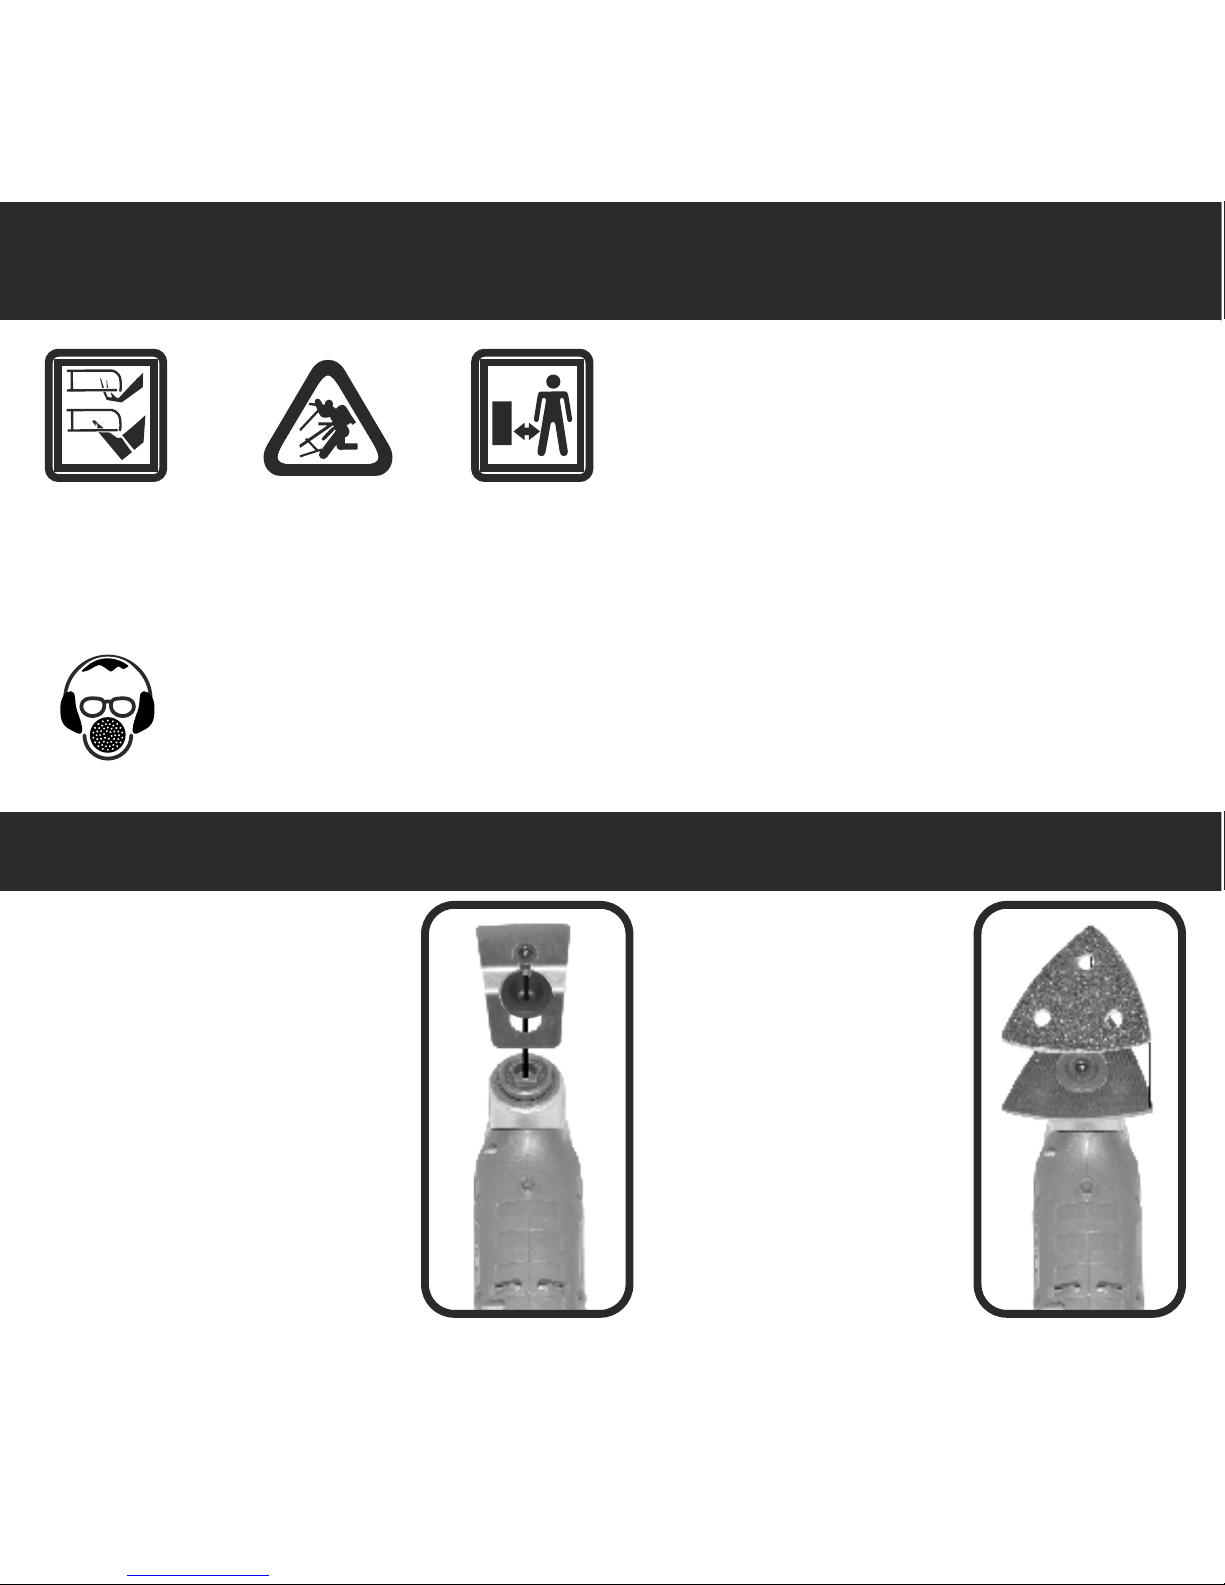
Fitting Tools 5.0
If required, remove an already
mounted tool/accessory.
Loosen the screw with the hex key
and remove the tool/accessory. Be
sure to clear any debris.
Mount a suitable tool/accessory in
such a manner on the tool holder that
the offset faces downward.
Turn the tool/accessory to a position
favourable for the respective job, and
allow it to engage into the cams of the
tool holder. 12 different positions are
possible, each offset by 30°. Fasten
the tool/accessory with Locking Bolt
and Washer. Tighten the bolt with Hex
key until the washer and bolt are flush
with the tool/accessory and firmly
fixed.
The sanding plates are fitted
with Velcro backing for quick
and easy fastening of sanding
sheets with Velcro adhesion.
Before attaching the sanding
sheet , free the Velcro backing
of the sanding plate from any
debris by tapping to enable
optimum adhesion.
Position the sanding sheet flush
alongside one edge of the
sanding plate, then lay the
sanding sheet onto the sanding
plate and press firmly.
To remove the sanding sheet,
grasp it at one of the tips and
pull it off from the sanding plate.
Check the tight seating of the
tool/accessory while fitting and
regularly while working there is
a risk they can come loose
during operation and be
damaged or hazardous .
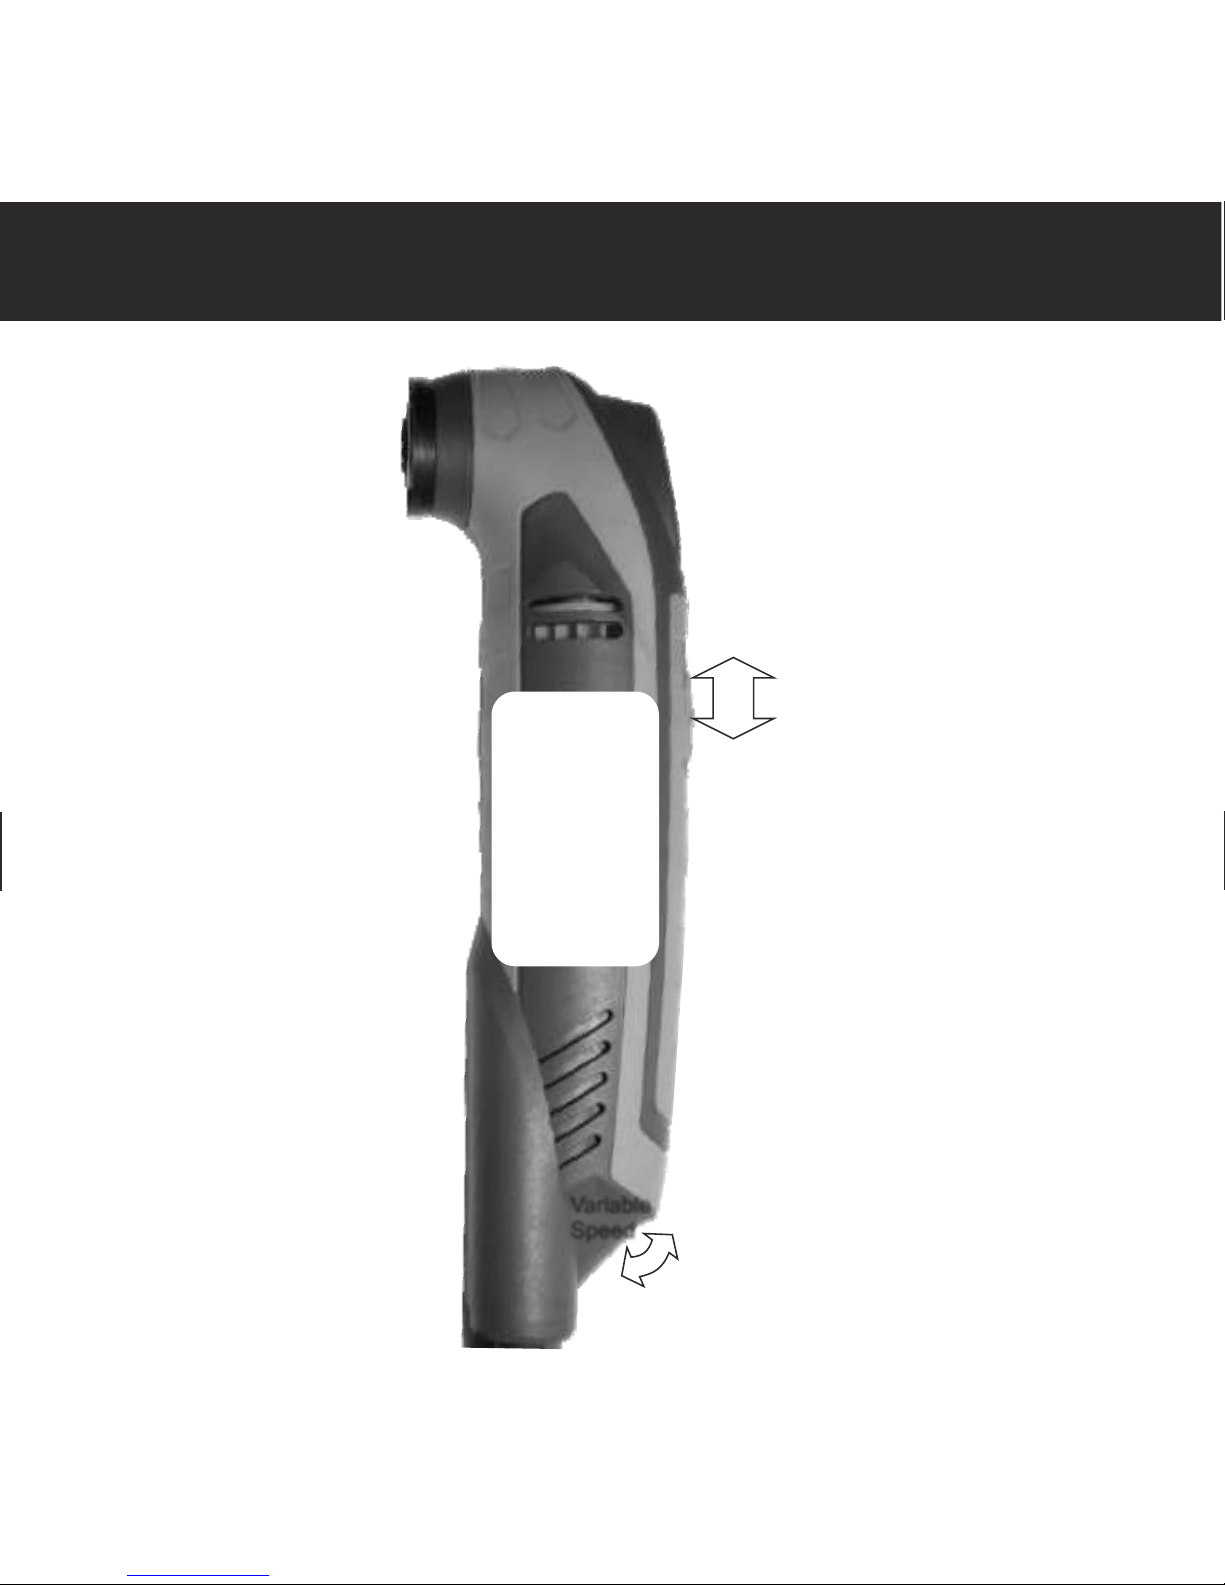
Switching On and Off
To start the machine, push the
On/Off switch forward so that "ON" is
indicated on the switch.
To switch off the machine, push the
On/Off switch toward the rear so that the
"OFF" is indicated on the switch.
Selecting the rate of oscillation
Use the thumbwheel to select the rate of
oscillation.
The required rate of oscillation depends
on the material and the working
conditions and can be determined
through practical testing.
Sawing
~ Use undamaged faultless saw blades
only.
Deformed, blunt saw blades or saw
blades that are otherwise damaged can
break or shatter.
~ Continuously move the blade to clear
debris and dissipate heat. Beware of
hot blades.
~ Plunge cuts may only be applied to
soft materials, such as wood, gypsum
plaster boards, etc.
~ Before sawing with AC12 saw blades
in wood, particle board, building
materials, etc., check these for foreign
objects such as nails, screws, or similar.
If required, remove foreign objects or
use AC11 saw blades.
Separating
Note: When separating wall tiles take into
consideration that the application tools/accessories
wear heavily when used for longer periods of time.
Sanding
The removal rate and the sanding pattern are
primarily determined by the choice of sanding
sheet, the preset oscillation rate and the applied
pressure, the corners of the sheet have the
longest oscillating travel and so will perform the
most vigorously.
Flawless sanding sheets achieve the
best sanding capacity and extend
the service life of the machine.
Try to apply uniform sanding pressure;
this increases the working life of the sanding
sheets. Low/medium speed is recommended.
Additional pressure does not lead to an
increased sanding capacity, only increased
wear of the machine and the sanding sheet.
For precise on-the-spot sanding of edges,
corners and hard to reach areas, it is also
possible to work only with the tip or an edge of
the sanding plate.
When selectively sanding on the spot, the
sanding sheet can heat up considerably. Reduce
the oscillation rate and allow the sanding sheet to
cool down regularly.
A sanding sheet that has been used for metal
should not be used for other materials.
Use only original CEL sanding accessories.
Scraping
For scraping, select a high oscillation rate. Work
on a soft surface (e.g. wood) at a flat angle, and
apply only light pressure. Otherwise the scraper
can cut into the surface. Do not press to hard,
allow the tool to work and reduce the risk of a slip.
Operating 6.0
Sharp blades, heat buildup and flying debris are a
danger to user and bystanders. Use of suitable
protective clothing, gloves, footwear, eye and ear
protection as well as safe working practices can reduce
these risks.
Dusts from materials such as lead-
containing coatings, some wood types,
minerals and metal can be harmful to
one's health. Touching or breathing-in the
dusts can cause allergic reactions and/or
lead to respiratory infections of the user
or bystanders.
Certain dusts, such as oak or beech dust, are
considered as carcinogenic, especially in connection
with wood-treatment additives (chromate, wood
preservative). Materials containing asbestos may only
be worked by specialists.
- Use dust extraction whenever possible.
- Provide for good ventilation of the working place.
- It is recommended to wear a P2 filter class respirator.
Observe the relevant regulations in your country for the
materials to be worked
Do not cover the venting slots of the machine while
working, as this reduces the working life of the
machine.
This tool vibrates at very high frequency. Regular
breaks must be taken to reduce the chance of injury. At
the first sign of discomfort work should immediately
cease.
Sharp blades, heat
buildup and flying
debris are a danger
to user and
bystanders. Use of
suitable protective
clothing, gloves,
footwear, eye and
ear protection as
well as safe
working practices
can reduce these
risks.
Variable
Speed
ON
OFF
NOTE:
The AC17 adaptor washer is not required to fit CEL blades on CEL tools.