Chargesplit WB132H User manual
1
English
User Manual
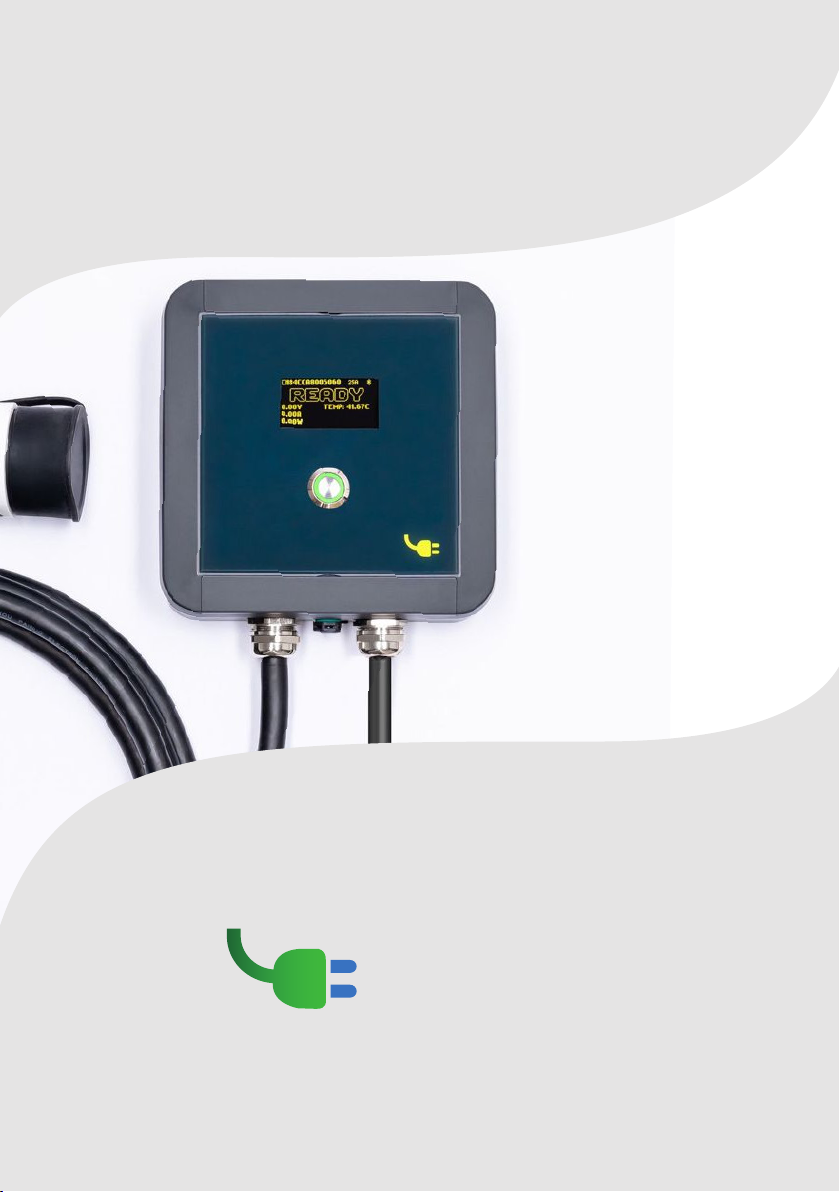
ChargeSplit DOMUS
WB132H
WB332H
WB132P
WB332P
Chargesplit

2
Content
Congratulations
THANKS FOR BUYING ONE OF MOST ADVANCED
SMART CHARGERS ON THE MARKET!
We spent lot of time engineering our product and we’re glad you
choose us. This guide will help guide you to first setup and thought all
functionalities
1. Security Notes
2. Legal Notes
3. Safety instruction
4. Installation Instructions
5, Electrical protections device
6. Drilling and securing to wall
7. Pole installation
8. Wiring
9.Load Balancing probe
10. Introduction to charger
11. Setting up Bluetooth or WiFi Connection
12. Configuring the device in the APP
13. Controlling device from the app:
14. Settings menu:
15. Scheduled charging menu:
16. Statistics:
3
3
4
6
7
8
8
8
8
9
11
14
16
18
20
21

The user must read and fully understand the safety instructions
provided. Disregard of or actions contrary to the safety
information and instructions contained in this manual and
printed on the device may lead to electric shock, fire and/or
severe injury and either damage to the vehicle or to the charging
device. Any resulting damage from such actions is excluded
from the warranty. The installation of the Wallbox device
must be performed by a qualified electrician in accordance
with the perceptive regulation. The information provided in
this User Guide does not relieve the user of responsibility to
follow all norms and standards or local regulations that may
apply. The charger device has been designed, developed and
manufactured to satisfy requirements, safety dispositions
and norms in accordance with the directives presented in the
declaration of conformity.
This document is intended to be used as a reference guide
for the installation and operation of the charger. The product
images shown are for illustration purposes only and may not
be an exact representation of the product. Wallbox reserves
the right to make changes to the specifications and processes
of the product and documentation at any time without prior
notice.
Security Notes
Legal Notes
1
2
3

Do not operate if physical
defects such as cracking,
breakage, corrosion,
or other damage are
observed. In case this
happens, shut down the
device and contact support
immediately.
Only an authorized
personnel may open,
disassemble, repair, alter
or modify the device.
Unauthorized modification
makes manufacturer
warranty void.
Unauthorized modifications
or conversions are not
allowed. A warranty sticker
and internal checker
indicate if the device has
been opened, invalidating
warranty
Do not alter or remove
any warning symbols on
the device, such as safety
symbols, warning notices,
rating plates, identification
plates or cable markings.
INSTALLATION MUST
BE CARRIED FROM
PROFESSIONAL
ELECTRICIANS ONLY.
Protect your device from
any impact which it may be
exposed.
Always respect local
electricity rules and
regulations, as relevant.
Device has to be used
in the operating range
temperature of -25oC
to 40oC of ambient
temperature.
Do not use your device
under adverse climatic
conditions that could affect
the vehicle.
Always check the charging
cable and the contacts for
damage and contamination
before use.
Safety Instructions
3
4

process and the duration of
unlocking may vary.
Some vehicles can be
started with the charging
cable connected. Be sure to
unplug before driving off.
Do not use the charging
cable with an extension
cable or an adapter.
If the connector emits
smoke or begins to melt,
never touch the charging
cable. If possible, stop the
charging process. In any
event, disconnect the power
supply from the device.
Keep the charging cable out
of the reach of children.
Be careful with the
connector, do not step on it
or on the cable.
The cable should NOT
be tightened under ANY
CIRCUMSTANCES while
connected to the vehicle.
Safety Instructions
Never use a damaged
charging cable, the vehicle
plug, or the infrastructure
electrical outlet to charge.
Never use contacts that are
dirty or wet.
Only connect the connector
to vehicle plug and
infrastructure electrical
outlets that are protected
against water, moisture and
liquids.
After stopping the
charging process, the
vehicle connector and the
equipment plug can be
disconnected.
Never use force to
disconnect the vehicle
connector from the inlet or
the equipment plug power
outlet. Such dangerous
activity can cause serious
injuries or even death.
Depending on the charging
station and the electric
vehicle, the time to
complete the charging
5

Installation must be performed by professional
electrician only in accordance to local law and
regulations. Non-professional or non-law conforms
installations can be cause of fire, electrical shocks
and even death.
PRE-REQUIRSITES:
The power supply connection must conform to local law and
dimensioned for the power you intend to apply to the device.
Device MUST be connected to Ground. If Ground is not present charging
process will not start.
Take in consideration solidity of the surface where you want to install
the charger due to forces involved into the charging process
The device is already assembled for installation. Do not open the device.
Charging process involves heat. Select an appropriate vented area
where to install the device and avoid direct sunlight
Do not install the device nearby:
Flammable, explosive or combustible materials.
Chemicals or solvents.
Flood prone areas, water passage areas or humid environments.
Gas conductors or vapor outlets.
Accumulators, storage radiators or heat emitting elements.
Direct Sunlight radiation, so as to avoid overheating and
degradation over time.
IMPORTANT!!: ALWAYS verify ground isolation is lower than 150 Ohm prior
installation. Higher value can cause error during charging
For external installation ensure the device is installed in a covered or
rain protected environments.
Installation Instructions
4
6

7
The device can is equipped with over temp, and over amps protection.
Over Amps is dynamically triggered based on Selected power +2A. This
means, as example, that If a 16Amps charging power is selected the
device will stop charging if power run above 18 amp.
The maximum PCB temperature is 75°. If 75° is reached at PCB level
the charging process will stop.
If your device is equipped with Type B Residual current monitor, the
charging process will stop in case of a fault occurs.
After a fault event the device will come back to normal after 60 seconds
after the fault. If fault is still present
The power supply line must be hardwired to an existing installation
and according to your local regulations.
The charger must be electrically protected installing externally a
Miniature Circuit Breaker (MCB) and a Residual Circuit Breaker (RCD).
Electrical protections device
5
MCB
RCD
Maximum value according to the maximum
output current of the charge point.
If your Charger is already equipped with type A+B
protection an 30mA RCD must be installed prior the
device to protect it during non-charging operation.
RCD of at least type A (30 mA triggering current) +
Type B 6ma triggering current.

8
Special mounting accessory can be provided both for vertical and
horizontal pole installation with matched device color.
Please contact us for additional details
Drilling and securing to wall
Pole Installation
6
7
Use included fishers and below mouonting schema attached
mounting holes schema and included
9
Wiring
8
Load / Solar Balancing Probe
9
After the device has been fixed to wall or pole it’s time for wiring to
the electrical line, the device it’s equipped with 1 meter connetion
cable and , as stated before, has to be equiped with protection device.
Connect EARTH (yellow/green) - NEUTRAL (blue) - L1 (brown) if 1P
Connect EARTH (yellow/green) - NEUTRAL (blue) - L1 (brown) - L2
(black) - L3 (gray)
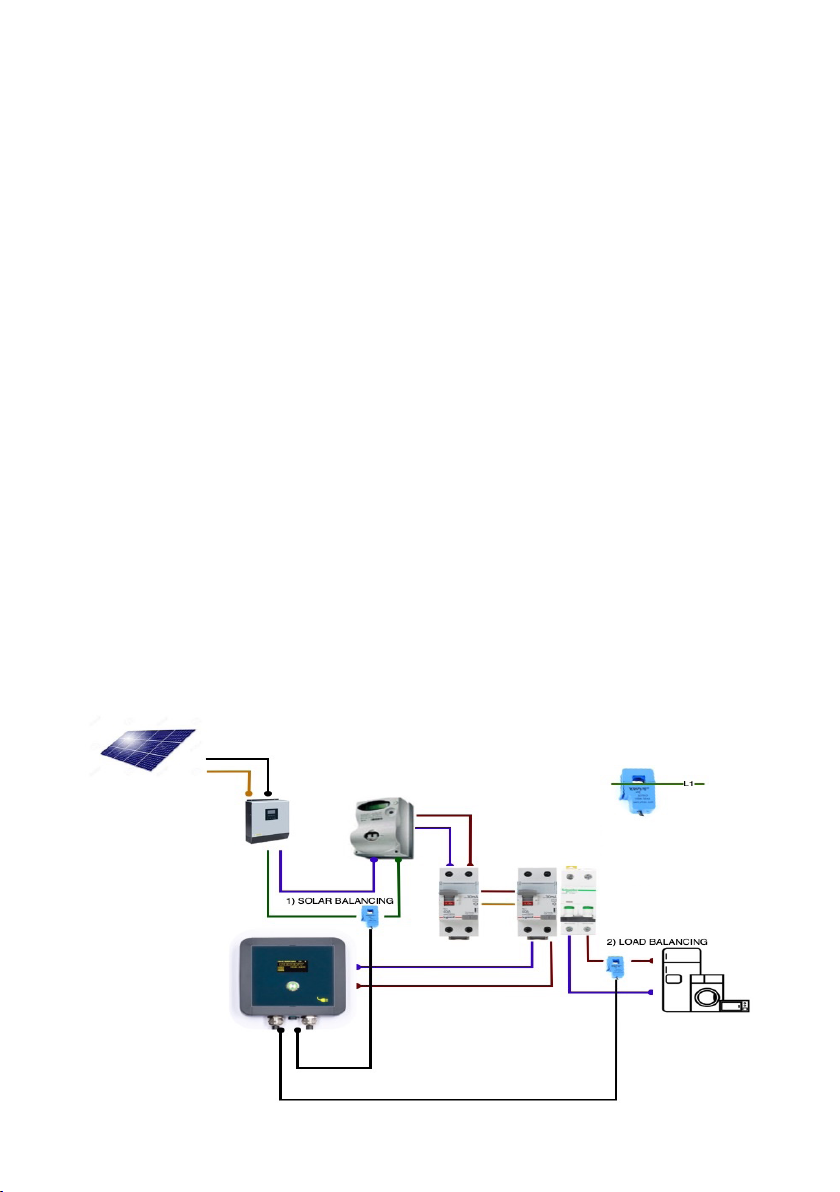
Device it’s equipped with load / Solar balancing probe for automatic energy management. Only
one option per time can be active. Probe is connected to chargepoint via lower 3.5mm Jack
connector
SOLAR BALANCING: Install the probe on Hybrid inverter AC output to catch the exceeding AC
production from solar
LOAD BALANCING: install the probe to catch energy consumption of the house excluded
charger.
IMPORTANT: For a correct installation ONLY phases cables ( L1,L2,L3) must pass through the
probe. NOT NEUTRAL. in case of 3 phase only 1 cable has to pass trought the current probe. The
calculation is made by multiply by 3 the value of single line so a balanced between line load/
solar generation is required for a correct work
10
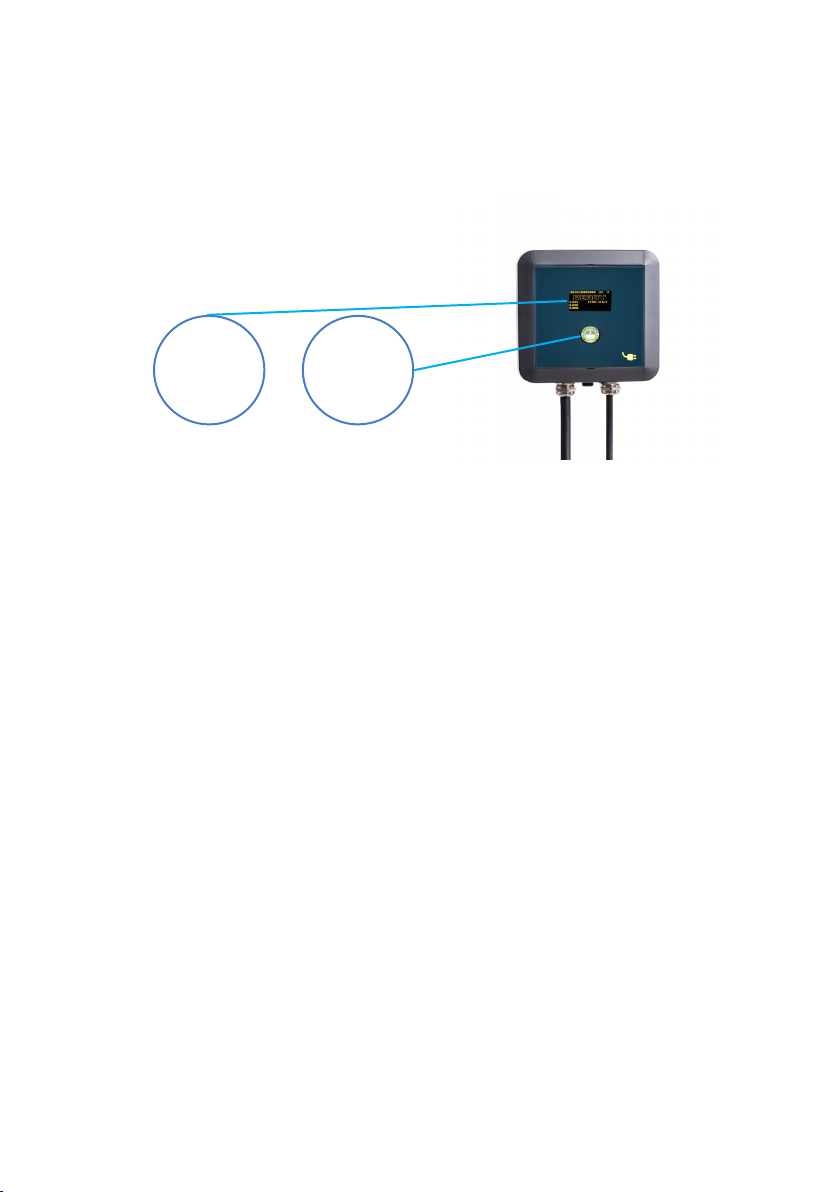
There are 2 main way to
identify the charger status:
The OLED display report the status of the charger and many useful
information regarding the charging process as total charged
kWh, voltage, temperature, amperage and, if available, the house
consumption to calculate load balancing. The OLED display remain
active for 60 seconds after button press and automatically power off
to save energy. If you want to reactivate the display simply press the
button. By pressing front button for more than 10 second in “READY“
state a new display language will be showed from available:
Italian, Spanish, German, English, France.
There are several charger status:
READY:
The charger is ready for charging process and the car can be
connected.
In this state the led ring will pulse GREEN color and the display will
report “READY” status
CONNECTED:
The car is connected and the charging process is going to start or
it’s ended.
The display will report status “CONNETED” and the led ring will pulse
in TURQUESE color
Introduction to charger
10
OLED
Display
LED ring
on button

11
CHARGING:
The charging process is active. The display will report “CHARGING” status
and the led ring will pulse BLUE. You can stop the charging process directly
from your car if necessary. If Load balancing is active led ring will pulse BLUE/
WHITE if solar balacing is active led ring will pulse BLUE/YELLOW
VENTILATION:
The car requires ventilation.
The charging process will be paused. The display will indicate “VENTILATION”
and the led ring will pulse in YELLOW
FAULT/BREAKERFAULT:
A fault happens.
The display will indicate “FAULT” status and the ring will pulse in RED, charging
process is interrupted. if equipped with TYPE B breaker BREAKERFAULT
will trig if a residual current fault happen. After one minute the device will
come back to normal status. Faults are possible for breaker reason, pilot
fault or temperature fault. in case of temperature higher than 65°C degree
the charging process will be interrupted and restarted automatically when
temperature lower down to 55°C degree
SCHEDULE:
Device is in SCHEDULE status.
This means the charging process has been scheduled to a certain timeframe
(ex. From 23:00 to 6:00). The display will show the “SCHEDULE” status and
the ring will blink in GREEN-WHITE. Schedule is setup and activated from app
LOCKED:
The device is locked.
It is not possible to start the charging process until unlock from app. The
display will show “LOCKED” status and the ring will pulse in GREEN-RED.
Charging is not possible in this status. You need to unlock the charger from
the app
SOLAR WAIT/PAUSED:
The device is paused.
The device can be paused cause you paused from the app, it is waiting for
solar energy generation or load balancing decided to pause the station to not
disconnect main power. display will show “SOLAR WAIT” or “PAUSED“ and
the ring color will pulse TURQUOISE
12
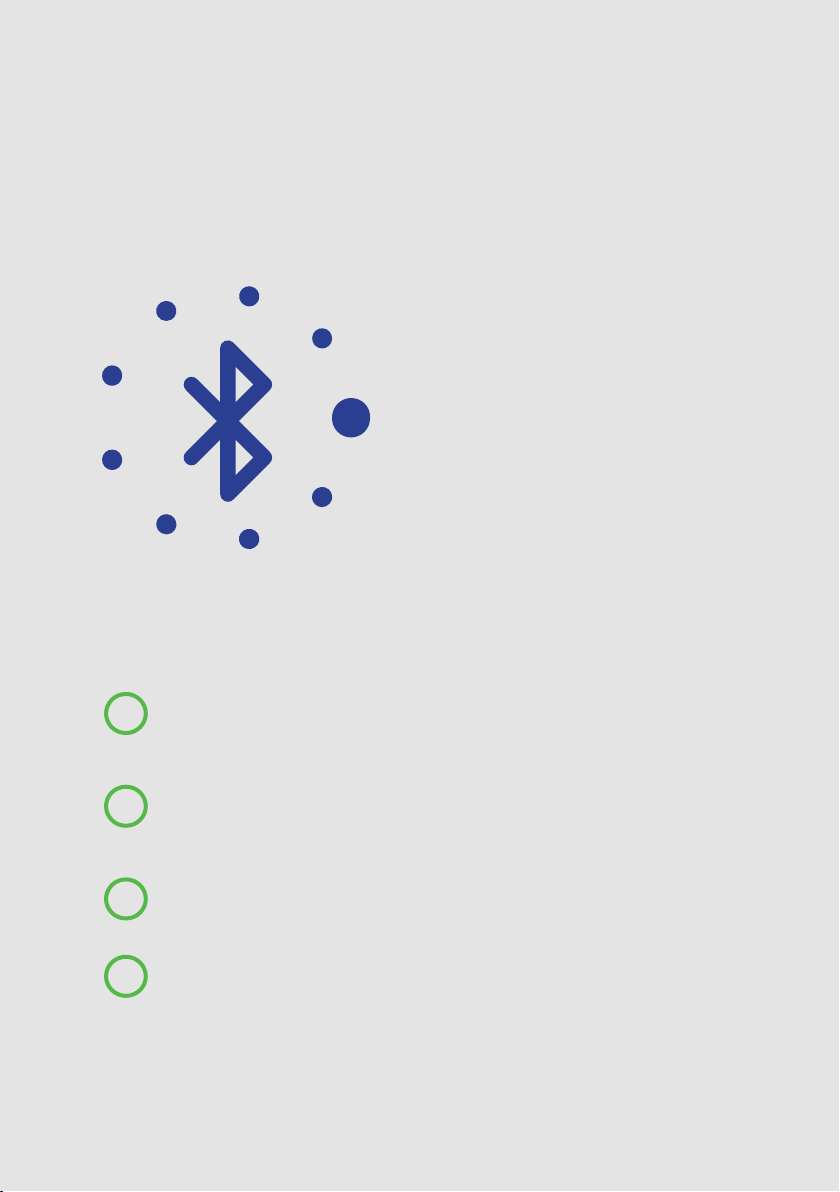
The device is equipped with
Bluetooth low energy and Wi-Fi
2.4 Ghz.
Only one operation mode
is possible at a time.
This means the device can work
in Bluetooth OR Wi-Fi. It is not
possible to operate both Bluetooth
or Wi-Fi at same time.
Setting up the connection mode:
With the device totally turned OFF maintain the central
button pressed
Without releasing the button, power up the device until the
display will show “CONNECT TO CHARGESPLIT WIFI” and the
button start ashing in RED-GREEN-BLUE
You can now release the button. A new Wi-Fi network called
CHARGESPLIT has been created.
Connect with your phone to the network and configure the
connection type.
Setting up Bluetooth
or Wi-Fi Connection:
11
1
2
3
4
12

13
Scan Wi-Fi network from
your phone and connect to
’Chargesplit’ Wi-Fi
Click on “Use Bluetooth” to
use the device in Bluetooth
Mode. After click the device will
restart in this Bluetooth mode
Click on “Configure Wifi” to
configure Wi-Fi connection.
Available Wi-Fi networks will
be scanned.
Hint:
if portal does not open try to
remove ”Chargesplit” from known
network or try open browser after
network is connected
5
6
13

14
After available network has
been scanned just select your
Wi-Fi network, insert password
and click on SAVE.
The device will reboot and, if
password is ok, will connect to
Wi-Fi network.
Only 2.4Ghz Wi-Fi networks
are supported.
If, after reboot, the device
remains in Connecting
Wi-Fi’repeat the
configuration process.
Working mode will be always reported on the device screen. If device
is in Bluetooth mode you will see the Bluetooth symbol. If in Wi-Fi mode
the Wi-Fi signal will be reported.
Due to real-time monitoring features of the device a stable Wi-Fi
connection is required in order for the device to operate correctly. In
case of reset of the device the credentials will be saved and the device
will reconnect automatically.
In case of Wi-Fi reset the device is configured to reconnect automatically
to saved Wi-Fi network
7
14

15
After registration you will
find in the main menu.
Click on “SETUP” under
“Add new Chargepoint”
menu.
After the device has been
connected to Wi-Fi or
configured in Bluetooth mode
is time to add the device in
the app. Configuration is
automatic and based on the
qrcode adhesive on side of
your stations
Conguring the device in
the APP
12
1
15
16
Select then the Operational mode
(Wi-Fi or Bluetooth).
The device is configured and
will appear in main menu, you
can now connect and manage it
remotely with your phone.
WARNING:
When mated to your account the charging station
become cloud locked to you and virtually unusable
from other person.
This ensure that your station cannot be stolen. If you
need to unmate the station from the account please
document.
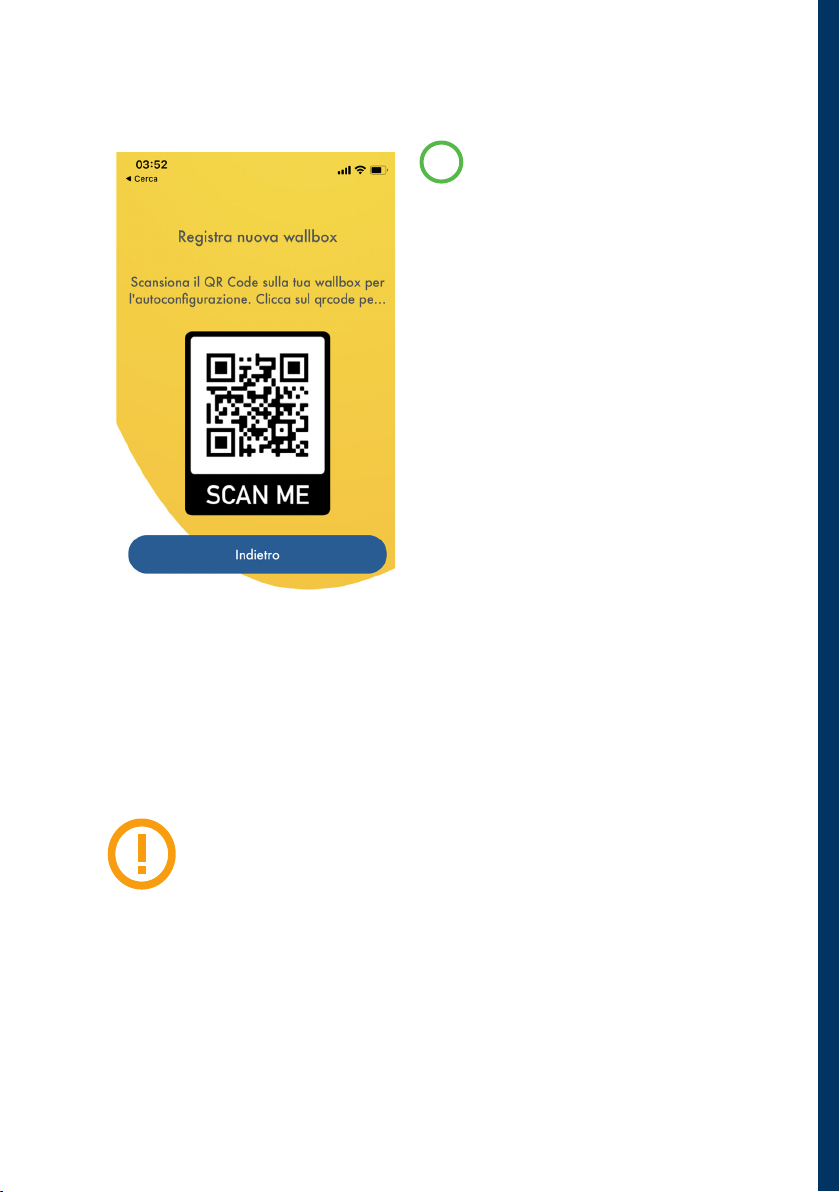
Click on the qr code icon
and start to scan the qrcode
adhesive on the side of your
charging station.
If qrcode is valid a new window
will ask you about how your
charing station is configured.
(WiFi or Bluetooth)
2

17
Controlling device from
the APP
13
Device Serial Number
Realtime power in Amps
Realtime temperature at
pcb level
Realtime Voltage
If scheduled charging, the
charging timeframe
If Load / Solar Balancing
is active, the real-time
house consumption / Solar
inverter AC generation
Power Ring. By rotating the
slider ring, you can real-
time change the power
level of the device from
8 to 32 amps. A security
setting under option,
will set the maximum
selectable power for
security. If load balancing
is active this setting is
managed automatically.
1
2
3
4
5
6
7
You have several options to control and real-
time monitor the device from menu:
17
1
2
3
4
15
1
2 3 4
5
6
7
8
9
10
11 12
13
14
16
18
NEVER EXCEED YOUR WIRING CAPACITY,
THIS CAN CAUSE SHOCKS, FIRE AND EVEN
DEATH
8
9
10
11
14
13
12
Pause /Resume if charging is active, you can remotely pause and
resume the charging process. IMPORTANT: CHARGING PROCESS
CAN’T BE STOPPED FROM APP. Must be stopped by car or by
chargepoint button if “stop charge by button” option is active
Lock. If device is in ready state you can lock the device. No
charging is possible in locking state. To unlock the device press
lock again
Scheduling. To schedule your charging at certain timeframe, use
the schedule button. See further detail explanations
Settings. From settings menu it is possible to control device
settings. See further detail explanations
Statistics. Wi-Fi ONLY If device is connected via Wi-Fi, you can
monitor consumption and costs from this menu. See further
details explanations
Realtime STATUS. The real-time status of the device. If charging is
active, real-time delivered power and total charged kWh will be
displayed
Indicates if device is WiFi or Bluetooth connected
If Charging limit is active this icon let you modify the amount of
kWh per charge
Live house consumption /AC solar inverter generation. It show
you live consumption of your house or AC solar generation of last
3 hours indicatively. Requires WiFi and LB probe
15
16

19
Settings Menu
14
Use this setting to set the electricity
cost. This will be used as base value to
calculate costs in statistics
Change the working mode from Wi-Fi
to Bluetooth.
To change working mode you need to be
connected to the device and the device
need to be already configured for Wi-Fi
access.
If you change working mode and the device is not
connected it will be not possible to connect again
device from app. To configure the device refer to
configuration procedure in the manual.
OTA FIRMWARE. If new firmware is available a popup
will let you start the automatic update procedure.
Do not disconnect chargepoint power until firmware
update has been completed.
Electricity cost €/kWh
Working Mode
1
2
-
Bluetooth WiFi
+
Warning:
19
1
2
3
4
5
6
7
8
9

20
Activate or deactivate load balancing:
When active Device power will adapt automatically based on your house
consumption. Load balancing is based on measurements from the provided
load balancing coil. The Coil should be connected via the 3.5mm jack and
attached to main house rail as per instructions to work.
Available power: When load balancing is active this represent the total
available power (house + charging )
Power security limit represents the maximum selectable power from main
menu, Ex. 16 amps.
NEVER EXCEED YOUR WIRING CAPACITY!
Delete: Delete chargepoint from your account and remove cloud lock
protection. Only after this a chargepoint can be setup to a new account.
Stop Charging by button: With this option active you will be able to stop
charging by pressing front chargepoint button (more than 3 seconds). You
will then have 60 seconds to disconnect the car. If no disconnection happen
the chargepoint will return to precedent state
Charge Limit: This option will let you limit the total amount of
kWh to be charged for a single session. When active, a new
icon will appear in chargepoint control menu. Press the icon
to modify the kWh value. When charging limit is reached the
chargepoint will set itself to PAUSE status and limit
option will be deactivated.
Solar Balancing: This option let you charge only when solar panel
generate enough extra energy . After activation you will see a
new icon on top left of main charger interface. By clicking you can
decide how much extra power has to be generated from inverter to start
charging. If this threshold is reached/missed for more than 2 minutes
charging will start/stop.
Load Balancing
Available Power in KW
Potenza Massima in A
3
4
5
3.6
8 20
11
13 32
No Yes
7.2
10 25
22
16
6
7
8
WARNING:
9
This manual suits for next models
3
Table of contents


