Charles 93-12PREG Service manual
Issue 1 Print 2 LT-12PREG-1
Page 1 of 11
Charles Industries, Ltd. All rights reserved. Printed in the United States of America.
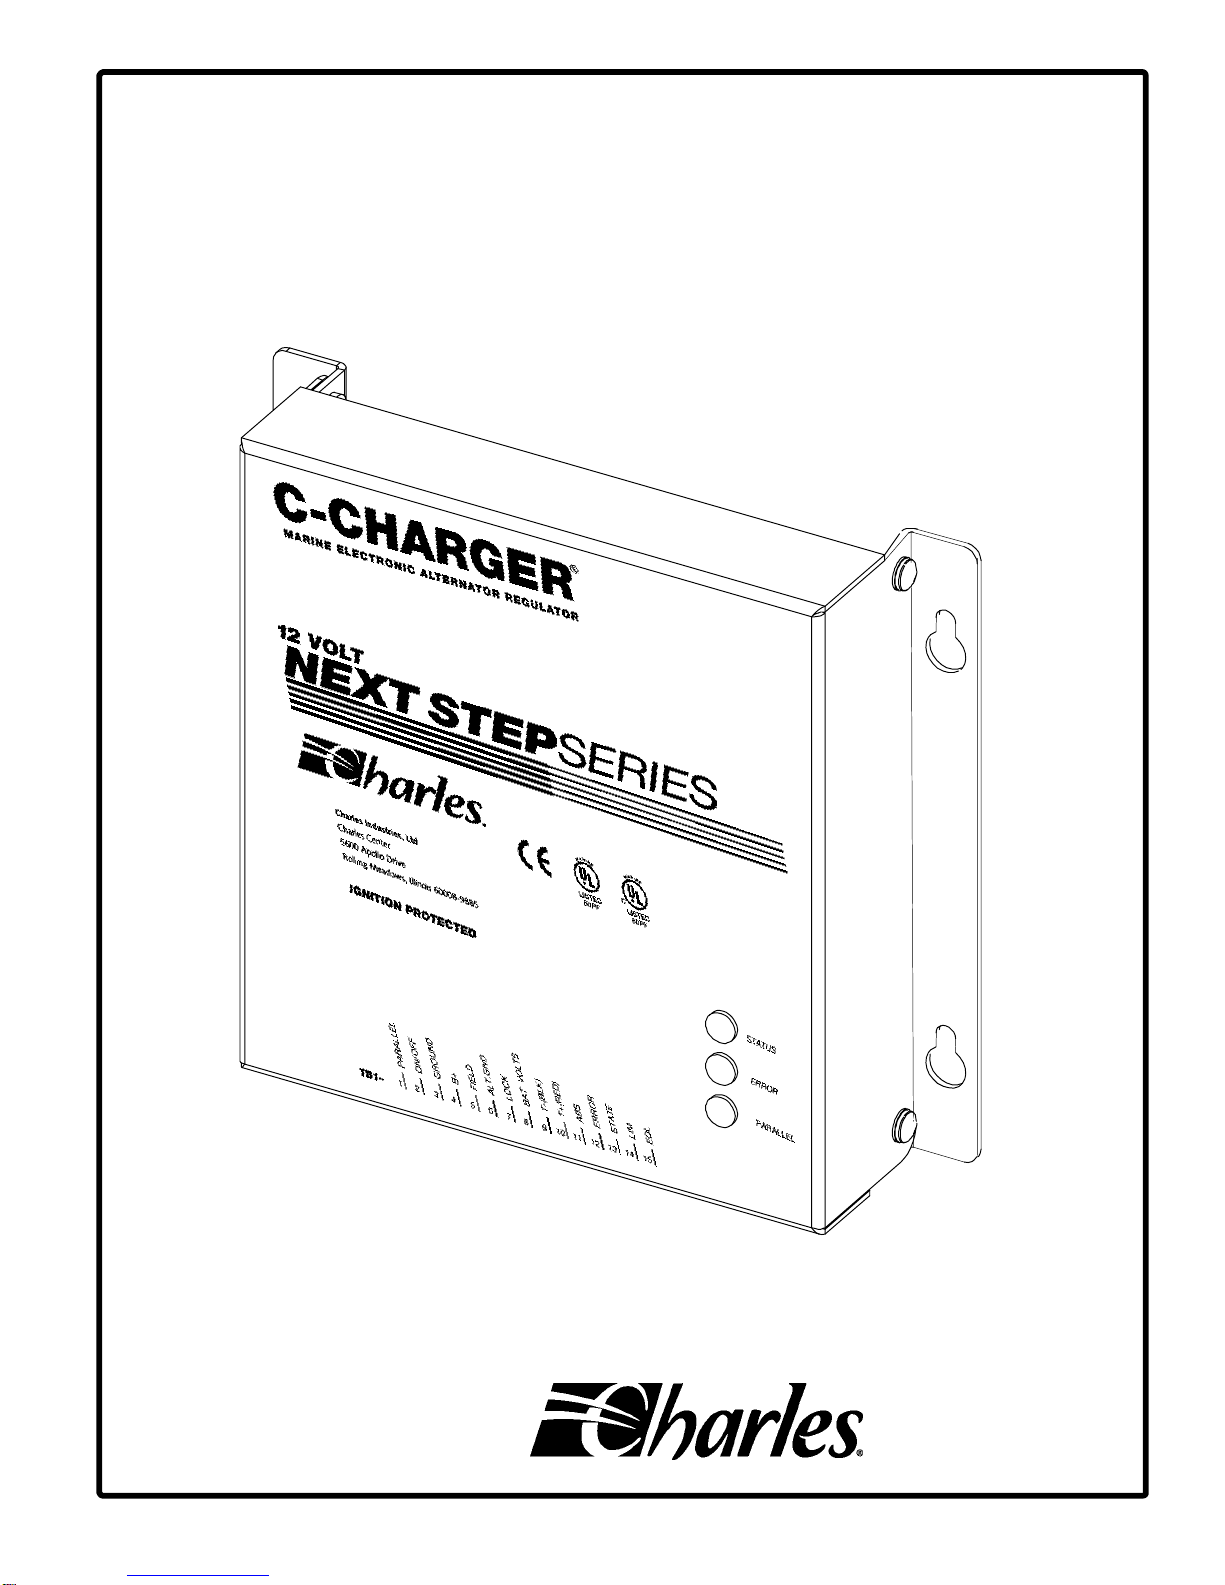
C-CHARGER
INSTALLATION INSTRUCTIONS
& OWNER’S MANUAL
Models: 93–12PREG
93–24PREG
9A–12PREG
9A–24PREG
MarineElectronic Alternator Regulator
Charles Industries, Ltd.

Issue 1 Print 2
LT-12PREG-1
2
Contents
INTRODUCING... THE ALTERNATOR REGULATOR 3. . . . . . . . . . . . . . . . . . . . . . . . . . . . . . . . . . . . . . . . . . . . . . . . . .
Warranty/Registration 3. . . . . . . . . . . . . . . . . . . . . . . . . . . . . . . . . . . . . . . . . . . . . . . . . . . . . . . . . . . . . . . . . . . . . . . . . .
Manual Purpose 3. . . . . . . . . . . . . . . . . . . . . . . . . . . . . . . . . . . . . . . . . . . . . . . . . . . . . . . . . . . . . . . . . . . . . . . . . . . . . . .
APPLICATION 3. . . . . . . . . . . . . . . . . . . . . . . . . . . . . . . . . . . . . . . . . . . . . . . . . . . . . . . . . . . . . . . . . . . . . . . . . . . . . . . . . . . .
Alternator Requirements 3. . . . . . . . . . . . . . . . . . . . . . . . . . . . . . . . . . . . . . . . . . . . . . . . . . . . . . . . . . . . . . . . . . . . . . . .
IMPORTANT SAFETY INSTRUCTIONS 3. . . . . . . . . . . . . . . . . . . . . . . . . . . . . . . . . . . . . . . . . . . . . . . . . . . . . . . . . . . . .
Installation Precaution 3. . . . . . . . . . . . . . . . . . . . . . . . . . . . . . . . . . . . . . . . . . . . . . . . . . . . . . . . . . . . . . . . . . . . . . . . . .
Environmental Precaution 3. . . . . . . . . . . . . . . . . . . . . . . . . . . . . . . . . . . . . . . . . . . . . . . . . . . . . . . . . . . . . . . . . . . . . . .
Application Precaution 4. . . . . . . . . . . . . . . . . . . . . . . . . . . . . . . . . . . . . . . . . . . . . . . . . . . . . . . . . . . . . . . . . . . . . . . . . .
Damaged Unit Precaution 4. . . . . . . . . . . . . . . . . . . . . . . . . . . . . . . . . . . . . . . . . . . . . . . . . . . . . . . . . . . . . . . . . . . . . . .
Disassembly Precaution 4. . . . . . . . . . . . . . . . . . . . . . . . . . . . . . . . . . . . . . . . . . . . . . . . . . . . . . . . . . . . . . . . . . . . . . . .
MOUNTING 4. . . . . . . . . . . . . . . . . . . . . . . . . . . . . . . . . . . . . . . . . . . . . . . . . . . . . . . . . . . . . . . . . . . . . . . . . . . . . . . . . . . . . .
Choosing Mounting Hardware 4. . . . . . . . . . . . . . . . . . . . . . . . . . . . . . . . . . . . . . . . . . . . . . . . . . . . . . . . . . . . . . . . . . .
Mounting the Alternator Regulator 4. . . . . . . . . . . . . . . . . . . . . . . . . . . . . . . . . . . . . . . . . . . . . . . . . . . . . . . . . . . . . . . .
WIRING 5. . . . . . . . . . . . . . . . . . . . . . . . . . . . . . . . . . . . . . . . . . . . . . . . . . . . . . . . . . . . . . . . . . . . . . . . . . . . . . . . . . . . . . . . . .
Voltage and Absorption Time Setpoints 8. . . . . . . . . . . . . . . . . . . . . . . . . . . . . . . . . . . . . . . . . . . . . . . . . . . . . . . . . . .
OPERATING THE ALTERNATOR/REGULATOR 8. . . . . . . . . . . . . . . . . . . . . . . . . . . . . . . . . . . . . . . . . . . . . . . . . . . . . .
At Power-Up 8. . . . . . . . . . . . . . . . . . . . . . . . . . . . . . . . . . . . . . . . . . . . . . . . . . . . . . . . . . . . . . . . . . . . . . . . . . . . . . . . . .
Input Priority 8. . . . . . . . . . . . . . . . . . . . . . . . . . . . . . . . . . . . . . . . . . . . . . . . . . . . . . . . . . . . . . . . . . . . . . . . . . . . . . . . . .
ABS Input 9. . . . . . . . . . . . . . . . . . . . . . . . . . . . . . . . . . . . . . . . . . . . . . . . . . . . . . . . . . . . . . . . . . . . . . . . . . . . . . . . . . . .
LOCK Input 9. . . . . . . . . . . . . . . . . . . . . . . . . . . . . . . . . . . . . . . . . . . . . . . . . . . . . . . . . . . . . . . . . . . . . . . . . . . . . . . . . . .
Current Limiting (LIM & EQL) 9. . . . . . . . . . . . . . . . . . . . . . . . . . . . . . . . . . . . . . . . . . . . . . . . . . . . . . . . . . . . . . . . . . . .
Equalization 9. . . . . . . . . . . . . . . . . . . . . . . . . . . . . . . . . . . . . . . . . . . . . . . . . . . . . . . . . . . . . . . . . . . . . . . . . . . . . . . . . . .
The STATUS LED 10. . . . . . . . . . . . . . . . . . . . . . . . . . . . . . . . . . . . . . . . . . . . . . . . . . . . . . . . . . . . . . . . . . . . . . . . . . . .
The ERROR LED 10. . . . . . . . . . . . . . . . . . . . . . . . . . . . . . . . . . . . . . . . . . . . . . . . . . . . . . . . . . . . . . . . . . . . . . . . . . . . .
ALTERNATOR REQUIREMENTS 10. . . . . . . . . . . . . . . . . . . . . . . . . . . . . . . . . . . . . . . . . . . . . . . . . . . . . . . . . . . . . . . . . .
TROUBLESHOOTING 10. . . . . . . . . . . . . . . . . . . . . . . . . . . . . . . . . . . . . . . . . . . . . . . . . . . . . . . . . . . . . . . . . . . . . . . . . . . .
WARRANTY & CUSTOMER SERVICE 11. . . . . . . . . . . . . . . . . . . . . . . . . . . . . . . . . . . . . . . . . . . . . . . . . . . . . . . . . . . . .
Warranty 11. . . . . . . . . . . . . . . . . . . . . . . . . . . . . . . . . . . . . . . . . . . . . . . . . . . . . . . . . . . . . . . . . . . . . . . . . . . . . . . . . . . .
Warranty Service and Repair 11. . . . . . . . . . . . . . . . . . . . . . . . . . . . . . . . . . . . . . . . . . . . . . . . . . . . . . . . . . . . . . . . . . .
Customer Service 11. . . . . . . . . . . . . . . . . . . . . . . . . . . . . . . . . . . . . . . . . . . . . . . . . . . . . . . . . . . . . . . . . . . . . . . . . . . . .
SPECIFICATIONS 11. . . . . . . . . . . . . . . . . . . . . . . . . . . . . . . . . . . . . . . . . . . . . . . . . . . . . . . . . . . . . . . . . . . . . . . . . . . . . . .

LT-12PREG-1
3
Charles Industries, Ltd. All rights reserved. Printed in the United States of America.
INTRODUCING... THE ALTERNATOR REGULATOR
Thank you
for purchasing the Alternator Regulator! The Alternator Regulator controls the field current of an alter-
nator so that the output DC voltage will regulate and charge batteries.
Warranty/Registration
Before proceeding, complete and mail back the Warranty Registration card.
Manual Purpose
With your personal safety in mind, this manual lists important safety precautions first, then covers installation,
operation, maintenance, troubleshooting, warranty, and customer service information.
APPLICATION
Alternator Requirements
The alternator must be an externally regulated model with one brush connected to ground and the other brush
fitted with a connection to make the field connection (P-type).
Note: Alternators not rated for continuous operation at high current and temperature may fail when driven by
the regulator unless current is limited to a safe value.
IMPORTANT SAFETY INSTRUCTIONS
SAVE THESE INSTRUCTIONS. This manual contains important safety and operating instructions
for the Alternator Regulator. Read the entire manual before using this unit. Also read all instructions and
cautions for and on the Alternator Regulator.
Installation Precaution
Boat wiring is a complex task that can cause shock, corrosion and other hazards if not done properly by trained,
experienced personnel. For more information on this subject contact the American Boat and Yacht Council
(ABYC) or see the standards and regulations below:
American Boat and Yacht Council 3069 Solomon’s Island Road
E-8 “Alternating Current (AC) Edgewater, MD 21037
Electrical Systems on Boats” Telephone: 410.956.1050
FAX: 410.456.2737
NFPA Standard 302. National Fire Protection Association
“Pleasure and Commercial Motor Craft” 1 Batterymarch Park
P.O. Box 9101
Quincy, MA 02269-9401
Telephone: 800.344.3555
Rules and Regulations for Recreational Boats Excerpts from the United States Code (USC) and
the Code of Federal Regulations (CFR) (U.S. Coast
Guard Regulations) are available from the Ameri-
can Boat and Yacht Council listed above.
Note: Installation of the Alternator Regulator must be made in accordance with all applicable standards and reg-
ulations.
Environmental Precaution
The Alternator Regulator is intended for installation inside an engine room or elsewhere inside the boat. Make
sure that the location will not subject the unit to rain, snow, excessive moisture, excessive heat, or corrosive ele-
ments.

LT-12PREG-1
4Charles Industries, Ltd. All rights reserved. Printed in the United States of America.
Application Precaution
These units are intended for hard-wired, permanent, on-board applications. Use of attachments not recom-
mended or sold by Charles Marine Products may result in risk of fire, electrical shock or personal injury.
Damaged Unit Precaution
Do not operate the Alternator Regulator if it has received a sharp blow, been dropped, immersed in water or
otherwise damaged. See the section in this manual on
Warranty & Customer Service
for repair information.
Disassembly Precaution
Do not disassemble the Alternator Regulator. See the sections in this manual on
Maintaining the Alternator Regu-
lator
,
Troubleshooting the Alternator Regulator
and
Warranty & Customer Service
.
MOUNTING
Choosing Mounting Hardware
As with any marine equipment, secure mounting is of utmost importance. You will need to provide four #8 bolts or
screws to secure the unit. The screws or bolts you choose should be backed with a flat washer and kept vibra-
tion-free with a split-ring lock washer. If using bolts, they must be secured on both sides of the bulkhead and also
backed with a washer or washer plate. If using screws, they should be at least 1” long. All hardware must be cor-
rosion-resistant stainless steel or cadmium-plated steel.
Mounting the Alternator Regulator
The regulator is protected against ambient humidity, but must be mounted in a dry location free of moisture, dust,
and other environmental insults. The regulator will operate in temperatures to 140F (60C).
Use care when drilling to avoid contact with any wires or live components.
WARNING – ELECTRICAL SHOCK HAZARD
Step Action
1. Carefully lower and position the Alternator Regulator in the exact location the unit will be installed.
Note: The wiring enclosure should be visible and accessible.
2. Mark the location of the mounting holes.
3. Remove the regulator and drill the four marked holes with the proper-sized drill bit.
4. Realign the regulator’s mounting holes with the drilled holes and fasten the unit to the mounting surface
with the appropriate mounting hardware.
5. Firmly secure all mounting hardware.

LT-12PREG-1
5
Charles Industries, Ltd. All rights reserved. Printed in the United States of America.
WIRING
The wiring diagram shown in Figure 2 is the only way to wire the regulator. Do not wire in any other way (such as
combining ground wires or battery positive wires).
Note: The parallel solenoid, the error lamp, and the status lamp are wired to their respective outputs with their
other connection returned to ground. All inputs at the terminal block are activated when they are con-
nected to battery voltage. Leave terminals open if they are unused.
Use fuses where shown. Failure to do so may result in fire.
DANGER
TB1—Makeconnections,
then plug in to PCB
Remove bottom screws (both
sides) and lift the cover.
Battery type
selector
P1
P2
R12
R11
Figure 1. Connecting the Terminal Block to the Alternator Regulator

LT-12PREG-1
6Charles Industries, Ltd. All rights reserved. Printed in the United States of America.
GND
BAT
RF
To ignition
switch or oil
pressure switch
F1
15A fast blow
#2018 Temperature
Sensor
F3
3A fast blow
Negative Distribution or
Engine Block
Alternator
Alternator field
connection
WIRE GAUGES:
Size as required for amperage. Consult
Table 2 for suggested wire gauges.
HOUSE BANK
To running
light circuit
#2003
Alarm Error Lamp
STARTER
BANK
#SOL–12 or
#SOL–24
ND
(continuousduty type)
.
#14 AWG
#16 AWG
To EMS
F2
3A fast blow
Current limit
enable Equalization
enable
PD
Status Lamp
WARNING
Connect this
wire first!
Figure 2. Alternator Regulator Wiring Diagram
Table 1. Notes for Figure 2
Required in-line fuse and holder or equivalent.
Optional
The temperature sensor wires should be a twisted pair at a minimum. For extremely noisy environ-
ments, use shielded pair wiring.
Optional lamps may be up to 0.5 watt (0.05 amps maximum).
In-line fuse and holder or equivalent should be used when optional switches are installed.

LT-12PREG-1
7
Charles Industries, Ltd. All rights reserved. Printed in the United States of America.
Table 2. Suggested Wire Gauges
Wire Length (feet) < 140 Amps < 200 Amps
10 #6 #6
20 #4 #2
30 #2 #1
40 #1 #0
50 #0 #00
Table 3 shows all the signals available, whether or not they are required, and their function.
Table 3. Alternator Regulator Signals
Pin # Signal Name Required Function
1 PARALLEL NO An output that has a positive voltage when the regulator detects that the
house battery is being charged. The maximum load is 1.5 amps.
2 ON/OFF YES A positive voltage that turns the alternator field circuits of the regulator on.
Typically connected the the ignition switch or oil pressure switch. Typical
draw is 0.003 amps
Note: On gasoline engines, do NOT connect to the ignition coil circuit.
Connect at the ignition switch.
3 GROUND YES The reference ground for the regulator. All battery voltages are referenced
to this wire. Connect this wire first.
4 B+ YES The source of power for the alternator field current, PARALLEL, ERROR
lamp, and STATUS lamp. Amperage draw on this wire is the same as the
alternator field current: 15 amps maximum.
5 FIELD YES The wire driven positive by the regulator to make the alternator charge. Volt-
age at this point depends on how much current is being produced by the
alternator, and varies from zero to battery voltage.
6ALT. GND YES The return line for field current.
Note: Absence or loss of this connection will prevent charging. Do NOT
jumper this wire to the ground tab.
7 LOCK NO If connected to battery voltage, the regulator is locked at battery gassing
voltage, typically 13.8 volts. Used to prevent higher voltages when halogen
lights are being used. Removal of the lock signal causes the regulator to go
to the float setpoint.
8BAT. VOLTS YES The sense wire for battery voltage. Any voltage drop in this wire from the
battery can cause overcharge.
9T– (BLK) NO Ground side of the temperature sensor which is supplied with the regulator.
10 T+ (RED) NO Positive side of the temperature sensor. Voltage at T+ is 2.98 volts at 25
C, and varies plus and minus with temperature at the rate of 0.01 volts per
degree C. Some battery manufacturers require temperature sensing of the
battery for warranty purposes. In all cases (except for temporary trouble-
shooting) we recommend using the the temperature sensor at all times.
11 ABS NO A positive voltage at ABS will lock the regulator at the absorption setpoint.
Typically used with the Charles Industries Energy Management System.
12 ERR NO A positive going signal that provides troubleshooting information identical to
the red Error LED (see Table 6). Maximum current permitted from the ERR
output is 0.05 Amps.

LT-12PREG-1
8Charles Industries, Ltd. All rights reserved. Printed in the United States of America.
Pin # FunctionRequiredSignal Name
13 STATE NO A positive going signal that provides troubleshooting information identical to
the green Status LED (see Table 5). Maximum current permitted from the
STATE output is 0.05 Amps.
14 LIM NO If connected to battery voltage, the regulator is duty-cycle-current limited at
the setting of potentiometer R11 (see Figure 1).
15 EQL NO This input is used to select either the regulator’s equalization mode or a
second duty cycle current limit, depending on internal jumper P1. This input
is activated when battery voltage is applied to EQL. The duty-cycle current
limit is adjusted with potentiometer R12 (see Figure 1).
Voltage and Absorption Time Setpoints
Voltage and the time of the absorption cycle are controlled by internal dipswitch S1. Select a charge profile by
setting the battery type switches on S1 according to Table 4.
Voltages and absorption time should be measured with the temperature sensor disconnected.
IMPORTANT
Table 4. Voltage and Absorption Time Dipswitch Settings
Battery Type S1–1 S1–2 S1–3 Absorption (v) Float (v) Eq. (v)
Thick Plate Liquid OFF OFF OFF 14.4 13.6 16.2
Medium Plate Liquid ON OFF OFF 14.4 13.6 16.2
East Penn Gel OFF ON OFF 14.1 13.4 —
Concorde AGM ON ON OFF 14.3 13.3 15.5
Optima OFF OFF ON 14.3 13.4 15.5
Exide Gel ON OFF ON 14.2 13.4 —
Johnson Control Gel OFF ON ON 14.2 13.4 —
Ample Power Gel ON ON ON 14.4 13.5 —
OPERATING THE ALTERNATOR/REGULATOR
The regulator is on whenever power is present at TB1–4 (B+). Without the ON/OFF output on TB1–2, the regula-
tor is simply controlling the parallel solenoid, and will close the solenoid whenever the voltage on TB1–8 indicates
that the main battery is being charged.
At Power-Up
When the regulator is first turned on, the red ERROR LED will glow for 5–8 seconds before extinguishing. Then
the green STATUS LED will start to flash status information, typically 2 seconds off, 1 second on (bulk charge).
If there is a positive voltage on TB1–2, ON/OFF, the alternator should start to charge after the ERROR LED goes
off. Charging can be controlled using the ON/OFF input.
Input Priority
The input signals are recognized in the following priority (the earlier listed input overrides all the inputs below it).
1. EQL
2. LIM
3. ABS
4. LOCK

LT-12PREG-1
9
Charles Industries, Ltd. All rights reserved. Printed in the United States of America.
Each input is described in detail in the following paragraphs.
ABS Input
When this input is connected, the alternator regulator is held at the absorption setpoint. Removal of the input sig-
nal causes the alternator regulator to begin stepping towards the float voltage. Step-to-float is an intermediate
mode where the float setpoint is approached in small steps over time. This is done in an attempt to maintain
some alternator output and keep the tachometer alive.
LOCK Input
This input locks the alternator regulator at the gassing setpoint, which is halfway between the absorption and the
float setpoint. Removal of the signal toggles between stepping to float or going to the absorption setpoint. The
first time the signal is removed, the alternator regulator steps to float. The next time the signal is asserted, the
regulator will go to the absorption setpoint. The LOCK input can be used to completely control the setpoint.
Current Limiting (LIM & EQL)
Two potentiometers with two input signals permit duty cycle current limiting at two specific setpoints. Duty cycle
current limiting is a mode in which the maximum amount of time that the alternator is driving the field is set by the
potentiometer. Current limiting is useful to reduce alternator output, reducing horsepower requirements from the
engine.
Two settings are available (LIM and EQL). EQL overrides the LIM input. For normal limiting on a small engine,
use the LIM input. The EQL input can be connected to the same switch that enables another load on the engine.
For instance, a clutch-driven pump may require a further reduction in current; in that case, wire the EQL input to
the switch that activates the clutch for the water pump. The potentiometer for LIM is R11. R12 sets the current
limit for the EQL input.
Equalization
Equalization is a process in which the voltage on the battery is allowed to rise to to a higher voltage, typically
16.2/32.4 volts for most batteries; applied current is limited to 3–7% of the Ah capacity of the battery. The applied
current must be set using R12.
The EQL input is used for a second current limit whenever the input signal is activated. To enter actual equaliza-
tion mode, the two pins of P1 must first be shorted with a jumper terminal or a switch connected to the two pins
(refer to Figure 1). This changes the mode of the EQL input signal to regulate at the equalization voltage set-
points, as well as current limit. Then the EQL limit should be activated for at least 2 seconds, then released. To
terminate the equalization process, activate the limit a second time. Equalization terminates automatically when-
ever the ending voltage or time is achieved.
Note: Equalization produces a higher voltage than some normal equipment can tolerate. Turn off equipment
that will not tolerate an input of 17 volts or more.
The alternator regulator does not permit equalization for the gel batteries selected by S1.

LT-12PREG-1
10 Charles Industries, Ltd. All rights reserved. Printed in the United States of America.
The STATUS LED
This green LED shows at which setpoint the regulator is presently operating. Status is shown by flashing the LED
ON and OFF—times in seconds as shown in Table 5.The same information is available at the STATE output.
Table 5. Status LED
Status ON OFF
Bulk Charge 2 1
Gas Charge 6 1
Absorption Charge 1 1
Step to Float 1 6
Float Charge 2 2
Gas Lock 3 1
ABS Hold 1 3
Equalization Charge 6 6
The ERROR LED
Abnormal conditions are reported by the red ERROR LED (and the external lamp/alarm, if wired). Errors are indi-
cated by flashing the LED ON and OFF—times in seconds as shown in Table 6.
Table 6. Error LED
Error ON OFF
Can’t turn field off 1 1
Can’t turn field on 1 3
Battery volts disconnected 3 1
Over temperature 3 3
Voltage runaway 6 3
Bad temperature sensor 6 6
Field short circuit 3 6
ALTERNATOR REQUIREMENTS
The alternator must be an externally-regulated model with one brush connected to ground and the other brush
fitted with a connection to make the field connection (P-type).
Note: Alternators not rated for continuous operation at high current and temperature may fail when driven by
the regulator unless the current is limited to a safe value.
TROUBLESHOOTING
Most problems with new installations are due to wiring faults. Look at the signal list (Table 3) and make sure that
all required wires are in place and properly connected.
Remove the T+ connection to prevent a faulty temperature sensor from affecting the system.
If all required wires are proper, as verified by a multimeter on the regulator connections, call your dealer or local
installer with voltage readings on al the regular connections. Measure the ON/OFF signal with the ignition switch
off, and again with it on.

LT-12PREG-1
11
Charles Industries, Ltd. All rights reserved. Printed in the United States of America.
WARRANTY & CUSTOMER SERVICE
Warranty
CHARLES MARINE PRODUCTS warrants the Alternator Regulator will be free from defects in materials and
workmanship which cause mechanical failure for two (2) years, as set forth in the Limited Warranty. Review this
warranty carefully for information on what is covered by its terms. Complete and return the warranty registration
card within ten (10) days of purchase to establish proof of ownership and validate the warranty coverage. You
must provide notice of any alleged defect in material of workmanship within thirty (30) days of discovering the
problem, and within the warranty period. Follow the procedure outlined below to obtain warranty service.
Warranty Service and Repair
If the unit fails to operate properly after following all the instructions in the manual, or if the Alternator Regulator
requires service, take the following steps:
1. Contact Charles Marine Products Customer Service and obtain a ”Returned Goods Authorization” (RGA) number
and a Service Center address
2. Ship or mail the Alternator Regulator together with the RGA to the appropriate Service Center. Shipping costs to
and from the Service Center are your responsibility
3. When service is completed, Charles Marine Products will return the Alternator Regulator to you.
Customer Service
If technical assistance or customer service is required, contact Charles Marine Products at:
(847) 806–6300 (Customer Service)
(847) 806–6352 (FAX)
(905) 821–7673 (Canada)
For correspondence only, mail to:
Charles Marine Products
Charles Center
5600 Apollo Drive
Rolling Meadows, IL 60008–4049
SPECIFICATIONS
The specifications for the Alternator Regulator are listed in Table 7.
Table 7. Alternator Regulator Specifications
Feature U.S. Metric
Input Voltage 12/24 VDC (nominal)
Input Current 15 Amps
Output Current 15 Amps
Operating Temperature 32°to 140°F 0°to 60°C
Approximate Weight 1 pound 0.4356 kilograms
Height 5.85 inches 14.86 centimeters
Width 6.70 inches 17.02 centimeters
Depth 1.65 inches 4.2 centimeters
This manual suits for next models
3
Table of contents
Other Charles Batteries Charger manuals


