Running in DMX ModeRunning in DMX Mode
This DMX mode enables the use of a universal DMX controller device. Each fixture requires a "start
address" that can be set from 001 to 512. A fixture requiring one or more channels for control begins
to read the data on the channel indicated by the start address. For example, a fixture that occupies or
uses 6 channels of DMX and was addressed to start on DMX channel 100, would read data from
channels: 100, 101, 102, 103, 104, and 105. Choose start addresses so that the channels used do
not overlap and notate the start address selected for future reference.
If this is your first time addressing a fixture using the DMX-512 control protocol than I suggest jumping
to the Appendix Section and read the heading “DMX Primer”. It contains very useful information that
will help you understand its use.
If this is your first time addressing a fixture using the DMX-512 control protocol than I suggest jumping
to the Appendix Section and read the heading “DMX Primer”. It contains very useful information that
will help you understand its use.
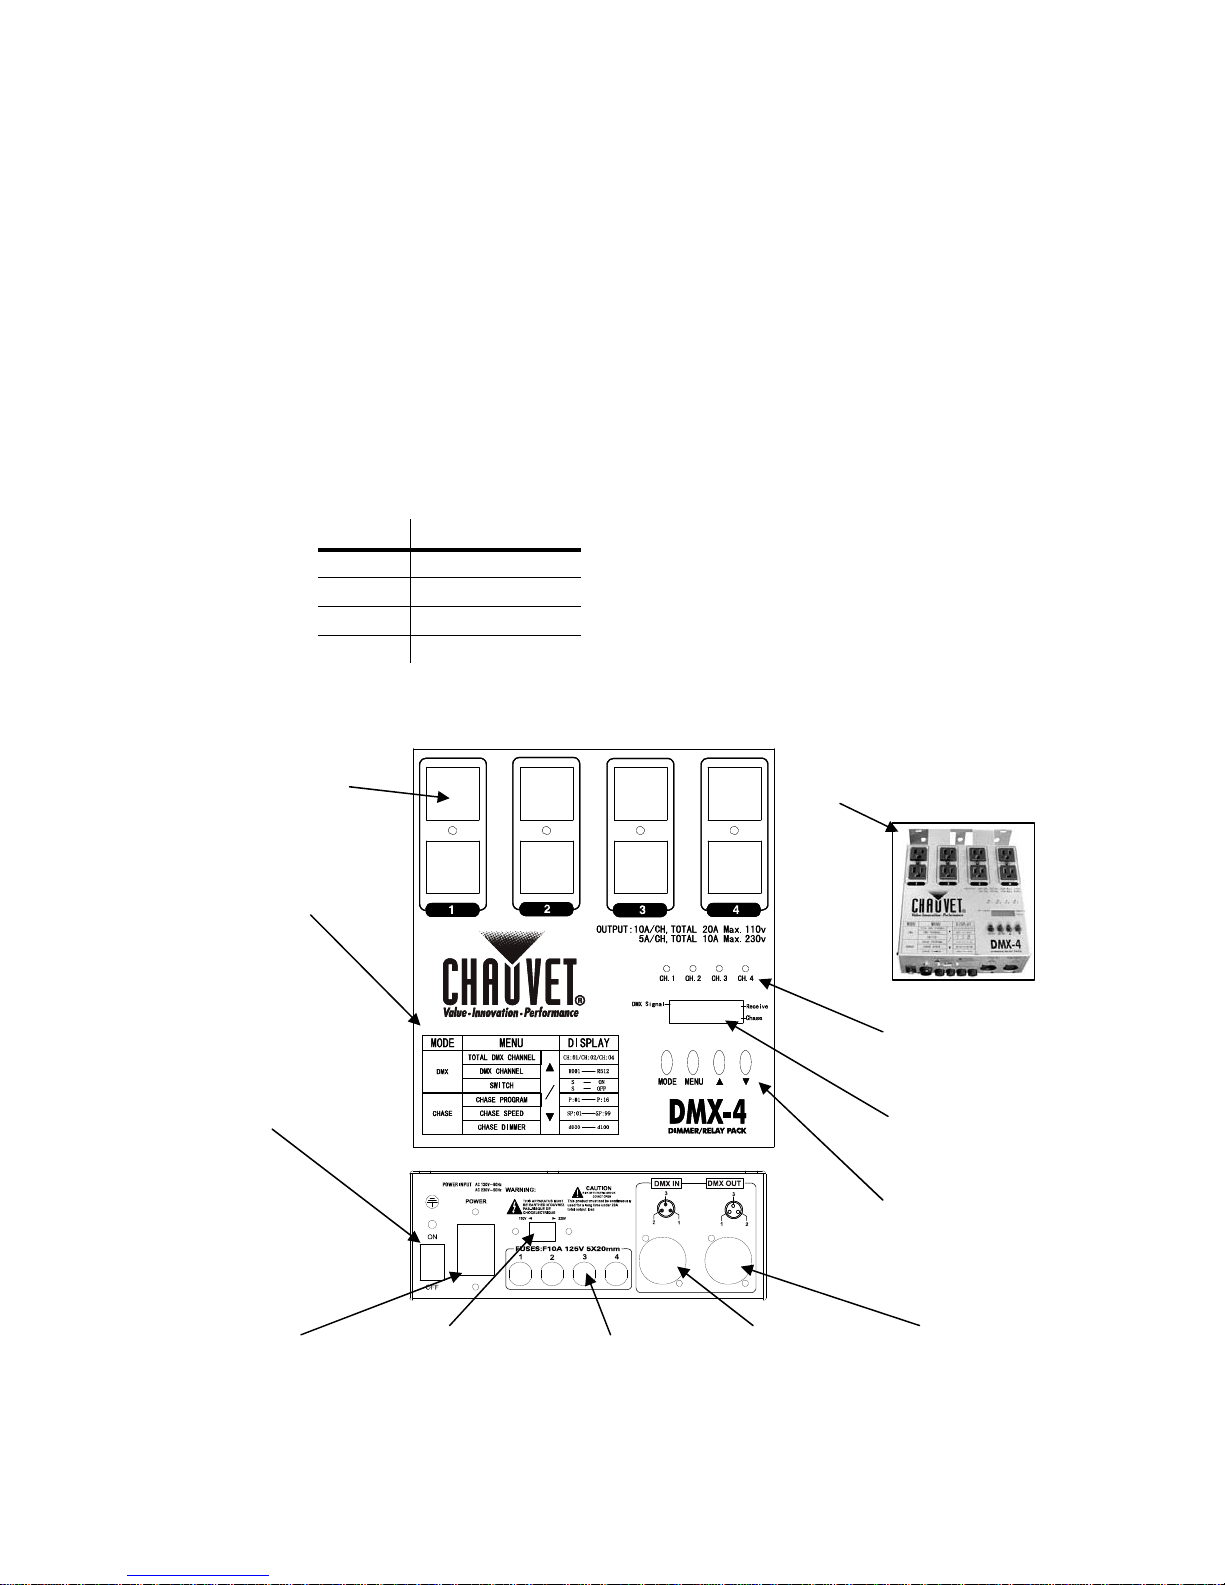
SELECT DMX MODE & SET STARTING ADDRESSSELECT DMX MODE & SET STARTING ADDRESS
1) Press the MODE button until the display reads {Annn}, where n represents a number between
001 and 512.
1) Press the MODE button until the display reads {Annn}, where n represents a number between
001 and 512.
2) Press the (cButton) and (dButton) to increase or decrease values until the desired DMX
starting address is achieved.
2) Press the (cButton) and (dButton) to increase or decrease values until the desired DMX
starting address is achieved.
OPTIONAL DIMMER/RELAY SETTINGOPTIONAL DIMMER/RELAY SETTING
1) Press the MODE button until the display reads {Annn}, where n represents a number between
001 and 512.
1) Press the MODE button until the display reads {Annn}, where n represents a number between
001 and 512.
2) Press the MENU button until the display reads {S-nn}, where nn represents either (oF) for
switching off or (oN) for switching on.
2) Press the MENU button until the display reads {S-nn}, where nn represents either (oF) for
switching off or (oN) for switching on.
3) Press the (cButton) and (dButton) to toggle between {S-oN} and {S-oF}.3) Press the (cButton) and (dButton) to toggle between {S-oN} and {S-oF}.
DMX CONTROL CHANNEL MODESDMX CONTROL CHANNEL MODES
1) Press the MODE button until the display reads {Annn}, where n represents a number between
001 and 512.
1) Press the MODE button until the display reads {Annn}, where n represents a number between
001 and 512.
2) Press the MENU button until the display reads {CH:nn}, where n represents a number between
01 and 04.
2) Press the MENU button until the display reads {CH:nn}, where n represents a number between
01 and 04.
3) Press the (cButton) and (dButton) to increase or decrease values to select a desired
channel output
3) Press the (cButton) and (dButton) to increase or decrease values to select a desired
channel output
SELECTIONSELECTION BEHAVIORBEHAVIOR
CH:01 DMX channel 1 will control outputs (1 through 4 combined)
CH:02 DMX channel 1 will control outputs (1 and 2 combined)
DMX channel 2 will control outputs (3 and 4 combined)
CH:04 DMX channels 1 through 4 will control outputs 1 through 4 respectively
Replacing a fuse
FUSES: F10A 125V 5 X20mm
1 2 3 43 4
With a Philips head screwdriver unscrew the
fuse holder until it can be entirely removed.
Remove the damaged fuse from its holder and
replace with exact same type fuse. Insert the
fuse holder back in its place and reconnect
power.
Disconnect the power cord before replacing a fuse and always
replace with the same type fuse.
DMX-4 User Manual 7