ChemoMetec NucleoCounter NC-200 User manual
NucleoCounter
NC-200
™
Quick Guide
to the easiest cell count ever!
®
How to get started
Dear NucleoCounter Customer,
Thank you for purchasing the NucleoCounter®NC-200™which offers the easiest one-step viability
and cell count ever.
One step viability and cell count
No pre-treatment
Fast and easy operation
Maintenance and service free
Safe sample handling and disposal
Excellent reproducibility
User adaptable counting protocols
21 CFR part11 ready
1
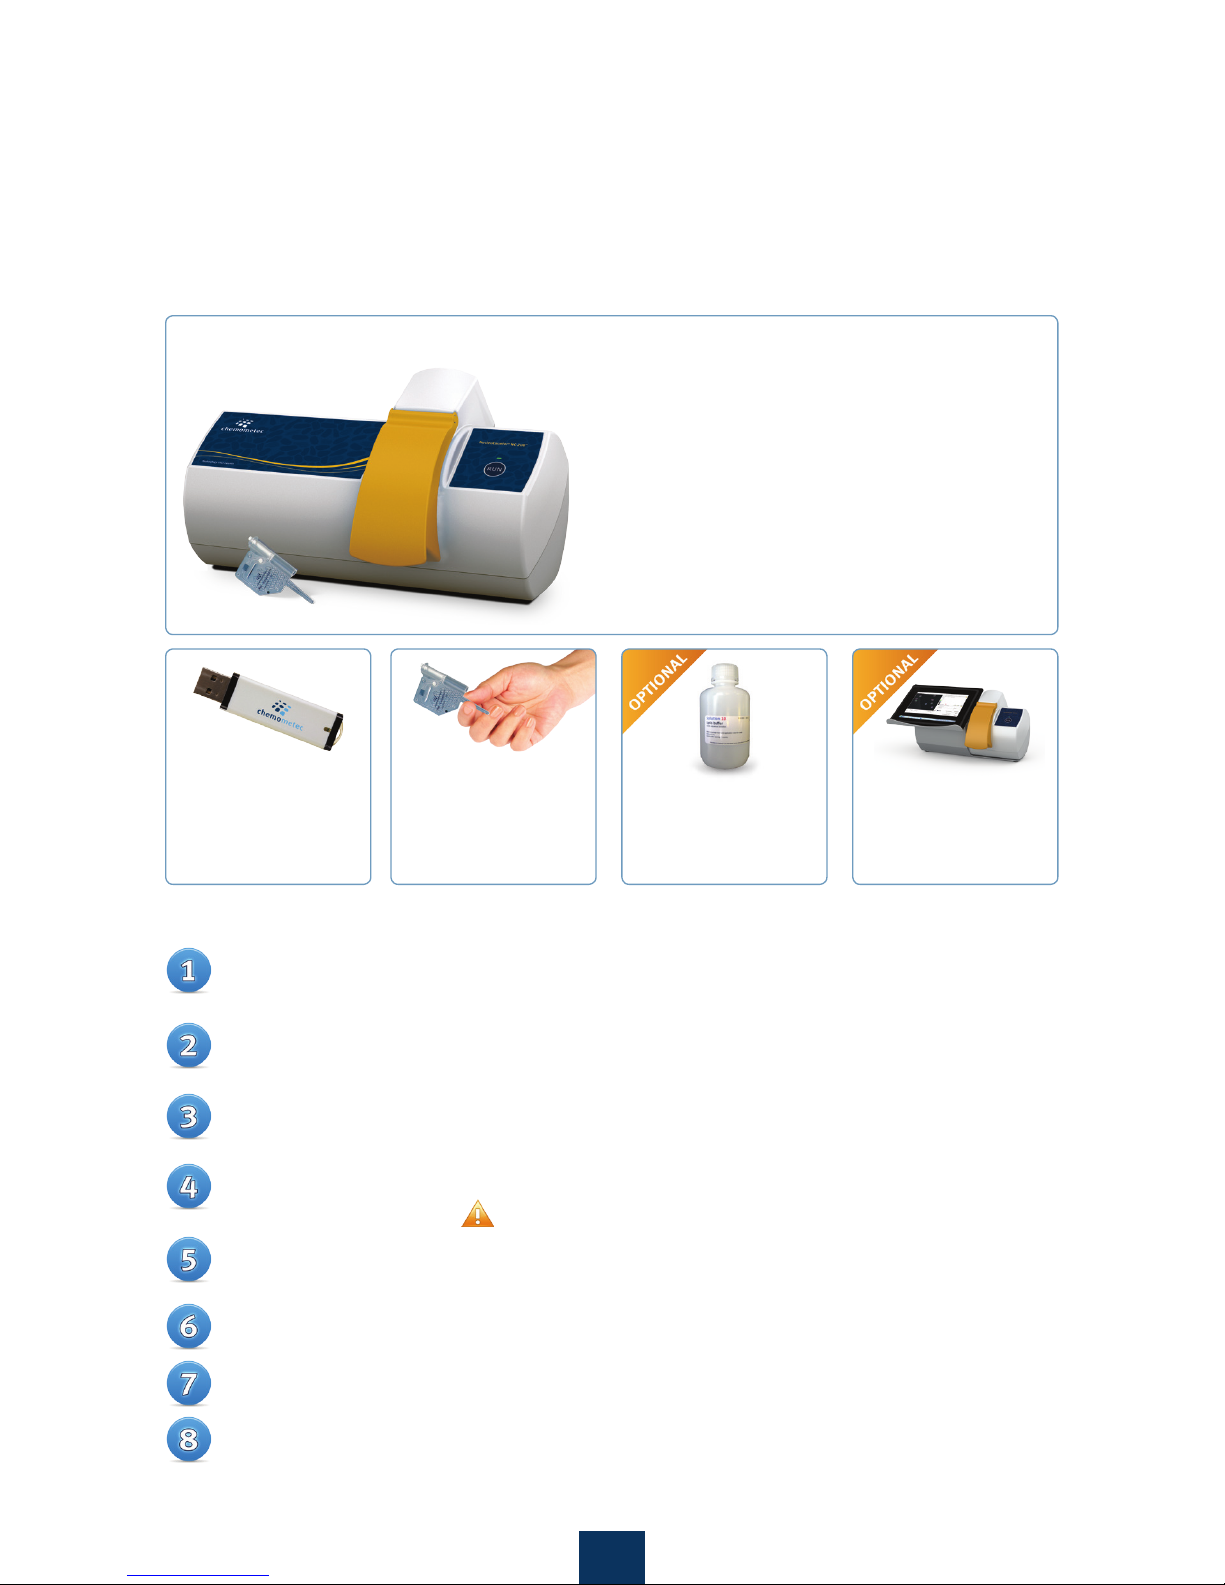
The NucleoCounter®NC-200™Concept
For detailed instructions, please read the manual.
NucleoView™Software
Included on a USB stick
for an unlimited number
of installations.
Via1-Cassettes™
For one-step viability and
cell count. Contains DAPI
and Acridine Orange.
Solution 10
Can be used for
disaggregation of
aggregating cells.
NC-200™ laptop stand
Can be used to minimize
footprint and facilitates
even easier operation.
Unpack the NC-200™ instrument and plug it in the main outlet. Do NOT connect the
USB cable to the PC.
Make sure that there are full administrator rights on the PC during the installation of
the NucleoView™ NC-200 software.
Insert the USB stick (found under the yellow lid) in the PC and open the “Install_
Guide.html” file for detailed installation instructions.
Open the “Install NucleoView NC-200 X.X.X.X.exe” file (the Xs indicate the version
number e.g. 1.0.22.0). Do NOT open the .bin file.
Follow the instructions on the screen. After the software installation it will be
required to restart the PC.
Open the NucleoView™ NC-200 software by double clicking on the NC-200 icon on
the desktop to start the installation of the instrument.
Follow the on-screen instructions to install the instrument.
The NucleoCounter® NC-200™ is ready to use when the LED indicator light on the
instrument turns green it is ready to use.
How to get started - 8 easy steps to install the NC-200™

2
How to Perform the One-step
Viability and Cell Count Analysis
Easiest cell count ever!
The NucleoCounter®NC-200™from ChemoMetec is a significant step forward for
automated cell counting.
No need to add buffers or dyes.
No need to calibrate.
Just prepare your cell suspension, load the disposable Via1-Cassette™, and
press RUN!
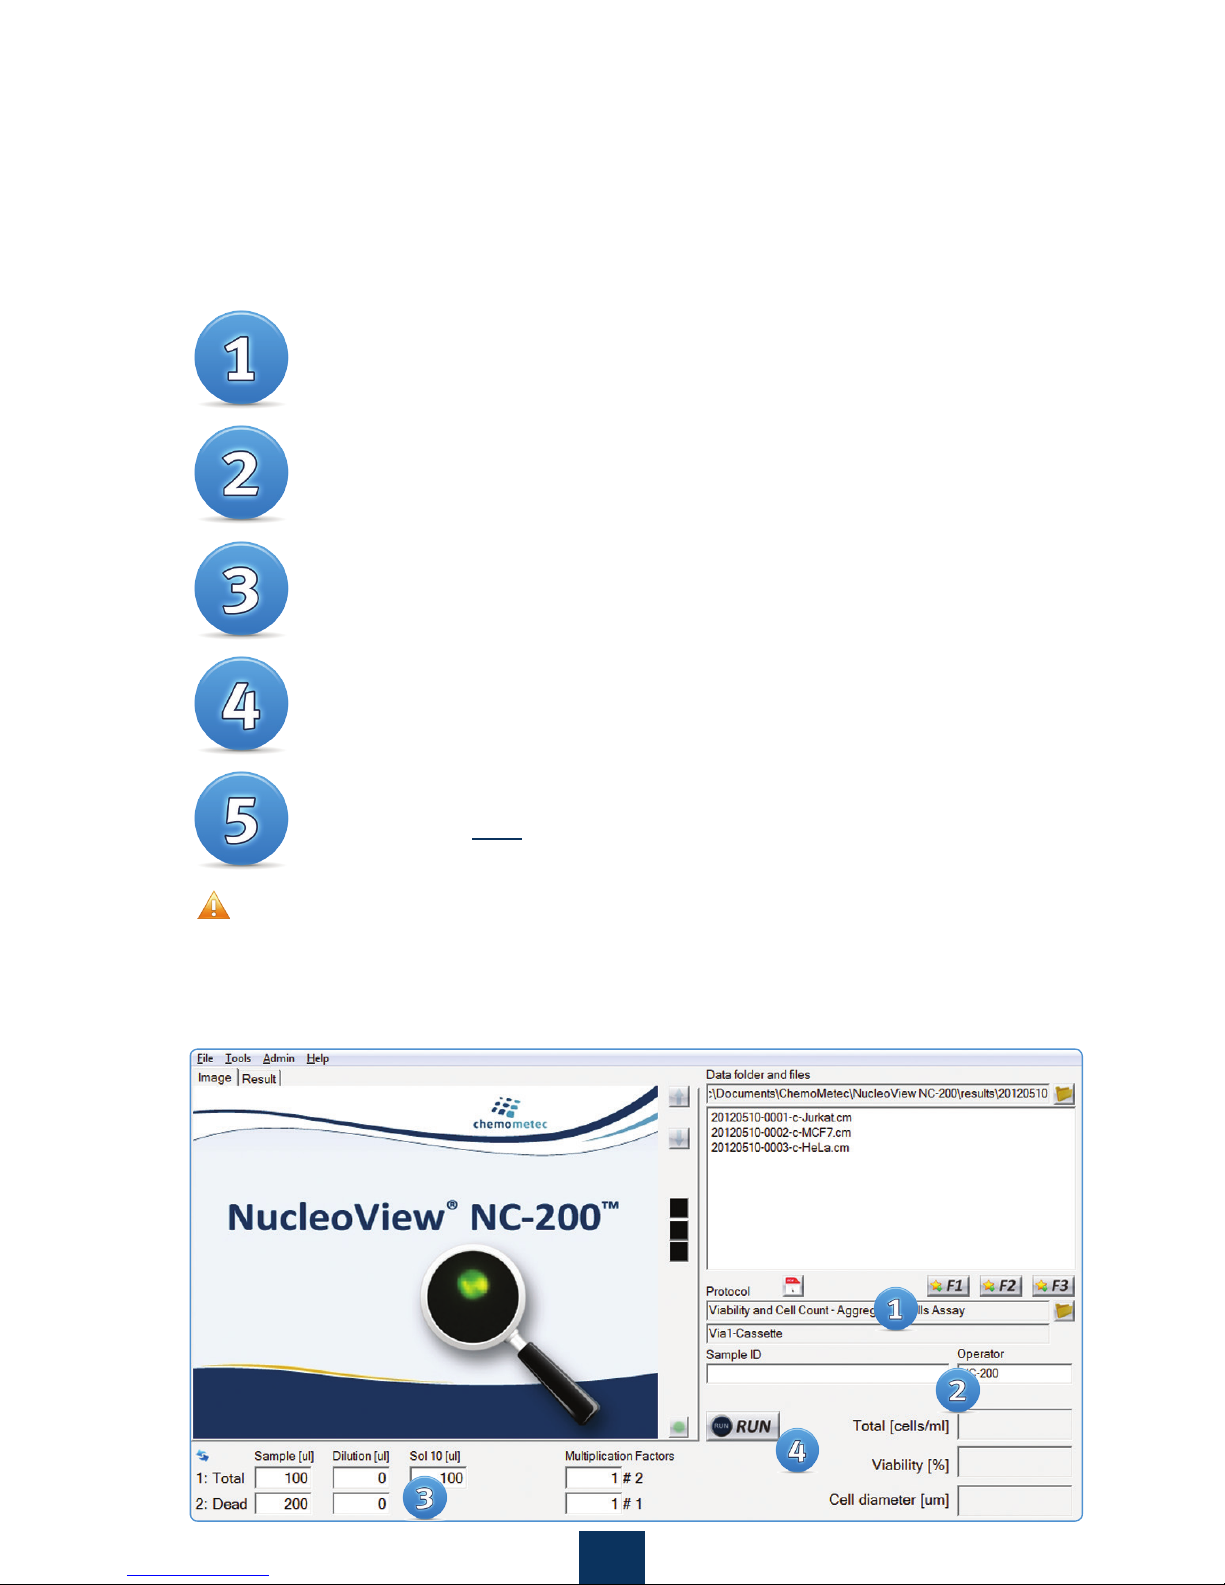
Select protocol from the menu:
‘Viability and Cell Count Assay’
Optional: Enter Sample ID and
Operator Name
Load the sample into a Via1-Cassette™
and Press ‘RUN’
3
How to Perform Total Cell Count
and Viability of Aggregated Cells
Select the protocol from the menu
‘Viability and Cell Count - Aggregated Cells Assay’
Optional: enter Sample ID and Operator Name
Add equal volumes of ‘Solution 10’ and your cell sample to a
microcentrifuge tube and mix. Retain an aliquot of at least 200 μL
cell suspension without ‘Solution 10’ for analysis in step 5
Immediately load your sample into a Via1-Cassette™ and
press ‘RUN’
After analysis, follow the on-screen prompt and load a sample
of your cells NOT treated with ‘Solution 10’ and press ‘RUN’
The compensation for the sample dilution with ‘Solution 10’ is automatically
performed by the software. However, if the proportions are different from those above,
please add the correct volumes in the input fields under the image window prior to run-
ning your assay. The entered volumes are used for calculating the cell concentration in the
original cell sample.

4
PDF reports
Right click on file to create a PDF report
Select which parameters that will be visible on the report, and
the properties of the parameters
Optional: Preview your result
Save and/or print you report to the default printer
Tip: Batch exports can be done from the NucleoView™ File Browser.

5
Optional: Visual Inspection
of Counting Gates
OPTION
(PREFERRED)
Click the green dot in the right-hand corner of the image window.
This activates the image overlay function indicating all the events in
the total cell count. The mouse scroll button allows the user to zoom
in at the cursor position. Cells will be framed by a pink square.
OPTION
(ADVANCED)
Right-click on the sample file name in the ’Data folders and
files’ window and select ’Show counting gates in Plot Ma-
nager’.
A new window will open displaying scatter plots and histograms of
event intensity and size for the appropriate channels (AO and DAPI).
It is important that the core of the population, most usually seen
as a coloured region on the scatter plot, is included in the square
counting gate.
Note: it is not required that all events be included in the counting
gate. Events in the lower, left-hand corner of the scatter plot are often
smaller than cells and considered debris.

6
Only If Required: Create your own protocol
with Adjusted Counting Gates
Perform the desired type of assay on a sample of the cells to be analyzed.
In the Tools menu select Protocol Adaptation Wizard or right-click on the de-
sired file and select ‘Start Protocol Adaption Wizard’.
Follow the instructions in the Protocol Adaptation Wizard to create your own
adapted protocol.
The viability and cell count results will not be adjusted for the image file
used for the adaption of counting gates. New results can only be obtained by
running a new sample with the new gating protocol.
1
2

Additional Resources
ChemoMetec A/S
Gydevang 43
DK-3450 Allerod
Denmark
Phone(+45) 48 13 10 20
Fax (+45) 48 13 10 21
Mail contact@chemometec.com
Web www.chemometec.com
Disclaimer Notices
The material in this document and referred documents is for information only and is subject to change without notice. While
reasonable efforts have been made in preparation of these documents to assure their accuracy, ChemoMetec A/S assumes
no liability resulting from errors or omissions in these documents, or from the use of the information contained herein.
ChemoMetec A/S reserves the right to make changes in the product design without reservation and without notification to
its users.
Copyright Notices
Copyright © ChemoMetec A/S 2012. All rights reserved. No part of this publication and referred documents may be repro-
duced, stored in a retrieval system or transmitted in any form or by any means, electronic, mechanical, photocopying, record-
ing or otherwise, without the prior written consent of ChemoMetec A/S, Gydevang 43, DK-3450 Allerod, Denmark.
ChemoMetec and NucleoCounter are registered trademarks owned by ChemoMetec A/S.
NucleoCassettes and NucleoView are trademarks of ChemoMetec A/S.
All other trademarks are the property of their respective owners.
Consumables/accessories/kits:
Item no. Description
941-0012 Via1-Cassette™, 1 box (100 pcs.)
910-3010 Solution 10 - Lysis Buffer, 100 ml
910-3017 Solution 17 - Blood Lysis Buffer, 25 ml
910-0003 Reagent A100 - Lysis Buffer, 500 ml
910-0002 Reagent B - Stabilizing Buffer, 500 ml
974-0001 PQ Test Kit (For check of Viability and Cell Count Assay)
912-0010 NucleoCounter®NC-200™IQ/OQ Kit
929-0011 Laptop Stand for NC-200™
Go to www.chemometec.com to find:
991-0205A ver. 01.2016
• Documentation
• SDS
• Application notes
• Certificates of analysis
• Videos etc.
Other manuals for NucleoCounter NC-200
4
Table of contents
Other ChemoMetec Cash Counter manuals


