Chromalox 8004-2 User manual

8004-2
Temperature Controller with Servomotor Output
Issue date rUSER'S MANUAL
May 2000
Chromalox
8004-Tser0-DA.p65 5/29/00, 6:50 PM1

INDEX
MOUNTING REQUIREMENTS .......................... 1
OUTLINE AND CUT OUT DIMENSIONS ........... 2
CONNECTION DIAGRAMS ................................ 3
PRELIMINARY HARDWARE SETTINGS ........... 9
CONFIGURATION PROCEDURE .................... 10
OPERATIVE MODE .......................................... 18
Display function ......................................... 18
Indicators ................................................... 19
Pushbutton function during operating mode
19
Feedback potentiometer calibration .......... 20
Enable/disable the control output .............. 20
Manual function ......................................... 21
Direct access to the set point .................... 21
operative set point selection ...................... 22
Serial link ................................................... 22
SMART function ........................................ 22
Lamp test ................................................... 23
OPERATIVE PARAMETERS ............................ 23
ERROR MESSAGES ........................................ 26
GENERAL INFORMATIONS ............................ 29
MAINTENANCE ................................................ 33
DEFAULT PARAMETERS ............................... A.1
GB
II
8004-Tser0-DA.p65 5/29/00, 6:50 PM2

III
Model identification
Model
8004 1/16 DIN Temperature Controller
Code Outputs
21 1 servomotor + 1 relay + 3 logic inputs
Code Output 2 - Alarm
0 None
1 Out #4
2 Out #4 + RS-485
Code Instrument Power
3 100 - 240 Vac
5 24 V AC/DC
Code
000 Add to complete model number
8004 21 1 3 000 Typical Model Number
8004-Tser0-DA.p65 5/29/00, 6:50 PM3

1
GB
MOUNTING REQUIREMENTS
Select a mounting location where there is
minimum vibration and the ambient temperature
range between 0 and 50 °C.
The instrument can be mounted on a panel up to
15 mm thick with a square cutout of 45 x 92 mm.
For outline and cutout dimensions refer to Fig. 2.
The surface texture of the panel must be better
than 6,3 mm.
The instrument is shipped with rubber panel
gasket (50 to 60 Sh).
To assure the IP65 and NEMA 4 protection, insert
the panel gasket between the instrument and the
panel as shown in fig. 1.
While holding the instrument against the panel
proceed as follows:
1) insert the gasket in the instrument case;
2) insert the instrument in the panel cutout;
3) pushing the instrument against the panel,
insert the mounting bracket;
4) with a screwdriver, turn the screws with a
torque between 0.3 and 0.4 Nm.
Screw
Screw
Fig. 1
bracket Panel
Gasket
8004-Tser1-DA.p65 5/29/00, 6:51 PM1

2
GB
OUTLINE AND CUT OUT
DIMENSIONS
Fig. 2
8004-Tser1-DA.p65 5/29/00, 6:51 PM2

3
GB
CONNECTION DIAGRAMS
Connections are to be made with the instrument
housing installed in its proper location.
Fig. 3 REAR TERMINAL BLOCK
A) MEASURING INPUT
NOTE: Any external components (like zener
barriers etc.) connected between sensor and
input terminals may cause errors in measurement
due to excessive and/or not balanced line
resistance or possible leakage currents.
TC INPUT
Fig. 4 THERMOCOUPLE INPUT WIRING
NOTE:
1) Don’t run input wires together with power
cables.
2) For TC wiring use proper compensating cable
preferable shielded.
3) when a shielded cable is used, it should be
connected at one point only.
Shield
Shield
1
3
+
_
1
3
+
_
8004-Tser1-DA.p65 5/29/00, 6:51 PM3

4
GB
RTD INPUT
Fig. 5 RTD INPUT WIRING
NOTE:
1) Don’t run input wires together with power
cables.
2) Pay attention to the line resistance; a high line
resistance may cause measurement errors.
3) When shielded cable is used, it should be
grounded at one side only to avoid ground loop
currents.
4) The resistance of the 3 wires must be the
same.
LINEAR INPUT
Fig. 6 mA, mV AND V INPUTS WIRING
NOTE:
1) Don’t run input wires together with power
cables.
2) Pay attention to the line resistance; a high line
resistance may cause measurement errors.
3) When shielded cable is used, it should be
grounded at one side only to avoid ground loop
currents.
4) The input impedance is equal to:
< 5 Wfor 20 mA input
> 1 MWfor 60 mV input
> 200 kWfor 5 V input
> 400 kWfor 10 V input
4
RTD
1
3 4
RTD
1
3
Shield
_
+mA,
mV
or
V
3
+
_
G
mA
mV
or
V
1
3
1
8004-Tser1-DA.p65 5/29/00, 6:51 PM4

5
GB
B) LOGIC INPUT
Safety note:
1) Do not run logic input wiring together with
power cables.
2) Use an external dry contact capable of
switching 0.5 mA, 5 V DC.
3) The instrument needs 100 ms to recognize a
contact status variation.
4) The logic inputs are NOT isolated by the
measuring input
Fig. 7 - LOGIC INPUT WIRING
This instrument is provided with 3 logic inputs.
The binary combination of the logic input 1 and 3
allows to select the operative set point according
with the following table:
logic input 3 logic input 1 op. set point
open open SP
open close SP2
close open SP3
close close SP4
The logic input 2 function is programmed by P 24
parameter.
8
Log. input 3
7
Log. input 2
6
5
Log. input 1
17
18
19
Servo-
motor
Power
line
20
21
22
s(Open the valve)
t(Close the valve)
Feedback
potentiometer
Shield
C) VALVE MOTOR DRIVE OUTPUT.
Fig. 8 - SERVOMOTOR WIRING
The two relay outputs are interlocked.
NOTE:
1) Before connecting the instrument to the power
line, make sure that line voltage and the load
current are in accordance with the contact rating
(3A/250V AC on resistive load).
2) To avoid electric shock, connect power line at
the end of the wiring procedure.
3) For servomotor connections use No 16 AWG or
larger wires rated for at last 75 °C.
4) Use copper conductors only.
5) Don’t run input wires together with power cables.
6) For feedback potentiometer, use shielded cable
with the shield connected to the earth at one point
only.
7) The relay outputs are protected by varistor
against inductive load with inductive
component up to 0.5 A.
8004-Tser1-DA.p65 5/29/00, 6:51 PM5

6
GB
D) RELAY OUTPUTS
Fig. 9 RELAY OUTPUTS WIRING
NOTE: OUT 1 can be used either as servomotor
output or as time proportional relay output;
by the P5 parameter (see pag.11) it is
possible to set the desired output.
All relay outputs are protected by varistor against
inductive load with inductive component up to 0.5 A.
The contact rating of OUT 1 is 3A/250V AC on
resistive load, the contact rating of OUT 3 and 4
is 2A/250V AC on resistive load.
The contact rating of the OUT 3 and 4 is 2A/250V AC
resistive load.
The number of operations is 1 x 10⁵at specified
rating.
Alarm 2 and alarm 3 are in OR condition on the
out 4.
The following recommendations avoid serious
problems which may occur, when using relay
output for driving inductive loads.
INDUCTIVE LOADS
High voltage transients may occur when switching
inductive loads.
Through the internal contacts these transients
may introduce disturbances which can affect the
performance of the instrument.
The internal protection (varistor) assures a correct
protection up to 0.5 A of inductive component.
The same problem may occur when a switch is
used in series with the internal contacts as shown
in Fig. 10.
Fig. 10 EXTERNAL SWITCH IN SERIES WITH
THE INTERNAL CONTACT
In this case it is recommended to install an
additional RC network across the external contact
as shown in Fig. 10
The value of capacitor (C) and resistor (R) are
shown in the following table.
Anyway the cable involved in relay output wiring
must be as far away as possible from input or
communication cables.
16
14
15 C - OUT 3/4
NO - OUT 3
NO - OUT 4
OUT 3
OUT 4
LOAD
(mA)
<40 mA
<150 mA
<0.5 A
C
(mF)
0.047
0.1
0.33
R
(W)
100
22
47
P.
(W)
1/2
2
2
OPERATING
VOLTAGE
260 V AC
260 V AC
260 V AC
17
18 C
NO
OUT 1
8004-Tser1-DA.p65 5/29/00, 6:51 PM6

7
GB
SERIAL INTERFACE
RS-485 interface allows to connect up to 30
devices with one remote master unit.
Fig. 11 - RS-485 WIRING
The cable length must not exceed 1.5 km at 9600
BAUD.
NOTE: The following report describes the signal
sense of the voltage appearing across the
interconnection cable as defined by EIA for
RS-485.
a) The ” A ” terminal of the generator shall
be negative with respect to the ” B ” terminal
for a binary 1 (MARK or OFF) state.
b) The ” A ” terminal of the generator shall
be positive with respect to the ” B ” terminal
for a binary 0 (SPACE or ON)
10
9COMMON
11
B'/B
B/B'
A/A' A'/A
M
A
S
T
E
R
I
N
S
T
R
U
M
E
N
T
R (S,T)
R (S,T)
N
N
POWER LINE 100 V to 240 V A.C
(50/60Hz)
or 24 V AC/DC
E) POWER LINE WIRING
Fig. 12 POWER LINE WIRING
NOTE:
1) Before connecting the instrument to the power
line, make sure that line voltage corresponds to
the descrtiption on the identification label.
2) To avoid electric shock, connect power line at
the end of the wiring procedure.
3) For supply connections use No 16 AWG or larger
wires rated for at last 75 °C.
4) Use copper conductors only.
5) Don't run input wires together with power cables.
6) For 24 V DC the polarity is a do not care condition.
7) The power supply input is fuse protected by a sub
miniature fuse rated T, 1A, 250 V.
When fuse is damaged, it is advisable to verify
the power supply circuit, so that it is necessary to
send back the instrument to your supplier.
8) The safety requirements for Permanently Con-
nected Equipment say:
- a switch or circuit-breaker shall be included in
the building installation;
- It shall be in close proximity to the equipment
and within easy reach of the operator;
- it shall be marked as the disconnecting device
for the equipment.
12
13
8004-Tser1-DA.p65 5/29/00, 6:51 PM7

8
GB
NOTE: a single switch or circuit-breaker can drive
more than one instrument.
9) When a neutral line is present, connect it to
terminal 13.
8004-Tser1-DA.p65 5/29/00, 6:51 PM8

9
GB
PRELIMINARY HARDWARE
SETTINGS
1) Remove the instrument from its case.
2) It is necessary to set J1 according to the desired
input type as shown in the following figure.
INPUT J1
TYPE 1-2 3-4 5-6 7-8 9-10
TC-RTD open close open open open
60 mV open close open open open
5 V close open close open open
10 V open open close open open
20 mA open open open close close
NOTE : the not used jumper can be positioned on
pin 7-9
OPEN INPUT CIRCUIT
This instrument is able to identify the open circuit
for TC and RTD inputs.
The open input circuit condition for RTD input is
shown by an "overrange" indication.
For TC input, it is possible to select overrange
indication (standard) or underrange indication set-
ting the CH2 and SH2 according to the following
table:
Overrange (STD) CH2 = close SH2 = open
Underrange CH2 = open SH2 = close
Both pads are located on the soldering side of the
CPU card
V2
Fig. 13
1 3 5 7 9
2 4 6 8 10
J1
Fig. 14
SH2
CH2
8004-Tser1-DA.p65 5/29/00, 6:51 PM9

10
GB
GENERAL NOTES for configuration.
FUNC = This will memorize the new value of
the selected parameter and go to the
next parameter (increasing order).
MAN = This will scroll back the parameters
without memorization of the new value.
s= This will increase the value of the
selected parameter
t= This will decrease the value of the
selected parameter.
CONFIGURATION PROCEDURE
1) Remove the instrument from its case.
2) Set the dip switch V2 to the open condition
(see fig. 13).
3) Re-insert the instrument.
4) Switch on the instrument.
The display will show COnF.
NOTE : If "CAL" indication is displayed, press
immediately the spushbutton and return to
the configuration procedure.
5) Push the FUNC pushbutton.
SEr1 = Serial interface protocol
OFF = No serial interface
Ero = Polling/selecting ERO
nbUS = Modbus
jbUS = Jbus
SEr2 = Serial link device address
Not available when SEr1 = OFF
From 1 to 95 for ERO protocol
From 1 to 255 for all the other protocols
NOTE: the electrical characteristic of the RS 485
serial interface will allow the connection of 31
devices maximum.
SEr3 = Baude rate for serial link
Not available when SEr1 = OFF
From 600 to 19200 baud.
NOTE: 19200 baud is shown on display as 19.2.
SEr4 = Byte format for serial link
Not available when SEr1 = OFF
7E = 7 bits + even parity (For ERO protocol only)
7O = 7 bits + odd parity (For ERO protocol only)
8E = 8 bits + even parity
8O = 8 bits + odd parity
8 = 8 bits without parity
P1 - Input type and standard range
0 = TC type L range 0 / +400.0 °C
1 = TC type L range 0 / +900 °C
2 = TC type J range-100.0 / +400.0 °C
3 = TC type J range -100 / +1000 °C
4 = TC type K range-100.0 / +400.0 °C
5 = TC type K range -100 / +1370 °C
6 = TC type T range-199.9 / +400.0 °C
7 = TC type N range -100 / +1400 °C
8 = TC type R range 0 / +1760 °C
9 = TC type S range 0 / +1760 °C
10 = TC type B range 0 / +1820 °C
11 = RTD type Pt 100 range-199.9 / +400.0 °C
12 = RTD type Pt 100 range -200 / +800 °C
13 = mV Linear range 0 / 60 mV
14 = mV Linear range 12 / 60 mV
15 = mA Linear range 0 / 20 mA
16 = mA Linear range 4 / 20 mA
17 = V Linear range 0 / 5 V
18 = V Linear range 1 / 5 V
19 = V Linear range 0 / 10 V
20 = V Linear range 2 / 10 V
21 = TC type L range 0 / +1650 °F
22 = TC type J range -150 / +1830 °F
8004-Tser1-DA.p65 5/29/00, 6:51 PM10

11
GB
23 = TC type K range -150 / +2500 °F
24 = TC type T range -330 / +750 °F
25 = TC type N range -150 / +2550 °F
26 = TC type R range 0 / +3200 °F
27 = TC type S range 0 / +3200 °F
28 = TC type B range 0 / + 3310 °F
29 = RTD type Pt 100 range-199.9 / +400.0 °F
30 = RTD type Pt 100 range -330 / +1470 °F
NOTE: selecting P1 = 0, 2, 4, 6, 10,11, 28 or 29,
the instrument set automatically P43 = FLtr. For
all the remaining ranges it will set P43 = nOFL.
P2 = Decimal point position
This parameter is available only when a linear
input is selected (P1 = 13, 14, 15, 16, 17, 18, 19
or 20). ----. = No decimal figure.
---.- = One decimal figure.
--.-- = Two decimal figures.
-.--- = Three decimal figures.
P3 = Initial scale value
For linear inputs it is programmable from -1999 to
4000.
For TC and RTD input it is programmable within
the input range.
When this parameter is modified, rL parameter
will be re-alligned to it.
P4 = Full scale value
For linear inputs it is programmable from -1999 to
4000.
For TC and RTD inputs, it is programmable within
the input range.
When this parameter is modified, rH parameter
will be re-alligned to it.
The initial and full scale values determine the
input span which is used by the PID algorithm,
the SMART and the alarm functions.
NOTE: the minimum input span (S = P4 - P3), in
absolute value, should be set as follows:
- For linear inputs, S > 100 units.
- For TC input with °C readout, S > 300 °C.
- For TC input with °F readout, S > 550 °F.
- For RTD input with °C readout, S > 100 °C.
- For RTD input with °F readout, S > 200 °F.
P5 = Output 1 type
Sn.OL= servomotor open loop.
Sn.CL = servomotor close loop.
rEv = time proportional control output with reverse
action
dir = time proportional control output with direct
action.
NOTES:
1) If P5 is changed to "Sn.OL" or it is changed from
"Sn.OL" to another selection, the parameter
P41 will be forced to 0.
2) If P5 is changed to "rEv" the cycle time (Cy1) will
be forced to 15 s
3) If P5 is changed to "dir" the cycle time (Cy1)
will be forced to: 10 s when P25 = Air
4 s when P25 = OIL
2 s when P25 = H2O
t
INPUT
t
OUTPUT
t
INPUT
t
OUTPUT
Reverse Direct
8004-Tser1-DA.p65 5/29/00, 6:51 PM11

12
GB
P6 = Valve position indication.
This parameter is available only if P5 = Sn.OL
Fb = the valve position will be displayed
no.Fb = the valve position will not be displayed (the
feedback potentiometer can be omitted)
P7 = Output 3 function.
nonE = output not used.
AL1.P = it is used as Alarm 1 output and the
alarm 1 is programmed as process
alarm.
AL1.b = it is used as Alarm 1 output and the
alarm 1 is programmed as band alarm.
AL1.d = it is used as Alarm 1 output and the alarm
1 is programmed as deviation alarm.
rEv = it is used as second time proportional
control output with reverse action.
dir = it is used as second time proportional
control output with direct action.
NOTES:
1) If P7 is changed to "rEv" the cycle time (Cy3) will
be forced to 15 s
2) If P7 is changed to "dir" the cycle time (Cy3)
will be forced to: 10 s when P25 = Air
4 s when P25 = OIL
2 s when P25 = H2O
3) Only one of the two outputs (see P5 and P7)
can be configured as "rEv" control output.
4) Only one of the two outputs (see P5 and P7)
can be configured as "dir" control output.
5) If the servomotor output is selected (P5 ="Sn.OL"
or "Sn.CL") the OUT 3 can be set as alarm
output only (P7 = "AL1.P" or "AL1.b" or "AL1.d").
P8 = Alarm 1 operating mode
Available only when P7 is equal to AL1.P, AL1.b
or AL1.d.
H.A. = High alarm (outside for band alarm) with
automatic reset.
L.A. = Low alarm (inside for band alarm) with
automatic reset.
H.L. = High alarm (outside for band alarm) with
manual reset (latched).
L.L. = low alarm (inside for band alarm) with
manual reset (latched).
P9 = Alarm 2 function (OUT 4).
nonE = output not used.
AL2.P = it is used as Alarm 2 output and the alarm
2 is programmed as process alarm.
AL2.b = it is used as Alarm 2 output and the
alarm 2 is programmed as band alarm.
AL2.d = it is used as Alarm 2 output and the
alarm 2 is programmed as deviation
alarm.
P10 = Alarm 2 operating mode
Available only when P9 is different from "nonE".
H.A. = High alarm (outside for band alarm) with
automatic reset.
L.A. = Low alarm (inside for band alarm) with
automatic reset.
H.L. = High alarm (outside for band alarm) with
manual reset (latched).
L.L. = low alarm (inside for band alarm) with
manual reset (latched).
P11 = Alarm 3 function (OUT 4)
nonE = output not used.
AL3.P = it is used as Alarm 3 output and the alarm
3 is programmed as process alarm.
AL3.b = it is used as Alarm 3 output and the
alarm 3 is programmed as band alarm.
AL3.d = it is used as Alarm 3 output and the alarm
3 is programmed as deviation alarm.
NOTE : The output 4 operates as a logic OR
between the alarm 2 and the alarm 3.
8004-Tser1-DA.p65 5/29/00, 6:51 PM12

13
GB
P12 = Alarm 3 operating mode
Available only when P11 is different from "nonE".
H.A. = High alarm (outside for band alarm) with
automatic reset.
L.A. = Low alarm (inside for band alarm) with
automatic reset.
H.L. = High alarm (outside for band alarm) with
manual reset.
L.L. = low alarm (inside for band alarm) with
manual reset.
P13 = Programmability of the alarm 3.
Available only when P11 is different from "nonE".
OPrt = Alarm 3 threshold and hysteresis are
programmable in operating mode.
COnF = Alarm 3 threshold and hysteresis are
programmable in configuration mode.
SPEC= During configuration mode, the user
assigns to the alarm 3 the hysteresis
value and two threshold values while,
during operative mode, he can select the
first or the second threshold value as
operative threshold value.
P14 = Alarm 3 first threshold value.
Available only when P11 is different from "nonE"
and P13 is equal to "COnF" or "SPEC".
Range:
- For process alarm - within the range limits.
- For band alarm - from 0 to 500 units.
- For deviation alarm - from -500 to 500 units.
P15 = Alarm 3 second threshold value
Available only when P11 is different from "nonE"
and P13 is equal to "SPEC".
Range:
- For process alarm - within the range limits.
- For band alarm - from 0 to 500 units.
- For deviation alarm - from -500 to 500 units.
P16 = Alarm 3 hysteresis value
Available only when P11 is different from "nonE"
and P13 is equal to "COnF" or "SPEC".
Range: from 0.1% to 10.0 % of the span
selected with P3 and P4 parameters.
P17 = Threshold of the “Soft Start” function.
Available only when P5 is different from "Sn.OL"
or "Sn.CL".
Threshold value, in eng. units, to initiate the "Soft
start" function (output power limiting) at start up.
Range : within the readout span.
NOTE: this threshold value will not be taken into
account when tOL = InF.
P18 = Safety lock
NOTE: When P18 is selected, the display will show:
- "0" if P18 is equal to 0
- "1" if P18 is equal to 1
- "SFt.A" if P18 is included from 2 to 4999
- "SFt.B" if P18 is included from 5000 to 9999.
Using sand tpushbutton set the P18
according to the following conditions:
0 = No parameter protection. The device is
always in unlock condition and all parameters
can be modified.
1 = The device is always in lock condition and no
one of the parameters (exception made for
SP, SP2, SP3, SP4 and alarm manual reset)
can be modified (for SMART status see P33
parameter).
From 2 to 4999 = This combination number is a
secret value to be used, in run time (see nnn
parameter) to put device in lock/unlock
condition.
With this selection, the lock/unlock condition
has no effect on SP, SP2, SP3, SP4 and
manual reset of the alarms (for SMART
status see P33).
8004-Tser1-DA.p65 5/29/00, 6:51 PM13

14
GB
From 5000 to 9999 = This combination number is
a secret value to be used, in run time (see
nnn parameter) to put device in lock/unlock
condition.
With this selection, the lock/unlock condition
has no effect on SP, SP2, SP3, SP4 ,
manual reset of the alarms and AL1/ AL2/
AL3 thresholds (for SMART status see P33).
The configuration procedure is completed and the
instrument shows " -.-.-.-. " on both
displays.
When it is desired to end the configuration
procedure push the FUNC pushbutton; the
display will show "COnF".
When it is desired to access to the advanced
configuration parameter procede as follows:
1) using sand tpushbutton set the 275 code.
2) push the FUNC pushbutton.
NOTE: P19, P20, P21, P22 and P23 are not
used.
P24 = Logic input 2 function (contact)
nonE = Logic input 2 not used
AU.nA = Logic input 2 used for AUTO/ MAN
control mode selection.
Open = AUTO
Closed = MANUAL
rE.dr = Logic input 2 used for REVERSE/
DIRECT control mode selection.
Open = REVERSE
Closed = DIRECT
NOTE: this selection is available only
when P5 = "Sn.OL" or "Sn.CL".
P25 = Cooling media.
Available only when the device is configured with
two control outputs.
AIr = Air OIL = Oil H2O = water
Changing P25 parameter, the instrument forces
the cycle time and relative cooling gain parameter
to the default value related with the chosen
cooling media.
When P25 = AIr - Cyx = 10 s and rC = 1.00
P25 = OIL - Cyx = 4 s and rC = 0.80
P25 = H2O - Cyx = 2 and rC = 0.40
P26 = Alarm 1 action
Available only when P7 is equal to "AL1.P" or
"AL1.b" or "AL1.d".
dir = direct action (relay energized in alarm
condition)
rEV = reverse action (relay de-energized in alarm
condition)
P27 = Alarm 1 stand-by function (mask)
Available only when P7 is equal to "AL1.P" or
"AL1.b" or AL1.d".
OFF = stand-by function (mask alarm) disabled
On = stand-by function (mask alarm) enabled
NOTE: If the alarm is programmed as band or
deviation alarm, this function masks the alarm
condition after a set point change or at the
instrument start-up until the process variable
reaches the alarm threshold plus or minus
hysteresis. If the alarm is programmed as a
process alarm, this function masks the alarm
condition at instrument start-up until the process
variable reaches the alarm threshold plus or
minus hysteresis.
8004-Tser1-DA.p65 5/29/00, 6:51 PM14

15
GB
P32 = Displayable protected parameters
This parameter is skipped when P18 = 0.
OFF = Protected parameters cannot be
displayed.
On = Protected parameter can be
displayed.
P33 = SMART function
0 = SMART function disabled.
1 = SMART function in NOT protected by safety
lock.
2 = SMART function is under safety lock
protection.
P34 = Maximum value of the proportional band
calculated by the SMART algorithm.
This parameter is skipped if P33=0.
It is programmable from P35 value to 200.0 %.
P35 = Minimum value of the proportional band
calculated by the SMART algorithm
This parameter is skipped if P33=0.
It is programmable from 1.0 % to P34 value.
P36 = Minimum value of the integral time
calculated by the SMART algorithm.
This parameter is skipped if P33=0.
It is programmable from 1 second (00.01) to 2
minutes (02.00).
P37 = Relative cooling gain calculated by
SMART function.
This parameter available only when device is
configured with two control output and P33 is
different from 0.
OFF = SMART algorithm does not calculate the
rC parameter value
On = SMART algorithm calculates the rC
parameter value.
P28 = Action of the alarm 2 and 3
Available only when P9 or P11 are different from
"nonE".
dir = direct action (relay energized in alarm condi-
tion)
rEV = reverse action (relay de-energized in alarm
condition)
P29 = Alarm 2 stand-by function (mask alarm)
Available only when P9 is different from "nonE".
OFF = Stand by (mask) disabled
On = Stand by (mask) enabled
P30 = Alarm 3 stand-by function (mask alarm)
Available only when P11 is different from "nonE".
OFF = Stand by (mask) disabled
On = Stand by (mask) enabled
P31 = OFFSET applied to the measured value
This will set a constant OFFSET throughout the
readout range. It is skipped for linear inputs
- For readout ranges with decimal figure, P31 is
programmable from -19.9 to 19.9.
- For readout ranges without decimal figure, P31
is programmable from -199 to 199.
Real curve
Readout
Adjusted
curve
Input
P31
8004-Tser1-DA.p65 5/29/00, 6:51 PM15

16
GB
P38 = MANUAL function
OFF = manual function is disabled
On = manual function can be enabled/
disabled by MAN pushbutton or by
contact closure on logic input 2.
P39 = Device status at instrument start up.
This parameter is skipped when P38 = OFF.
0 = the instrument starts in AUTO mode.
1 = the instrument starts in manual mode.
oIf the time proportioning output is
configured, the power output will be set to 0.
oIf servomotor control is configured, the
instrument will not modify the valve position.
2 = It starts in the same way it was prior to the
power shut down.
oIf the time proportioning output is configured
and the instrument was in manual mode, the
power output will be set to 0.
oIf servomotor control is configured and the
instrument was in manual mode, the instru-
ment will not modify the valve position.
3 = It starts in the same way it was prior to the
power shut down.
oIf: - the time proportioning output is
configured
- the instrument was in manual mode
the power output will be set equal to the last
value prior to power shut down.
oIf: - servomotor control is configured
- the instrument was in manual mode
- P40 = "bUnP"
the instrument will not modify the valve
position.
oIf: - servomotor control is configured
- the instrument was in manual mode
- P40 is different from "bUnP"
the instrument will modify the valve position
in order to reach the value set in P40.
P40 = Transfer from AUTO to MANUAL
This parameter is skipped if P38 = OFF
When P5 = "Sn.OL" and P6 = "no.Fb", this
parameter is forced to "bUnP" and it cannot be
modified.
- When the device is configured for one control
output, P40 can be set from 0 to 100
- When device is configured for two control
outputs, P40 can be set from -100 to 100.
Above the 100 value the instrument will show
"bUnP" and the transfer will be bumpless (the
manual mode starts with an output value equal to
the last value in the auto mode)
NOTE: If P40 is different from "bUnP" and an
open loop servomotor control with feedback
potentiometer is programmed, the instrument will
reach the P40 value using the feedback
indication.
P41 = Conditions for output safety value
When P5 is different from "Sn.OL" the P41
possible selections are:
0 = No safety value ("Standard" effect)
1 = Safety value applied when overrange or
underrange condition is detected.
2 = Safety value applied when overrange
condition is detected.
3 = Safety value applied when underrange
condition is detected.
When P5 is equal to "Sn.OL" the P41 possible
selections are:
0 = No safety value ("Standard" effect)
4 = When an overrange or an underrange
condition is detected the instrument will close
the OUT 1 (s) relay contact.
5 = When an overrange or an underrange
condition is detected the instrument will close
the OUT 2 (t) relay contact.
8004-Tser1-DA.p65 5/29/00, 6:51 PM16

17
GB
6 = When an overrange or an underrange
condition is detected the instrument will
revert the "standard" effect.
NOTE: For "Standard effect" see chapter "Error
messages".
P42 = Output safety value
This parameter is skipped when P41 = 0, 4, 5 or
6.
This value can be set
- from 0 to 100 % when one control output is
configured
- from -100 % to 100 % when two control outputs
are configured.
P43 = Digital filter on the displayed value
It is possible to apply to the displayed value a
digital filter of the first order with a time constant
equal to :
- 4 s for TC and RTD inputs
- 2 s for linear inputs
noFL. = no filter
FLtr = filter enabled
P44 = Control action type
Pid - the instrument operates with a PID algorithm.
Pi - the instrument operates with a PI algorithm.
P45 = Operative set point alignement at
instrument start up.
0 = The operative set point will be aligned to SP,
SP2, SP3 or SP4 according to the status of
the logic inputs 1 and 3.
1 = The operative set point will be aligned to the
measured value and then it will reach the
selected set point with a programmable ramp
(see Grd1 and Grd2 operative parameters).
NOTE: if the instrument detects an out of range
or an error condition on the measured value it will
ever operate as P45 = 0.
P46 = Timeout selection
This parameter allows to set the time duration of
the timeout for parameter setting used by the
instrument during the operating mode.
tn. 10 = 10 seconds
tn 30 = 30 seconds
P47 = Servo behaviour when PID is limited by
"Sn.LL" and "Sn.HL"
This parameter is available only when P5 =
"Sn.CL".
0 = when the PID value is higher than "Sn.HL" or
lower than "Sn.LL" the instrument will reach
the respective limit value and than it will
maintain the output relays in open condition.
1 = - When PID value is higher than "Sn.HL", the
OUT 1 (s) relay contact is ever closed.
- When PID value is lower than "Sn.LL", the
OUT 2 (t) relay contact is ever closed.
P48 = Set point indication
Fn.SP = during operative mode, when the
instrument performs a ramp, it will show
the final set point value.
OP.SP =during operative mode, when the
instrument performs a ramp, it will show
the operative set point.
P49 = Extension of the anti-reset-wind up
Range: from -30 to +30 % of the proportional
band.
NOTE: a positive value increases the high limit of
the anti-reset-wind up (over set point) while a
negative value decreases the low limit of the anti-
reset-wind up (under set point).
8004-Tser1-DA.p65 5/29/00, 6:51 PM17
Table of contents
Other Chromalox Temperature Controllers manuals
Chromalox
Chromalox 1604 User manual
Chromalox
Chromalox 2110 User manual
Chromalox
Chromalox 2104 User manual
Chromalox
Chromalox ETR-3400 User manual

Chromalox
Chromalox 1020 User manual

Chromalox
Chromalox 1601 User manual
Chromalox
Chromalox 2002 PLUS! User manual
Chromalox
Chromalox TEMPERATURE CONTROLLER 1604-7 User manual
Chromalox
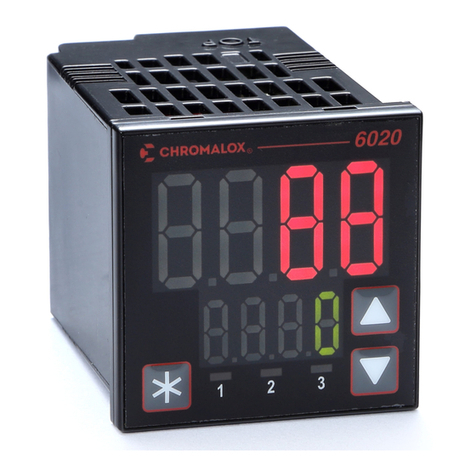
Chromalox 6020 Instruction manual

Chromalox
Chromalox 2110 User manual
