8
STATIONARY SEAT
Apply light film of clean lubricating oil to O-ring on outer diameter of stationary seat. Install stationary seat into
bore in inboard cover (4) with fingers so slot in non-running face of seal is facing into inboard cover (4). Do not
touch sealing face with fingers or any tools. Be sure stationary seat is all the way to bottom of bore in inboard
cover (4) and slot in seal mates up to pin (95).
RE-CLEAN / RE-OIL SEALING FACES – Do this only if faces accidentally touched during installation process.
5. Mesh two idler rotors (8) and power rotor (7) together into a rotor assembly making sure ends of idler rotors are
properly engaged into slots in power rotor.
6. Install rotors by positioning pump housing in a vertical position and sliding rotor assembly into housing bore (1)
until ball bearing (11) bottoms out in housing bore.
7. Lubricate and install O-ring (31) in groove in inboard cover (4).
8. Install inboard cover (4) on housing (1).
CAUTION
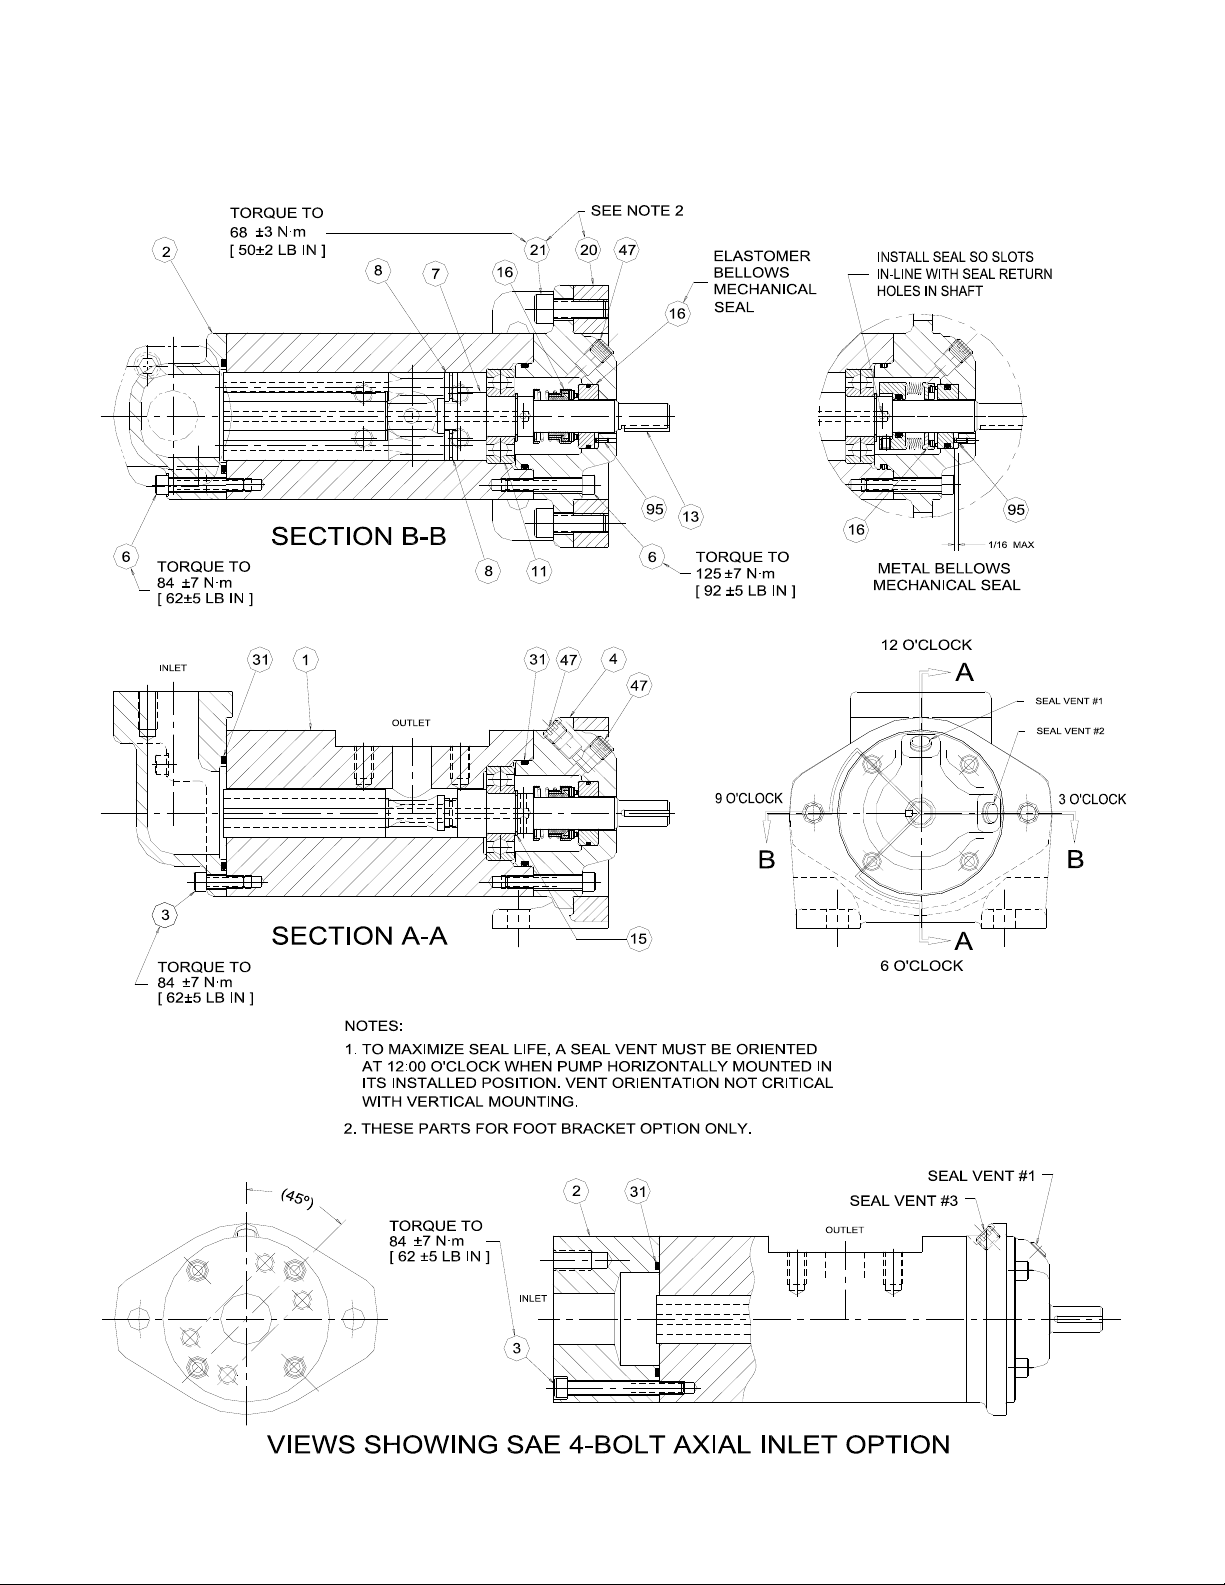
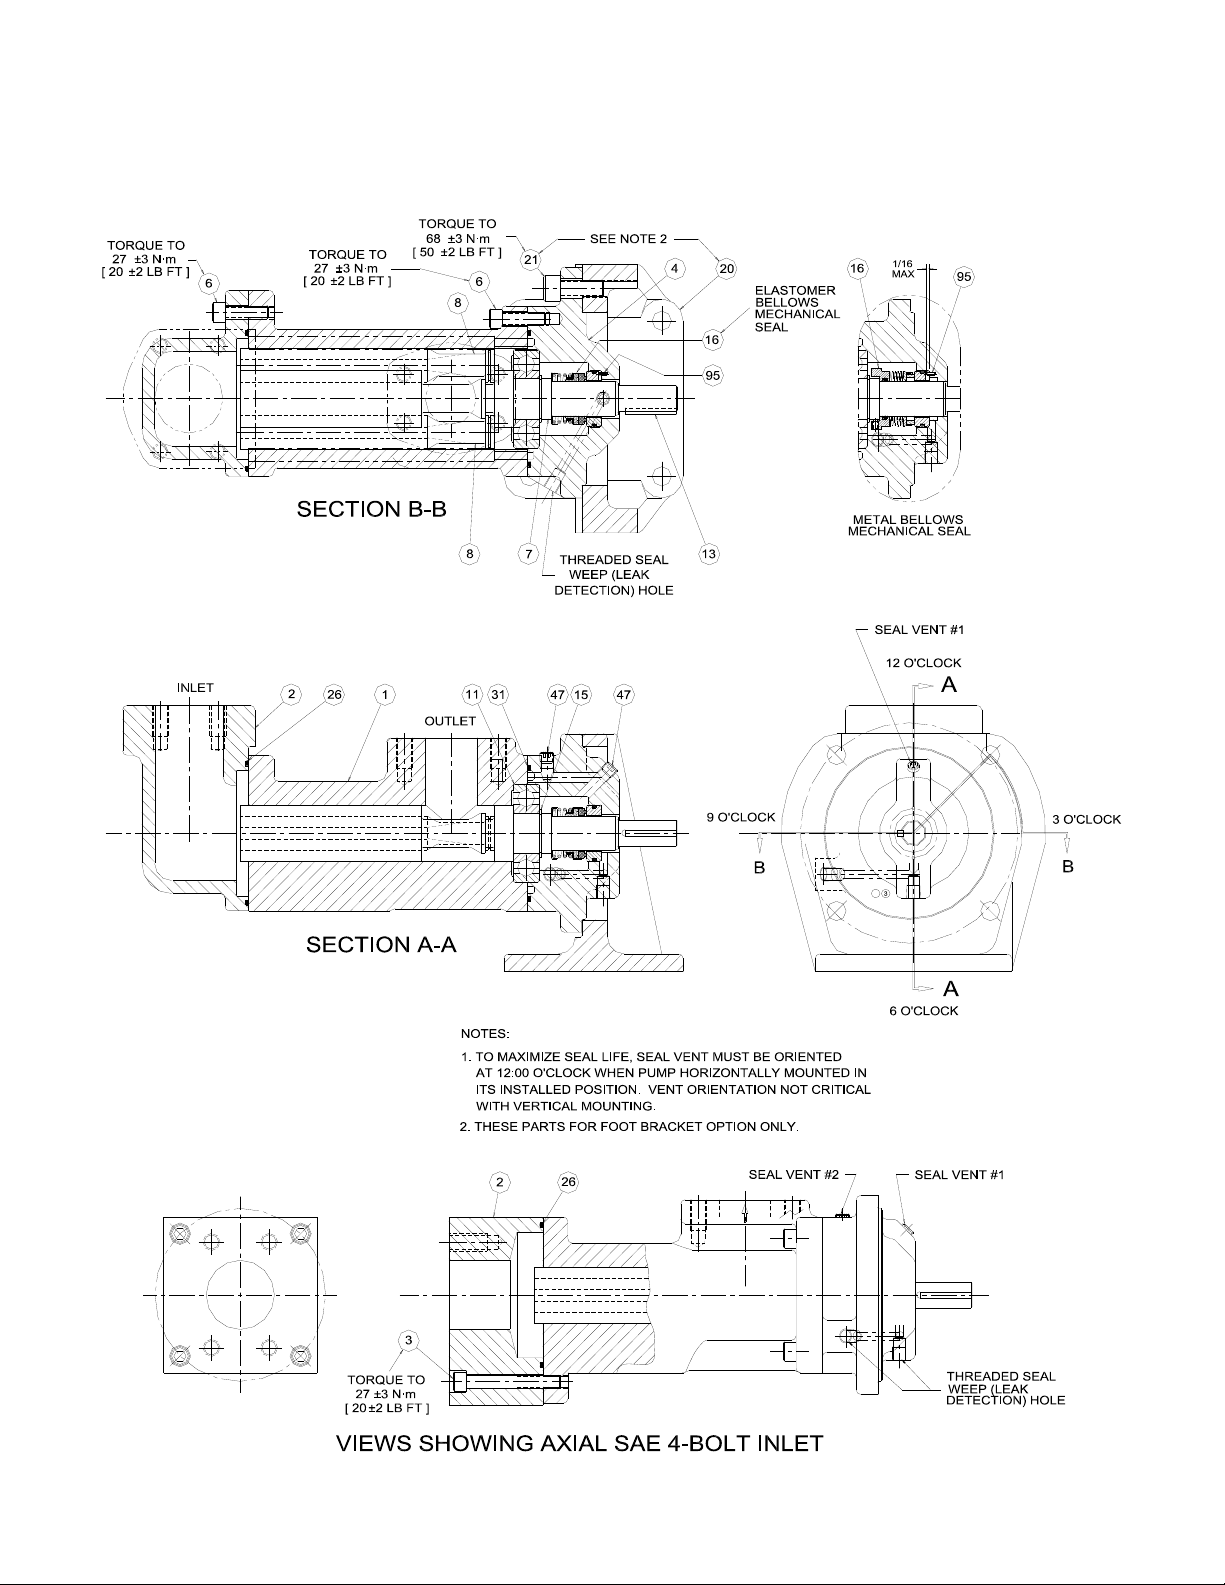
To maximize seal life, seal vent in cover must be oriented at 12:00 o'clock when pump is horizontally mounted in
its installed position. Vent orientation not critical when unit is vertically mounted.
9. Install four bolts (3 or 6) into inboard cover (4) and thread bolts into housing (1). Torque bolts to value shown on
assembly drawing (Figures 4, 5 or 6).
10. Install O-ring (31) in groove in inlet head (2).
11. Install inlet head (2) onto housing (1) with cap screws (3 or 6).
12. Install key (13) into keyway on drive end of power rotor (7). If appropriate, install drive coupling over key (13) and
drive end of power rotor (7).
I. INSTALLATION, ALIGNMENT AND TROUBLESHOOTING
Install coupling to pump drive shaft. Align pump and driver shafts per Manual SRM00101.
Connect piping to pump. Open inlet and outlet line valves. Vent air from seal chamber before starting pump by
opening pipe plug at inboard end of pump until oil comes out. This will assure that seals are lubricated at startup.
DANGER
3-screw pumps are positive displacement types. They must NOT be started with blocked outlet lines.
For detailed instructions regarding installation, alignment, operation general maintenance and trouble shooting, see
Manuals SRM00101.
J. FIELD AND FACTORY SERVICE / PARTS
Imo Pump maintains a staff of trained service personnel that can provide pump installation, pump start-up,
maintenance/overhaul and troubleshooting supervision as well as installation and maintenance training.
Our factories have facilities and personnel to inspect, maintain, overhaul and test pumps in the event user prefers to
return pumps for these services. Pumps that have been factory-overhauled are normally tested and warranted “as-
new” for a period of one year from date of shipment.
For either field service or factory overhaul assistance, contact your local Imo Sales Office or representative at the
Technical/Customer Service Department in Monroe, NC, USA, (704) 289-6511.
Minor Repair Kits are available for CFHN series pump models. Minor Repair Kits are used to repair leaking seals,
rough or failed bearings and/or for re-assembly after pump tear-down. They include (as applicable) mechanical
seals, O-rings, bearings and any part that might be damaged during disassembly (e.g., retainer rings). Kits contain
all necessary parts. Individual parts within Minor Repair Kits are not sold. If major pump components (e.g., rotors or
housings) are heavily worn or damaged, entire pump should be replaced.