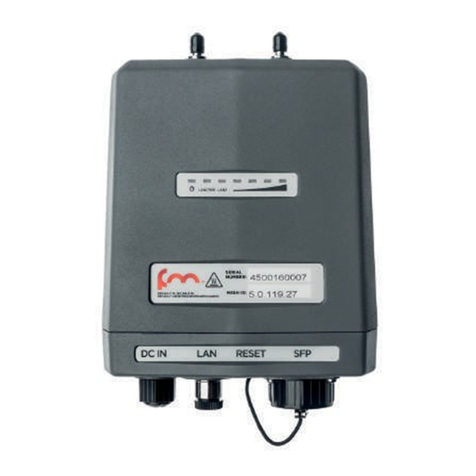
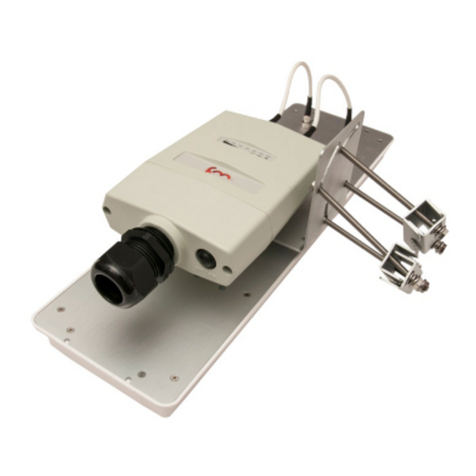
Cisco FM1200 Volo Manual

Cisco Ultra-Reliable Wireless
Backhaul FM1200 Volo
Installation and Configuration Manual
(Formerly Fluidmesh)
Model FM1200V-HW | Edition 1.15 | Firmware 7.8.0

Copyright © Cisco and the Cisco logo are trademarks or registered trademarks of
Cisco and/or its affiliates in the U.S. and other countries. To view a list of Cisco
trademarks, go to this URL: www.cisco.com/go/trademarks. Third-party
trademarks mentioned are the property of their respective owners. The use of the
word 'partner' does not imply a partnership relationship between Cisco and any
other company. (1110R) © 2018–2021 Cisco Systems, Inc. All rights reserved.

Table of Contents
1. HAZARDOUS CONDITION WARNINGS ........................................................... 7
1.1. Radio-Frequency Transmission Hazard .................................................... 8
1.2. Hot Surfaces Hazard ............................................................................... 9
2. Reporting Mistakes And Recommending Improvements ................................... 10
3. Getting Started ............................................................................................... 11
3.1. Introduction ........................................................................................... 11
3.1.1. Cisco FM1200 Volo ....................................................................... 11
The Cisco FM1200 Volo Radio Transceiver ........................................ 11
Introduction ..................................................................................... 11
Unit Function And Throughput Speed ............................................... 12
Data Throttling ................................................................................ 12
MPLS Protocol ................................................................................ 12
Unit Configuration ........................................................................... 12
Role Adaptability ............................................................................. 12
Environmental Rating ...................................................................... 13
Staging Hardware ........................................................................... 13
Product Specifications ..................................................................... 13
Transceiver And Gateway Unit Power Consumption .......................... 13
3.2. Cisco Architecture ................................................................................. 14
3.2.1. Overview ..................................................................................... 14
Wireless Network Architectures ........................................................ 14
The FluidMAX TDMA Protocol ......................................................... 14
3.2.2. Cisco Technologies ...................................................................... 15
Prodigy .......................................................................................... 15
FM Racer ....................................................................................... 16
Virtual Gigabit ................................................................................. 16
3.2.3. Point-To-Point Wireless Bridge ...................................................... 17
3.2.4. Mesh Network Architecture ........................................................... 18
3.3. Cisco Network Addressing ..................................................................... 19
3.3.1. Bridge IP Addressing ................................................................... 19
3.3.2. Unit Identification And Addressing ................................................. 20
Mesh- And Bridge-Capable Radio Transceiver Identification ............... 20
Operating The Unit In Mesh Point Mode Or Mesh End Mode .............. 21
Network Addressing ........................................................................ 22
Cisco Radio Transceivers .......................................................... 22
Connecting And Configuring An Ethernet Edge Device ...................... 22
Cisco Radio Transceivers ................................................... 23
4. Installing The Radio ....................................................................................... 24
4.1. Installing The Radio Using The Multi-Axis Mounting Bracket .................... 24
4.2. Installing The Radio Using Tie-Wraps ..................................................... 26
5. Hardware Installation ..................................................................................... 28
5.1. Cisco Hardware Installation .................................................................... 28
5.1.1. Installing The Cisco FM1200 Volo ................................................. 28
Environmental Rating And Unit Roles ............................................... 28
Installation Hardware ....................................................................... 28
Antenna Staging Kit ........................................................................ 28
Removable Bottom Housing ............................................................ 28
5.1.2. Best Practice For Shielded CAT5/6 Connectors .............................. 29
5.1.3. Cisco FM1200 Volo Status And Link LEDs ..................................... 30
Unit And Link Quality Status ............................................................ 30
Boot Sequence ............................................................................... 30
© 2021 Cisco and/or its affiliates. All rights reserved. Page 3 of 175

5.1.4. Supplying Power To The Cisco FM1200 Volo ................................. 31
Connecting Power To The Cisco FM1200 Volo .................................. 33
Connecting Power Through A LAN RJ45 Port ............................. 33
5.1.5. Rebooting The Firmware And Resetting The Unit To Factory
Defaults ............................................................................................... 34
Device Firmware Reboot ................................................................. 34
Resetting The Unit To Factory Settings ............................................. 35
5.1.6. Suitability For Outdoor Installation ................................................. 36
5.2. Connecting The Cisco FM1200 Volo To Networking And Communications
Hardware ................................................................................................... 37
5.2.1. Terminal Assignments For Power And Data Connectors .................. 37
RJ45 Ethernet ................................................................................ 37
5.2.2. Connecting LAN Cables To The Unit ............................................. 39
Bottom Housing And RJ45 LAN Cabling ........................................... 39
6. Using The Cisco Partner Portal ............................................................... 41
6.1. Accessing The Partner Portal ................................................................ 41
6.2. Enabling Two-Factor Authentication For Security .................................... 42
6.3. Administering Plug-In License Codes ..................................................... 43
6.4. Using The RACER™ Radio Configuration Interface ................................. 44
6.5. Viewing The Technical Documentation For Your Cisco Device .................. 44
7. Device Configuration Using The Configurator Interface .................................... 45
7.1. Software And Hardware Prerequisites .................................................... 47
7.2. Accessing The Cisco FM1200 Volo For Device Configuration ................... 47
7.2.1. Local Access And Login For Initial Configuration ............................ 47
7.2.2. Initial Configuration With The Unit In Provisioning Mode .................. 50
7.3. Switching Between Offline And Online Modes ......................................... 56
Uploading A Device Configuration File From FM Racer ............................ 57
7.4. General Settings ................................................................................... 59
7.4.1. The General Mode Window .......................................................... 59
Changing The Operational Mode ...................................................... 60
Changing The Operational Mode On A Mesh Network-Capable
Unit .......................................................................................... 60
Changing The Prodigy Version ......................................................... 61
Changing The LAN Parameters ........................................................ 62
7.4.2. Wireless Settings ......................................................................... 63
Modifying The Wireless Settings ...................................................... 63
Important Considerations For Wireless Settings ................................ 65
Point-To-Point And Point-To-Multipoint Considerations ....................... 65
Co-Location Considerations ............................................................. 66
Channel Width Considerations ......................................................... 66
Dynamic Frequency Selection Considerations ................................... 67
7.4.3. Antenna-Alignment Tools And Physical Statistics ............................ 68
7.4.4. Spectral Analysis ......................................................................... 70
7.5. Network Control .................................................................................... 72
7.5.1. Ping Softdog ................................................................................ 72
7.5.2. FM-QUADRO .............................................................................. 74
FM-QUADRO For Mesh Network-Capable Devices ........................... 74
Plotting And Interpreting The Wireless Links ..................................... 75
Viewing Live Data For A Radio Or Wireless Link ................................ 79
Viewing Live RSSI Data For A Wireless Link ..................................... 82
Manipulating The FM-QUADRO View ............................................... 83
Changing The Relative Position Of Device Icons ............................... 83
Showing KPI Values For Wireless Links ............................................ 85
© 2021 Cisco and/or its affiliates. All rights reserved. Page 4 of 175

Showing Real-Time Color Codes For Radio Transceiver Key
Performance Indicators ................................................................... 86
Adding An Aerial Map To The FM-QUADRO View ............................. 86
Adjusting The Transparency Of The Aerial Map View ......................... 88
Exporting A Network Representation File .......................................... 88
7.5.3. Advanced Tools ........................................................................... 89
Using The Ping Test Tool ................................................................. 89
Using The Bandwidth Test Tool ........................................................ 90
Using The Path MTU Discovery Tool ................................................ 91
7.6. Advanced Settings ................................................................................ 92
7.6.1. Advanced Radio Settings ............................................................. 92
Using The FluidMAX Management Setting ........................................ 93
Using The Max TX Power Setting ..................................................... 94
Using The Select Antenna Gain Setting ............................................ 95
Using The Data Packet Encryption Setting ........................................ 95
Using The Maximum Link Length Setting .......................................... 96
7.6.2. Static Routes ............................................................................... 96
7.6.3. Pass Lists And Block Lists ............................................................ 97
7.6.4. Multicast ................................................................................... 101
Multicast Management For Mesh Network-Capable Devices ............ 101
Configuring Multicast Within A Layer-3 Network .............................. 103
7.6.5. SNMP Configuration .................................................................. 104
Using SNMP V2c .......................................................................... 105
Using SNMP V3 ............................................................................ 106
7.6.6. Wireless Access Point Configuration ........................................... 108
7.6.7. RADIUS Configuration ................................................................ 112
7.6.8. NTP Configuration ...................................................................... 116
7.6.9. L2TP Configuration ..................................................................... 117
7.6.10. VLAN Settings .......................................................................... 118
VLAN Configuration ....................................................................... 118
Rules For Packet Management ....................................................... 119
7.6.11. Miscellaneous Settings ............................................................. 121
7.7. Management Settings ......................................................................... 123
7.7.1. View Mode Settings ................................................................... 123
7.7.2. Changing The Administrator Username And Password ................. 126
Enabling Remote Access To The Unit By Telnet .............................. 127
7.7.3. Overwriting And Upgrading The Unit Firmware ............................. 128
7.7.4. Plug-In Management .................................................................. 130
7.7.5. The Device Status View ............................................................. 134
The Device Status Window ............................................................ 134
7.7.6. Saving And Restoring The Unit Settings ...................................... 136
7.7.7. Resetting The Unit To Factory Defaults ........................................ 138
Rebooting The Unit ....................................................................... 138
7.7.8. Logging Out .............................................................................. 139
7.7.9. Viewing The End-User License Agreement .................................. 139
8. Software Plug-Ins ........................................................................................ 141
8.1. Available Plug-Ins ............................................................................... 141
8.2. Plug-In Management Procedures ......................................................... 145
8.2.1. Plug-In Activation ....................................................................... 145
8.2.2. Deactivating An Active Plug-In .................................................... 147
8.2.3. Reactivating A Deactivated Plug-In ............................................. 150
8.2.4. Exporting And Uploading Multiple Activation Codes ...................... 151
8.2.5. Sharing License Codes And Accepting Shared License Codes ...... 152
9. Troubleshooting .......................................................................................... 154
© 2021 Cisco and/or its affiliates. All rights reserved. Page 5 of 175
9.1. I Cannot Get The Log-In Screen .......................................................... 154
9.2. I Cannot Log In To The FM Racer Interface .......................................... 154
9.3. I Forgot The Administrator Password ................................................... 154
9.4. The Wireless Link Is Poor Or Non-Existent In Bridge Mode .................... 155
9.5. I Purchased A Cisco Device, But It Is Not Shown In FM Racer ........ 155
9.6. I Cannot Connect My Cisco Device To The FM Racer Interface ....... 155
9.7. I Applied Configuration Settings To The Device Using FM Racer, But I
Have Lost Connection To The Device In FM Racer. ..................................... 156
9.8. How Do I Connect An Existing Pre-FM Racer Device To FM Racer? ....... 156
10. Electrical Power Requirements ................................................................... 158
11. Heat Radiation Data ................................................................................... 161
12. Federal Communications Commission (FCC) Radio Interference Statement .. 163
13. Device Certification For Taiwan (RoC) ......................................................... 166
14. Cisco End-User License Agreement ..................................................... 168
14.1. Preamble ......................................................................................... 168
14.2. Notice .............................................................................................. 168
14.3. Definitions ........................................................................................ 168
14.4. License Grant ................................................................................... 169
14.5. Uses And Restrictions On Use ........................................................... 169
14.6. Open-Source Software ...................................................................... 170
14.7. Termination ...................................................................................... 170
14.8. Feedback ......................................................................................... 171
14.9. Consent To Use Of Data .................................................................... 171
14.10. Warranty Disclaimer ........................................................................ 172
14.11. Limitation Of Liability ....................................................................... 172
14.12. Exclusion Of Liability For Emergency Services .................................. 173
14.13. Export Control ................................................................................ 173
14.14. General .......................................................................................... 174
15. Contact Us ................................................................................................ 175
© 2021 Cisco and/or its affiliates. All rights reserved. Page 6 of 175

1. HAZARDOUS CONDITION WARNINGS
Like all other global technology vendors, Cisco is required to complywith
all local health and government regulations in the locations in whichwe
operate. This includes meeting radio frequency (RF) exposure limitsfor
our products.
Our equipment is tested in accordance with regulatory requirements as a
condition to our ability to market and sell in any given jurisdiction. As an
equipment manufacturer, Cisco defers to expert national and
international health organizations responsible for guidance on the safety
of RF signals, specifically the US Food and Drug Administration (FDA),
Health Canada, the World Health Organization (WHO), and other national
and global health agencies.
In May 2019, the FDA stated that there is "no link between adverse health
effects and exposure at or under the current RF energy exposure limit",
and that the current FCC RF exposure limits are sufficient to insure the
safety of users.
If any Cisco hardware unit breaks down or malfunctions, emits smokeor
an unusual smell, if water or other foreign matter enters the unit
enclosure, or if the unit is dropped onto a hard surface or damaged in any
way, power off the unit immediately and contact an authorized Cisco
Networks dealer for assistance.
If you are adjusting and/or controlling a Cisco device using control
software such as the RACER™ interface or the device's local Configurator
interface, do not make configuration changes unless you know with
certainty that your changes will not negatively impact people or animals in
the vicinity of the device and its antennas.
HAZARDOUS CONDITION WARNINGS
© 2021 Cisco and/or its affiliates. All rights reserved. Page 7 of 175

1.1. Radio-frequency transmission hazard
WARNING
The system shown in this manual is designed to be installed
and operated in a way that avoids contact with the antennas by
human beings. The legislation quoted in this section is
designed to reduce overall exposure of human beings to RF
radiation.
This section gives minimum separation distances between
antennas and humans. It is strongly recommended that the
system be installed in a location where these minimum
separation distances can be maintained at all times.
United States: This system has been evaluated for RF
exposure for humans, in accordance with FCC regulation CFR
47 Part 2.1091. To maintain compliance, the minimum
separation distance from the antenna to general bystanders is
20cm/7.9in. (all FM Ponte kit and x200 radio transceivers), or
21cm/8.3 in. (all FM1300 Otto and x500 radio transceivers).
Canada: This system has been evaluated for RF exposure for
humans, in accordance with ISED regulation RSS-102. To
maintain compliance, the minimum separation distance from
the antenna to general bystanders is 20cm/7.9in. for all
Cisco radio transceivers.
Europe / Australia / New Zealand: This system has been
evaluated for RF exposure for humans, in accordance with
standard EN 62232. To maintain compliance, the minimum
separation distance from the antenna to general bystanders is
20cm/7.9in. for all Cisco radio transceivers.
Before activating any device capable of transmitting RF
signals, make sure that all persons and animals are protected
from possible RF exposure.
Make sure that all RF feeds are securely connected to an
appropriate antenna. Never activate any RF-capable device
that is not connected to an antenna.
HAZARDOUS CONDITION WARNINGS
© 2021 Cisco and/or its affiliates. All rights reserved. Page 8 of 175

1.2. Hot surfaces hazard
WARNING
The outer surfaces of transceiver and gateway unit enclosures
may become hot during normal operation. During normal
operation, do not touch or handle the unit enclosure without
personal protective equipment.
HAZARDOUS CONDITION WARNINGS
© 2021 Cisco and/or its affiliates. All rights reserved. Page 9 of 175

2. Reporting mistakes and recommending
improvements
You can help improve this manual.
If you find any mistakes, or if you know of a way to improve the
procedures that are given, please let us know by E-mailing your
suggestions to [email protected].
Reporting mistakes and recommending improvements
© 2021 Cisco and/or its affiliates. All rights reserved. Page 10 of 175

3. Getting Started
3.1. Introduction
3.1.1. Cisco FM1200 Volo
The Cisco FM1200 Volo radio transceiver
Introduction
The Cisco FM1200 Volo (model FM1200V-HW) is designed to operate in
the sub-6 GHz range as a wireless data backhaul link. In non-technical
terms, this means it is designed to function as an intermediate radio link
between a core wired data network and a sub-network. The radio has an
integrated, internally mounted panel antenna with a vertical beam width of
up to 24° (vertical polarization), and 22° (horizontal polarization). The
radio is capable of transmitting and receiving between 4.9 GHz and 6.0
GHz. A separate antenna cannot be installed or mounted.
Getting Started
© 2021 Cisco and/or its affiliates. All rights reserved. Page 11 of 175

IMPORTANT
Note that FM Ponte and FM1200 Volo transceivers utilize
different communication protocols, and cannot communicate
with each other.
Unit function and throughput speed
The unit is designed to handle mission-critical video, voice, and data with
extremely high reliability. It can be used to create point-to-point, point-to-
multipoint or mesh network links, with real throughput of up to 150 Mbps
(under optimal wireless link conditions).
Data throttling
The unit's FluidThrottle functionality allows you to specify the maximum
amount of data throughput the unit will be required to handle at any time.
The unit's throughput capacity can be upgraded to different levels using
software plug-ins.
MPLS protocol
Two different Multi-Protocol Label Switching (MPLS)-based protocol
versions can be chosen. If a newer network is being built or upgraded, the
advanced Prodigy 2.0 protocol can be selected to boost performance. If
an older network incorporating Cisco components is being upgraded,the
Prodigy 1.0 protocol with limited functionality can be selected to
guarantee compatibility. Prodigy uses a traffic optimization algorithm that
allows every Cisco radio to assign a specific priority level to every
forwarded data packet.
Unit configuration
The unit is compatible with Cisco RACER™. This is a centralized,
web-based interface that allows you to configure, monitor, and
troubleshoot the unit (and in certain cases, the entire wireless network) in
real time, without the need for any offline software. In cases where an
initial connection cannot be made to the internet, the unit can be
configured using a built-in offline Configurator interface.
Role adaptability
The unit is equipped with FluidMAX. This is a software technology that
allows you to easily change the role of the unit, so that it is able to function
as part of a Point-to-Point, Point-to-Multipoint, or Mesh network
architecture without having to replace physical hardware. The unit can use
time-division multiple access (TDMA), or carrier sense multiple access
(CSMA) protocols.
Getting Started
© 2021 Cisco and/or its affiliates. All rights reserved. Page 12 of 175

Environmental rating
The unit is certified for outdoor usage, equipped with vibration-proof
connectors, and designed for fast installation and enhanced reliability in
harsh environments.
Staging hardware
A staging kit that allows easy installation of the unit on walls and utility
poles is supplied as part of the complete package.
Product specifications
For detailed product specifications, refer to the product data sheet for the
Cisco FM1200 Volo.
Transceiver and gateway unit power consumption
In service, Cisco transceiver units and gateway units consume
electrical power at the rates given in the table below.
IMPORTANT
In service, transceiver and gateway units will consume power
at various levels between the quoted lower limit and upper
limit, depending on data traffic load, signal strength,
environmental conditions such as line-of-sight and atmospheric
moisture, and other factors.
Note that the power consumption of transceiver units tends to
be affected in inverse proportion to the unit temperature (in
other words, power consumption tends to rise when the
temperature of the unit falls, and the other way around).
Table 1. Power consumption figures (transceiver units)
Unit series Minimum power
consumption
Nominal power
consumption
(typical conditions)
Maximum power
consumption
(realistic system-
design
assumption)
FM Ponte kit
(Model FM1200V-
HW)
4 Watts 6 to 7 Watts 10 Watts
FM1200 Volo
(Model FM1200V-
HW)
4 Watts 6 to 7 Watts 10 Watts
FM1300 Otto 8 Watts 10 to 12 Watts 15 Watts
FM3200-series
(Model FM3200)
4 Watts 6 to 7 Watts 10 Watts
Getting Started
© 2021 Cisco and/or its affiliates. All rights reserved. Page 13 of 175

Unit series Minimum power
consumption
Nominal power
consumption
(typical conditions)
Maximum power
consumption
(realistic system-
design
assumption)
FM4200-series
(Models FM4200F
and FM4200)
4 Watts 6 to 7 Watts 10 Watts
FM3500 Endo
(Model FM3500)
8 Watts 10 to 12 Watts 15 Watts
FM4500-series
(Models FM4500F
and FM4500)
8 Watts 10 to 12 Watts 15 Watts
FM 4800 Fiber 13 Watts 15 to 17 Watts 20 Watts
Table 2. Power consumption figures (gateway units)
Unit Maximum power consumption (realistic system-
design assumption)
FM1000 Gateway 60 Watts
FM10000 Gateway
(Gen. 1)
275 Watts (redundant AC power supply)
250 Watts (non-redundant AC power supply)
FM10000 Gateway
(Gen. 2)
300 Watts (redundant AC power supply)
3.2. Cisco Architecture
3.2.1. Overview
Wireless network architectures
Depending on the network design and the type of components used, the
Cisco FM1200 Volo can be used to create wireless network architectures,
including:
• Point-to-point (P2P) links.
• Point-to-multipoint (PTMP) sectors.
• Mesh networks.
• Mobility networks.
• Mixed networks that are capable of using any combination of types
listed above.
The FluidMAX TDMA protocol
Individual radio transceivers can easily be assigned different roles within
the same network, using Cisco's patented FluidMAX™ technology. A
typical example of a general network architecture that uses a combination
of Cisco components is shown below:
Getting Started
© 2021 Cisco and/or its affiliates. All rights reserved. Page 14 of 175

FluidMAX™ enables high-performance deployments of outstanding
flexibility. The following section shows how to build point-to-point, point-to-
multipoint and mesh networks using Cisco products.
3.2.2. Cisco technologies
Prodigy
Prodigy is Cisco's proprietary implementation of the Multi-Protocol-
Label-Switching (MPLS) standard.
IMPORTANT
A Cisco device only features Prodigy selection if the
installed Prodigy engine includes the selection feature.
Cisco devices that are designed to operate exclusively in
Bridge Mode (in other words, point-to-point configuration) do
not feature Prodigy.
Prodigy 2.0 offers greatly improved performance compared to Prodigy 1.0.
New features include:
• Traffic engineering
• Advanced Quality of Service (QoS)
Note that Prodigy 2.0 is only compatible with device firmware versions 6.5
and higher.
Getting Started
© 2021 Cisco and/or its affiliates. All rights reserved. Page 15 of 175

IMPORTANT
Prodigy
1.0
and
Prodigy
2.0
are
not
compatible
with
each
other.
Do
not
implement
the
two
protocol
versions
within
the
same network.
If you are expanding an existing network using new Cisco
hardware
components,
make
sure
that
all
components
are
compatible with each other by:
1. Upgrading all network components within the same
network to firmware version 6.5 or higher, and:
2. Configuring all network components within the same
network to operate using
either
Prodigy 1.0 or Prodigy
2.0.
Use
of
Prodigy
1.0
is
only
recommended
if
the
network
contains older Cisco devices that are not compatible with
Prodigy 2.0.
Select
the
Prodigy
version
you
need
by
using
the
General
Mode
page of the Configurator interface.
FM Racer
RACER™ is Cisco's web-based configuration portal. It is the primary
interface with which to configure Cisco radio devices.
You can operate FM Racer using any internet-connected computer with a
web browser.
IMPORTANT
For a detailed description of the differences between FM Racer
and the local Configurator interface, refer to “Device
configuration using the configurator interface” (page 45).
Virtual Gigabit
Virtual Gigabit (VGbe) is a proprietary technology that allows a substantial
upgrade in throughput performance for the Cisco FM1200 Volo.
VGbe works by ‘bonding’ the unit’s two physical Ethernet ports into a
single ‘virtual’ port. This allows a throughput increase from the standard
maximum of 100 Mbps to a theoretical maximum of 150 Mbps (under
optimal wireless link conditions).
To enable Virtual Gigabit, software plug-in FM-VGBE must be installed.
Refer to “Plug-in management procedures” (page 145) for details. No
special configuration is required for any other equipment (network
switches, routers etc.)
Getting Started
© 2021 Cisco and/or its affiliates. All rights reserved. Page 16 of 175

IMPORTANT
VGbe is only supported when the Cisco FM1200 Volo is
configured as a Mesh End or Mesh Point unit. If the unit is
switched to Bridge mode, VGbe will be disabled.
A representation of the scenarios in which VGbe is active are shown
in Figure 1 (page 17) below:
Figure 1. Virtual Gigabit implementation scenarios
In the figure above, all data traffic is sent to and from the primary Ethernet
port by default.
If multiple traffic streams (in other words, more than one destination MAC
address) are detected, the unit monitors the aggregate throughput of the
traffic streams. If aggregate throughput exceeds a detected 85 Mbps, one
or more of the traffic streams are 'moved' onto the secondary Ethernet
port, allowing the unit's Ethernet throughput capacity to exceed 100 Mbps
(under optimal wireless link conditions).
3.2.3. Point-to-point wireless bridge
A point-to-point wireless bridge allows two local networks to communicate
with each other. A simplified example is shown in Figure 2 (page 18).
In context of the overall network architecture, the two local networks are
called network segments.
Getting Started
© 2021 Cisco and/or its affiliates. All rights reserved. Page 17 of 175

Figure 2. Point-to-point network architecture
All network activity that takes place on wireless bridges is 'transparent' to
the network hosts. In other words, a wireless bridge forwards packets
from one network segment to another according to a 'Forwarding table'.
The forwarding table is built by learning the network topology from
analysis of incoming traffic.
In this configuration, no explicit interaction takes place between the
wireless bridge and the network hosts. The network segments on either
side of the wireless bridge share the same IP subnet. Therefore, each
network host must use a unique IP address within the subnet.
3.2.4. Mesh network architecture
Cisco Networks offers wireless networking solutions that are basedon
the mesh networking architecture, but can also fill more traditional
networking roles if needed. This allows substantial reliability and flexibility
advantages when compared to traditional wireless solutions.
A simplified example of a wireless mesh network is shown in Figure 3
(page 19). In such a network, every Cisco hardware component
transmits the data packets that come from the components directly linked
to it.
In a reliable mesh network with an acceptable amount of redundancy,
every stream of data packets may reach the base station through any of a
variety of paths. The Cisco FM1200 Volo is designed to act as an
'intelligent router' that is able to forward packets coming from other
Cisco components in real time, based on an optimal, software-
determined path. In addition, the absence of any single point of failure
Getting Started
© 2021 Cisco and/or its affiliates. All rights reserved. Page 18 of 175

greatly increases reliability when compared to any other wireless or wired
data-transmission technology.
Figure 3. Cisco Mesh Networking Architecture
3.3. Cisco network addressing
3.3.1. Bridge IP addressing
If needed, the Cisco FM1200 Volo can be operated in Bridge mode. This
creates a single point-to-point connection between two network segments.
A simplified example of a Bridge mode connection is shown in Figure 4
(page 20).
As shipped from the factory, the wired ethernet ports of all Cisco
hardware components are assigned the same default IP address of
192.168.0.10/24.
No default IP address is associated with the wireless interface.
Getting Started
© 2021 Cisco and/or its affiliates. All rights reserved. Page 19 of 175

Figure 4. Wireless network architecture (bridge configuration)
3.3.2. Unit identification and addressing
Mesh- and bridge-capable radio transceiver identification
CAUTION
This section contains theoretical explanations of the underlying
concepts behind mesh network addressing, and is intended for
use by qualified network engineers only.
• For specific instructions on Cisco hardware
installation, see “Hardware installation” (page 28).
• For specific instructions on how to configure a
Cisco radio transceiver unit using the configurator
interface, see “Device configuration using the
configurator interface” (page 45).
Regardless of its configuration and operating mode, every Cisco
radio transceiver is shipped from the factory with a unique unit
identification (ID) number. This number always takes the following form:
5.a.b.c
The triplet a.b.c uniquely identifies the individual physical hardware unit,
and cannot be changed.
The unit ID number is used to identify the physical hardware units within
the configurator interface that is used for configuration of the unit.
A simplified diagram demonstrating the relationship between a wired LAN,
and a linked mesh radio network containing a mesh end unit and mesh
point units, is shown in Figure 5 (page 21).
Getting Started
© 2021 Cisco and/or its affiliates. All rights reserved. Page 20 of 175
This manual suits for next models
1
Table of contents
Other Cisco Transceiver manuals

Cisco
Cisco FM4200 Manual

Cisco
Cisco QSFP-H40G-CU5M Installation and operation manual

Cisco
Cisco FM3200 Base Manual

Cisco
Cisco DWDM-XFP Series Quick start guide

Cisco
Cisco Fluidmesh 1200 VOLO Manual

Cisco
Cisco FM4500 Mobi Manual

Cisco
Cisco DWDM-XENPAK Series Quick start guide

Cisco
Cisco FM3500 Endo Manual

Cisco
Cisco X2-10GB-SR Quick start guide

Cisco
Cisco MGBBX1 User manual