manuals.online logo
Brands
  1. Home
  2. •
  3. Brands
  4. •
  5. Cisco
  6. •
  7. Wireless Router
  8. •
  9. Cisco Small Business WRP400 User manual

Cisco Small Business WRP400 User manual

Quick Start Guide
WRP400 Wireless-G Broadband Router with 2 Phone Ports
Package Contents
•Wireless-G Broadband Router with 2 Phone Ports
•Setup CD-ROM
•Documentation on CD-ROM
•Ethernet Network Cable
•Power Adapter
Welcome
Thank you for choosing the WRP400 Wireless-G Broadband Router. The
WRP400 is a networking solution that combines telephone, wireless, and
wired capabilities.
This guide describes how to physically install your WRP400 and how to set up
a basic configuration by using the Setup Wizard.
Getting to Know the WRP400
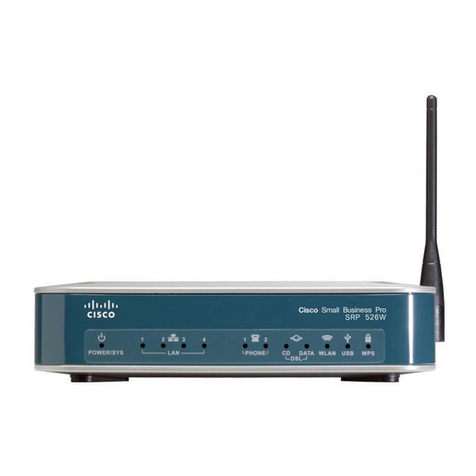
Front Panel
USB: For information about compatible USB devices, see www.cisco.com/
en/US/products/ps10028/index.html
Wi-Fi Protected Setup (White/Orange): Can be used to automatically
configure wireless security for client devices that support Wi-Fi Protected
Setup. The button shines white while wireless security is enabled. It shines
steady orange if there is an error during the Wi-Fi Protected Setup process.
Power (Green/Red/Orange): Indicates the status of the following:
Power: The LED shines steady green and stays on while the router is
powered on. If the LED shines steady red, verify that the correct power
adapter is used. If the LED remains red, contact your service provider for
support.
Self-diagnostic test: During boot-up, the Power LED flashes green to indicate
that the self-diagnostic test is in progress. When the test is complete, the LED
shines steady green.
Initialization of a USB modem: The Power LED flashes green and orange
when initialization is in progress. After the device initializes, the LED shines
steady green. If the device fails to initialize, the LED continues to flash green
and orange.
1
Back Panel
Mobile network connection: If a compatible USB modem is installed, the
mobile network connection is used as a failover when an Ethernet connection
is unavailable. The Power LED indicates the status of the mobile network
connection:
•Steady Green: The mobile network connection is not in use.
•Flashing Orange: The WRP400 is attempting to connect to the Internet
through the mobile network connection.
•Steady Orange: The WRP400 is connected to the Internet through the
mobile network connection.
•Continuous Flashing Orange: The WRP400 failed to connect to the
Internet through the mobile network connection and is trying again.
Phone 1-2 (Green): The LED shines steadily when an active line is registered
to the corresponding phone port. The LED slowly flashes when voicemail
messages are waiting.
Wireless (Green): The LED shines steadily when the wireless feature is
enabled. It flashes when the router is actively sending or receiving data over
the wireless network.
Ethernet 1-4 (Green): The LED shines steadily to show that a device is
connected through the corresponding port. It flashes to indicate network
activity over that port .
Internet (Green): This LED shines steadily when an Internet connection is
made through the Internet port. It flashes to indicate network activity over the
Internet port.
Internet: Use this port to connect the WRP400 to a cable or
DSL Internet connection.
Phone 1-2: Use these ports to connect standard analog
telephones to the router.
Ethernet 1, 2, 3, 4: Use these Ethernet ports to connect the
router to wired computers and other Ethernet network devices.
Power: Use the power port to connect the power adapter.
Side Panel
Installing the WRP400
There are three ways to place the WRP400:
•Horizontal Placement: The router has four rubber feet on the bottom panel.
Place the Router on a level surface near an electrical outlet.
•Vertical Placement: The Router has a stand on the side panel opposite to
the antenna. Rotate the stand 90 degrees, and place the Router on a level
surface near an electrical outlet.
Reset: To restore the router’s factory defaults, press and hold
the Reset button for approximately ten seconds.
Stand: To place the router in a vertical position, rotate the stand
90 degrees.
2
•Wall-Mounting Placement: The Router has four wall-mount slots on its back
panel. To mount the router on a wall, follow these instructions:
– Choose a wall that is smooth, flat, dry, and sturdy. Make sure that an
electrical outlet is nearby.
– Obtain mounting hardware. Suggested hardware is illustrated below
(not true to scale).
– Drill two holes, 6 cm (about 2-23/64 in.) apart. Insert a screw into each
hole and leave 3 mm (about 1/8 in.) of the head exposed.
– Position the router so that two of the wall-mount slots are over the two
screws. Slide the Router down until the screws fit snugly into the wall-
mount slots.
Connecting and Configuring the
WRP400
Complete the initial configuration by using the Setup Wizard.
STEP 1Insert the Setup CD-ROM into your CD-ROM drive.
2.5-3.0 mm
4-5 mm 1-1.5 mm
3
Americas Headquarters
Cisco Systems, Inc.
170 West Tasman Drive
San Jose, CA 95134-1706
USA
http://www.cisco.com
Tel: 408 526-4000
800 553-NETS (6387)
Fax: 408 527-0883
Cisco, Cisco Systems, the Cisco logo, and the Cisco Systems logo are registered trademarks or
trademarks of Cisco Systems, Inc. and/or its affiliates in the United States and certain other
countries. All other trademarks mentioned in this document or Website are the property of their
respective owners. The use of the word partner does not imply a partnership relationship between
Cisco and any other company. (0705R)
© 2009 Cisco Systems, Inc. All rights reserved.
Printed in the USA on recycled paper containing 10% postconsumer waste.
78-xxxxx-xx
STEP 2When the Welcome screen appears, select the language that you want
to use. Then click the Click Here to Start button.
STEP 3Read the License Agreement, and then click Next.
STEP 4Follow the instructions on each page of the Setup Wizard, and then
click Next. You can click Back to review a previous step.
STEP 5When you are finished with the final step of the Setup Wizard, a
progress message appears. Wait for the Wizard to complete the
connection.
STEP 6When you have finished setting up the router, this screen appears.
Click Finish.
NOTE For advanced configuration of your router, you can use the built-in
administration web server. Connect a computer to the router, and
then enter the following URL: 192.168.15.1.
Log on with admin as the user name and the password
To configure more advanced settings and security options, use the
administration web server. See the
User Guide
for details.
Suggested Next Steps
Upgrading the Firmware
STEP 1To download the latest firmware, go to the WRP400 product page on
Cisco.com: www.cisco.com/en/US/products/ps10028/index.html
NOTE This site requires a login. If you do not have a Cisco.com account,
you can register for free.
STEP 2Click the Download Software link. Follow the steps on the screen to
download the latest release.
STEP 3Connect to the WRP400 administration web server, and log on.
STEP 4Click Administration > Firmware Upgrade.
STEP 5If you see the
Username & Password
screen, enter the User Name and
Password provided by your service provider. (The factory default User
Name and Password are admin.) Then click OK.
STEP 6Click Browse to find the firmware file, and then click Start to Upgrade.
For more information, see the
WRP400 User Guide
.
Installing a Mobile Broadband USB Modem
STEP 1Make sure that your WRP400 has version 2.0 firmware or higher to
support mobile broadband.
STEP 2Make sure that your Mobile Broadband USB Modem is compatible with
the WRP400. To view a current list of compatible Mobile Broadband
USB modems, visit the WRP400 product page on Cisco.com:
www.cisco.com/en/US/products/ps10028/index.html
STEP 3Make sure your Mobile Broadband USB modem is activated with a
data service, and verify that it can be used on your computer.
4
STEP 4Connect a compatible USB Modem into the USB port of the WRP400.
The Power LED on the front of the WRP400 indicates the progress of
initialization. After the device initializes, the Power LED shines steady
green. When the WRP400 is connected to the Internet through the
mobile network connection, the Power LED shines steady orange. For
more information, see the Front Panel table.
By default, the WRP400 connects to the Internet through the wired
Ethernet. The mobile network connection may be configured as a
failover connection when the Ethernet connection is unavailable.
NOTE To check the status of the USB Modem, or modify the settings for the
mobile network, connection recovery, and failover, you can use the
administration web server.
NOTE Voice quality over the mobile network cannot be guaranteed.
Where to Go From Here
Support
Cisco Small Business Support
Community
www.cisco.com/go/smallbizsupport
Online Technical Support and
Documentation (Login Required)
www.cisco.com/support
Phone Support Contacts www.cisco.com/en/US/support/tsd_cisco_
small_business_support_center_contacts.html
Software Downloads
(Login Required)
Go to tools.cisco.com/support /downloads, and
enter the model number in the Software Search
box.
Product Documentation
Documentation for Cisco An alog
Te l e p h o n e A d a p t e r s
www.cisco.com/en/US/products/ps10024/
tsd_products_support_series_home.html
Cisco Small Business
Cisco Partner Central for Small
Business (Partner Login
Required)
www.cisco.com/web/partners/sell/smb
Cisco Small Business Home www.cisco.com/smb
5

Other manuals for Small Business WRP400

2

Other Cisco Wireless Router manuals

Cisco 4402 - Wireless LAN Controller Guide

Cisco

Cisco 4402 - Wireless LAN Controller Guide

Cisco Linksys SE1500 User manual

Cisco

Cisco Linksys SE1500 User manual

Cisco 6000 series Manual

Cisco

Cisco 6000 series Manual

Cisco WRT54G2 Linksys User manual

Cisco

Cisco WRT54G2 Linksys User manual

Cisco Valet Plus User manual

Cisco

Cisco Valet Plus User manual

Cisco RV340W User manual

Cisco

Cisco RV340W User manual

Cisco Universal Broadband Router Cisco uBR10012 User manual

Cisco

Cisco Universal Broadband Router Cisco uBR10012 User manual

Cisco 876W - Integrated Services Router Wireless User manual

Cisco

Cisco 876W - Integrated Services Router Wireless User manual

Cisco WRVS4400N - Small Business Wireless-N Gigabit Security... Instruction Manual

Cisco

Cisco WRVS4400N - Small Business Wireless-N Gigabit Security... Instruction Manual

Cisco LINKSYS WRT54GX4 User manual

Cisco

Cisco LINKSYS WRT54GX4 User manual

Cisco RV132W Instruction Manual

Cisco

Cisco RV132W Instruction Manual

Cisco UBR7225VXR Manual

Cisco

Cisco UBR7225VXR Manual

Cisco 3230 User manual

Cisco

Cisco 3230 User manual

Cisco WRT54G2 Linksys User manual

Cisco

Cisco WRT54G2 Linksys User manual

Cisco Small Business RV315W Instruction Manual

Cisco

Cisco Small Business RV315W Instruction Manual

Cisco BBSM 1 User manual

Cisco

Cisco BBSM 1 User manual

Cisco Linksys WRT54GS User manual

Cisco

Cisco Linksys WRT54GS User manual

Cisco SRP521W Instruction Manual

Cisco

Cisco SRP521W Instruction Manual

Cisco BEFW11S4 Operation manual

Cisco

Cisco BEFW11S4 Operation manual

Cisco WRT610N - Simultaneous Dual-N Band Wireless... User manual

Cisco

Cisco WRT610N - Simultaneous Dual-N Band Wireless... User manual

Cisco Linksys E3000 User manual

Cisco

Cisco Linksys E3000 User manual

Cisco ASR 9000 Series User manual

Cisco

Cisco ASR 9000 Series User manual

Cisco WAP54GP - Wireless-G Access Point User manual

Cisco

Cisco WAP54GP - Wireless-G Access Point User manual

Cisco WRT54GL User manual

Cisco

Cisco WRT54GL User manual

Popular Wireless Router manuals by other brands

D-Link DIR-868L Features & specifications

D-Link

D-Link DIR-868L Features & specifications

NETGEAR Nighthawk 5G Mobile Hotspot Pro user manual

NETGEAR

NETGEAR Nighthawk 5G Mobile Hotspot Pro user manual

NetComm NB604N user guide

NetComm

NetComm NB604N user guide

NETGEAR DG834Gv3 Setup manual

NETGEAR

NETGEAR DG834Gv3 Setup manual

D-Link DSL-G2452GR user manual

D-Link

D-Link DSL-G2452GR user manual

Tenda F3 user guide

Tenda

Tenda F3 user guide

ZIGBEE G07 user manual

ZIGBEE

ZIGBEE G07 user manual

Linksys WRT54G3G-AT Product data

Linksys

Linksys WRT54G3G-AT Product data

NETGEAR N600 DGND3700v2 user manual

NETGEAR

NETGEAR N600 DGND3700v2 user manual

TP-Link TL-WR940N Quick installation guide

TP-Link

TP-Link TL-WR940N Quick installation guide

NETGEAR LBR20 quick start guide

NETGEAR

NETGEAR LBR20 quick start guide

D-Link DIR-640L Quick install guide

D-Link

D-Link DIR-640L Quick install guide

Corega COR-BAR-AWLA-54 user manual

Corega

Corega COR-BAR-AWLA-54 user manual

TP-Link TL-WR810N user guide

TP-Link

TP-Link TL-WR810N user guide

Clas Ohlson IR DSIR-620 user manual

Clas Ohlson

Clas Ohlson IR DSIR-620 user manual

SonicWALL TZ 105 Series quick start guide

SonicWALL

SonicWALL TZ 105 Series quick start guide

Digicel MF250 quick start guide

Digicel

Digicel MF250 quick start guide

Huawei 5G CPE Pro quick start

Huawei

Huawei 5G CPE Pro quick start

manuals.online logo
manuals.online logoBrands
  • About & Mission
  • Contact us
  • Privacy Policy
  • Terms and Conditions

Copyright 2025 Manuals.Online. All Rights Reserved.