Citizen IF1-WFx4 Series User manual

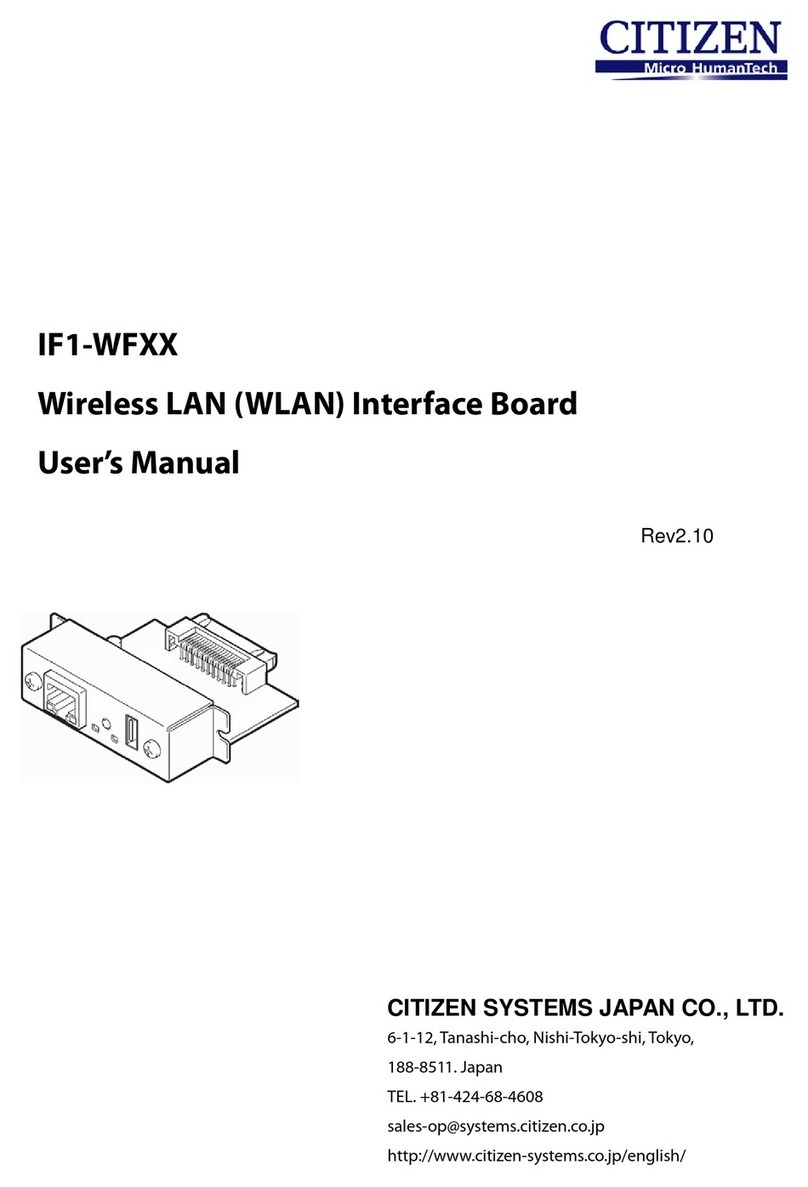
IF1-WFx4 / IF1-WFx5
IF2-WFx5 / IF2-WFx6
“Wireless LAN”(WLAN) Interface Board
User’s Manual
Rev1.02

2
Contents
Contents.........................................................................................................................2
Read before using .........................................................................................................4
1. Introduction .............................................................................................................5
1-1. Features................................................................................................................................. 5
1-2. Model Classification............................................................................................................... 5
1-3. Specifications......................................................................................................................... 6
1-4. Part Names and Functions .................................................................................................... 8
2. Preparation ............................................................................................................10
2-1. Installing the printer and connecting LAN cable.................................................................. 10
2-2. Connecting the USB Wi-Fi Adapter ..................................................................................... 10
2-3. Connecting a Peripheral Device .......................................................................................... 10
2-4. Connecting the Interface Board Unit.................................................................................... 12
3. Network Settings and Operation..........................................................................14
3-1. Overview .............................................................................................................................. 14
3-2. Using the Panel Button ........................................................................................................ 16
3-3. Printing the Interface Board Configuration........................................................................... 17
3-4. Returning the Interface Board Configuration to Factory Default Settings........................... 19
3-5. Display status by LED.......................................................................................................... 20
3-6. Simple Setting Procedure Example for Wireless LAN......................................................... 22
4. Web Manager.........................................................................................................23
4-1. Starting the Web Manager................................................................................................... 23
4-2. HOME Window..................................................................................................................... 24
4-3. STATUS Window.................................................................................................................. 25
4-3-1. STATUS>>System Status Tab............................................................................................ 26
4-3-2. STATUS>>Network Status Tab........................................................................................... 27
4-3-3. STATUS>>Wireless LAN Tab ............................................................................................. 28
4-3-4. STATUS>>Printer Status Tab ............................................................................................. 29
4-4. CONFIG Window ................................................................................................................. 30
4-4-1. CONFIG>>General Tab...................................................................................................... 32
4-4-2. CONFIG>>Wireless LAN Tab............................................................................................. 34
4-4-3. CONFIG>>User Account Tab ............................................................................................. 36
4-4-4. CONFIG>>Maintenance Tab.............................................................................................. 37
5. NetToolK.................................................................................................................38
5-1. Installing the NetToolK ......................................................................................................... 38
5-2. Information List Window....................................................................................................... 41
5-3. Setup Window...................................................................................................................... 43
5-3-1. “General“ Tab...................................................................................................................... 43
5-3-2. “Wireless LAN“ Tab............................................................................................................. 43
5-3-3. “Supported Protocols“ Tab.................................................................................................. 44
5-3-4. “User Account“ Tab ............................................................................................................. 44

Contents
3
5-3-5. “Maintenance“ Tab .............................................................................................................. 44
6. XML Function and Peripheral Device Control Function.....................................46
6-1. Overview .............................................................................................................................. 46
6-2. Explanation of Each Setting Item of Service Tab in CONFIG Window................................ 47
6-2-1. Media Converter................................................................................................................. 48
6-2-2. XML Print............................................................................................................................ 48
6-2-3. XML Device Control............................................................................................................ 48
6-2-4. XML Device Control / Line Display..................................................................................... 49
6-2-5. XML Device Control / Scanner ........................................................................................... 49
6-2-6. XML Device Control / Speaker ........................................................................................... 49
6-2-7. Submit / Reset Button......................................................................................................... 49
6-3. Service Status Tab of STATUS Window............................................................................... 50

4
Read before using
Be sure to read this manual carefully before using the product. After you read it, store it in a safe
place so that you can reread it when necessary.
Contents of this manual may be changed without notice.
Reproducing and/or copying the contents of this manual by any means without permission are
prohibited.
We will not be responsible for any adverse occurrence that results from the use of this manual,
regardless if it contains omissions, errors/misprints, etc.
Note that we will not be responsible for (a) loss caused by improper operation or mishandling of
the device by the user, or (b) loss due to operational environment.
Data etc., are basically impermanent; long time or permanent storing/saving of data by the
device is not possible.
Note that we will not be responsible for any loss or loss of profits owing to loss of data due to
breakdown, repairs, inspections, etc.
Please contact us if there are omissions, errors, ambiguities, etc. in this manual.
Refer to this document along with the user manual of the printer.
This product operates by setting up a wireless connection between itself and other WLAN
equipment for data transmission. Therefore, other WLAN equipment is required to use this
product. While we have confirmed the operation of this product with certain WLAN equipment,
operation with all types of WLAN equipment is not guaranteed. Carry out a sufficient evaluation
before using this product.
Trademarks
・Microsoft, Windows Vista, Windows 7, Windows 8 and Windows 10 are registered trademarks of
Microsoft Corporation U.S.A.
・Other company names and product names mentioned here are trademarks or registered
trademarks of those companies.

5
1. Introduction
Thank you for purchasing the Citizen IFx-WFxX “Wireless LAN”(WLAN) interface board.
By using the WLAN interface board (hereinafter referred to as the interface board) with our POS
printers and barcode printers, you can directly connect to various printers via a network and use
computers on the network to print from the printers. In addition, the operational status, print settings,
and other information about the printer can be checked from computers on the network.
1-1. Features
Support for WLAN and Ethernet for configuration
Support for 802.11b/g/n WLAN and capable to support 802.11a
Support for WPA/WPA2 WLAN encryption
Support for DHCP, static IP, and ZeroConf methods of IP address acquisition
Configuration through a browser or utility software
Support for Raw 9100 port and LPR printing methods
Panel button to print configuration information and change the configuration mode
LED indicators for connection, operation, and error statuses
Support for printing and peripheral device control by XML data depending on the printer
1-2. Model Classification
IF1 type: Applicable to CT-S801(II) / 851(II) / 601(II) / 851(II) / CL-S400DT / 6621 / CL-E7xx
IF2 type: Applicable to CT-D151 / CT-E651 / CT-S251 / 751 / 4500
IF1-WF04, IF1-WF44, IF1-WF05, IF2-WF05 come with 2.4GHz USB WiFi dongle.
IF1-WFN4, IF1-WFN5, IF2-WFN5 comes without USB WiFi dongle.
IF2-WFx6 does not exist as a single item.
IF1 type
IF2 type
(with USB host)
Normal model
Model with USB host
Name
IF1-WF04
IF1-WF44
IF1-WFN4
IF1-WF05
IF1-WFN5
IF2-WF05
IF2-WFN5
IF2-WFx6
Peripheral device
control
Not possible
Possible
Possible
Possible
Number of USB
ports
1
2
1
2

1Introduction
6
1-3. Specifications
USB Wi-Fi adaptor
Model number
WU606n
Radio
Supported standards
IEEE802.11n,
IEEE802.11g,
IEEE802.11b
Number of channels
1 to 13
Frequency band
2.4GHz band (2,412 to 2,472 MHz)
Transmission speed
IEEE802.11n: maximum 150 Mbps
IEEE802.11g: maximum 54 Mbps
IEEE802.11b: 11 Mbps
Main board (Network)
WLAN
Access mode
Infrastructure, *Ad-Hoc
Security
WPA2-PSK (encryption: AES, TKIP)
WEP (Key size: 64 bit/128 bit)
Ethernet
Standards
100BASE-TX/10BASE-T, Full Duplex/Half Duplex auto negotiation
Port
RJ-45
Network
IP Version
IPv4
Protocols
TCP, UDP, HTTP, ICMP, DHCP, SNMP
Port number for printing
RAW (port 9100 (Changeable)), LPR
IP address setting
Manual, DHCP
Hardware
IF1-WFx4 / IF1-WFx5
IF2-WFx5
Hardware
Compatible printers
CT-S801 / 851 / 601 / 651(II)
CL-S400DT / 6621 / E7xx
CT-D151 / E651 / S251 / 751
CT-S4500
Operation panel
LED: 4 (2 on panel, 2 on RJ45 connector),Button: 1
USB
USB-A connector 1 or 2
USB Specs

1Introduction
7
Software
Software
Setting methods
Browser, PC setting tool
Firmware upgrade
Browser, PC setting tool
Supported Platforms
Windows XP, Windows Vista, Windows 7、Windows8
*The communication by “Ad-Hoc” does not work correctly in various cases due to various restrictions. If "Ad-Hoc" does not work
correctly, we recommend “Infrastructure”.
*Only 2.412GHz~2.462GHz is allowed to be used in USA. Available 2.4GHZ channels to choose for US users are only 1 - 11.
*Rules on the use of 5GHz band channels may vary according to different national laws.
Choose the 5GHz channel according to the law of the country to use this device.

1Introduction
8
1-4. Part Names and Functions
Interface Board Unit
IF1-WFx4 (USB 1 port) IF1-WFx5 (USB 2 ports)
IF2-WFx5 (USB 1 port) IF2-WFx6 (USB 2 ports)
①RJ45 connector (compatible with 10Base-T/100Base-TX)
Connection for LAN cable
②Ethernet transmission speed LED indicator (green)*1
Shows Ethernet transmission speed with steady/blinking light.
③Ethernet status indicator LED (yellow)*1
Shows Ethernet connection status (disconnected, receiving data, etc.).
④Ethernet/WLAN status LED indicator (green)*1
⑤Ethernet/WLAN status LED indicator (red)*1
Shows transmission, connection and error statuses with steady/blinking lights combinations.
⑥Panel button*2
Used to operate the Interface board.
⑦USB Wi-Fi adaptor / USB connector (First)
Connection for the Wi-Fi adapter.
⑧USB connector (Second)
This exists only on IF1-WFX5/IF2-WFx6.
*1 See 3-5, Display status by LED (page 20) for indicator details.
*2 See, 3-2, Using the Panel Button (page 16) for panel button operations.
①
②
③
⑥
④
⑦
⑤
10/100BAS
E
②
③
④
⑦
⑤
⑥
①
①
⑦
⑥
④
⑤
②
③
⑧
①
10/100BASE
SW
①
⑦
⑥
④
⑤
②
③
⑧
①

1Introduction
9
USB Wi-Fi Adapter
①Wireless adapter status indicator LED*
Shows connection status (connecting, communicating,
etc.).
①

10
2. Preparation
2-1. Installing the printer and connecting LAN cable
■Installing Printer
With an unobstructed view, the guideline transmission distance is approximately 30 m. The
transmission distance depends on the setup environment. This includes electrical interference from
the periphery, obstacles such as the printer, and the antenna location. Carefully consider these
points before the installation.
■ Connecting LAN cable*
Connect a LAN cable to the RJ45 connector of this
interface board. (Diagram on right shows a typical
example)
* When configuring the wireless LAN settings on this
interface board, connect via Ethernet to configure
them.
2-2. Connecting the USB Wi-Fi Adapter
To perform wireless LAN communication, connect the USB Wi-Fi adapter to a USB port of the board.
In the case of the IF1-WFX5 which has two USB ports, connecting USB Wi-Fi adapters to both the
left and right ports is possible, but even if two USB Wi-Fi adapters are connected to both the left and
right, operation will not be possible.
Connect the USB Wi-Fi adapter while the power of the printer is off.
2-3. Connecting a Peripheral Device
There are the following restrictions regarding peripheral devices. Correctly observe them when using
a peripheral device.
• Connecting a device other than a supported model to a USB port is prohibited (please inquire about
which devices are supported).
• Connecting a tablet or other device to a USB port for the purpose of supplying power is also
prohibited.
• Connecting and disconnecting a peripheral device to/from a USB port while the power of the printer
is on is prohibited.
• Connecting via a USB hub is prohibited.
Network cable
RJ45 connector
LAN cable
・If the Ethernet and Wi-Fi USB adapter are connected at the same time, Ethernet will be
enabled.
・For use with a wireless LAN, disconnect the LAN cable after the settings are finished.
・
Warning

2Preparation
11
• In the case of the IF1-WFX5 which has two USB ports, connecting to both the left and right ports is
possible, but connecting two of the same type of device (two displays, two scanners, etc.) is
prohibited.

2Preparation
12
2-4. Connecting the Interface Board Unit
1) The interface board can be used by connecting it to the main board of a printer.
The printer interface connector is connected to the connector of the main board of the printer.
You can also replace another interface with the wireless LAN interface but care is required.
(Diagram below shows a typical example)
2) If another interface board is installed in the printer, remove
it.
•Malfunctions may occur if the interface board is removed or re-inserted.
•To install the interface board, please contact your dealer or service person.
•If you work on your own, consider static electricity and other factors carefully and then install
the interface board at your own responsibility.
Warning
Printer interface connector
Operation panel

2Preparation
13
3) Insert the interface board into the interface slot of the
printer.
4) Connect the interface connector of the board to the
interface connector inside the printer.
5) Fix the interface board in place with screws.
Interface slot

14
3. Network Settings and Operation
3-1. Overview
To use this interface board connected to a network, you need to connect to the network and
configure the settings for communication in addition to configuring the settings of the printer.
There are two methods to configure the settings for a network connection.
Web Manager
Connect to this interface board from a browser and then configure the settings from a dedicated
settings screen.
NetToolK
Connect to this interface board from a dedicated tool for Windows and then configure the
settings.
You can check the current state and restore the initial state by operating the panel button.
See the next page for an explanation of the panel button.

2Network Settings and Operation
16
3-2. Using the Panel Button
The panel button on the operation panel is used to operate the Interface board.
Starting the LAN Interface Board
Turn on the printer. The Interface board starts working approximately 20 seconds after the printer
turns on.
Printing the Interface Board Configuration
Press the panel button. See 3-3, Printing the Interface Board Configuration (page 17) for details.
Switching to Setting Mode
Press and hold the panel button. The buzzer*will sound once, signaling a switch to setting mode.
・Setting mode enables the reading of the factory default settings.
・If there is no activity for three seconds in the setting mode, the buzzer*will sound once, signaling a
return to normal mode.
* Note that the buzzer will not sound if the Interface board is connected to the barcode printer. In
addition, the buzzer will not sound when the Interface board is used with the POS printer if the
buzzer has been set to not sound.
Restoring to the Factory Default Settings
Switch to setting mode, then press and hold the panel button. The Interface board will return to the
factory default settings.
When the operation is complete, the interface board will restart automatically.
The settings are cleared so the wireless LAN must be configured again.
When automatically obtaining the IP address from the DHCP server is set, an IP address that
differs from the previous one may be assigned.
Warning

2Network Settings and Operation
17
3-3. Printing the Interface Board Configuration
Press the panel button to print out the configuration of the interface board from the printer.
Ethernet Connection and DHCP On
①Title of the printout.
②Model name, hardware revision, and
firmware version of the interface board
③System information of the interface board
The LAN board name, serial number, and
MAC address are printed.
④Network information of the interface board
⑤Ethernet information. Printed when
connected by Ethernet.
⑥Printer information. The name of the
manufacturer and the model name of the
printer connected to the interface board are
printed.
⑦Configuration information of the interface
board. The information stored in the
interface board is printed and may be
different from the connection status of the
current network. Check the connection
status using the network information of .
I/F Board
Information
IFx-WFXx(Rev0.1.3): Ver 2.00
System
WLAN Board Name : Net Printer
Serial Number : 100123
MAC Address : 00:01:02:0a:0b:0c
Current Network Status
IP Address : 192.168.0.2 (DHCP)
Subnet Mask : 255.255.255.0
Gateway : 192.168.0.1
DHCP Server : 192.168.0.1
Ethernet Status
Speed & Duplex : Auto (100BaseTx Full)
Printer Status
Manufacturer : CITIZEN
Model : CT-S801
User Configuration
DHCP : Enable
IP Address : 192.168.0.10
Subnet Mask : 255.255.255.0
Gateway : 192.168.0.1
Print Port : 9100
Receive Timeout : 180
Wireless Type : Infrastructure
SSID : CITIZENSYSTEMS
Security : None
①
②
③
④
⑤
⑥
⑦

2Network Settings and Operation
18
LAN Connection and DHCP Off
①Title of the printout.
②Model name, hardware revision, and
firmware version of the interface board.
③System information of the interface board.
The LAN board name, serial number, and
MAC address are printed.
④Network information of the interface board.
⑤Information of Wi-Fi adapter and access
point that the interface board is connected.
“Module” is printed when USB Wi-Fi adapter
is in place.
Other 2 items are printed when connected
with access point. Until establishing the
connection, it is printed as “Scanning”.
⑥Printer information. The name of the
manufacturer and the model name of the
printer connected to the interface board are
printed.
⑦The configuration information of the
interface board. The information stored in
the interface board is printed and may be
different from the connection status of the
current network. Check the connection
status using the network information of .
I/F Board
Information
IFx-WFXx(Rev0.1.3): Ver 2.00
System
WLAN Board Name : Net Printer
Serial Number : 100123
MAC Address : 00:01:02:0a:0b:0c
Current Network Status
IP Address : 192.168.0.2 (DHCP)
Subnet Mask : 255.255.255.0
Gateway : 192.168.0.1
DHCP Server : 192.168.0.1
Ethernet Status
Speed & Duplex : Auto (100BaseTx Full)
Printer Status
Manufacturer : CITIZEN
Model : CT-S801
User Configuration
DHCP : Enable
IP Address : 192.168.0.10
Subnet Mask : 255.255.255.0
Gateway : 192.168.0.1
Print Port : 9100
Receive Timeout : 180
Wireless Type : Infrastructure
SSID : CITIZENSYSTEMS
Security : None
①
②
③
④
⑤
⑥
⑦

2Network Settings and Operation
19
3-4. Returning the Interface Board Configuration to Factory Default Settings
1) Press and hold the panel button to switch to setting mode.
2) After the interface board has switched to setting mode, press and holds the panel button again
within three seconds. The following message is printed and the interface board returns to factory
default settings.
I/F Board
Information
--!Caution!--
Print Server will
automatically restart.
When the operation completes, this interface board restarts automatically.
When automatically obtaining the IP address from the DHCP server is set, an IP address that
differs from the previous one may be assigned.
Warning

2Network Settings and Operation
20
3-5. Display status by LED
The following charts show what each LED indicator indicates.
(Diagram shows a typical example. There are interface boards where the positioning of LEDs differs,
but the order from left to right is the same.)
Green Yellow Green Red
①Ethernet transmission speed indicator
Transmission speed
LED (green)
100 Mbps
On
10 Mbps / Disconnected
Off
②Ethernet connection/transmission status indicator
Connection status
LED (yellow)
Connected
On
Disconnected
Off
Transmitting data
Flashing
③Wired/WLAN status indicator
Connection Status
LED (green)
LED (red)
Description
Printer disconnected
Off
-
Not connected to printer.
Printer
connection
Network: disconnected
On
Off
Connected to printer.
Ethernet connecting
On
Flashing
(1-second cycle)
Seeking IP address from DHCP server via
Ethernet.
Ethernet working
On
On
Network operation via Ethernet.
WLAN connecting
Flashing
(2-second cycle)
Flashing
(1-second cycle)
Connecting to access point or seeking IP
address from DHCP server via WLAN.
WLAN working
Flashing
(2-second cycle)
On
Network operation via WLAN.
Resource error
Alternating blinking (1-second cycle)
The interface board is malfunctioning.
System error
Alternating blinking (0.2-second cycle)
The interface board is malfunctioning.
10/100BASE
SW
This manual suits for next models
10
Table of contents
Other Citizen Computer Hardware manuals
Popular Computer Hardware manuals by other brands

Delta Electronics
Delta Electronics SMT Power Inductor SIWC1360 Product specifications

Delta Electronics
Delta Electronics SIW75 Series SIW75 Product specifications

Omron
Omron ACCURAX G5 - datasheet

IBM
IBM SAN Volume Controller 2145-CF8 Hardware installation guide

Cisco
Cisco RSP1 Installation and configuration

Advantech
Advantech ARK-1551 user manual