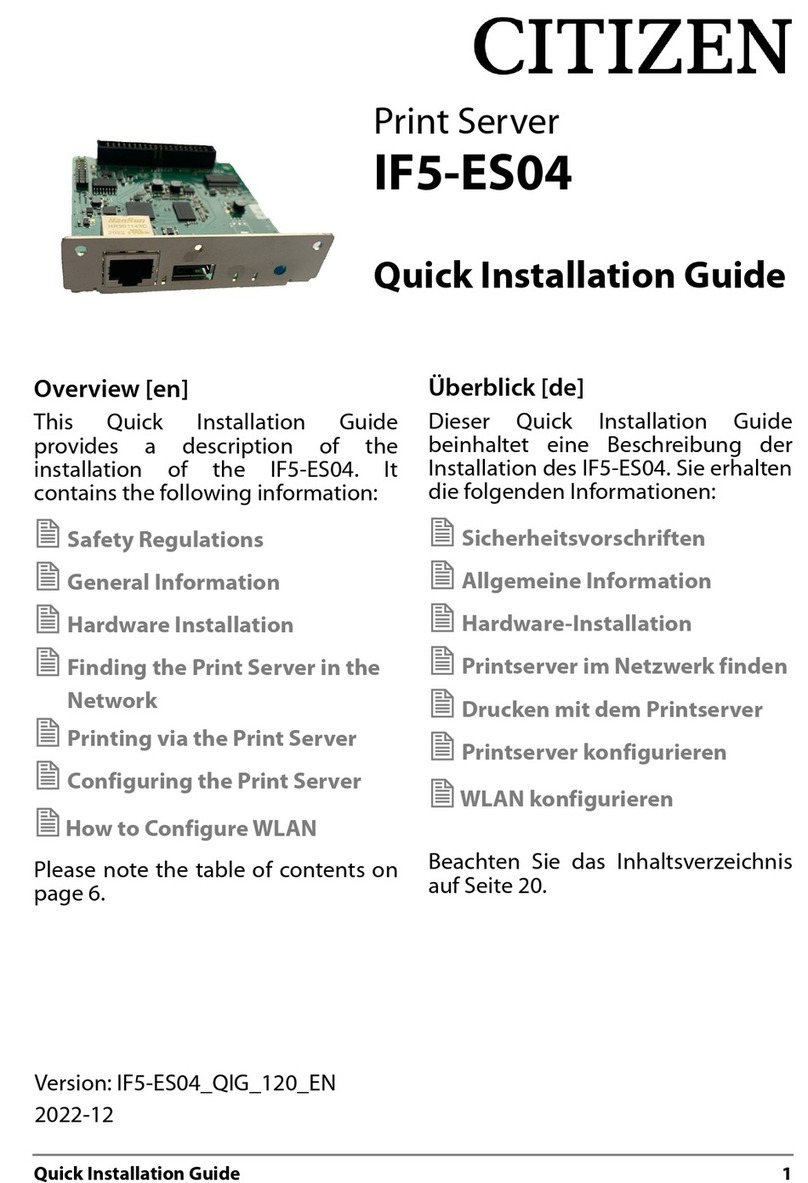
Citizen IF2-WF Series User manual

IF2-WFXX
Wireless LAN (WLAN) Interface Board
User’s Manual
Rev1.03

2
Contents
Contents ...................................................................................................................................2
Read before using....................................................................................................................3
Safety Instructions...................................................................................................................4
1. Introduction ......................................................................................................................6
1-1. Features................................................................................................................................................................................6
1-2. Model Classification.........................................................................................................................................................6
1-3. Specifications .....................................................................................................................................................................7
1-4. Part Names and Functions ............................................................................................................................................8
2. Preparation........................................................................................................................9
2-1. Installing the Printer ........................................................................................................................................................9
2-2. Using the Panel Button...................................................................................................................................................9
2-3. LED Functions ..................................................................................................................................................................10
2-4. Printing the WLAN Interface Board Configuration.............................................................................................11
2-5. Returning the WLAN Interface Board Configuration to Factory Default Settings..................................13
2-6. Setting the WLAN ...........................................................................................................................................................14
2-6-1. Settings ...............................................................................................................................................................................14
2-6-2. Example Settings.............................................................................................................................................................16
3. Web Manager ..................................................................................................................17
3-1. Starting the Web Manager..........................................................................................................................................17
3-2. HOME Window.................................................................................................................................................................18
3-3. STATUS Window...............................................................................................................................................................19
3-3-1. System Status Tab ...........................................................................................................................................................20
3-3-2. Network Status Tab.........................................................................................................................................................21
3-3-3. Wireless LAN Tab .............................................................................................................................................................22
3-3-4. Printer Status Tab ............................................................................................................................................................23
3-4. CONFIG Window..............................................................................................................................................................24
3-4-1. General Tab........................................................................................................................................................................25
3-4-2. Wireless LAN Tab .............................................................................................................................................................27
3-4-3. User Account Tab.............................................................................................................................................................30
3-4-4. Maintenance Tab.............................................................................................................................................................31
4. WLAN Setup Tool.............................................................................................................32
4-1. Installing the WLAN Setup Tool.................................................................................................................................32
4-2. Information List Window..............................................................................................................................................35
4-3. Setup Window..................................................................................................................................................................37
4-3-1. “General“ Tab ....................................................................................................................................................................37
4-3-2. “Wireless LAN“ Tab..........................................................................................................................................................37
4-3-3. “Protocol“ Tab ...................................................................................................................................................................38
4-3-4. “User Account“ Tab .........................................................................................................................................................38
4-3-5. “Maintenance“ Tab..........................................................................................................................................................38
5. Appendix: Connecting the WLAN Interface Board Unit...............................................40

3
Read before using
Be sure to read this manual carefully before using the product. After you read it, store it in a safe place so
that you can reread it when necessary.
Contents of this manual may be changed without notice.
Reproducing and/or copying the contents of this manual by any means without permission are
prohibited.
We will not be responsible for any adverse occurrence that results from the use of this manual,
regardless if it contains omissions, errors/misprints, etc.
Note that we will not be responsible for (a) loss caused by improper operation or mishandling of the
device by the user, or (b) loss due to operational environment.
Data etc., are basically impermanent; long time or permanent storing/saving of data by the device is
not possible.
Note that we will not be responsible for any loss or loss of profits owing to loss of data due to
breakdown, repairs, inspections, etc.
Please contact us if there are omissions, errors, ambiguities, etc. in this manual.
Refer to this document along with the user manual of the printer.
This product operates by setting up a wireless connection between itself and other WLAN equipment
for data transmission. Therefore, other WLAN equipment is required to use this product. While we have
confirmed the operation of this product with certain WLAN equipment, operation with all types of
WLAN equipment is not guaranteed. Carry out a sufficient evaluation before using this product.
Trademarks
・Microsoft, W i n d o w s X P, Windows Vista, Windows 7, Windows 8and Windows 10 are registered
trademarks of Microsoft Corporation U.S.A.
・Ethernet is a registered trademark of Fuji Xerox Co., Ltd.
・Other company names and product names mentioned here are trademarks or registered trademarks of
those companies.

4
Safety Instructions
Before handling the product (removing from packaging, etc.), discharge static electricity by touching
metal, etc.
Do not spill liquid onto the device.
Do not place the device in a humid place.
Do not step on, or subject the LAN cable connected to the device to rough treatment.
Do not connect a telephone line to the RJ45 connector on the device. Be sure to connect STP cable
(category 5 or higher).
Connect the product only to devices that operate on SELV voltage (safety extra-low voltage).
Be sure to use the device inserted in the interface board slot of the printer. Do not use the device when
it is not inserted in the interface board slot.

Safety Instructions
5
Important
FCC Radiation Exposure Statement
The radiation exposure from this equipment is within the FCC RF radiation exposure limits for an
uncontrolled environment. It is recommended that you install and operate this equipment with a minimum
of 20 cm between the radiator and your body.
This equipment is restricted to indoor operation only in the band 5150–5250 MHz.
CE Mark Warning
This equipment is classified as a Class B product and may cause radio interference in a home environment.
In such cases, the user is requested to take the necessary countermeasures to resolve the interference.
Restrictions by Country
Frequency range: 2400.0 to 2483.5 MHz
Country
Restrictions
Notes
Bulgaria None Outdoor use and public service
require general authorization.
France Outdoor use is limited to 10 mW e.i.r.p.
within the band 2,454 to 2,483.5 MHz
Used for military radiolocation.
The 2.4 GHz band is being
reformed to relax the current
regulations. Full implementation is
planned by 2012.
Italy None Outdoor use requires general
authorization.
Luxembourg None Network and service supply (not
for spectrum) require general
authorization.
Norway Implemented The geographical area within a
radius of 20 km from the center of
Ny-Ålesund is excluded from this
subsection.
Russian
Federation
None For indoor use only.
Note: Do not use this equipment outdoors in France.

6
1. Introduction
Thank you for purchasing the Citizen IF2-WFXX wireless LAN (WLAN) interface board.
By using the IF2-WFXX WLAN interface board (hereinafter referred to as the IF2-WFXX) with the CT-S251 and
other equipment, you can directly connect to various printers via a network and use computers on the
network to print from the printers. In addition, the operational status, print settings, and other information
about the printer can be checked from computers on the network.
1-1. Features
Support for WLAN and Ethernet for configuration
Support for 802.11a/b/g/n WLAN (depends on W-Fi adapter)
Support for WPA/WPA2 WLAN encryption
Support for DHCP, static IP, and ZeroConf methods of IP address acquisition
Configuration through a browser or utility software
Support for Raw 9100 port and LPR printing methods
Panel button to print configuration information and change the configuration mode
LED indicators for connection, operation, and error statuses
1-2. Model Classification
IF2-WF01: 2.4GHz model (802.11b/g/n)
IF2-WFX2: 2.4/5GHz model (802.11a/b/g/n)
Remarks : Depending on the country, different Wi-Fi adapter may be used with IF2-WFX2 and model name
can be changed by that. (Ex: IF2-WF12 is for Japan.)
Also there are countries where IF2-WFX1 is not available.

3Introduction
7
1-3. Specifications
Model number
IF2-WF01
IF2-WFX2
WLAN
Wi-Fi Adapter
WU606n
WN-AC433UK (For Japan)
Supported standards
IEEE802.11b/g/n
IEEE802.11a,/b/g/n
Number of channels 1 to 13 2.4GHz band: 1 to 13
5GHz band:W52 (36 to 48),
W53 (52 to 64), W56(100 to 140),
W58 (149 to 164)
Frequency band 2.4GHz band (2,412 to 2,472 MHz) 2.4GHz band (2,412 to 2,472 MHz)
W52:5..2GHz band ((5150 to 5250MHz)
W53:5.3GHz band (5250 to 5350MHz)
W56: 5.6GHz band (5470 to 5725MHz)
Transmission speed IEEE802.11n: maximum 150 Mbps
IEEE802.11g: maximum 54 Mbps
IEEE802.11b: 11 Mbps
IEEE802.11n: maximum 150 Mbps
IEEE802.11a: maximum 54 Mbps
IEEE802.11g: maximum 54 Mbps
IEEE802.11b: 11 Mbps
Access mode
Infrastructure, *Ad-Hoc
Security
WPA2-PSK (encryption: AES, TKIP)
WEP (Key size: 64 bit/128 bit)
*Ethernet
Standards
100BASE-TX/10BASE-T, Full Duplex/Half Duplex auto negotiation
Port
RJ-45
Network
IP Version
IPv4
Protocols
TCP, UDP, HTTP, ICMP, DHCP, SNMP
Port number for printing
RAW (port 9100 (Changeable)), LPR
IP address setting
Manual, DHCP
Hardware Operation panel LED: 4 (2 on panel, 2 on RJ45 connector)
Button: 1
Compatible printers
CT-S251
Safety standards
VCCI Class A FCC Part 15, CE Mark
*The communication by “Ad-Hoc” does not work correctly in various cases due to various restrictions. If "Ad-Hoc"
does not work correctly, we recommend “Infrastructure”.
*The purpose of Ethernet port is to set up the WLAN interface board. And printing through the Ethernet port is not
taken into the consideration. Therefore, depending on the used environment, the Ethernet port may not work properly
for the printing.
*Only 2.412~2.462GHz is allowed to be used in USA. Available 2.4GHZ channels to choose for US users are only 1 - 11.
*Rules on the use of 5GHz band channels may vary according to different national laws.
Choose the 5GHz channel according to the law of the country to use this device.

3Introduction
8
1-4. Part Names and Functions
WLAN Interface Board Unit
①RJ45 connector (compatible with 10Base-T/100Base-TX)
Connection for LAN cable
②Ethernet transmission speed LED indicator (green)*1
Shows Ethernet transmission speed with steady/blinking light.
③Ethernet status indicator LED (yellow)*1
Shows Ethernet connection status (disconnected, receiving data, etc.).
④Ethernet/WLAN status LED indicator (green)*1
⑤Ethernet/WLAN status LED indicator (red)*1
Shows transmission, connection, and error statuses of the IF2-WFXX with combinations of steady and
blinking lights.
⑥Panel button*2
Used to operate the IF2-WFXX.
⑦USB Wi-Fi adapter
Wi-Fi USB adapter is connected to USB connector.
*1 See 2-3, LED Functions (page 10) for indicator details.
*2 See 2-2, Using the Panel Button (page 9) for panel button operations.
①
②
③
⑥
④⑦⑤

9
2. Preparation
2-1. Installing the Printer
With an unobstructed view, the guideline transmission distance for the IF2-WFXX is approximately 30 m.
The transmission distance depends on the setup environment. This includes electrical interference from the
periphery, obstacles such as the printer, and the antenna location. Carefully consider these points before
installing the IF2-WFXX.
2-2. Using the Panel Button
The panel button on the operation panel is used to operate the IF2-WFXX.
Starting the WLAN Interface Board
Turn on the printer. The IF2-WFXX starts working approximately 20 seconds after the printer turns on.
Printing the WLAN Interface Board Configuration
Press the panel button. See 2-4, Printing the WLAN Interface Board Configuration (page 11) for details.
Switching to Setting Mode
Press and hold the panel button. The buzzer*will sound once, signaling a switch to setting mode.
・Setting mode enables the reading of the factory default settings.
・If there is no activity for three seconds in the setting mode, the buzzer*will sound once, signaling a return
to normal mode.
* Note that the buzzer will not sound if the IF2-WFXXis connected to the barcode printer. In addition, the
buzzer will not sound when the IF2-WFXX is used with the POS printer if the buzzer has been set to not
sound.
Restoring to the Factory Default Settings
Switch to setting mode, then press and hold the panel button. The IF2-WFXX will return to the factory
default settings.
When the operation is complete, the IF2-WFXX will restart automatically.
The settings are cleared so the wireless LAN must be configured again.
Warning
Panel button

2Preparation
10
2-3. LED Functions
The following charts show what each LED indicator indicates.
Green Yellow Green Red
(Status)
①Ethernet transmission speed indicator
Transmission speed LED (green)
100 Mbps On
10 Mbps / Disconnected Off
②Ethernet connection/transmission status indicator
Connection status LED (yellow)
Connected On
Disconnected Off
Transmitting data Flashing
③Wired/WLAN status indicator
Connection Status LED (green) LED (red) Description
Printer disconnected Off - Not connected to printer.
Printer
connection
Network: disconnected On Off Connected to printer.
Ethernet connecting On
Flashing
(1-second cycle)
Seeking IP address from DHCP server via
Ethernet.
Ethernet working On On Network operation via Ethernet.
WLAN connecting
Flashing
(2-second cycle)
Flashing
(1-second cycle)
Connecting to access point or seeking IP address
from DHCP server via WLAN.
WLAN working
Flashing
(2-second cycle)
On Network operation via WLAN.
Resource error Alternating blinking (1-second cycle) The IF2-WFXX is malfunctioning.
System error Alternating blinking (0.2-second cycle) The IF2-WFXX is malfunctioning.

2Preparation
11
2-4. Printing the WLAN Interface Board Configuration
Press the panel button to print out the configuration of the IF2-WFXX from the printer.
Ethernet Connection and DHCP On
①Title of the printout.
②Model name, hardware revision, and firmware
version of the IF2-WFXX.
③System information of the IF2-WFXX. The
WLAN board name, serial number, and MAC
address are printed.
④Network information of the IF2-WFXX.
⑤Ethernet information. Printed when connected
by Ethernet.
⑥Printer information. The name of the
manufacturer and the model name of the
printer connected to the IF2-WFXX are printed.
⑦Configuration information of the IF2-WFXX.
The information stored in the IF2-WFXX is
printed and may be different from the
connection status of the current network.
Check the connection status using the
network information of .
I/F Board
Information
IF2-WFX2(Rev2.0.6): Ver 3.01
System
WLAN Board Name : Net Printer
Serial Number : 100123
MAC Address : 00:01:02:0a:0b:0c
Current Network Status
IP Address : 192.168.0.2 (DHCP)
Subnet Mask : 255.255.255.0
Gateway : 192.168.0.1
DHCP Server : 192.168.0.1
Ethernet Status
Speed & Duplex : Auto (100BaseTx Full)
Printer Status
Manufacturer : CITIZEN
Model : CT-S251
User Configuration
DHCP : Enable
IP Address : 192.168.0.10
Subnet Mask : 255.255.255.0
Gateway : 192.168.0.1
Print Port : 9100
Receive Timeout : 180
Wireless Type : Infrastructure
SSID : CITIZENSYSTEMS
Security : None

2Preparation
12
WLAN Connection and DHCP Off
①Title of the printout.
②Model name, hardware revision, and firmware
version of the IF2-WFXX.
③System information of the IF2-WFXX. The
WLAN board name, serial number, and MAC
address are printed.
④Network information of the IF2-WFXX.
⑤Ethernet information. Printed when connected
by Ethernet.
⑥Printer information. The name of the
manufacturer and the model name of the
printer connected to the IF2-WFXX are printed.
⑦The configuration information of the IF2-WFXX.
The information stored in the IF2-WFXX is
printed and may be different from the
connection status of the current network.
Check the connection status using the network
information of .
I/F Board
Information
IF2-WFX2(Rev2.0.6): Ver 3.01
System
WLAN Board Name : Net Printer
Serial Number : 100123
MAC Address : 00:01:02:0a:0b:0b
Current Network Status
IP Address : 192.168.10.10 (Fixed)
Subnet Mask : 255.255.255.0
Gateway : 192.168.10.1
DHCP Server :
Wireless LAN Status
Module : Module Name
BSSID : AA:BB:CC:DD:EE:FF
Channel : 11
Security : WPA2-PSK AES
Printer Status
Manufacturer : CITIZEN
Model : CT-S251
User Configuration
DHCP : Disable
IP Address : 192.168.0.10
Subnet Mask : 255.255.255.0
Gateway : 192.168.0.1
Print Port : 9100
Receive Timeout : 180
Wireless Type : Infrastructure
SSID : CITIZENSYSTEMS
Security : WPA2-PSK AES/TKIP

2Preparation
13
2-5. Returning the WLAN Interface Board Configuration to Factory Default Settings
1) Press and hold the panel button to switch to setting mode.
2) After the IF2-WFXX has switched to setting mode, press and hold the panel button again within three
seconds. The following message is printed and the IF2-WFXX returns to factory default settings.
I/F Board
Information
--!Caution!--
Print Server will
automatically restart.

2Preparation
14
2-6. Setting the WLAN
2-6-1. Settings
Classification Item Description
General tab
WLAN board
Information
WLAN board
Name
Set the ID of the IF2-WFXX.
Net Printer (factory default)
TCP/IP TCP/IP Select the IP address acquisition method.
“Obtain an IPAddress Automatically”(factory default)
“Use the following IPAddress”
IP Address Set the IP address for a static address.
192.168.10.100 (factory default)
Subnet Mask Set the subnet mask for a static address.
255.255.255.0 (factory default)
Default
Gateway
Set the default gateway for a static address.
192.168.10.100 (factory default)
UPnP Setting UPnP Set the UPnP setting.
Enable (factory default)
Disable
Print Setting Raw Port
Number
Set the TCP port number for raw protocol printing.
9100 (factory default)
Timeout for
print data
Set the timeout duration of connection to the host.
0 to 65535
(seconds). When the setting is“0”, there is no timeout.
180 (factory default).
Action at
Timeout
Set the action when a timeout occurs with the host and other
connections are open.
Close all connections (factory default)
Move to next connection
Wireless LAN tab
Basic Network Type Set the access mode.
Infrastructure (factory default)
Ad Hoc
SSID Set the SSID of the connection access point.
CITIZENSYSTEMS (factory default)

2Preparation
15
Security Security
System
Select the encryption method.
Disable (factory default)
WEP
WPA-PSK
WPA2-PSK
Authentication Select the authentication method when WEP is selected.
Open System (factory default)
Shared Key
Key Size Select the key size when WEP was selected.
64 Bit (Hex-10 chars) (factory default)
64 Bit (ASCII-5 chars)
128 Bit (Hex-26 chars)
128 Bit (ASCII-13 chars)
Key1 to Key4 When WEP is selected, enter the WEP key and select the key to be used.
KEY1: 0123456789 (factory default)
Key Format Select the key format when WPA-PSK/WPA2-PSK is selected
Passphrase (8-63 chars) (factory default)
Hex (64 chars)
Pre-Shared
Key
Enter the shared key when WPA-PSK/WPA2-PSK is selected
ABCDEF4321 (factory default)
Encryption Enter the encryption method when WPA-PSK/WPA2-PSK is selected
TKIP (factory default)
AES
TKIP/AES mixed mode
WPS Setting WPS Turn the WPS function on or off.
Enable (factory default)
Disable
Within WPS
Setting
Mode Select the WPS mode.
PBC (factory default)
PIN
PIN Select the PIN allocation method.
Random Generation (factory default)
Manually Generation

2Preparation
16
2-6-2. Example Settings
Use the WPS function and Configure Settings*
1) Connect the WLAN adapter to the IF2-WFXX.
2) Turn on the printer.
Confirm that the IF2-WFXX recognized the WLAN adapter. The WLAN adapter is recognized
approximately 20 seconds after the printer is turned on. The status indicator LED (green) starts flashing.
3) Hold the WPS button on the WLAN adapter for 1 second or more. The LED on the WLAN adapter starts
flashing.
If the adapter cover is being used, either open the cover or use a thin needle to press the WPS button
from the hole in the cover.
4) Start the WPS function of the access point.*
5) When the configuration is complete, the LED of the WLAN adapter changes to transmission status.
You can confirm that the configuration was performed correctly by pressing the panel button to print
out the configuration of the IF2-WFXX. See 2-4, Printing the WLAN Interface Board Configuration (page
11) for details.
* For the method to start the WPS function, see the manual of the access point. If the access point you
are using does not support the WPS function, perform configuration by using the “Configuring using
the Ethernet Adapter” method.
Configuring using the Ethernet Adapter
1) Connect the WLAN adapter to the IF2-WFXX.
2) Connect the Ethernet cable to the IF2-WFXX.
3) Turn on the printer.
After the printer is turned on and the IF2-WFXX starts, the IF2-WFXX will automatically obtain an IP
address from the DHCP server within 90 seconds. If an IP address cannot be obtained automatically, use
the ZeroConf function to allocate the IP address 169.254.XX.YY (XX.YY will differ by a setup
environment). Allocate the IP address while referring to 4-3, Setup Window (page 37).
4) Use the Web manager to configure the WLAN.
Configure the wireless LAN while referring to 3, Web Manager (page 17).

17
3. Web Manager
The IF2-WFXX is equipped with a Web manager function, which allows you to access the IF2-WFXX from a
web browser and check the status of the IF2-WFXX or change its settings.
3-1. Starting the Web Manager
1) Start a web browser.
2) In the address bar, enter the IP address and then press Enter.
Web Manager Window Layout
The Web manager consists of the following windows and tabs.
・The configuration window of the IF2-WFXX cannot be displayed if the network settings of your computer and the IF2-WFXX
differ. Ensure that the IP address of the IF2-WFXX matches the settings of your network.
・The IP address of the IF2-WFXX
can be confirmed by using the “Printing the Wireless LAN Interface Board Configuration”
method.
Warning
*
The image to the left is a sample. Enter the
actual allocated value for the IP address.
HOME window
STATUS
window
CONFIG
window
System Status tab
Network Status tab
Wireless LAN Status tab
Printer Status tab
General tab
Wireless LAN tab
User Account tab
Maintenance tab
Site Survey Setting tab
WPS Setting tab

3Web Manager
18
3-2. HOME Window
This is the Home window of the Web manager.
①HOME button
Display the Home window.
②STATUS button
Display the Status window. At the status window, you can check the status of the IF2-WFXX.
③CONFIG button
Display the CONFIG window. At the CONFIG window, you can configure the IF2-WFXX.
④Logout button
Log out from the CONFIG window of the IF2-WFXX. It is not possible to open the CONFIG window at
multiple PCs of the same time. You must log out to make settings using another Web manager or WLAN
Setup Tool.

3Web Manager
19
3-3. STATUS Window
Displays the status of the IF2-WFXX.
①System Status tab
See 3-3-1, System Status Tab (page 20).
②Network Status tab
See 3-3-2, Network Status Tab (page 21).
③Wireless LAN Status tab
See 3-3-3, Wireless LAN Tab (page 22).
④Printer Status tab
See 3-3-4, Printer Status Tab (page 23).

3Web Manager
20
3-3-1. System Status Tab
①Firmware Version
Displays the firmware version of the IF2-WFXX.
②Model Name
Displays the model name of the IF2-WFXX.
③Serial Number
Displays the serial number of the IF2-WFXX.
④MAC Address
Displays the MAC address of the IF2-WFXX.
⑤RAW Port Number
Displays the TCP port number for RAW printing.
⑥Timeout for print data
Displays the socket timeout duration during printing. When the host and the TCP/IP socket are
connected and the host sends no data for this duration during printing, the socket is forced to close.
When the setting is “0”, the socket remains connected until a disconnection request is received from
the host.
⑦LPR Queue Name
Displays the LPR queue name.
⑧UPnP
Displays the UPnP configuration status.
This manual suits for next models
2
Table of contents
Other Citizen Computer Hardware manuals
Popular Computer Hardware manuals by other brands

Ebmpapst
Ebmpapst D3G146-LT13-30 operating instructions

Tandberg Data
Tandberg Data TDC 3640 Reference manual

Rosslare
Rosslare MD-IO84 installation guide

Tews Technologies
Tews Technologies TCP270 user manual

SMC Networks
SMC Networks EliteConnect SMC2531W-B EU Specifications

Freescale Semiconductor
Freescale Semiconductor MPC850 user manual