manuals.online logo
Brands
  1. Home
  2. •
  3. Brands
  4. •
  5. Citizen
  6. •
  7. Printer
  8. •
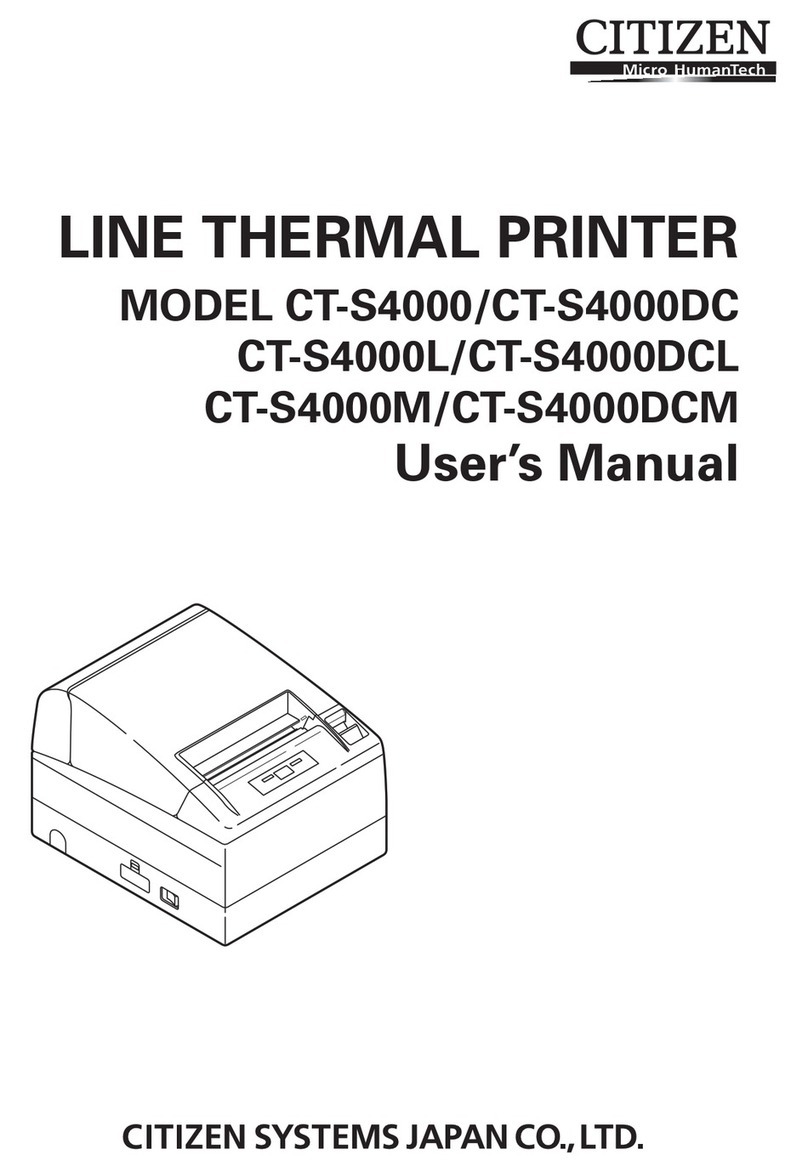
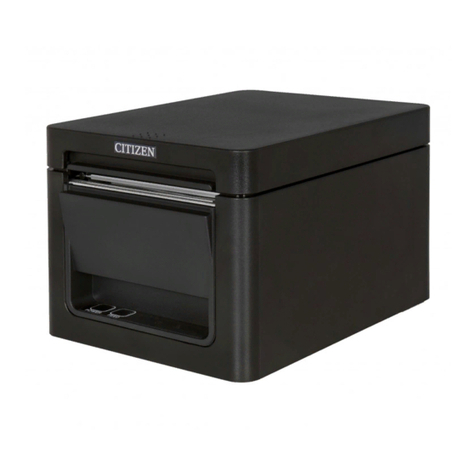
  9. Citizen CT-S281 Series User manual

Citizen CT-S281 Series User manual

LINE THERMAL PRINTER
MODEL CT-S281
Quick Start Guide
GENERAL PRECAUTIONS
●For further information and more detailed instructions on the use of your new
printer, please refer to the complete user manual included on the CD-ROM
accompanying your printer.
●Please take moment to read this Quick Start Guide which will familiarise yourself
with the printer and its operation.
●The information contained herein is subject to change without prior notice.
●Reproduction or transfer of part or all of this document in any means is prohibited
without permission from CITIZEN SYSTEMS.
●Note that CITIZEN SYSTEMS is not responsible for any operation results regardless
of missing, error, or misprinting in this manual.
●Note that CITIZEN SYSTEMS is not responsible for any trouble caused as a result
of using options or consumables that are not specified in this manual.
●Except explained elsewhere in this manual, do not attempt to service, disassemble,
or repair this product.
●Note that CITIZEN SYSTEMS is not responsible for any damage attributable to
incorrect operation/handling or improper operating environments that are not
specified in this manual.
●Data are basically for temporary use, not stored for a long period or permanently.
Please note that CITIZEN SYSTEMS is not responsible for damage or lost profit
resulting from the loss of data caused by accidents, repairs, tests or other
occurrence.
●If you find loss of information, error, or uncertain matter, please contact your
CITIZEN SYSTEMS dealer.
●If you find any disordered or missing page(s), contact your CITIZEN SYSTEMS
dealer for replacement.
This printer conforms to the following Standards:
The Low Voltage Directive 2006/95/EC, the EMC Directive 2004/108/EC, the RoHS
Directive 2002/95/EC, and the WEEE Directive 2002/96/EC.
LVD:EN60950-1
EMC : EN55022 / Class B, EN61000-3-2, EN61000-3-3, EN55024
This declaration is applied only for 230V model.
Declaration of Conformity
IMPORTANT: This equipment generates, uses, and can radiate radio frequency energy
and if not installed and used in accordance with the instruction manual, may cause
interference to radio communications. It has been tested and found to comply with
the limits for a Class B computing device pursuant to Subpart J of Part 15 of FCC
Rules, which are designed to provide reasonable protection against such interference
when operated in a commercial environment. Operation of this equipment in a
residential area is likely to cause interference, in which case the user at his own
expense will be required to take whatever measures may be necessary to correct
the interference.
CAUTION: Use shielded cable for this equipment.
Sicherheitshinweis
Die Steckdose zum Anschluß dieses Druckers muß nahe dem Gerät angebracht und
leicht zugänglich sein.
For Uses in Canada
This Class A digital apparatus complies with Canadian ICES-003.
This digital apparatus does not exceed the class B limits for radio noise emissions
from digital apparatus, as set out in the radio interference regulations of the Canadian
department of communications.
Pour L’utilisateurs Canadiens
Cet appareil numérique de la classe B est conforme à la norme NMB-003 du Canada.
Cet appareil numérique ne dépasse pas les limites de carégorie a pour les émissions
de bruit radio émanant d’appareils numériques, tel que prévu dans les réglements
sur l’interférence radio du départment Canadien des communications.
Do not use or store this product in a place where it will be exposed to:
●Flames or moist air
●Direct sunlight
●Hot airflow or radiation from a heating device
●Salty air or corrosive gases
●Ill-ventilated atmosphere
●Chemical reactions in a laboratory
●Airborne oil, steel particles, or dust
●Static electricity or strong magnetic field
•Neglecting these warnings may result in printer failure, overheating,
emission of smoke, fire, or electric shock.
PRECAUTIONS ON PRINTER INSTALLATION
Do not drop any foreign object nor spill liquid into the printer. Do not
place any object on the printer either.
●Do not drop any metallic object such as paper clip, pin or screw into
the printer.
●Do not place a flower vase, pot or cup containing water on the printer.
●Do not spill coffee, soft drinks or any other liquid into the printer.
●Do not spray insecticide or any other chemical liquid over the printer.
•Ametallic foreign object, if accidentally dropped into the printer, may
cause printer failure, fire, or electric shock. Should it occur,
immediately turn the printer off, unplug it from the supply outlet,
and call your local CITIZEN SYSTEMS dealer.
Do not handle the printer in the following ways:
●Do not allow the printer to sustain strong impacts or hard jolts (e.g.,
trampling, dropping, striking with a hard edge).
●Never attempt to disassemble or modify the printer.
•Neglecting to handle properly may result in printer failure,
overheating, emission of smoke, fire, or electric shock.
WARNING
Install, use, or store the printer out of the reach of children.
•Electric appliances could cause an unexpected injury or accident if
they are handled or used improperly.
•Keep the power cord and signal cables out of the reach of children.
Also children should not be allowed to gain access to any internal
part of the printer.
•The plastic bag the printer came in must be disposed of properly or
kept away from children. Wearing it over the head may lead to
suffocation.
PRECAUTIONS IN HANDLING THE PRINTER
Please observe the following precautions for power source and power
cord:
●Do not plug or unplug the power cord with a wet hand.
●Use the printer only at the specified supply voltage and frequency.
●Use only the specified AC adapter with the printer.
●Use the power cord supplied with the product. Never use the power cord
for other product.
●Check to make sure that the supply outlet from which the printer is
powered has a sufficient capacity.
●Do not supply the printer from a power strip or current tap shared
with other appliances.
●Do not plug the power cord into a supply outlet with dust or debris
left on its plug.
●Do not use a deformed or damaged power cord.
●Do not move the printer while the printer power is on.
•Neglecting to handle properly may result in printer failure, emission
of smoke, fire, or electric shock.
•An overload may cause the power cord to overheat or fire or the circuit
breaker to trip.
●Do not allow anything to rest on the power cord. Do not place the
printer where the power cord will be trampled on.
●Do not use or carry the printer with its power cord bent, twisted, or
pulled.
●Do not attempt to modify the power cord unnecessarily.
●Do not lay the power cord in the neighbor of a heating device.
•Neglecting these cautions may cause wires or insulation to break,
which could result in leakage, electric shock, or printer failure. If a
power cord sustains damage contact your CITIZEN SYSTEMS dealer.
●Do not leave things around the supply outlet.
●Supply power to the printer from a convenient wall outlet, readily
accessible in an emergency.
•The printer may not be immediately shut down in an emergency.
●Insert the power plug fully into the outlet.
●If the printer is not to be used for a long time, leave it disconnected
from its supply outlet.
●Hold the plug and connector when plugging or unplugging the power
cord or signal cable after turning off the printer and the appliance
connected to it.
WARNING
TE74902-05F
1.05E-1609
September 2016
Printed in Japan
●EPSON and ESC/POS are registered trademarks of Seiko Epson Corporation.
●QR Code is registered trademark of DENSO WAVE INCORPORATED.
●CITIZEN is a registered trade mark of CITIZEN WATCH CO.
●CITIZEN es una marca registrada de CITIZEN WATCH CO.
●
iPad, iPod, iPod touch and MacOS are trademarks of Apple Inc. registered in the U.S. and other countries.
●Bluetooth is a registered trademark of Bluetooth SIG, Inc.
●All other trademarks are the property of their respective owners.
●
Citizen Systems use these trademarks in accordance with the license of relevant owners.
Copyright c 2016 by CITIZEN SYSTEMS JAPAN CO., LTD.
3
Connecting the AC Adapter and AC Power Cord
CAUTION!
●Use only the specified AC adapter with the printer.
●When disconnecting a cable, do not pull out by the cable. Always hold the plug.
●Always keep the AC power supply away from other noise generating equipment.
●Do not pull the power cord. Otherwise fire, electric shock, or power disconnection
may result.
●If lightning is approaching, unplug the AC power cord from the wall outlet. Otherwise
fire or electric shock may result.
●Keep the power cord away from heat generating appliances. Otherwise the shield of
power cord may be fused resulting in a fire or electric shock.
●If the printer is not to be used for a long time, leave it disconnected from its supply
outlet.
●Lay the cable not to be caught by the leg or the like.
AC
power cord
Inlet
Cable
connector
AC adapter
4 Connecting Interface Cables
Turn off the printer and unplug the power connector. Then follow the procedure for
interface cable connection.
Orient the interface cable terminal correctly and insert it into the interface connector.
CAUTION!
●When disconnecting the cable, always hold the connector.
●Lay the cable not to be caught by the leg or the like.
Serial Interface USB Interface
USB cable clamp
5 Setting/Replacing Paper Rolls
WARNING
●When opening the printer cover, take care not to touch the print head or cutter blade.
Otherwise, burning or injury of hand may result.
1. Press the cover open button down.
2. Open the printer cover.
3. Insert a paper roll with is print area facing down
as shown in the figure and pull out the paper end
straight forward by several cm out of the printer.
4. Close the printer cover until a click can be heard.
CAUTION!
●Always use the specified types of paper roll.
●Confirm that the paper roll is set correctly.
●When the paper is skewed and not extended straightforward from under the cover,
open the cover and adjust the paper correctly.
●When closing the cover, press on the center part of the cover to close it firmly.
●When setting paper, pay attention not to let your fingers get injured by the edge of
paper.
●When setting a label paper roll to the printer, be sure that there is no uneven portion
on the roll paper side. If the roll paper side is uneven, set it evenly.
1. Turn off the printer power.
2. Plug in the cable connector of the
AC adapter to the power connector
at the rear of the printer.
3. Connect the AC power cord to the
inlet of the of AC adapter, and insert
the AC power-cord plug into a
suitable wall outlet.
7
When the Printer Cover Cannot Be Opened
Cutter lock error may occur with the Auto Cutter due to dropping of foreign object, paper
jam, etc. If the cutter blade remains protruded with cutter lock error, the printer cover
does not open.
The Auto Cutter can also be restored to the initial position by turning the printer on
again or by pressing the FEED button, when the memory SW3-1 is set to OFF.
If the cutter lock error cannot be recovered by the above method, release cutter lock in
the following procedure.
1. Turn the printer power off.
2. If a cutter lock error occurs, the printer cover is held unopened. To open the
cover, open the cutter gear cover on the front of the printer, turn the cutter
gear under the protection sheet in the arrow direction, and return the movable
blade to the initial position. (Return the movable blade to the position where
the printer cover can open.)
3. Open the printer cover and remove the cause of the cutter lock.
4. Set paper correctly, close the printer cover, and turn the printer power on.
(Check to make sure ERROR LED goes off.)
CAUTION!
●Do not touch the printer head by hand just after printing because high temperature
remains on it.
●Do not touch the surface of the heating element of the print head by bare hand or by
metal.
●Do not touch the blade of the cutter.
Protection sheet Cutter gear cover
Cutter gear
Cover open button
6 Self-printing
Insert paper into the printer. With the FEED button pressed and held, turn the printer
power on, keep the FEED button held for about 1 second, and then release the FEED
button. The printer starts self-printing. The printer prints model name, version, DIP
switch setting, memory switch setting, and built-in fonts.
Memory
switch
setting
Serial communication
condition (Only serial
interface model)
DIP switch setting
(Only serial interface
model)
Firmware version
Interface
Buffer size
USB cable clamp
(USB Interface model)
1 Unpacking
When unpacking the printer, confirm that the following are provided:
●Printer: 1
●AC adapter: 1
●AC power cord: 1
●Sample paper roll: 1 roll
●USB cable clamp(USB Interface model): 1
●Operation panel(for wall mounting): 1
●Quick start guide: 1
●CD-ROM: 1
Printer
AC adapter
Sample paper roll ** AC power cord *
CD-ROM
Quick start guide Operation panel
(for wall mounting)
* The AC power cord plug will vary depending of the region.
** In case of label model, Label paper is used for sample paper roll.
2 Model Classification
The printer models are classified by the following designation method:
CT-S 281 RS U - WH - PX - M1
Interface
RS:
Serial RS-232C compliant
UB: USB
BT:Bluetooth & USB
(Destination: Japan only)
BD: Bluetooth, USB & Drawer
Case color
WH: Cool white
BK: Black
Destination
(Letters + Power cord)
J: Japan
E: Europe
U: USA
Model name
Optional feature
No sign: Standard printing
PX: With paper near-end sensor
XL: With label sensor
PL: With paper near-end sensor and label sensor
Optional feature
No sign: Standard printing
M1: With blackmark sensor (Applicable only
for the printer with label sensor)
* Some specific combination may not be supported. Contact us beforehand.

Other manuals for CT-S281 Series

5

Other Citizen Printer manuals

Citizen CBM-262 Type II User manual

Citizen

Citizen CBM-262 Type II User manual

Citizen CL-S521 Installation and operation manual

Citizen

Citizen CL-S521 Installation and operation manual

Citizen PD-22 User manual

Citizen

Citizen PD-22 User manual

Citizen iDP-3550 User manual

Citizen

Citizen iDP-3550 User manual

Citizen CMP-30 series User manual

Citizen

Citizen CMP-30 series User manual

Citizen CL-E321 User manual

Citizen

Citizen CL-E321 User manual

Citizen CT-D101TR User manual

Citizen

Citizen CT-D101TR User manual

Citizen GSX-190 User manual

Citizen

Citizen GSX-190 User manual

Citizen iDP3240 User manual

Citizen

Citizen iDP3240 User manual

Citizen CBM-1000 User manual

Citizen

Citizen CBM-1000 User manual

Citizen CBM-820 User manual

Citizen

Citizen CBM-820 User manual

Citizen CT-S4500 User manual

Citizen

Citizen CT-S4500 User manual

Citizen LINE THERMAL PRINTER CT-S280 Installation manual

Citizen

Citizen LINE THERMAL PRINTER CT-S280 Installation manual

Citizen CT-S851 User manual

Citizen

Citizen CT-S851 User manual

Citizen iDP3240 User manual

Citizen

Citizen iDP3240 User manual

Citizen CT-S310 User manual

Citizen

Citizen CT-S310 User manual

Citizen iDP-460 User manual

Citizen

Citizen iDP-460 User manual

Citizen CW-01 User manual

Citizen

Citizen CW-01 User manual

Citizen CT-S601 II User manual

Citizen

Citizen CT-S601 II User manual

Citizen CLP-4081 User manual

Citizen

Citizen CLP-4081 User manual

Citizen PPU-700 User manual

Citizen

Citizen PPU-700 User manual

Citizen CT-S801 User manual

Citizen

Citizen CT-S801 User manual

Citizen CD-S500 series Installation manual

Citizen

Citizen CD-S500 series Installation manual

Citizen CT-S2000 User manual

Citizen

Citizen CT-S2000 User manual

Popular Printer manuals by other brands

Roland EGX-600 Service notes

Roland

Roland EGX-600 Service notes

Canon PIXMA MX432 Setting up

Canon

Canon PIXMA MX432 Setting up

CIM PRO THERMAL 2000 Operator's manual

CIM

CIM PRO THERMAL 2000 Operator's manual

Xerox 8860MFP - Phaser Color Solid Ink Evaluator guide

Xerox

Xerox 8860MFP - Phaser Color Solid Ink Evaluator guide

Epson C11CA27201 - WorkForce 40 Color Inkjet... Specifications

Epson

Epson C11CA27201 - WorkForce 40 Color Inkjet... Specifications

Rimage Everest 600 user guide

Rimage

Rimage Everest 600 user guide

Philips CRYSTAL 660 - NETWORK Installation guidelines

Philips

Philips CRYSTAL 660 - NETWORK Installation guidelines

Reiner jetStamp 1025 operating manual

Reiner

Reiner jetStamp 1025 operating manual

Samsung ML-1200 Series quick guide

Samsung

Samsung ML-1200 Series quick guide

FujiFilm ApeosPro C810 user manual

FujiFilm

FujiFilm ApeosPro C810 user manual

NCR 719 II Series CLEANING

NCR

NCR 719 II Series CLEANING

Brother MFC-7320 Quick setup guide

Brother

Brother MFC-7320 Quick setup guide

VinTelecom FS10 user manual

VinTelecom

VinTelecom FS10 user manual

Olivetti PGL2535 Operation guide

Olivetti

Olivetti PGL2535 Operation guide

TallyGenicom 9050N - quick start guide

TallyGenicom

TallyGenicom 9050N - quick start guide

Simplex 4100-1293 installation instructions

Simplex

Simplex 4100-1293 installation instructions

Epson L3210 user guide

Epson

Epson L3210 user guide

Pitney Bowes Datamax w1110 Installation instruction

Pitney Bowes

Pitney Bowes Datamax w1110 Installation instruction

manuals.online logo
manuals.online logoBrands
  • About & Mission
  • Contact us
  • Privacy Policy
  • Terms and Conditions

Copyright 2025 Manuals.Online. All Rights Reserved.