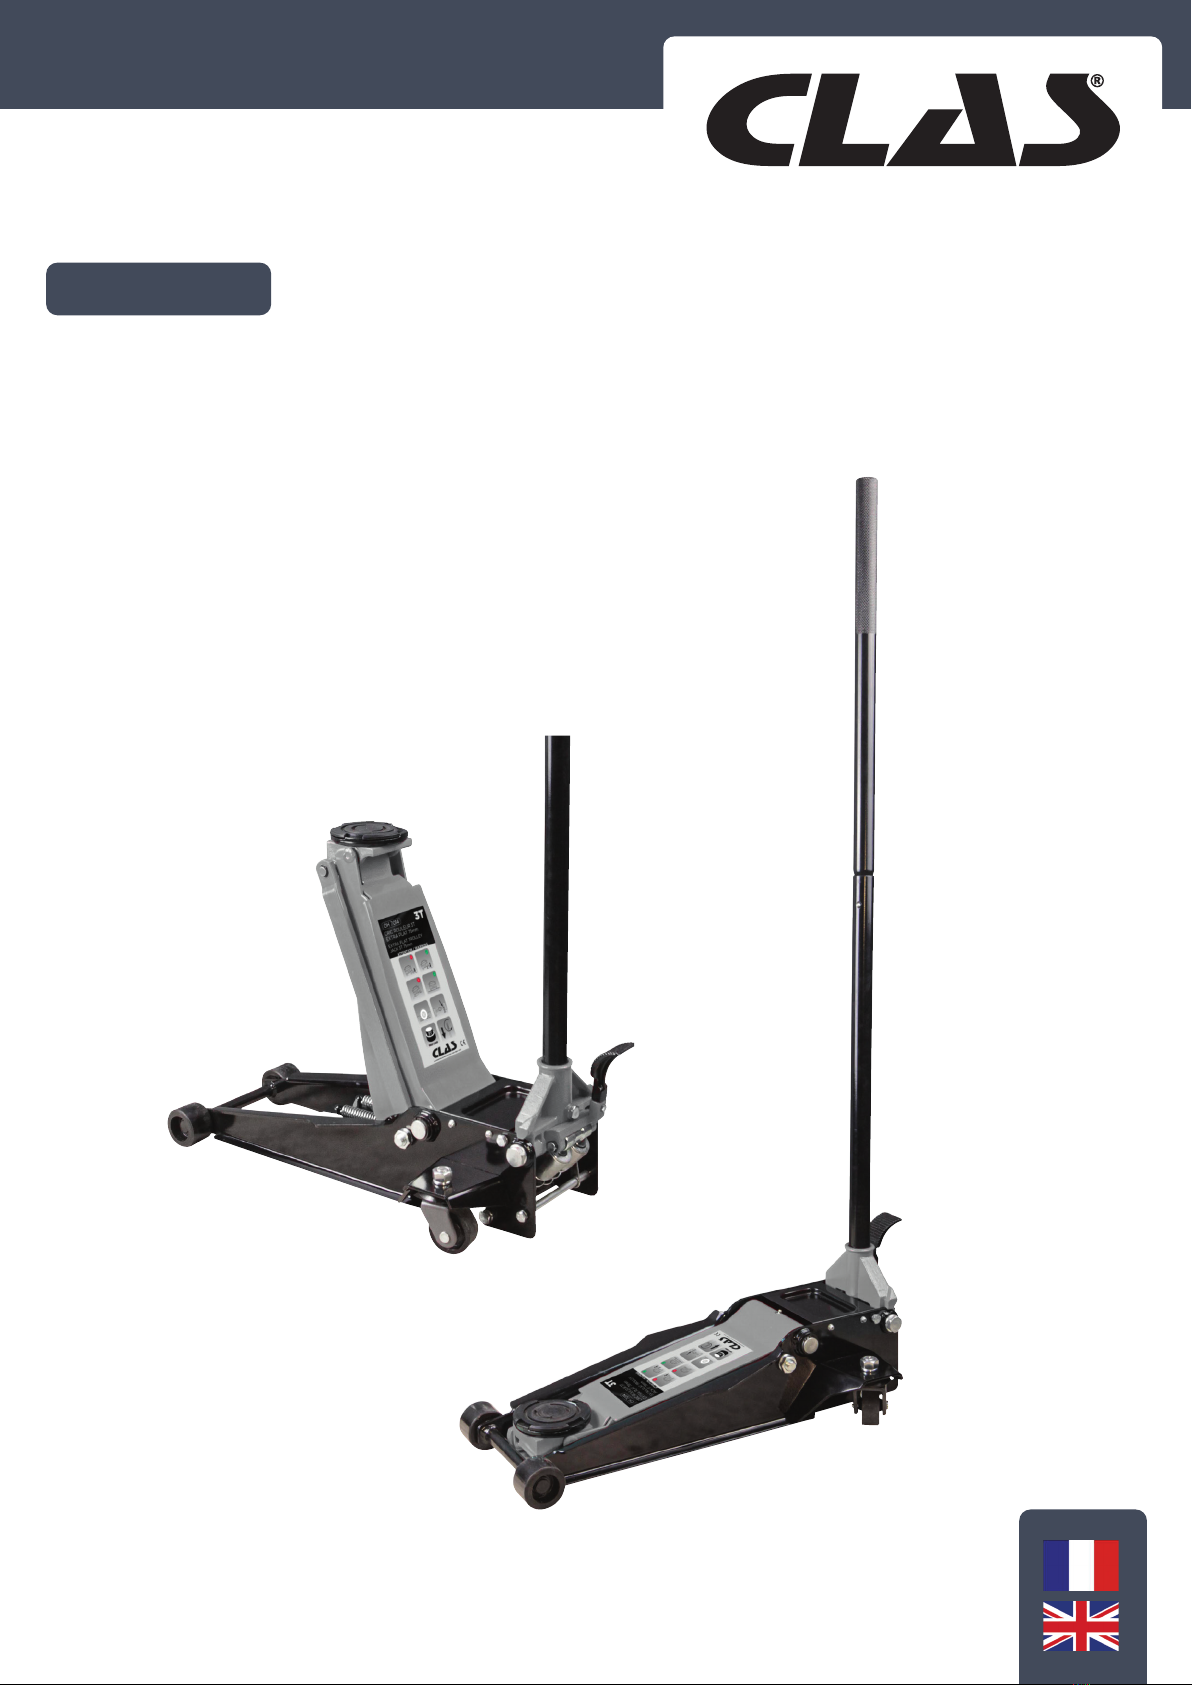
OH 7014 CRIC ROULEUR 3T EXTRA PLAT 75mm
MAINTENANCE
Il s’agit du symbole d’alerte de sécurité utilisé dans la section MAINTENANCE PRÉVENTIVE
de ce manuel pour vous avertir des risques potentiels de blessures corporelles. Respectez toutes
les instructions pour éviter toute blessure ou tout décès.
1. Rangez toujours le cric dans un endroit bien protégé où il ne sera pas exposé aux intempéries,
aux vapeurs corrosives, à la poussière abrasive ou à tout autre élément nuisible. Le cric doit
être nettoyé de l’eau, de la neige, du sable, des gravillons, de l’huile, de la graisse ou de toute
autre matière étrangère avant d’être utilisé.
2. Le cric doit être lubrifié périodiquement afin d’éviter l’usure prématurée des pièces. Une
graisse à usage général doit être appliquée sur tous les raccords de graissage zerk, les roues
pivotantes, l’essieu avant, le bras de levage, les boulons de pivot de la base de la poignée, le
mécanisme de libération et toutes les autres surfaces de roulement. Les pièces usées en raison
d’une lubrification inadéquate ou inexistante ne sont pas admissibles à la garantie.
3. Il ne devrait pas être nécessaire de remplir ou de faire l’appoint de liquide hydraulique dans le
réservoir, sauf en cas de fuite externe. Une fuite externe nécessite une réparation immédiate
qui doit être eectuée dans un environnement exempt de saleté par un centre de service
agréé.
IMPORTANT : Afin d’éviter d’endommager les joints et de provoquer une défaillance du cric,
n’utilisez jamais d’alcool, de liquide de frein hydraulique ou d’huile de transmission dans le cric.
Utilisez l’huile hydraulique Chevron AW ISO 32 ou son équivalent Unocal Unax AW 150.
4. Chaque propriétaire de cric est responsable de la propreté et de la lisibilité des étiquettes du
cric. Utilisez une solution de savon doux pour laver les surfaces externes du cric, mais pas les
composants hydrauliques mobiles.
5. Inspectez le cric avant chaque utilisation. N’utilisez pas le cric si un composant est fissuré,
cassé, plié, présente des signes d’endommagement ou laisse échapper du liquide hydraulique.
N’utilisez pas le cric si des pièces ou des composants sont desserrés ou manquants, ou s’ils ont
été modifiés de quelque façon que ce soit. Prenez les mesures correctives nécessaires avant
d’utiliser à nouveau le cric.
6. Toute réparation hydraulique pendant la période de garantie doit être eectuée par un centre
de service agréé.
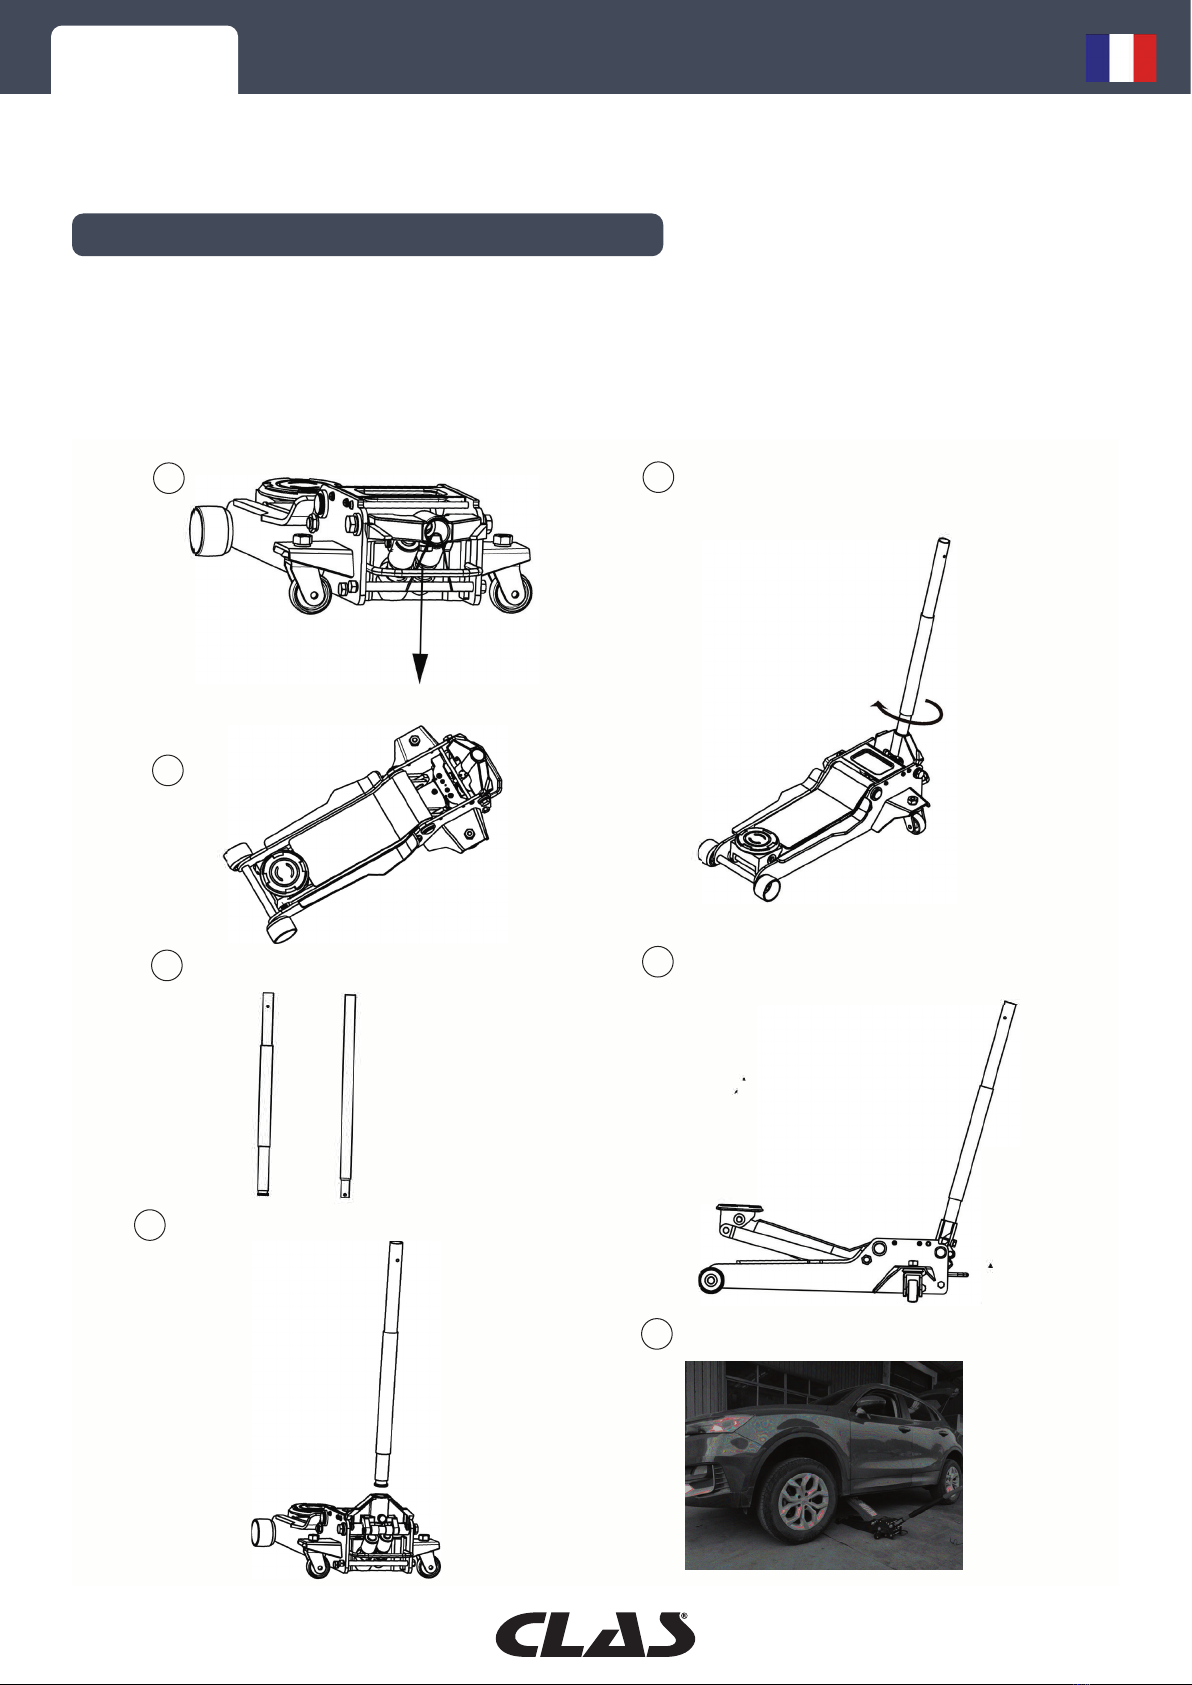
Raising the Jack
Lowering the Jack
1. Block the vehicle’s wheels for lifting stability.Secure the load to prevent inadvertent shifting and movement.
2. Position the jack near desired lift point.
3. Set the Parking Brake in the vehicle.
4. Refer to the vehicle manufacturer owner’s manual to locate approved lifting points on the vehicle.Position the jack so that the saddle is
centered and will contact the load lifting point rmly.Raise jack by pumping handle until desired height is reached. After lifting, secure and
transfer load to jack stands or other appropriate means. Do not use jack as the only means of support.
5. Assemble the handle; ensure to align with slots.
6. Close the release valve by turning it clockwise until it is rmly closed.
7. Before raising the vehicle double check and verify the saddle is centered and also has full contact with the lifting point.
8. Pump handle to lift until saddle contacts load.Continue to pump the jack handle to lift the vehicle to the desired height. After lifting, support
the load with appropriately rated vehicle support stands before working on the vehicle.
1. Raise load high enough to allow clearance for the jack stands to be removed, then carefully remove jack stands.
2. Remove support stands.
3. Grasp the handle rmly with both hands. Securely hold on to the jack handle so your hands do not slip and ensure the release valve does
not rapidly lower.
4. Carefully open the Release Valve by slowly turning the handle counter-clockwise. (Do not allow bystanders around the jack or under the
load when lowering the jack.
5. After removing jack from under the load, keep jack in the lowered position to reduce exposure to rust and contamination.
NOTE: Always store jack in the fully lowered position, and the handle in the upright position
PREVENTATIVE MAINTENANCE
This is the safety alert symbol used for the PREVENTATIVE MAINTENANCE section of this manual to alert you to potential personal
injury hazards. Obey all instructions to avoid possible injury or death.
1. Always store the jack in a well protected area where they will not be exposed to inclement weather, corrosive vapors, abrasive dust, or
any other harmful elements. The jack must be cleaned of water, snow, sand, grit, oil, grease or other foreign matter before using.
2. The jack must be lubricated periodically in order to prevent premature wearing of parts. A general purpose grease must be applied to all
zerk grease fittings, caster wheels, front axle, lift arm, handle base pivot bolts, release mechanism and all other bearing surfaces. Worn
parts resulting from inadequate or no lubrication are not eligible for warranty consideration.
3. It should not be necessary to refill or top off the reservoir with hydraulic fluid unless there is an external leak. An external leak requires
immediate repair which must be performed in a dirt-free environment by an authorized service center.
IMPORTANT: In order to prevent seal damage and jack failure, never use alcohol, hydraulic brake fluid or transmission oil in the jack.
Use Chevron Hydraulic Oil AW ISO 32 or its equivalent Unocal Unax AW 150.
4. Every jack owner is responsible for keeping the jack labels clean and readable. Use a mild soap solution to wash external surfaces of the
jack but not any moving hydraulic components.
5. Inspect the jack before each use. Do not use the jack if any component is cracked, broken, bent, shows sign of damage or leaks
hydraulic fluid. Do not use the jack if it has loose or missing hardware or components, or is modified in any way. Take corrective action
before using the jack again.
6. Any hydraulic repairs within the warranty period must be performed by an authorized service center.
Linkage Lifting Arm Handle Socket Rolloer Pin
Articluation Bras de levage Poignée Axe des rouleaux