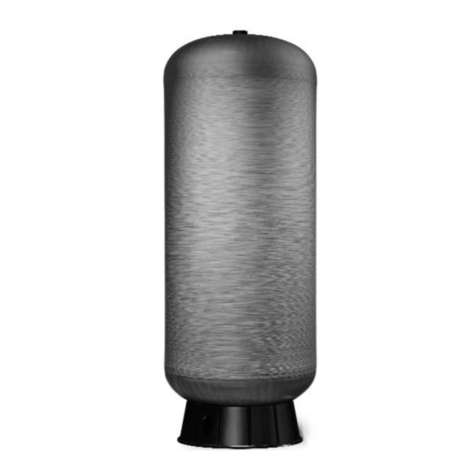
Clayton WartHog 603-105W Guide

WARNING
Respiratory protection is recommended
operating this equipment.
WARNING
Eye protection is required when operating this
equipment.
WARNING
Hearing protection is recommended when
operating this equipment.
WARNING
Read and understand operator’s manual before
using this equipment.
SAFETY LEGEND
WARNING
WH-1xxW August 03, 2021
Safety – Operation – Maintenance
Keep this document in a safe place
Read and understand this manual before operating your air tool
• When vacuum tank is used in DRY or DAMP cleanup applications, a HEPA Filter must be installed in this vacuum at all times.
• If this vacuum is used to collect hazardous material, personal protective equipment should be used when opening the vacuum or
emptying its contents.
• Any alteration to this equipment by a third party will nullify its warranty
WartHog Vacuum Tank
Poly Wet/Dry General Dust
Models: 603-105W, 603-107W, 603-115W
603-105W
WH-1xxW_cover_A
603-107W
WH-1xxW_cover_B
603-115W
WH-1xxW_cover_C
Scan this QR code for
online instructions and
documentation, or visit
www.ClaytonHowTo.com

Repair or Warranty Contact Clayton Associates, Inc. • 1650 Oak Street • Lakewood, New Jersey 08701 • P.+1-732-363-2100 F.+1-732-364-6084
WH-1xxW www.DustlessMadeSimple.com • [email protected]
Page 2
TABLE OF CONTENTS
Applications & Environments...............................................................................................3
What’s In the Box ................................................................................................................3
Consumables/Accessories ..................................................................................................4
Specications & Requirements............................................................................................4
Getting Started ....................................................................................................................5
Before Each Use .................................................................................................................7
Install Float Assembly..........................................................................................................8
Illustrated Parts Breakdown.................................................................................................9
Limited Lifetime Warranty Terms And Conditions ..............................................................12

Repair or Warranty Contact Clayton Associates, Inc. • 1650 Oak Street • Lakewood, New Jersey 08701 • P.+1-732-363-2100 F.+1-732-364-6084
WH-1xxW www.DustlessMadeSimple.com • [email protected]
Page 3
This vacuum tank and lters are intended for the following applications:
• Dry Use;
• Damp Use;
• Wet Use.
Do not use this equipment for cleaning or extracting fuel residues from any vehicle or equipment.
Do not use this equipment for cleaning or extracting live sparks or burning embers.
Do not use this equipment in combustible Dust or Gas atmospheres.
In addition to the WartHog vacuum tank, the following items have been shipped with the tank:
NOTE:Clayton power heads are shipped in a separate box. These instructions assume you have both a vacuum tank and an appropriate
power head. Refer to the instruction manual included with the power head for additional information.
APPLICATIONS & ENVIRONMENTS
WHAT’S IN THE BOX
Wet Float
Assembly
WH-1xxW_014
GL_012
Filter Bags
GL_009
Poly Bag 5‑Pack
Hydrophobic HEPA Filter
WH-1xxW_015
HEPA Timer Card
GL_004
HEPA Pre‑Filter
GL_011

Repair or Warranty Contact Clayton Associates, Inc. • 1650 Oak Street • Lakewood, New Jersey 08701 • P.+1-732-363-2100 F.+1-732-364-6084
WH-1xxW www.DustlessMadeSimple.com • [email protected]
Page 4
Recommended consumables:
PHYSICAL:
603-105W
Weight ..............................................................................................................................................................................TBD lbs (9.8 kg)
Dimensions (L x W x H).......................................................................................................TBD x TBD x TBD in (TBD x TBD x TBD cm)
Capacity [tanks only] .......................................................................................................................................................... 5 gal (19 liters)
603-107W
Weight ..............................................................................................................................................................................TBD lbs (9.8 kg)
Dimensions (L x W x H).......................................................................................................TBD x TBD x TBD in (TBD x TBD x TBD cm)
Capacity [tanks only] .......................................................................................................................................................... 7 gal (26 liters)
603-115W
Weight ..............................................................................................................................................................................TBD lbs (9.8 kg)
Dimensions (L x W x H).......................................................................................................TBD x TBD x TBD in (TBD x TBD x TBD cm)
Capacity [tanks only] ........................................................................................................................................................ 15 gal (57 liters)
CONSUMABLES/ACCESSORIES
Item Model No.
603-105W 603-107W 603-115W
Filter Bags 627-0913B 627-1414B 627-16B
Hydrophobic HEPA Filter 627-12C 627-12C 627-12C
HEPA Pre-Filter 627-12P 627-12P 627-12P
Poly Bags 600-114DM-05 600-114DM-05 600-114DM-05
Wet Float Assembly 627-12F 627-12F 627-12F
SPECIFICATIONS & REQUIREMENTS

Repair or Warranty Contact Clayton Associates, Inc. • 1650 Oak Street • Lakewood, New Jersey 08701 • P.+1-732-363-2100 F.+1-732-364-6084
WH-1xxW www.DustlessMadeSimple.com • [email protected]
Page 5
1. Unbox the vacuum tank.
2. Visually inspect vacuum tank to ensure that no parts are missing or damaged.
3. Remove items shipped in the vacuum tank.
4. Attach the Handle [603-115W].
• Remove the 4 screws from the handle slots on both sides of the vacuum tank using a 1/2 in socket or open end wrench.
• Slide the handle into the handle slots on the side of the vacuum tank.
• Insert the screws through the holes in the handle and into vacuum tank; nger tighten until all 4 screws are started.
• Tighten using a 1/2 in socket or open end wrench.
GETTING STARTED
WH-1xxW_001
Handle
Screws (x2)
Screws (x2)

Repair or Warranty Contact Clayton Associates, Inc. • 1650 Oak Street • Lakewood, New Jersey 08701 • P.+1-732-363-2100 F.+1-732-364-6084
WH-1xxW www.DustlessMadeSimple.com • [email protected]
Page 6
5. Familiarize yourself with the vacuum tank.
GETTING STARTED
Latch
Inlet Port
Gasket
Liquid
Drain Port
603-107W
WH-1xxW_004 WH-1xxW_005
WH-1xxW_002
Latch
Inlet Port
603-105W
Gasket
Latch
Inlet Port Gasket
603-115W
WH-1xxW_006

Repair or Warranty Contact Clayton Associates, Inc. • 1650 Oak Street • Lakewood, New Jersey 08701 • P.+1-732-363-2100 F.+1-732-364-6084
WH-1xxW www.DustlessMadeSimple.com • [email protected]
Page 7
6. Install appropriate application‑specic items:
• Dry Applications:
–Hydrophobic HEPA lter;
–Pre‑lter;
–Bag lter;
• Damp Applications:
–Hydrophobic HEPA lter;
–Pre‑lter;
–Bag lter;
• Wet Applications:
–Float Assembly with reticulated foam lter;
–Bag lter [optional].
7. Refer to the appropriate power head instructions for additional information.
1. Verify the appropriate application‑specic lter is in place.
If necessary, remove the current lter(s) and install the appropriate items based on the intended application:
• For dry applications install:
–Hydrophobic HEPA;
–Pre‑lter;
–Bag lter;
• For damp applications install:
–Hydrophobic HEPA;
–Pre‑lter;
–Bag lter;
• For wet applications:
–Remove the hydrophobic HEPA lter and pre‑lter;
–Install the Float Assembly with reticulated foam lter;
–Install a bag lter [optional].
2. Refer to the appropriate power head instructions for additional operation information.
GETTING STARTED
BEFORE EACH USE

Repair or Warranty Contact Clayton Associates, Inc. • 1650 Oak Street • Lakewood, New Jersey 08701 • P.+1-732-363-2100 F.+1-732-364-6084
WH-1xxW www.DustlessMadeSimple.com • [email protected]
Page 8
1. Safe the vacuum.
• Disconnect the vacuum from the power source.
• Remove all tools and hoses from the vacuum.
2. Remove the power head.
• Unlatch the power head from the vacuum tank.
• Lift the power head and the attached HEPA lter o the tank using the top handle.
• Carefully place the power head on the oor – avoid damaging the HEPA lter.
3. Unbox the Reticulated Foam lter.
• Remove the Reticulated Foam lter from the box and remove it from the plastic bag.
4. Remove the HEPA lter.
• Holding the power head on its side cut the HEPA cable lock and remove it.
• Unscrew the HEPA lter from the lter adapter.
• Dispose of the HEPA lter according to company policy.
5. Install a new Reticulated Foam lter.
• Holding the power head on its side, screw the new Reticulated Foam lter onto the threaded lter adapter.
• Verify the white inner ring of the lter is in contact with the underside of the power head.
–If it is not, turn it clockwise until it comes in contact with the underside of the power head.
• Refer to the instructions included with the HEPA cable lock to install the cable lock.
6. Replace the power head.
• Carefully position the power head on the vacuum tank.
• Rotate the power head so that the power switch on the power head is in line with the inlet port on the vacuum tank.
• Latch the power head to the vacuum tank.
7. Activate the HEPA lter timer.
• Remove the old HEPA timer card from the power head.
• Attach the new HEPA timer card with a zip tie (included) to the top handle of the vacuum.
• Follow the directions on the timer card to activate.
INSTALL FLOAT ASSEMBLY
Repair or Warranty Contact Clayton Associates, Inc. • 1650 Oak Street • Lakewood, New Jersey 08701 • P.+1-732-363-2100 F.+1-732-364-6084
WH-1xxW www.DustlessMadeSimple.com • [email protected]
Page 9
603-105W
ILLUSTRATED PARTS BREAKDOWN
Seq Item No Description
1
602-104 Vacuum Tank poly yellow 5gal
2
701-025-001S Caster, 2.5 in, swivel 11 x 35mm stem
3
911-039 Molded gasket for 5 gallon poly tank
4
923-A006 Inlet valve, cast assembly
5
951-003 Latch, draw style, Warthog vacuums
6
RE0623-SDSSS-Z Rivet blind 3/16 x 0.719 sealed SS (.376-.5)
7
RE0630-SDSSS-Z Rivet blind 3/16 x 0.938 sealed SS (.501-.625)
8
WE133203-RFS-Z Washer .203ID X .500OD .047H round SS
WH-1xxW_008
1
2
3
4
5
6
7
8
8

ILLUSTRATED PARTS BREAKDOWN
Repair or Warranty Contact Clayton Associates, Inc. • 1650 Oak Street • Lakewood, New Jersey 08701 • P.+1-732-363-2100 F.+1-732-364-6084
WH-1xxW www.DustlessMadeSimple.com • [email protected]
Page 10
ILLUSTRATED PARTS BREAKDOWN
603-107W
Seq Item No Description
1 602-114 7 Gal Poly Tank, Cleanup, Yellow
2 701-025-001S Caster, 2.5 in, Swivel 11 X 35mm Stem
3 800-013 Spigot
4 911-047 Gasket, Molded Silicone, 7 Gallon Tank
5 923-A006 Inlet Valve, Cast Assembly
6 951-009 Draw Latch SS Wire Bale Locking
7 RE0616-SDSSS-Z Rivet Blind 3/16 x 0.500 Sealed SS (.126-.250)
8 RE0623-SDSSS-Z Rivet Blind 3/16 X 0.719 Sealed SS (.376-.5)
9 WE133203-RFS-Z Washer .203ID X .500OD .047H Round Stainless Steel
WH-1xxW_009
1
4
2
5
8
9
WH-1xxW_010
7
3
6

Repair or Warranty Contact Clayton Associates, Inc. • 1650 Oak Street • Lakewood, New Jersey 08701 • P.+1-732-363-2100 F.+1-732-364-6084
WH-1xxW www.DustlessMadeSimple.com • [email protected]
Page 11
ILLUSTRATED PARTS BREAKDOWN
603-115W
Seq Item No Description
1 601-122 Axle Retaining Plate For WH-115
2 601-123 Axle, Poly Warthog 15 Gal
3 602-107 Vacuum Tank Poly Yellow 15Gal
4 610-141-4 Handle, 15 Gallon Warthog Vacuum
5 701-025-001S Caster, 2.5 in, Swivel 11 X 35mm Stem
6 701-08-001 Wheel, 8 in, 1/2 Axle, Offset
7 911-044 Gasket, 15 Gal Poly Lip
8 923-A006 Inlet Valve, Cast Assembly
9 929-RR.75 Retaining Ring, Split, .75 Shaft
10 929-WW.500 Washer, Triple Wave, .516ID .860OD
11 951-003 Latch, Draw Style, Warthog Vacuums
12 RE0623-SDSSS-Z Rivet Blind 3/16 X 0.719 Sealed SS (.376-.5)
13 RE0630-SDSSS-Z Rivet Blind 3/16 X 0.938 Sealed SS (.501-.625)
14 SE162008-HHSM-Z Screw 1/4-20 X 1/2In SS Hex
15 SE201824-HHSM-Z Screw 5/16-18 X 1.5In SS Hex
16 WE133203-RFS-Z Washer .203ID X .500OD .047H Round SS
WH-1xxW_011
5
13
3
7
15
8
16
WH-1xxW_012
1
9
26
10
14
11
12
16
4

Repair or Warranty Contact Clayton Associates, Inc. • 1650 Oak Street • Lakewood, New Jersey 08701 • P.+1-732-363-2100 F.+1-732-364-6084
WH-1xxW www.DustlessMadeSimple.com • [email protected]
Page 12
Warranty Terms
Clayton Associates, Inc. guarantees its manufactured products against defects in materials or workmanship and will either repair or replace
all parts that prove defective under normal use during the lifetime of the products. The warranty period shall commence from the date of paid
invoice.
This warranty does not cover (a) repairs due to normal wear, accident, neglect, misuse, or use other than as indicated in the instruction booklet
(b) products manufactured by third parties and distributed by Clayton (c) wear items such as bearings, rotor blades, regulators, valve stems,
levers, shrouds, guards, O‑rings, seals, gaskets, motor brushes, and other wearable parts.
Repair within the Continental US
During the rst 90 days of the warranty period, Clayton will provide parts and labor to the customer’s site at no charge or pay freight costs
associated with returning the products for repair to a Clayton selected service location and repair the product at no charge. Clayton personnel
will determine the best way to repair the product.
Past 90 days, Clayton will provide parts to the customer’s site at no charge or the customer may ship the product to a Clayton selected service
location at customer’s expense and Clayton will repair the product at no charge and provide return shipping.
Repair Outside the Continental US
Clayton will provide parts to the customer’s site at no charge or the customer may ship the product to a Clayton selected service location at
customer’s expense and Clayton will repair the product at no charge and provide return shipping.
Limitation of Liability
Clayton shall not in any event be liable for any damages, loss of production time or prots, whether based on contract, warranty, negligence,
strict liability or otherwise, including without limitation any consequential, incidental or special damages, arising with respect to the equipment
or its failure to operate.
Clayton Associates, Inc. makes no other warranty or representation of any kind, except that of title, and all other warranties, express or implied,
including warranties of merchantability or tness for any particular purpose, are hereby expressly disclaimed.
LIMITED LIFETIME WARRANTY TERMS AND CONDITIONS

THIS PAGE IS INTENTIONALLY BLANK

Repair or Warranty Contact Clayton Associates, Inc. • 1650 Oak Street • Lakewood, New Jersey 08701 • P.+1-732-363-2100 F.+1-732-364-6084
www.DustlessMadeSimple.com • [email protected]
Clayton products are proudly made in the USA
This manual suits for next models
2
Table of contents