Clearwell Mobility Admiral Mk3 User manual

MOBILITY SCOOTER
USER MANUAL
Admiral Mk3

www.clearwellmobility.co.uk
2
Contents
Intended Use of the Vehicle
Dashboard Controls
Safety Information in Freewheel Drive
Adjustments
Battery Charging
Simple Maintenance
Hazards
Troubleshooting
Warranty
Technical Specication
Intended Use Of The Vehicle
This vehicle is designed to help a single person (up to the maximum recommended
weight) who requires a scooter for their mobility. The scooter is outside use up to a
maximum speed of 8mph. It is not intended to be used for towing or in use in muddy
or soft areas of ground. Users could endanger themselves and others if they are not
capable of driving the scooter safely. It is up to the users to ensure that they have the
manual dexterity to drive the vehicle, adequate sight and hearing to perceive danger in
time, and can at all times operate the scooter safely. If in doubt we suggest you consult
a healthcare professional for advice.
Modications
Any modications to the specications will invalidate the warranty and may render the
vehicle dangerous.
Clearwell Mobility
Technical Support Helpline
Contents and Introduction
Page
2
3
4
5-7
8
9
10-11
12-13
14
15
MODEL:
SERIAL NUMBER:
DATE OF PURCHASE:
01444 253 300

@clearwellmobility @clearwellmob 3
Dashboard Controls
Before driving your vehicle it is important to familiarise yourself with the controls.
Do not attempt to drive the vehicle until you have understood these instructions
To Turn On: Insert the key vertically and turn 90 degree clockwise.
To Turn Off: Turn key back to vertical position and remove.
To Operate: Your speed and forward and reverse motion is controlled via the wig-wag.
Gently pull with the right hand or push with the left thumb to move the scooter in a
forward motion. The amount of movement applied to the wig-wag also proportionally
controls the speed of the scooter. The left hand or right thumb moves the scooter in a
reverse motion and also controls the speed of the scooter in reverse. The lever will
return by itself when released, and you will stop gently. Braking is engaged
automatically when the wig-wag is released.
Description of Dashboard Controls
Battery Level Gauge: This indicates the amount of charge you have in the batteries.
Green indicates fully charged batteries with reducing charge to the red indicator. Red
indicates warning and less than half-charged batteries.
Note: When the vehicle is climbing a steep incline or starting off , the level may drop
momentarily, this is normal. The vehicle must be stationary in order to get an accurate
reading.
The 50% speed prole button changes the speed of the scooter to a preset 50% of
maximum speed and reduces the acceleration and deceleration, this is ideal when
travelling indoors or within conned spaces. It is recommended that this button is used
when driving on pavements in order not to exceed the limit of 4mph.
Indicators: Pressing the button will illuminate the front and rear LED indicators.
Horn: The horn will sound when the button is depressed.
Hazard Lights: With the scooter on, the front and rear LED indicators will ash
simultaneously when this button is pressed. Press the button again to switch the
hazard lights off.
Lights: To switch on the lights, press the button and release. To switch off, press again.
50% Speed
Prole
Battery Level
Gauge
Speed Control
Lights
Hazard Lights
Horn
Indicators
Key
Switch
Charger
Socket
Tiller
Adjuster Control Lever
(Wig-Wag)

www.clearwellmobility.co.uk
4
Freewheeling the Scooter
There may be occasions where you may wish to move the vehicle without power. To do
this there is a freewheel lever.
Push the red button down and push the lever forward into the free-wheel position.
• Do not sit on the machine at any time when the braking is disengaged.
• Never attempt to activate free-wheel mode when the scooter is stopped or parked on
a signicant slope.
Free-Wheel Lever
Secondary Parking Brake
Your scooter is tted with a secondary parking brake. If the free-wheel position is
engaged the secondary parking brake can be operated by pulling the handbrake lever on
the left hand side of the tiller.
Before attempting to push the scooter in free-wheel mode, release the secondary
parking brake by pulling back the small thumb lever.
Emergency Braking- Key Switch
In the unlikely event of an unwanted movement of the scooter, turning the key switch
OFF will cause the scooter to come to an immediate stop. Though very effective,
emergency braking is extremely abrupt and must never be used in normal use.

@clearwellmobility @clearwellmob 5
Adjustments
Angle Adjustment
Armrest Angle/Depth Adjustment
When getting seated on the scooter, lift the
armrest up. When riding, always have the
armrest in the down position.
The scooter armrests are angle adjustable for
user comfort. The adjustment bolt is found
under the armrest body. The bolt is rotated
either way to increase or decrease the angle of
the armrest. The armrest depth is adjusted via
the 2 bolts underneath the armrest pad.
Seat Position
CAUTION: Make sure the seat is locked
in the forward position before driving
the vehicle.
The scooter can be adjusted in a forward
or backwards position. The adjustment
lever is found on the right hand side
under the front of the seat. Pull the lever
upwards and use legs and body to move
to the required position and release
lever.
Seat Backrest Recline
Adjust the backrest angle by pulling up
on the handle at the side of the seat, and
gently pushing backwards. Take care
when adjusting the seat backrest recline
angle, as it could be possible to fall
backwards and harm the user or the
scooter.
When adjusting the angle be careful not
to get your ngers caught.

www.clearwellmobility.co.uk
6
Seat Rotate Lever
This is found under the right side of the seat.
Push it forwards to allow the seat to rotate
360º and release to lock in any 45º position
desired.
Adjustments
Seat Removal
1. Push the seat rotate lever forwards and
turn seat 45º.
2. Stand behind the seat, ip up the arm rests
and fold the backrest forward by lifting up
the backrest adjustment lever.
3. Place hands on either side of the seat base,
push the seat rotate lever forwards and lift
the seat vertically, keeping back posture
upright with bent knees.
WARNING: The seat is heavy (35kg) please
seek assistance.
Seat Height Adjustment
Remove the battery cover to access the
seat height adjustment bolts and remove
the seat stem xing bolt.
The seat can then be adjusted to a range
of 100mm. When the desired height is
reached, replace the bolt through the
seat stem hole and tighten to a torque of
25 Nm.

@clearwellmobility @clearwellmob 7
Tiller Adjustment
CAUTION: Do not adjust the tiller while the
scooter is being driven as serious injury could
happen if you lose control.
The angle of the tiller can be adjusted for
getting on and off the scooter and for
achieving a comfortable driving position.
1. Pull and hold the lever upwards.
2. Hold the handlebar and push or pull the
tiller to the required position.
3. Let the lever go.
The tiller contains a gas strut to aid in the
adjustment of the tiller position.
Adjustments
Crutch/Walking Stick Holder
Ensure that the crutch holder is securely
fastened to the seat back rest and it is not
interfering with the mechanisms of the
scooter.
Ensure that the crutch does not protrude
from the sides of the scooter.
Do not attempt to remove the crutch whilst
the scooter is in motion.
Head Rest
The headrest is supplied as standard tted
to the seat. To adjust the height, squeeze
the clip on the left hand stem guide and
move the head rest until it clicks into the
nearest notch to the desired position.
To remove the head rest do the same, but
lift the head rest completely out.

www.clearwellmobility.co.uk
8
Charging Socket
The charging socket should only be used for
connecting the scooter battery charger plug to
the scooter. The charging socket should not be
used to supply power for any other device.
Connection of unapproved electrical devices may
damage the control system or compromise the
EMC performance of the scooter.
Always put the socket cover back over the
charging socket when the battery charger has
been removed.
Connecting the Charger and Charging
Ensure the scooter is switched off and connect the charger to the scooter. Then,
connect the charger to the mains supply by means of the mains plug and switch on.
The red light will illuminate to show that the power is on.
If the red light ashes there is a fault - contact Clearwell Mobility.
Charging
Socket
Battery Charging
The yellow light will illuminate to show the batteries are charging.
The yellow light ashes to show incorrect or no battery connected.
The green light will illuminate when the charge cycle is complete.
Always leave the charger on for a full cycle of 8-10 hours before disconnecting. This
should be done even if the charger indicates full charge.
WARNING: The charger is designed for indoor use. Do not use outdoors or expose to
rain, snow, spray or moisture.
When the scooter is not to be used for a long period of time, rst charge the batteries
fully and then disconnect them from the scooter. Store as close to room temperature as
possible.

@clearwellmobility @clearwellmob 9
Simple Maintenance
Maintenance should only be carried out by a qualied engineer.
You should check the following before each journey:
1. Visually check the tyres for damage and their pressure.
Caution: Not maintaining your tyre pressures will affect stability and range.
2. Check the steering moves freely.
3. The tiller clamp is tight.
4. The seat is located correctly and locked.
5. Check the armrests are tight.
6. Batteries are fully charged.
7. The front basket is secure.
Anti-tip Wheels
These are factory tted and should not be removed. The anti-tip assembly is bolted
to the rear frame of the scooter. Never use the scooter without the anti-tip wheels
tted.
Important- Possible Faults
As you get used to your vehicle you will get a feel for how it behaves. If something feels
unusual, for instance the vehicle does not accelerate or brake smoothly, the brakes are
not holding on a slope or the steering feels different; contact Clearwell immediately
and explain to an engineer what the problem is.
Cleaning the Scooter
Ensure the controller is switched off before cleaning.
The scooter should be wiped over once per week with a slightly damp (not wet) cloth.
Make sure to dry thoroughly after cleaning.
IMPORTANT: Do not use a hose or pressure or steam washer to clean your scooter.
Cleaning the Control System
Clean the control system and the keypad with a cloth dampened with diluted detergent.
Be careful not to use excessive water or force when cleaning the control keypad.
Simple Maintenance

www.clearwellmobility.co.uk
10
Hazards
Getting on and off the Vehicle
• When getting on, make sure that the vehicle is on level ground and not in freewheel
mode.
• Ensure that the armrests are secure.
• When getting off, park on level ground, turn off the ignition and remove the key
before leaving your seat.
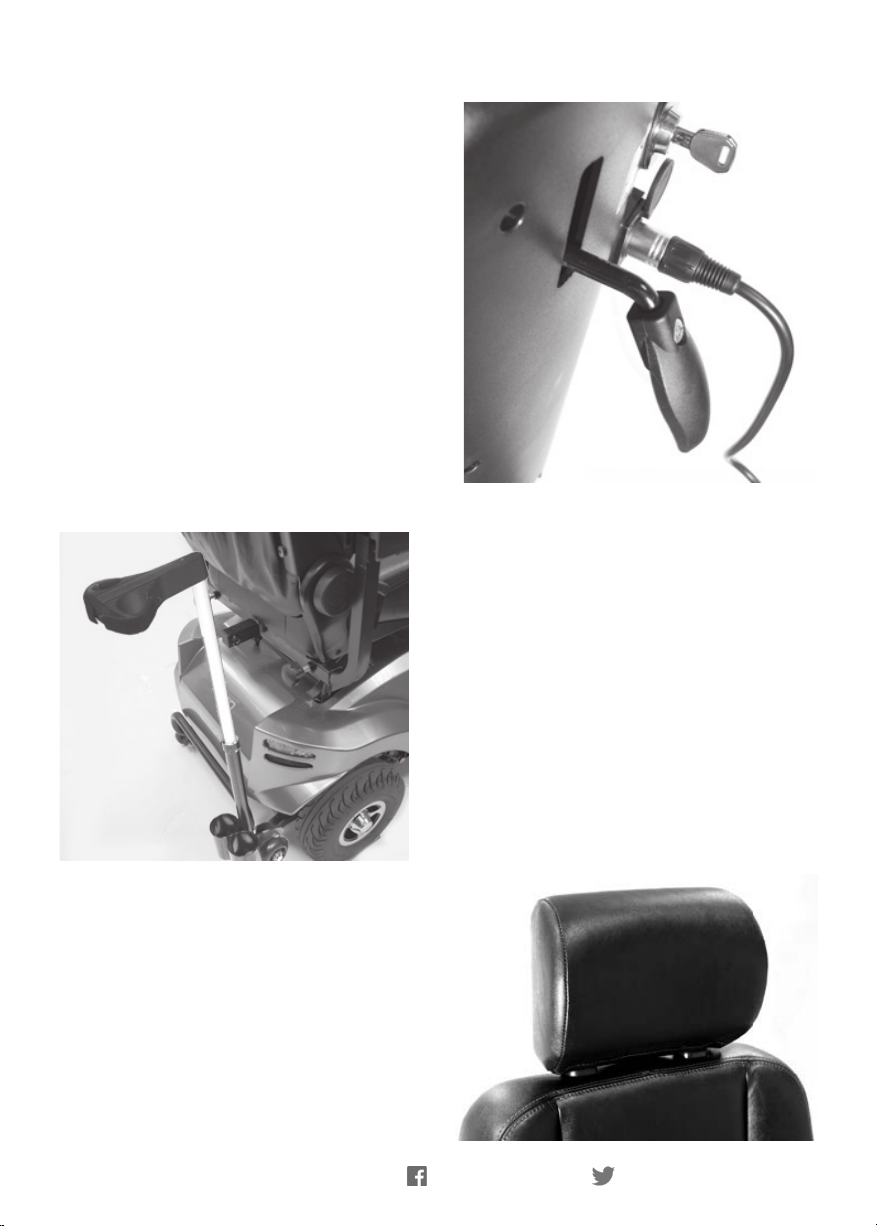
Tiller Position
•Never drive with the tiller in the unlocked position, as injury could result from
unintended tiller movement whilst driving.
Kerbs and Obstacles
• Do not ride up kerbs or obstructions higher than that in the Technical Specication
Sheets.
• Always tackle kerbs and obstacles head on.
• The anti-tip rollers at the rear of the scooter may contact the kerb as you descend,
this may cause a noise, which is normal.
• Take great care to avoid tipping.
• Never make sharp turns on slopes.
Try to avoid crossing slopes - always try to drive straight up and down the slope -
never reverse down a slope.
Going Up a Hill
• Lean forward when going up hill.
• Make sure you have enough speed to climb the slope.
• Do not stop or turn the vehicle around.
• If you have to turn whilst going up an incline keep going until you reach a level area.
• If you have to start on an incline, lean forward and apply power slowly.
• Consider adjusting your seat forward if you’re not comfortable with the gradient.
Going down a hill
• When going down a hill lean back in the seat, and turn the speed control dial to low.
• If you are not comfortable with the hill gradient, consider adjusting your seat position
further back.
Ramps
• When using a ramp for access, please ensure that it is capable of taking the combined
weight of the scooter and yourself.
• When a ramp is being used, please ensure that the ramp is stable and properly
secured.
Lap Belt
• Pull the buckle over your lap and push rmly into the receiver. Ensure that there is no
excess belt material and the belt is tensioned correctly.
• To release the belt, push the red button marked ‘PRESS’.

@clearwellmobility @clearwellmob 11
Stowed Transport
• Remove the batteries.
• Ensure seat is removed or folded and the tiller is in its lowest position.
Transportation in Vehicles
• This scooter is not suitable to use as a seat in a vehicle, it has not been crash tested.
• For transportation by road, rail, sea or air, please contact the appropriate carrier.
Turning
• Slow down and look in the direction you are travelling.
• Sound the horn on blind corners.
Bad Weather
• This product should not be used in snowy or icy conditions.
• Ice, snow and slippery surfaces such as manhole covers, wet grass and drains can
affect braking and steering.
Pneumatic tyres
• Your vehicle is tted with pneumatic tyres to give you a smoother ride over uneven
ground.
• Repair of tyres or wheels should be carried out by Clearwell Mobility.
• If you are worried about punctures contact Clearwell for advice on puncture proong
your tyres.
Front Basket
• The basket mounted on the front has a weight limit of 10lbs (5kgs). Do not exceed this
as it could affect the steering.
Handlebars
• Do not carry or attach anything to the handlebars. Anything attached to the
vehicle handlebars will affect the control of the vehicle.
Floor Area
• Do not use the oor area to carry additional items.
Other Items
• Only t approved products or accessories.
Child Safety
• This product is designed to be operated by adults.
• Children should not be allowed to tamper with the controls or play on the
vehicle.
• Do not carry children as passengers, this product is designed for single person use
only.
Hazards

www.clearwellmobility.co.uk
12
Troubleshooting
Troubleshooting Guide
This table is a guide to fault nding. The battery gauge indicates the status of the
control system as well as the charge remaining in your battery.
If the battery gauge ashes one or more LED’s it indicates that there is a system fault.
No. of LED’s
ashing
Possible Cause Solution
2 Low battery voltage The battery needs charging or there is a
bad connection, check the connections to
the battery. If the connections are good,
try charging the battery.
3 High battery voltage An excessive voltage has been applied to
the system. This is usually caused by a bad
battery connection. Check the battery
connections and check that you are using
the charger supplied with your scooter.
5 Solenoid brake trip The motor brake has a bad connection,
check the motor brake and motor
connections. Make sure all the system
connections are secure.
6/7 Throttle trip A throttle trip is indicated. Make sure
that the throttle is in the neutral position
before switching on the scooter.
8 Motor disconnected The motor has a bad connection. Check all
connections and leads between the motor
and power module. Check the position of
the free-wheel lever.
9 Possible controller trip Check all plugs and sockets.
10 + Beep Free-wheel activated The free-wheel lever is activated and the
motor brake disengagement mechanism is
operated. Check the position of the free-
wheel lever and select DRIVE. Switch off
and back on again to clear the fault.

@clearwellmobility @clearwellmob 13
Troubleshooting
Symptom Solution
Slow or sluggish movement If the scooter does not travel at full speed or does not
respond quickly enough and the battery condition is
good, check the maximum speed setting. If adjusting
the speed setting does not remedy the problem then
there may be a non hazardous fault.
No drive Charger connected? The system is being inhibited
from driving. This may be because the battery charger
is connected. Disconnect the charger. Contact Clear-
well Mobility.
What to do next?
If you are unable to solve the issue using the troubleshooting table, carry out the
following:
• Switch the scooter off.
• Check that none of the plugs and sockets have become loose or disconnected.
• Check the condition of the battery and charge it if necessary.
WARNING:
• If the safety circuits continue to operate, switch off and do not try to use the scooter.
• Contact Clearwell Mobility.

www.clearwellmobility.co.uk
14
Warranty
Repairs- After Sales Service
Your original receipt acts as your
guarantee and conrms your guarantee
period. Please make sure you retain it.
The guarantee does not cover you against
faults caused by accidental damage or
misuse. For further details visit www.
clearwellmobility.co.uk/warranty-
information. If your purchase is not
working correctly, please refer to the
‘troubleshooting’ chapter in this manual.
If a fault occurs which you cannot resolve
through following the advice and
information contained within this
instruction manual, the next step is to
contact Clearwell Mobility on 01444 253
300.
When you contact Clearwell Mobility you
will need to give the following details:
1. Your name, address and post code
2. Your telephone number
3. Clear and concise details of fault
4. The purchase date as found on your
receipt
5. The model and serial number of your
scooter (These can be found on the label
stuck to the outside of your scooter pack).
IMPORTANT: If you call out an engineer
to a fault listed under the heading
‘troubleshooting’ or to repair a fault
caused by incorrect use, a call out charge
will be made even if the scooter is under
guarantee.
Spare Parts
Always insist on genuine spare parts
An authorised Clearwell Mobility
engineer should service this product and
only genuine spare parts should be used.
Under no circumstances should you
attempt to repair the product yourself.
Repairs carried out by inexperienced
persons may cause injury or further
damage to the equipment.
One Year Warranty
Clearwell Mobility warrants its products
against defects in materials and
workmanship for a period of one year,
providing the products are operated and
maintained in accordance with the vehicles
owners manual. This warranty is limited to
the original purchaser.
If a defect appears within the warranty
period and the purchaser has given
Clearwell Mobility immediate notice, the
company will repair or replace the part. Any
description, specications, samples,
models, bulletins or similar materials used
in connection with the sales of Clearwell
Mobility products are for the purpose of
identifying the equipment and are not to be
construed as expressed warranties.
Clearwell Mobility shall not be liable for
any indirect or consequential damages.
Clearwell Mobility’s liability on any claim
of any kind including negligence for any
loss or damage arising out of, connected to,
or resulting from the design, manufacture
or use of the equipment shall in no case
exceed the price paid by the purchaser for
the equipment.
This limited warranty does not cover
normal maintenance service, or periodic
adjustments necessitated by normal wear
and tear.

@clearwellmobility @clearwellmob 15
Technical Specication
ISO 7176-15 MIN. MAX. COMMENTS
Overall length 1345mm 1345mm Standard conguration
Overall width 655mm 655mm Standard conguration
Total mass (with batteries) 117kg 117kg Standard conguration
Mass of the heaviest part - 35kg Seat
Static stability downhill - 8° 150kg user
Static stability uphill - 8° 150kg user
Static stability sideways - 8° 150kg user
Energy consumption (max. range) - 25km to ISO 7176-4
Dynamic stability uphill - 8° - 18° 150kg user
Obstacle climbing - 50mm Standard conguration
Max. speed forward - 8mph Standard conguration
Min. brake distance from max. speed - 4m With standard programming
Max. speed reverse - 50% % of forwards speed
Effective seat depth - 490mm Standard conguration
Effective seat width - 490mm Standard conguration
Seat surface height 447mm 497mm To scooter oor (3 positions)
Back rest angle -70° 60° From vertical
Back rest height - 525mm Standard conguration
Fore/aft seat adjustment - +100mm From rear most position
Top of arm rest to seat - 230mm Arm rest set at 90°
Min. turning radius - 3.03m Standard conguration
Min. turn between walls - 1.98m Standard conguration
Nominal battery voltage 24v 24v Two 12v batteries
Additional Specications MIN. MAX. Comments
Maximum potential range - 26 Miles Industry benchmark
Battery capacity - 55Ah See options
Battery fusible links - 100A In-line fuse on each battery
Battery charger loom fusible link - 15A -
Battery charger 8A 8A Automatic cyclic
Max. kerb height - 50mm -
Ground clearance - 60mm -
Crash tested - NO -
Tyre pressure - 40psi -

Clearwell Mobility
21 Albert Drive
Burgess Hill
West Sussex
RH15 9TN
Call Us: 01444 253 300
www.clearwellmobility.co.uk
Table of contents
Other Clearwell Mobility Scooter manuals

Clearwell Mobility
Clearwell Mobility Aguna Ultralight User manual

Clearwell Mobility
Clearwell Mobility Skipper User manual

Clearwell Mobility
Clearwell Mobility Aguna Comfort User manual

Clearwell Mobility
Clearwell Mobility Mazarine User manual

Clearwell Mobility
Clearwell Mobility Helios HD User manual

Clearwell Mobility
Clearwell Mobility Argent User manual
Popular Scooter manuals by other brands

ZIMX
ZIMX HoverKart HK-4 user manual

Pride Mobility
Pride Mobility PMV5000 owner's manual

TVS
TVS WEGO 110 owner's manual

GLOBAL FITNESS & LEISURE
GLOBAL FITNESS & LEISURE EVOLT User instructions

Allstate
Allstate 788.94370 Operating instructions and parts list

Daymak
Daymak BOOMERBEAST 2.0 STANDARD user manual