manuals.online logo
Brands
  1. Home
  2. •
  3. Brands
  4. •
  5. CLIMAQUA
  6. •
  7. Outdoor Fountain
  8. •
  9. CLIMAQUA MODUM S User manual

CLIMAQUA MODUM S User manual

SESTAVENÍ
MONTAGE
MONTAGGIO
SET UP
Obrázek 1
Illustration 1
Esempio 1
Illustration 1
AQUASOFT
ALGICID
MODUM
1
2
6
4
8
3
Chraňte zástrčku a vypínač před stykem s
vodou Gardez la prise et le régulateur hors
de l’eau Tenere la spina e l’erogatore fuori
dall’acqua Keep plug and switch out of the
water
CLIMAQUA® PUMP 150
Vodní nádržka
Réservoir d’eau
Serbatoio di acqua
Water tank
Hadička
Tuyau exible
Tubo essibile
Hose
Měděná trubka
Tube en cuivre
Tubo in rame
Copper tube
Kulatý kamenný segment
Pierre ronde
Pietra rotonda
Round Stone
Hranatý kamenný segment
Pierre angulaire
Pietra angolare
Retangular Stone
Kruhový segment
Plaque ronde
Elemento circolare
Circular stone
Matka
Écrou hexagonal doré
Anello esagonale dorato
Hexagonal golden ring
CZ
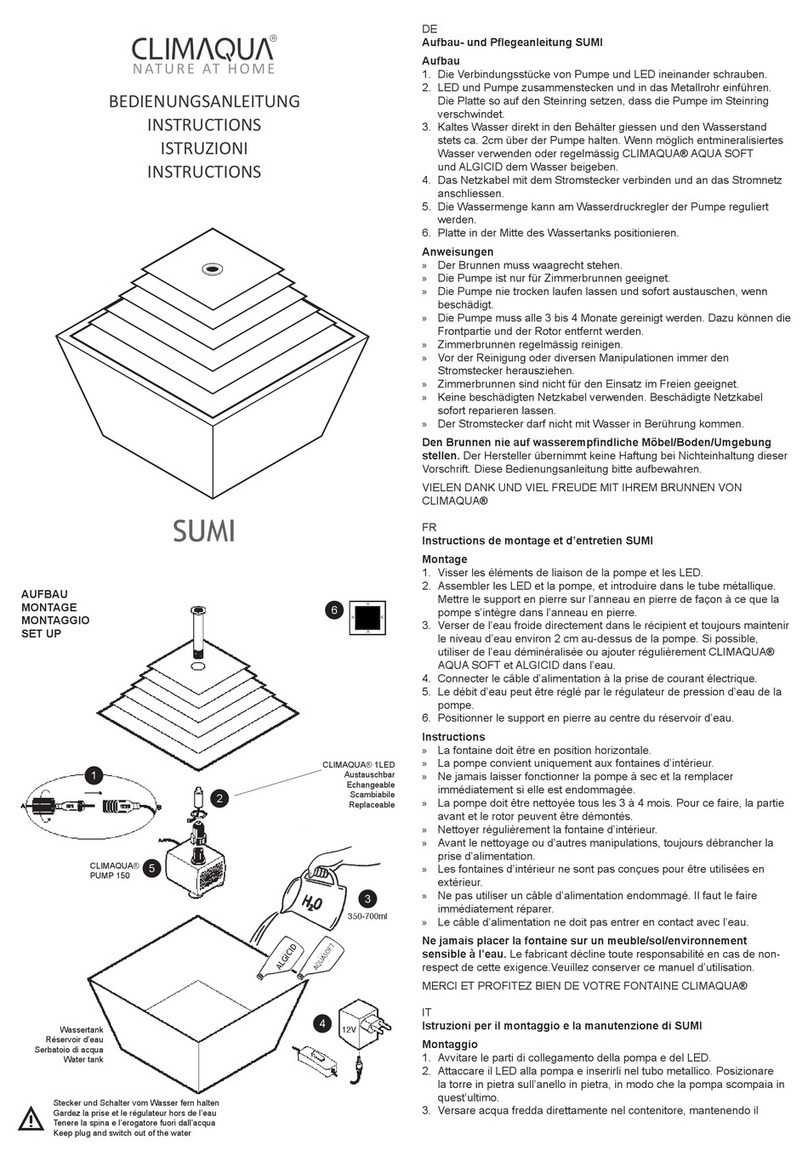
Sestavení a údržba MODUM S
Sestavení
1. Hadičku prostřčte skrz měděnou trubku a měděnou trubku pevně
utáhněte na vrchním kamenném dílu.
2. Otočte měděnou trubku tak, aby horní kamenný díl byl dole. Postupně
nasazujte na trubku kulaté a hranaté kamenné části viz obr. 1.Ukončete
kruhovým prvkem a dotáhněte maticí pomocí klíče (obsažen v balení).
3. Připojte čerpadlo k hadici.
4. Pootočte kamenné rovnoměrně prvky tak, aby vytvořily schody.
5. Nalijte studenou vodu přímo do spodní nádoby a dodržujte aby hladina
byla cca 1 cm nad čerpadlem. Pokud možno používejte destilovanou
vodu.
6. Spojte kabel od čerpadla s trafem a zapojte do el. zásuvky.
7. Průtok vody můžete regulovat přímo na čerpadle(obr. 2).
Anweisungen
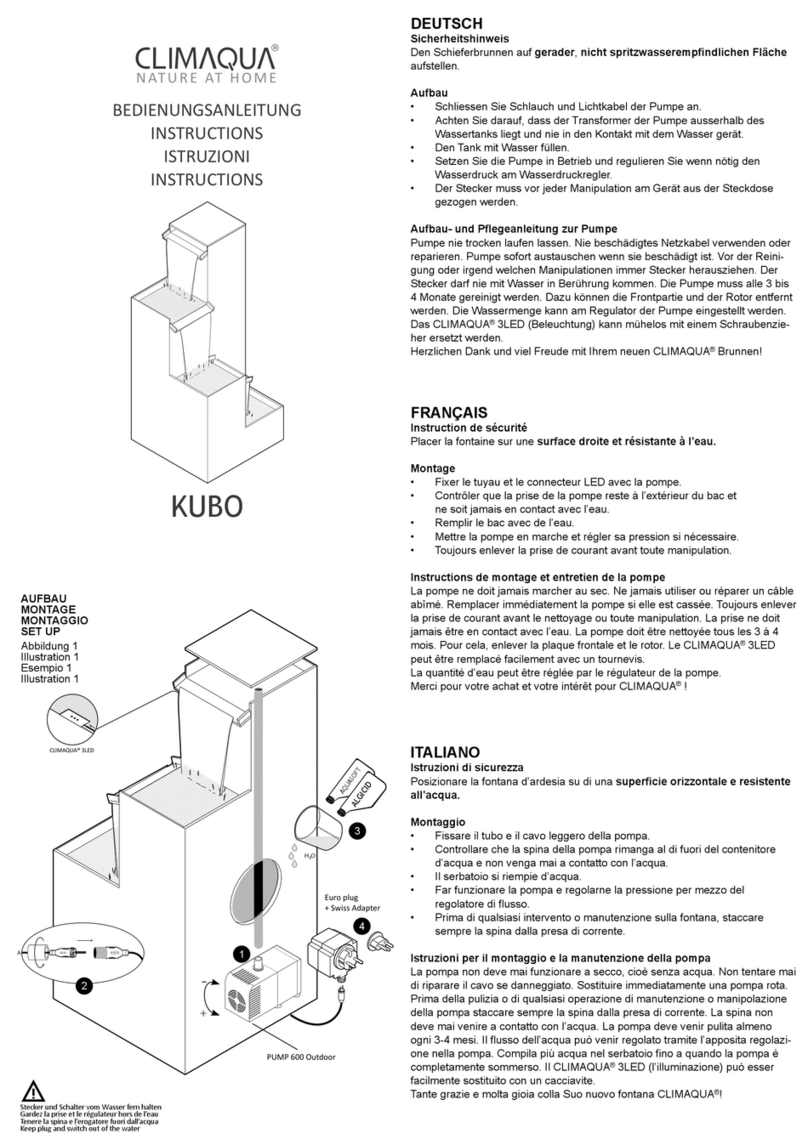
»» – Fontána musí stát vodorovně.
»» – Čerpalo je vhodné na používání jen ve fontánách.
»» – Nikdy nenechávejte běžet čerpadlo na sucho, pokud dojde k jeho
»» poškození okamžitě ho vyměňte.
»» – Čerpadlo je zapotřebí za 3 až 4 měsíce vyčistit. Pro čištění sejměte
»» přední kryt a vyjměte rotor.
»» – Pokojovou fontánu čistěte pravidelně.
»» – Vždy před čištěním nebo manipulací ji vždy odpojte z el. sítě.
»» – Pokojové fontány nejsou určeny k venkovnímu použití.
»» – Nepoužívejte ji nikdy pokud je porušen přívodní el. kabel. Nechte ho
»» okamžitě spravit.
»» – Elektrická zástrčka se nesmí dostat do kontaktu s vodou.
Nikdy nestavte pokojovou fontánu na citlivé povrchy nábytek/podlahu.
Výrobce nepřebírá žádnou zodpovědnost pokud se nedodrží tento návod.
Návod prosím uschovejte.
MOC DĚKUJEME A PŘEJEME VÁM HODNĚ RADOSTI S
FONTÁNKOUOD CLIMAQUA®
FRANÇAIS
Instructions de montage et d’entretien MODUM S
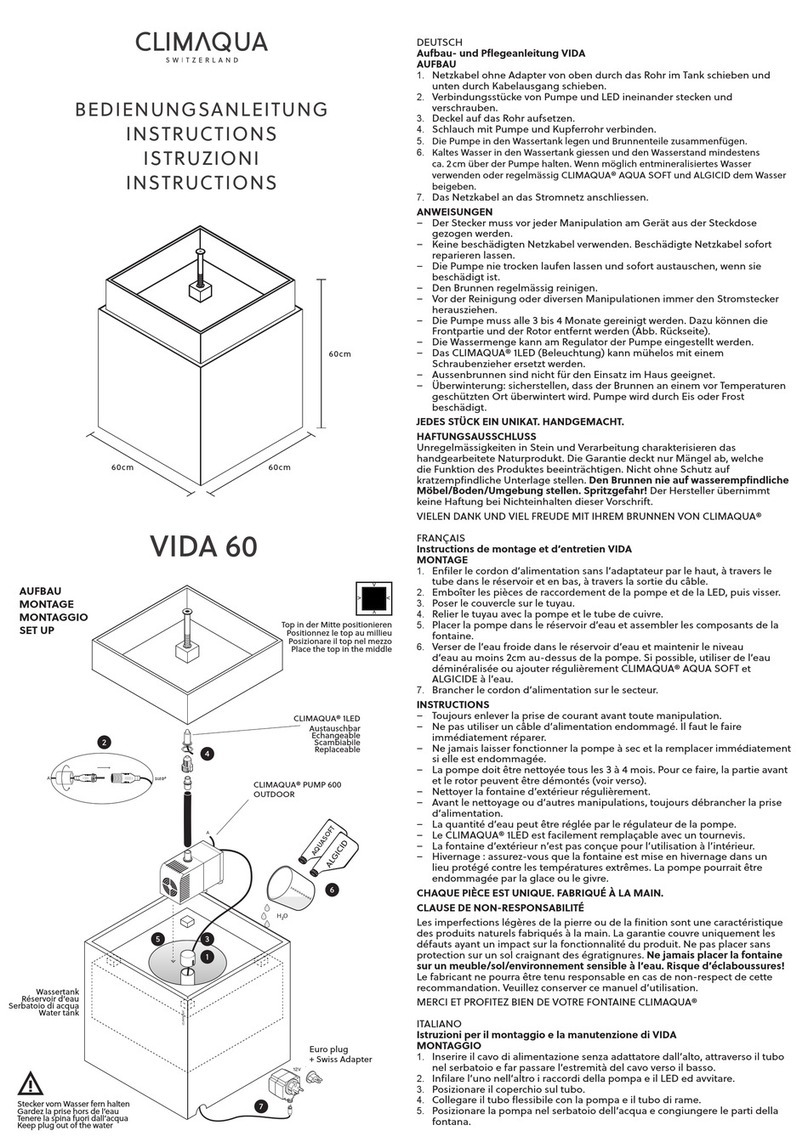
Montage
1. Passer le tuyau plastique à travers le tube de cuivre. Visser le tube dans
l’élement de pierre.
2. Retourner l’élément de pierre an qu’il soit „la tête en bas“. Passer
les éléments de pierre ronde et angulaire en altérnance sur le tube de
cuivre (image 1).
3. Terminer le montage avec la plaque en pierre ronde. Serrer l’écrou sur le
tube de cuivre à l’aide de la clé outil (inclue dans le set de montage).
4. Raccorder la pompe au tuyau plastique.
5. Aligner les éléments en pierre en forme d’escalier.
6. Remplir le récipient d’eau froide. Le niveau d’eau doit impérativement et
toujours être à 1 cm au-dessus de la pompe. Si possible, utiliser de l’eau
déminéralisée ou ajouter CLIMAQUA® AQUA SOFT et CLIMAQUA®
ALGICID à l’eau selon le dosage indiqué sur le acon.
7. Brancher le câble éléctrique dans le transformateur et le transformateur
dans la prise de courant.
8. La pression du jet peut être réglée à l’aide du régulateur de pression
d’eau (sur la pompe) (Figure 2).
Instructions
»La fontaine doit être en position horizontale.
»La pompe convient uniquement aux fontaines d’intérieur.
»Ne jamais laisser fonctionner la pompe à sec et la remplacer
immédiatement si elle est endommagée.
»La pompe doit être nettoyée tous les 3 à 4 mois. Pour ce faire, la partie
avant et le rotor peuvent être démontés.
»Nettoyer régulièrement la fontaine d’intérieur.
»Avant le nettoyage ou d’autres manipulations, toujours débrancher la
prise d’alimentation.
»Les fontaines d’intérieur ne sont pas conçues pour être utilisées en
extérieur.
»Ne pas utiliser un câble d’alimentation endommagé. Il faut le faire
immédiatement réparer.
»Le câble d’alimentation ne doit pas entrer en contact avec l’eau.
Ne jamais placer la fontaine sur un meuble/sol/environnement
sensible à l’eau. Le fabricant décline toute responsabilité en cas de non-
respect de cette exigence.Veuillez conserver ce manuel d’utilisation.
MERCI ET PROFITEZ BIEN DE VOTRE FONTAINE CLIMAQUA®
H2O
12V
®
NATURE AT HOME
Návod k použití
INSTRUCTIONS
ISTRUZIONI
INSTRUCTIONS
S
7
5
WWW.CLIMAQUA.SWISS
FLAMES PLANTERSFOUNTAINS
DYNCO AG CH-3065 Bolligen www.dynco.ch
ITALIANO
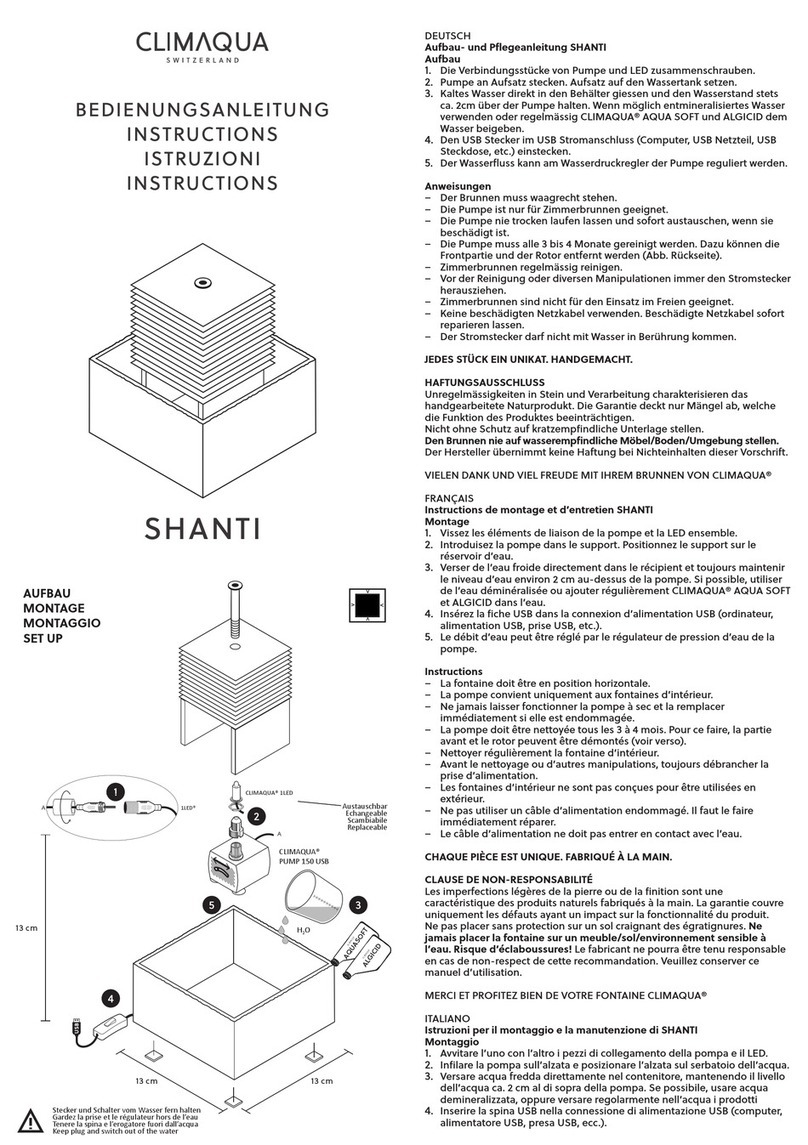
Istruzioni per il montaggio e la manutenzione di MODUM S
Montaggio
1. Guidare il tubo essibile attraverso il tubo di rame e serrare il tubo di rame
all’elemento in pietra più in alto.
2. Ruotare l’elemento superiore in pietra verso il basso. Far passare
alternativamente altri elementi rotondo e angolare in pietra sul tubo di rame
(Figura 1).
3. Chiudere con elemento circolare e serrare l’anello esagonale dorato sul
tubo di rame con l’utensile esagonale (in dotazione).
4. Collegare la pompa al tubo essibile.
5. Allineare gli elementi in pietra a scatti.
6. Riempire il contenitore con acqua fredda. Il livello dell’acqua deve sempre
essere almeno 1 cm al di sopra della pompa. Se possibile, utilizzare
acqua demineralizzata o aggiungere CLIMAQUA®AQUA SOFT e
CLIMAQUA®ALGICID all’ acqua in base al dosaggio sul acone.
7. Inserire il cavo di bassa tensione nel trasformatore e inserirlo nella presa.
8. La pressione dell’acqua può essere regolata tramite il regolatore di
pressione dell’acqua della pompa (Figura 2).
Istruzioni d’uso
»La fontana deve essere posizionata in senso orizzontale.
»La pompa è adatta unicamente a fontane da interni.
»Non fare funzionare mai la pompa a secco. In caso di danneggiamento,
sostituirla immediatamente.
»La pompa deve essere pulita ogni 3 – 4 mesi. Per pulirla, è
possibile rimuovere il pannello frontale e il rotore.
»Pulire la fontana da interni regolarmente.
»Prima della pulizia o di altri interventi di manutenzione, è sempre
necessario staccare la spina.
»Le fontane da interni non sono adatte all’uso in ambienti esterni.
»Non usare cavi di alimentazione danneggiati. In caso di danneggiamento,
farli riparare immediatamente.
»La spina non deve venire in contatto con l‘acqua.
La fontana non deve mai essere posizionata su mobili/superci o in
ambienti sensibili all’acqua. Il produttore declina qualunque responsabilità in
caso di mancato rispetto di questa norma. Conservare queste istruzioni d’uso.
VI RINGRAZIAMO E VI AUGURIAMO PIACEVOLISSIMI MOMENTI CON LA
VOSTRA FONTANA DI CLIMAQUA®
ENGLISH
Assembly and Maintenance Instructions MODUM S
Assembly
1. Insert the hose through the copper tube and tighten the copper tube to the
top stone element.
2. Turn the top stone element downwards. Slide the round and retangular
stone elements over the copper pipe alternately (Figure 1).
3. End with circular stone element and tighten the golden hexagonal ring to
the copper tube with hexagonal tool (in the assembly set).
4. Connect the pump to the hose.
5. Adjust stone elements in steps.
6. Fill the container with cold water. The water level should always be at
least 1cm above the pump. If possible, use demineralised water or add
CLIMAQUA®AQUA SOFT and CLIMAQUA®ALGICID according to dosage
on bottle.
7. Plug the low voltage cable into the transformer and the transformer into the
plug.
8. The water pressure can be adjusted on the pump’s water pressure
regulator (Figure 2).
Instructions
»The fountain must stand vertically.
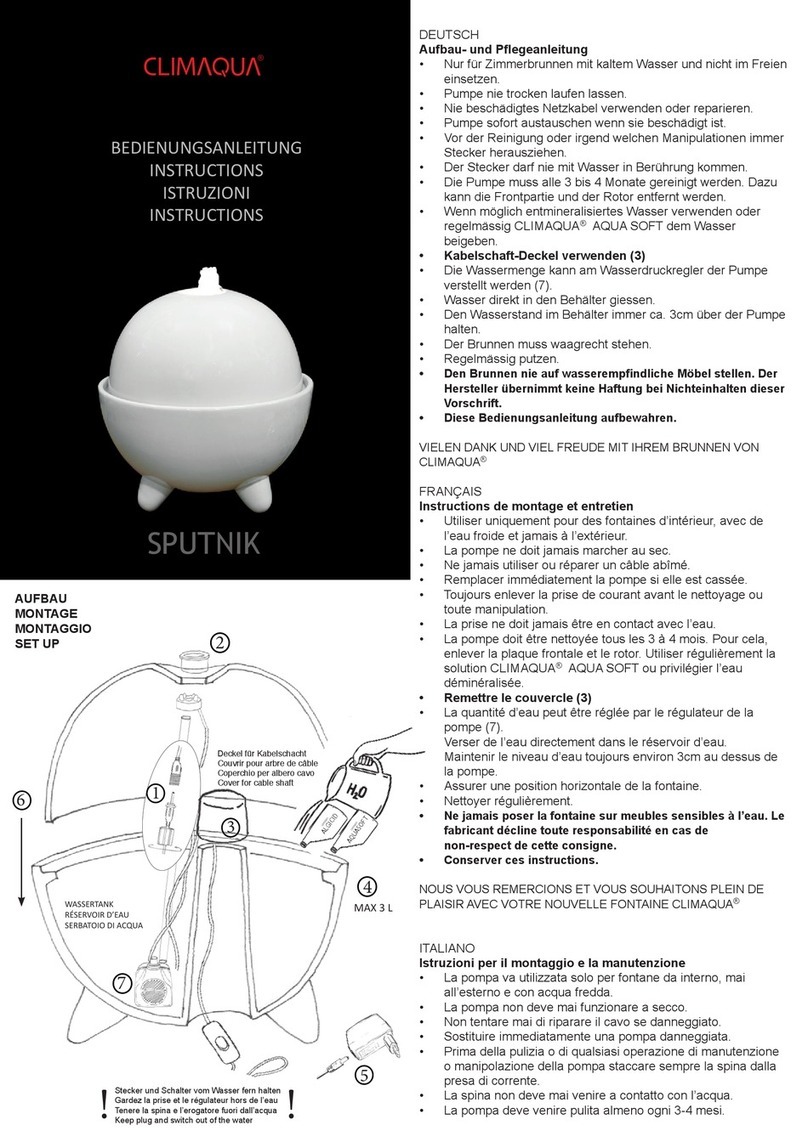
»The pump is only suitable for indoor fountains.
»Never let the pump run dry and replace it immediately, once it is damaged.
»The pump must be cleaned every 3 to 4 months. In so doing, the front
section and rotor may be removed.
»Clean the indoor fountain regularly.
»Before cleaning or handling the pump in any way, always pull the power
plug from the wall socket.
»Indoor fountains are not suitable for installation outdoors.
»Do not use damaged power cords. Repair them immediately.
»The power plug may not come into contact with the water.
Never place the fountain on water-sensitive furniture, oors or
surroundings. The manufacturer will not accept responsibility for violations of
this provision. Please keep these operating instructions handy.
THANK YOU VERY MUCH. WE HOPE YOU ARE DELIGHTED WITH YOUR
FOUNTAIN FROM CLIMAQUA®
ENJOY THE MOMENT.
Obrázek 2 2
Illustration 2
Esempio 2
Illustration 2
Rozebrání čerpadla
OUVRIR LA POMPE
APRIRE LA POMPA
OPEN THE PUMP

1.
Opatrně ručně rozeberte
ouvrir soignesement à la
main aprire a mano con
attenzione
carefully open by hand
Čištění rotoru
nettoyer le rotor
pulire il rotore
clean the rotor
2.
Regulátor průtoku vody a přední kryt
réglage de la pression d’eau et plaque frontale
regolazione del flusso d'acqua e coperchio
water pressure regulator and front part
CLIMAQUA® PRODUKTY JSOU UNIKÁTNÍ A VYRÁBĚNÉ RUČNĚ
Z
PŘÍRODNÍCH MATERIÁLU.
LES PRODUITS CLIMAQUA® SONT UNIQUES ET FABRIQUÉS
ÀLAMAIN À PARTIE DE MATÉRIAUX NATURELS. POUR PLUS
D’INFORMATIONS SUR L’UNIVERS DE CLIMAQUA®, NOUS VOUS
INVITONS À VISITER NOTRE SITE INTERNET. VOUS Y
TROUVEREZ D’AUTRES FONTAINES ET L’ENSEMBLE DE
L’ASSORTIMENT DE CLIMAQUA® FLAMES ETCLIMAQUA®
PLANTERS.
IPRODOTTI CLIMAQUA® FOUNTAINS SONO ESEMPLARI UNICI
PRODOTTE A MANO E CON SOLI MATERIALI NATURALI. VISITI IL
NOSTRO SITO PER SAPERNE DI PIÙ SULL’UNIVERSO CLIMAQUA®.
POTRÀ TROVARE MOLTI ALTRI MODELLI DIFONTANE, OLTRE
CHE L’INTERO ASSORTIMENTO CLIMAQUA® FLAMES E
CLIMAQUA® PLANTERS.
CLIMAQUA® PRODUCTS ARE UNIQUE PIECES, MADE BY HAND OUT
OF NATURAL MATERIALS. VISIT THE WEBSITE AND DISCOVER THE
WORLD OF CLIMAQUA®. YOU’LL FIND OUT
THE COMPLETE RANGE OF NATURAL FOUNTAINS AND LEARN
ABOUT THE LARGE PROGRAM OF THE CLIMAQUA® FLAMES AND
CLIMAQUA® PLANTERS.
Other CLIMAQUA Outdoor Fountain manuals

CLIMAQUA PLATO User manual

CLIMAQUA

CLIMAQUA PLATO User manual

CLIMAQUA AVA L User manual

CLIMAQUA

CLIMAQUA AVA L User manual

CLIMAQUA SIERRA User manual

CLIMAQUA

CLIMAQUA SIERRA User manual

CLIMAQUA SPUTNIK User manual

CLIMAQUA

CLIMAQUA SPUTNIK User manual

CLIMAQUA TAIPEI XL User manual

CLIMAQUA

CLIMAQUA TAIPEI XL User manual

CLIMAQUA SWAN User manual

CLIMAQUA

CLIMAQUA SWAN User manual

CLIMAQUA SUMI Quick guide

CLIMAQUA

CLIMAQUA SUMI Quick guide

CLIMAQUA HARUMI User manual

CLIMAQUA

CLIMAQUA HARUMI User manual

CLIMAQUA SIERRA User manual

CLIMAQUA

CLIMAQUA SIERRA User manual

CLIMAQUA KERMO 10619 User manual

CLIMAQUA

CLIMAQUA KERMO 10619 User manual

CLIMAQUA AVA S User manual

CLIMAQUA

CLIMAQUA AVA S User manual

CLIMAQUA KUBO User manual

CLIMAQUA

CLIMAQUA KUBO User manual

CLIMAQUA HELIOS L User manual

CLIMAQUA

CLIMAQUA HELIOS L User manual

CLIMAQUA SUMI User manual

CLIMAQUA

CLIMAQUA SUMI User manual

CLIMAQUA DUBAI L User manual

CLIMAQUA

CLIMAQUA DUBAI L User manual

CLIMAQUA COBRA User manual

CLIMAQUA

CLIMAQUA COBRA User manual

CLIMAQUA MODUM S User manual

CLIMAQUA

CLIMAQUA MODUM S User manual

CLIMAQUA LIV S User manual

CLIMAQUA

CLIMAQUA LIV S User manual

CLIMAQUA MYO User manual

CLIMAQUA

CLIMAQUA MYO User manual

CLIMAQUA MODUM M User manual

CLIMAQUA

CLIMAQUA MODUM M User manual

CLIMAQUA AVA WALL User manual

CLIMAQUA

CLIMAQUA AVA WALL User manual

CLIMAQUA CHI User manual

CLIMAQUA

CLIMAQUA CHI User manual

CLIMAQUA VIDA 40 User manual

CLIMAQUA

CLIMAQUA VIDA 40 User manual

CLIMAQUA VIDA 11 Set User manual

CLIMAQUA

CLIMAQUA VIDA 11 Set User manual

Popular Outdoor Fountain manuals by other brands

Campania International Williamsburg Pineapple FT-133 Assembly instructions

Campania International

Campania International Williamsburg Pineapple FT-133 Assembly instructions

Campania FT-161 M Series Assembly instructions

Campania

Campania FT-161 M Series Assembly instructions

Halsey Taylor Endura II 4400BF quick start guide

Halsey Taylor

Halsey Taylor Endura II 4400BF quick start guide

Alpine TZL154 Assembly instructions

Alpine

Alpine TZL154 Assembly instructions

Astonica 40201037 instruction manual

Astonica

Astonica 40201037 instruction manual

Halsey Taylor BFM-LR owner's manual

Halsey Taylor

Halsey Taylor BFM-LR owner's manual

Kasco 3400JF owner's manual

Kasco

Kasco 3400JF owner's manual

Pontec PondoClear Island-3000 operating instructions

Pontec

Pontec PondoClear Island-3000 operating instructions

Gainsborough K518 quick start guide

Gainsborough

Gainsborough K518 quick start guide

Campania International FT-41 Assembly instructions

Campania International

Campania International FT-41 Assembly instructions

Angelo Decor Buddha instructions

Angelo Decor

Angelo Decor Buddha instructions

Kelkay 45062L instructions

Kelkay

Kelkay 45062L instructions

ASC SF021 instructions

ASC

ASC SF021 instructions

Blumfeldt Dharma manual

Blumfeldt

Blumfeldt Dharma manual

Hagen Laguna Decor Picassa Quick start instructions

Hagen

Hagen Laguna Decor Picassa Quick start instructions

Halsey Taylor SCWT4A-CB-Q 1E Series owner's manual

Halsey Taylor

Halsey Taylor SCWT4A-CB-Q 1E Series owner's manual

Angelo Decor Hollow Tree Falls quick start guide

Angelo Decor

Angelo Decor Hollow Tree Falls quick start guide

velda Heron Stop User instructions

velda

velda Heron Stop User instructions

manuals.online logo
manuals.online logoBrands
  • About & Mission
  • Contact us
  • Privacy Policy
  • Terms and Conditions

Copyright 2025 Manuals.Online. All Rights Reserved.