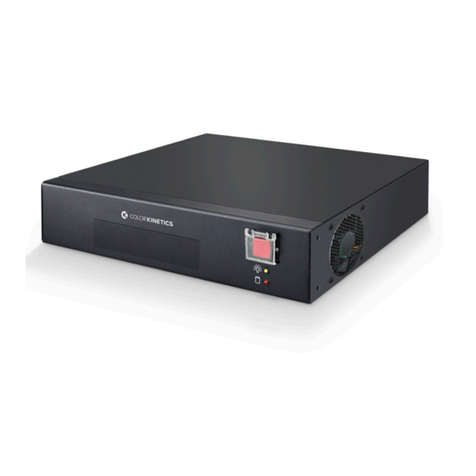
COLORKINETICS iPlayer 3 User manual

ActiveSite
iPlayer 3
User Guide


iPlayer 3 User Guide i
Contents
1 Introduction 1
Welcome to iPlayer 3 1
Key Features 1
About ColorPlay 3 2
About this Guide 2
2 Installation and Hardware Overview 3
iPlayer 3 Installation 3
iPlayer 3 Hardware Features 8
LCD Screen Output 9
3 Show Conguration Concepts 11
Overview 11
Shows 11
Eects 11
Triggers 11
Alarms 12
4 Run Mode 13
Overview 13
Playing Shows 13
5 Conguration Mode 15
Overview 15
Navigating Menus 15
Assigning Triggers 15
Setting an Alarm 16
Setup Menu 17
Info Menu 18
6 USB Mode 19
Overview 19
Initiating USB Mode 19
Downloading Show Files from ColorPlay 3 19
Downloading Triggers from ColorPlay 3 20
Downloading Alarms from ColorPlay 3 20
AppendixA: Pinouts and DIP Switch Functions 21
Serial Port: DB9F Pinouts 21
DMX: RJ-45 Pinouts 21
iPlayer 3 DIP Switch Functions 22
AppendixB: Conguring Remote Triggering Devices 23
Electrical 23
Protocol 23
AppendixC: Firmware Update Procedure 25
Overview 25
Determining Firmware Version 25
Firmware Update Procedure 25
AppendixD: Cloning and Formatting SD Memory
Cards for use in iPlayer 3 27
Overview 27
SD Card Cloning Procedure 27
Windows SD Card Formatting Procedure 27
Mac OS SD Card Formatting Procedure 28
AppendixE: Conguration Menus in Detail 29
Triggers Menu 29
HSB Editor 31
Alarms Menu 32
Setup Menu 34
Info Menu 36
AppendixF: Powering O the iPlayer 3 37

iPlayer 3 User Guideii

iPlayer 3 User Guide 1
1Introduction
Welcome to iPlayer 3
iPlayer® 3 is the compact lighting system controller from Color Kinetics capable
of controlling up to two full DMX universes or 340 individual three-channel
luminaires. Equipped with an LCD interface for simple operation, iPlayer 3 stores
and plays pre-programmed and custom-authored light shows.
Key Features
• Light shows are authored with ColorPlay® 3 software
• Designed for use with the optional wall-mounted Controller Keypad
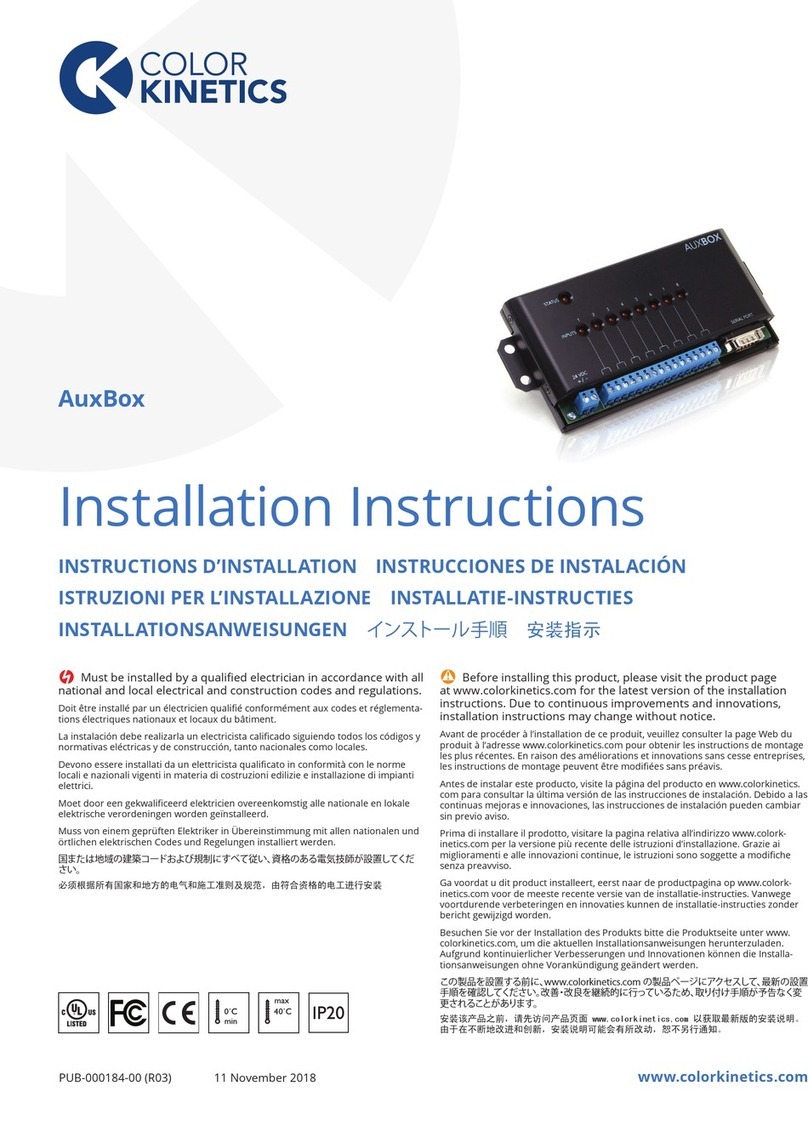
• Supports the optional AuxBox expansion device, which enables show triggering
by a variety of dry-contact closure devices including motion sensors, photocell
applications, and more.
iPLAYER 3
PRESETS
45
X
3
2
1
POWER
USB
INPUTS
SERIAL POR
T
24 VDC
+ / -
STATUS
2
134
56
78
AUXBOX
To Light Universe 1
To Light Universe 2
Input from
ColorPlay 3
Software
Input from
AuxBox
Input from
Controller
Keypad
OFF

iPlayer 3 User Guide2
About ColorPlay 3
ColorPlay 3 light show authoring software enables you to create unique light
shows, download light show les to your iPlayer 3, and manage the les on your
iPlayer 3.
Out of the box, iPlayer 3 comes programmed with default, single-eect light shows
designed for quick testing of your lighting installation. ColorPlay 3 enables you to
create and manage more sophisticated shows using the following features:
• 16 fully customizable eects, including a particle eect used to simulate re,
clouds, or rain
• Timeline editing with multiple tracks, enabling eect layering and unique
transitions
• Eect editing both on-screen or live on a lighting installation
• Management of multiple shows within each ColorPlay 3 project le
• Custom color palettes
ColorPlay 3 is compatible with both Microsoft Windows® and Mac OS X
operating systems.
About this Guide
This user guide contains step-by-step hardware setup and mounting instructions,
details about iPlayer 3 modes and features, and reference information. The
following documents are also available to help you fully realize the potential of
your iPlayer 3 and lighting installation as a complete system:
Document Name Online Location
iPlayer 3 Installation Instructions www.colorkinetics.com/support/userguides/
iPlayer 3 Quick Start Guide www.colorkinetics.com/support/userguides/
ColorPlay 3 User Guide www.colorkinetics.com/support/userguides/
Controller Keypad Product Guide www.colorkinetics.com/support/datasheets/
AuxBox Product Guide www.colorkinetics.com/support/datasheets/
EDownload ColorPlay 3 from
http://www.colorkinetics.com/ls/
controllers/colorplay3/.


iPlayer 3 User Guide 3
2Installation and
Hardware Overview
iPlayer 3 Installation
Step 1: Conrm all components received
iPLAYER3
PRESETS
2
1
3
4
5
x
POWER
USB
DMX 2
DMX 1
SERIAL 2
SERIAL 1
Take a moment to conrm you have received these iPlayer 3 components:
• iPlayer 3
• Mounting bracket
• Mounting bracket screws
• Power cord (North American or European)
• USB 2.0 Cable
• RJ-45 DMX 512 data cable
• Installation Instructions
• Quick Start Guide
Step 2: Prepare for the Installation
• Create a layout plan that starts with the locations of iPlayer 3 and all power
supplies or data enablers.
• Select a convenient but unobtrusive location for mounting the iPlayer 3 that
will be accessible to a computer via USB connection. If also installing external
show selection switches such as Controller Keypads or an AuxBox, mount
iPlayer 3 in a location accessible to the maximum serial cable length of 15.2 m
(50 ft).
• Verify that the mounting location meets the following
environmental specications.

iPlayer 3 User Guide4
Electrical Specications
Power requirements: 100 – 240 VAC, 50/60 Hz, 5 W
Environmental Specications
Operating temperature range: -10˚ – 40˚ C (14˚ – 104˚ F). Maximum 95%
relative humidity.
Step 3: Install mounting bracket
Choose a method for mounting bracket installation: quick-release or secure.
Quick-release mounting method
With the release tab pointing downward, screw the mounting bracket onto a
surface using the innermost screw holes.
Slide the iPlayer 3 onto the mounting bracket until the iPlayer clicks securely
into place.
PRESETS
123
4
x
5
iPLAYER3
Secure mounting method
Slide the iPlayer 3 onto the mounting bracket until the iPlayer 3 clicks securely into
place. Using the supplied machine screws, secure the mounting bracket to the
iPlayer 3.

iPlayer 3 User Guide 5
Using the outermost screw holes, install the mounting bracket and iPlayer 3
assembly onto a surface. Secure with screws suitable for mounting substrate.
PRESETS
123
4
x
5
iPLAYER3
Step 4: Attach the power cable
iPLAYER3
PRESETS
2
1
3
4
5
x
POWER
USB
DMX 2
DMX 1
SERIAL 2
SERIAL 1
Step 5: Install ColorPlay 3 Software
System Requirements
Windows® Mac OS
Windows 7 or greater Mac OS 10.6 or greater
512 MB RAM 512 MB RAM
60 MB free disk space 60 MB free disk space

iPlayer 3 User Guide6
To install ColorPlay 3 on Windows:
1. Download the latest version of ColorPlay 3 Software from http://www.
colorkinetics.com/support/colorplay3/.
2. Locate the compressed (.ZIP) le you just downloaded. Extract its contents
to your computer, and double-click ColorPlay3Installer.exe to launch
the installer.
3. Follow the on-screen prompts. When the installation is complete, click Finish
to exit the installer.
To install ColorPlay 3 on MacOS X:
1. Download the latest version of ColorPlay 3 Software from http://www.
colorkinetics.com/support/colorplay3/.
2. Locate the compressed (.ZIP) le you just downloaded. Extract its contents
to your computer, and double-click ColorPlay3Installer.app to launch
the installer.
3. Follow the on-screen prompts. When the installation is complete, click Finish
to exit the installer.
Step 6: Connect computer with USB cable
iPLAYER 3
PRESETS
45
X
3
2
1
POWER
USB
Input from
ColorPlay 3
Software
Step 7: Attach external show selection devices
as required
iPLAYER 3
PRESETS
45
X
3
2
POWER
USB
INPUTS
SERIAL PORT
24VDC
+/ -
STATUS
2
34
56
78
AUXBOX
Input from
AuxBox
Input from
Controller
Keypad
OFF
To connect a Controller Keypad:
1. Power o the iPlayer 3.
DIf using Windows, you
must install ColorPlay 3 prior
to connecting the iPlayer 3 to
your PC. ColorPlay 3 installs
the device drivers required for
USB connectivity.

iPlayer 3 User Guide 7
2. Connect the cable end with the 4-pin leads into the back of the
Controller Keypad.
3. Connect the cable end with the DB9 cable connector to serial port 1 or 2 on
iPlayer 3.
4. As needed, set the Range switch position on the back of the keypad. By
default, switch position 0 (zero) sets the keypad to trigger shows 1 – 8 (see
“About Show Ranges” on page 18 for an overview of trigger ranges).
5. Power on the iPlayer 3.
To connect an AuxBox:
1. Power o the iPlayer 3.
2. Connect the female end of the serial cable to the AuxBox serial port.
3. Connect the male end with of the serial cable to serial port 1 or 2 on iPlayer 3.
4. As needed, set the Range switch position on the front of the AuxBox. By
default, switch position 0 (zero) sets the AuxBox to trigger shows 1 – 8.
5. Connect each external triggering device’s two-wire cable to a terminal pair on
the AuxBox.
6. Connect the 24 VDC power cable to the 24 VDC terminals on the AuxBox, and
then plug it in.
7. Power on the iPlayer 3.
Step 8: Connect lighting systems with RJ-45
data cable
iPLAYER 3
PRESETS
45
X
3
2
POWER
USB
DMX 1
Control to Lights
DMX 2
Control to Lights
DMX output port 1 manages light universe 1 (light addresses 1-170)
DMX output port 2 managed light universe 2 (light addresses 1-170)
Step 9: Create and download light shows via
ColorPlay 3

iPlayer 3 User Guide8
iPlayer 3 Hardware Features
The iPlayer 3 has the following hardware features:
Access panel for SD memory card
and conguration DIP switches
09:21:48 17-Feb-09
Cong mode
Show type? <
downloaded show
Current mode and information
Displays the color appearing on light
address 1 (DMX output port 1)
Pause/resume show
Cancel menu action
Select a trigger for show playback
Adjust brightness level
Change mode
Navigate menus
USB 2.0 port
Activity LED
DMX output ports
Serial ports
Power inlet

iPlayer 3 User Guide 9
LCD Screen Output
iPlayer 3 has three modes of operation. The LCD screen displays the currently
active mode.
Run Mode
09:21:36 17-Feb-09
RUN Mode
Show 1 >
/ b100
Run mode launches automatically when you power on the iPlayer 3. In Run mode,
by default, iPlayer 3 triggers the show assigned to Preset . You can manually
trigger other shows by pressing Presets through on the iPlayer 3 faceplate or
keys 1 – 8 on a Controller Keypad. Setting alarms enables you to automate show
triggers by time, day of the week, or an astronomical event such as sunset.
Conguration Mode
09:21:48 17-Feb-09
Config mode
Main Menu >
ALARMS
Conguration Mode provides an onboard menu system enabling you to congure
triggers, set alarms, perform device setup, and view device information.
USB Mode
09:21:02 17-Feb-09
USB
USB mode enables you to transfer shows, triggers, and alarms between a
computer running ColorPlay 3 and the iPlayer 3.

iPlayer 3 User Guide10

iPlayer 3 User Guide 11
3Show Conguration
Concepts
Overview
This chapter introduces show conguration termterminology and concepts, which
will help you in the upcoming chapters.
Shows
Shows contain visual eects and the parameters associated with those eects.
iPlayer 3 can display two types of shows:
• Precongured shows stored and congured on iPlayer 3
• Custom shows created and downloaded from ColorPlay 3
Effects
Visual eects range in complexity from a xed color display to multi-color
animations. Each eect has multiple customizable parameters such as start color,
end color, and fade time.
• There are seven eect types available when setting up iPlayer 3
precongured shows.
• You can work with 16 eect types when creating ColorPlay 3 custom shows.
Triggers
Triggers specify show playback behaviors—for example, what happens at the end
of a show or how to transition to the next show. Therefore, to be played back, you
must associate each show with a trigger.
Triggers are numbered 0 – 255 and associate show les with the following:
• End Behavior Fade to black, loop, or jump to another trigger.
• Transition Type Snap (no transition to next show), fade out-and-in, or cross
fade(morph with next show).
Pressing a Preset button on the iPlayer 3 faceplate triggers a show. For example,
pressing activates trigger 1, which launches the show and the playback
behaviors associated with it.
Linking Multiple Shows to a Trigger
Because show les do not specify playback behaviors, you can assign more than
one show to a single trigger. When creating the trigger, selecting the Jump to
Trigger end behavior links a second show to the rst. If you select the Jump to
Trigger end behavior for the second show, you can link a third show, and so on.

iPlayer 3 User Guide12
Alarms
Alarms automatically activate triggers. You can manually activate a trigger by
pressing a Preset button on the iPlayer 3, pressing a button on a Controller
Keypad, or by tripping a remote triggering device connected to an AuxBox. With an
alarm, you can automatically activate a trigger based on a specic date, day of the
week, weekdays, weekends, or an astronomical event (sunrise or sunset).
When you create an alarm, you associate the alarm with a trigger number. You
can then specify alarm parameters (either a clock time or an astronomical event).
For example, you can create an alarm that automatically activates trigger 3 every
weekday at 7 A.M.

iPlayer 3 User Guide 13
4Run Mode
Overview
Run Mode is the default iPlayer 3 playback mode and automatically launches when
you power on the iPlayer 3 controller. The iPlayer 3 must be in Run Mode for you to
manually trigger shows or use automatic playback alarms. Run Mode is suspended
when you enter USB Mode or Conguration Mode.
Playing Shows
Using Preset Buttons to Trigger Shows
There are ve Preset buttons located on the faceplate of the iPlayer 3. Each button
triggers a show:
• When you power on the iPlayer 3 or exit from USB Mode, iPlayer 3
automatically begins playing the show triggered by Preset .
• To trigger another show, press another Preset button, through .
If you have an optional Controller Keypad connected to your iPlayer 3, you can
assign show triggers to keypad buttons 1 – 8. Likewise, if you have an AuxBox
connected, you can assign triggers to up to eight remote triggering devices.

iPlayer 3 User Guide14
Automating Show Playback
When using alarms, you do not have to manually press a Preset button or keypad
button to trigger show playback. Alarms automatically set o triggers based on
settings such as time of day or an astronomical event, such as sunset. You can
congure up to 15 alarms on iPlayer 3.
Run Mode LCD Output
09:21:36 17-Feb-09
RUN Mode
Show 1 >
/ b100
The iPlayer 3 LCD displays the following information during Run Mode:
Light Show Brightness
Using the and buttons, you can set the overall brightness level of lights in a
show during playback. The B number displayed on the LCD reects the brightness
level you set, between 0% and 100%.
Trigger Number Message
The LCD displays the current show (trigger) number during playback. If you have
not associated a trigger with a Preset button, the LCD displays an EMPTY message
when you press that Preset button.
Lights O
You can pause Run Mode and show playback at any time by pressing the button.
The LCD displays a LIGHTS OFF message, and the connected lights turn black until
you either:
• Press the button a second time to resume Run Mode
• Press a Preset button to start the selected show from the beginning
LED Indicator Light
The LED indicator light, located to the right of the LCD screen, is active when a
show is playing. It shows the color currently displayed on the xture assigned to
light address 1 on DMX output port 1. LED Indicator Light

iPlayer 3 User Guide 15
5Conguration
Mode
Overview
Conguration mode provides an onboard menu system enabling you to congure
show triggers, set alarms, perform device setup, and view device information
without having to connect to your PC or Mac.
Navigating Menus
• At any time during playback, press to launch Conguration mode and open
the Main Menu.
09:21:48 17-Feb-09
Config mode
Show type? <
downloaded show
• From any menu, press and to scroll through the menu options and make a
selection, then press to access the next menu.
• To save your changes, continue pressing until you reach the Save Changes
menu item, then press a nal time to save.
• Press at any time to cancel the menu action and return to Run mode.
Assigning Triggers
You can assign a trigger to either:
• A precongured show
• A custom show downloaded from ColorPlay 3
When you assign a trigger, that trigger corresponds to the Preset button with the
same number on the iPlayer 3 faceplate, a keypad button on a Controller Keypad,
or a remote triggering device connected to an AuxBox.
Example 1: Assigning a Precongured Show to Preset Button 3
1. Launch Conguration mode.
2. Access the Triggers menu from the Main Menu.
3. Select trigger number 3.
4. Access the Show Type menu item, then select Canned Eect.
5. Access the Eect Type menu, then make a selection. There are seven visual
eect types from which to choose:
DEach eect type has unique
parameters. For example, some
eects use a background color
setting, whereas other eects
display only foreground colors.
See “AppendixE: Conguration
Menus in Detail” on page 29 for
iPlayer 3 menu system charts and
descriptions of each menu item.

iPlayer 3 User Guide16
• Fixed Color Static display of a solid color
• Cross Fade A smooth transition from one solid color to another
• Rainbow A sequence of solid colors moving in one direction
• Random Color A sequence of randomly generated solid colors at
specifiedintervals
• Sparke Flashes of foreground color at random over a solid background
color
• Color Sweep Progressive transition of a solid foreground color across a
solid background
• Color Streak An animated eect with narrow lines of color over a
solidbackground
6. Press to access the next menu item, which is an eect-specic parameter,
and then enter a value.
7. Continue navigating through the eect-specic parameters and entering
values. At the Test Eect menu item, press to use the show tester, which
runs a live preview of your show.
8. Select a transition type:
• Snap No transition
• Fade Out & In Fade to black in between two shows
• Cross Fade Effect morphing
9. As needed, enter a value for the transition duration, then press to save
your changes.
Example 2: Assigning a Downloaded ColorPlay 3 Show to Preset Button 4
1. Launch Conguration mode.
2. Access the Triggers menu from the Main Menu.
3. Select trigger number 4.
4. Access the Show Type menu, then select Downloaded Show.
5. Access the Show le menu, then select a .SHO le.
6. 6. At the TEST SHOW menu, press to use the show tester, which runs a live
preview of your show.
7. Select an End Behavior type:
• Loop
• Lights Off
• Jump to Trigger
8. Select a transition type:
• Snap No transition
• Fade Out & In Fade to black in between two shows
• Cross Fade Effect Morphing
9. As needed, enter a value for the transition duration, then press to save
your changes.
Setting an Alarm
Alarms enable you to automate show playback. When you set an alarm,
you specify:
• The alarm number (0 – 15).
• The alarm day: every day, on weekdays, on weekends, on a specic day of the
week, or on a specic date.
• Alarm type:
Time of day iPlayer 3 uses a 24-hour notation with hours ranging from 00 – 23
Astronomical time In relation to sunrise and sunset
• The trigger associated with the alarm.
Table of contents
Other COLORKINETICS Controllers manuals

COLORKINETICS
COLORKINETICS Data Enabler IntelliPower User manual

COLORKINETICS
COLORKINETICS Gen6 User manual

COLORKINETICS
COLORKINETICS iColor Player User manual

COLORKINETICS
COLORKINETICS Light System Manager gen5 User manual

COLORKINETICS
COLORKINETICS VAYA Series User manual

COLORKINETICS
COLORKINETICS iColor Player User manual

COLORKINETICS
COLORKINETICS ColorDial Pro User manual

COLORKINETICS
COLORKINETICS PDS-60CA User manual

COLORKINETICS
COLORKINETICS Data Enabler Pro User manual

COLORKINETICS
COLORKINETICS AuxBox User manual