manuals.online logo
Brands
  1. Home
  2. •
  3. Brands
  4. •
  5. COLORKINETICS
  6. •
  7. Lighting Equipment
  8. •
  9. COLORKINETICS PureStyle Compact Powercore User manual

COLORKINETICS PureStyle Compact Powercore User manual

Installation Instructions
INSTRUCTIONS D’INSTALLATION INSTRUCCIONES DE INSTALACIÓN 
ISTRUZIONI PER L’INSTALLAZIONE INSTALLATIE-INSTRUCTIES 
INSTALLATIONSANWEISUNGEN インストール手順 安装指示
A Must be installed by a qualified electrician in accordance with all
national and local electrical and construction codes and regulations.
Doit être installé par un électricien qualifié conformément aux codes et réglementa-
tions électriques nationaux et locaux du bâtiment.
La instalación debe realizarla un electricista calificado siguiendo todos los códigos y
normativas eléctricas y de construcción, tanto nacionales como locales.
Devono essere installati da un elettricista qualificato in conformità con le norme
locali e nazionali vigenti in materia di costruzioni edilizie e installazione di impianti
elettrici.
Moet door een gekwalificeerd elektricien overeenkomstig alle nationale en lokale
elektrische verordeningen worden geïnstalleerd.
Muss von einem geprüften Elektriker in Übereinstimmung mit allen nationalen und
örtlichen elektrischen Codes und Regelungen installiert werden.
国または地域の建築コードおよび規制にすべて従い、資格のある電気技師が設置してくだ
さい。
必须根据所有国家和地方的电气和施工准则及规范,由符合资格的电工进行安装
A Before installing this product, please visit the product page
at www.colorkinetics.com for the latest version of the installation
instructions. Due to continuous improvements and innovations,
installation instructions may change without notice.
Avant de procéder à l’installation de ce produit, veuillez consulter la page Web du
produit à l’adresse www.colorkinetics.com pour obtenir les instructions de montage
les plus récentes. En raison des améliorations et innovations sans cesse entreprises,
les instructions de montage peuvent être modifiées sans préavis.
Antes de instalar este producto, visite la página del producto en
www.colorkinetics.com para consultar la última versión de las instrucciones de
instalación. Debido a las continuas mejoras e innovaciones, las instrucciones de
instalación pueden cambiar sin previo aviso.
Prima di installare il prodotto, visitare la pagina relativa all’indirizzo
www.colorkinetics.com per la versione più recente delle istruzioni d’installazione.
Grazie ai miglioramenti e alle innovazioni continue, le istruzioni sono soggette a
modifiche senza preavviso.
Ga voordat u dit product installeert, eerst naar de productpagina op
www.colorkinetics.com voor de meeste recente versie van de installatie-instructies.
Vanwege voortdurende verbeteringen en innovaties kunnen de installatie-instructies
zonder bericht gewijzigd worden.
Besuchen Sie vor der Installation des Produkts bitte die Produktseite unter
www.colorkinetics.com, um die aktuellen Installationsanweisungen herunterzuladen.
Aufgrund kontinuierlicher Verbesserungen und Innovationen können die Installa-
tionsanweisungen ohne Vorankündigung geändert werden.
この製品を設置する前に、www.colorkinetics.com の製品ページにアクセスして、最新の設置
手順を確認してください。改善・改良を継続的に行っているため、取り付け手順が予告なく変
更されることがあります。
安装该产品之前,请先访问产品页面 www.colorkinetics.com 以获取最新版的安装说明。
由于在不断地改进和创新,安装说明可能会有所改动,恕不另行通知。
PureStyle Compact Powercore
IntelliHue, RGBA
PUB-000482-00 (R01) 10 January 2020 www.colorkinetics.com
2  PureStyle Compact Powercore, IntelliHue, RGBA  Installation Instructions PureStyle Compact Powercore, IntelliHue, RGBA  Installation Instructions  3
Confirm all components received.
Confirmez la réception de l’intégralité des composants  Compruebe si ha recibido todos los componentes  Confermare tutti i componenti ricevuti
Controleer alle ontvangen componenten  Bestätigen Sie, dass Sie alle Bestandteile erhalten haben  すべてのコンポーネントが揃っていることを確認します。   确认收到了所有部件
1
E Conguration Calculator: www.colorkinetics.com/support/install_tool
Calculates the number of luminaires each circuit can support based on: model of luminaires, line voltage, circuit load,
and cable lengths.
Calcule le nombre d’appareils que chaque circuit peut prendre en charge en fonction des éléments suivants : modèle de l’appareil, tension secteur, charge d’une ligne et
longueurs des câbles.
Calcular la cantidad de apliques que cada circuito puede admitir según: el modelo de aplique, la tensión de línea, la carga del circuito y las longitudes de cable.
Calcolare il numero di gruppi di illuminazione che possono essere supportati da ogni circuito sulla base dei seguenti parametri: modello del gruppo di illuminazione, voltaggio
della linea, carico del circuito e lunghezza dei cavi
Berekent het aantal bevestigingen dat ieder circuit kan ondersteunen gebaseerd op: bevestigingsmodel, lijnspanning, circuitlading en kabellengtes.
Berechnet die Anzahl der Beleuchtungseinheiten, die jede Schaltung unterstützen kann, auf Basis von: Modell der Beleuchtungseinheit, Spannung, Belastung der Schaltung,
Kabellängen.
各回線でサポートできる器具数を器具のモデル、線間電圧、回線負荷、およびケーブル長に基づ いて算出します
计算每个电路上可安装的灯具数量,计算依据是:灯具型号、线路电压、电路负荷和电线长度。
Data Control Limits
Limites de contrôle des données  Límites de control de datos  Limiti di controllo dati  Dataregellimieten
Maximale Kabellänge für Datenübertragung  データコントロールの制限  数据控制限制
Hinge lock
Charnière  bloqueo de la bisagra  blocco della cerniera
scharnierslot  Scharniersperre  ヒンジロック  铰链锁
53.3 m (175 ft) maximum individual run length
Longueur individuelle maximale de 53,3 m (175 pi)
Longitud máxima individual de 53,3 m (175 pies)
Lunghezza esecuzione individuale massima 53,3 m (175 piedi)
53,3 m (175 ft) maximale individuele lengte
53,3 m maximale Einzelkabellänge
1 本で最大 175 フィート (53.3 m) まで敷設可能
53.3 米(175 英尺)最大单个行程长度
122 m (400 ft) maximum total run length
Longueur totale de 122 m maximum
Longitud máxima total de 122 m
Lunghezza totale massima di 122 m
122 m totale lengte
122 m maximale Gesamtlänge
合計の長さは最大 122 m
122 m 最大总长度
Data
Enabler
Pro
Data
Enabler
Pro
Luminaires Luminaires
2
Verify the electrical plan and all necessary surge protection requirements.
Vérifiez le plan électrique et toutes les exigences de protection contre les surtensions nécessaires.
Verifique el plan eléctrico y todos los requisitos necesarios de protección contra sobretensiones.
Verificare il piano elettrico e tutti i requisiti necessari per la protezione dalle sovratensioni.
Controleer het elektrische plan en alle noodzakelijke overspanningsbeveiliging eisen.
ÜberPrüfen Sie den elektrischen Plan und alle notwendigen Überspannungsschutz Anforderungen.
電気的計画と必要なすべてのサージ保護要件を確認します。
验证电气计划和所有必要的浪涌保护要求。
3
Record location and serial number of each luminaire for addressing.
Enregistrez l’emplacement et le numéro de série de chaque appareil pour l’adressage  Anote la posición y el número de serie de cada lámparas para su programación
Registrare la posizione e il numero seriale di ogni gruppo di illuminazione per la localizzazione
Noteer plaats en serienummer van elk onderdeel, dit ten behoeve van installatie  Ort und Seriennummer jedes Beleuchtungskörpers zur Adressierung notieren
各フィクスチャの場所とシリアル番号を書き留めます  记下各灯具的位置和序列号,以便查询
4
Mounting Options
Options de montage  Opciones de montaje  Opzioni di montaggio  Montage-opties  Befestigungsmöglichkeiten  取り付けオプション  安装方案
62.5 mm (2.46 in)
22 mm (0.87 in)
2x Ø
4.5 mm
(0.18 in)
305 mm (12.0 in)
152.5 mm (6 in)
37 mm
(1.46 in)
44.5 mm
(1.75 in)
70 mm
(2.76 in)
37.5 mm
(1.48 in)
2x 62.5 mm (2.46 in)
22 mm (0.87 in)
2x Ø
4.5 mm
(0.18 in)
1205 mm (47.44 in)
302.5 mm (11.91 in)
37 mm
(1.46 in)
44.5 mm
(1.75 in)
70 mm
(2.76 in)
37.5 mm
(1.48 in)
4 mm
(0.16 in)
Maximum
Ø 9.0 mm
(0.35 in)
Maximum
267° Maximum
1.2 m (4 ft)0.3 m (1 ft)
B Important Surge Protection Requirement: www.colorkinetics.com/KB/surge-protection
4  PureStyle Compact Powercore, IntelliHue, RGBA  Installation Instructions PureStyle Compact Powercore, IntelliHue, RGBA  Installation Instructions  5
Luminaire and
masking plate
Luminaire,
mounting track
and masking plate
Retrofit
masking plate
7
Connect luminaires
Branchez les appareils   Conecte las lámparas  Collegare i gruppi di illuminazione  Montageverbindingen
Schließen Sie die Beleuchtungskörper an   器具の接続  连接灯具
8 mm (.32 in) minimum
minimum  mínimo
minimo  minimum
mindestens  最低  最小
Terminator
Terminateur
Terminador
Terminatore
Afsluiter
Abschlusswiderstand
ターミネーター
终端器
Jumper Cable (optional)
Câbles de raccordement interboîtier
Cables puente  Ponticelli
Overbruggingskabel  Schaltkabel
ジャンパー ケーブル  跨接电缆
Direct Connect
Connexion directe
Conexión directa
Collegamento diretto
Rechtstreekse verbinding
Direktanschluss
直接接続
直接连接
Leader Cable
Câble principal
Cable conductor
Cavo pilota
Hoofdkabel
Leitkabel
リーダー ケーブル
主电缆
BAttach Terminator at end of run
Attachez Terminator à la fin du cycle
Adjuntar Terminador al final de la carrera
Collegare Terminator alla fine della corsa
Bevestig de terminator aan het einde van de run
Schließen Sie den Terminator am Ende des Laufs an
運転終了時にターミネーターを取り付ける
在运行结束时附加终结器
8
0.3 m (1 ft)
1.5 m (5 ft)
CLICK!
6
Make sure power is OFF.
Assurez-vous que l’alimentation est coupée  Asegúrese de que la alimentación eléctrica esté desconectada  Assicurarsi che l’alimentazione sia disattivata
Zorg dat de voeding is uitgeschakeld  Vergewissern Sie sich, dass die Stromzufuhr ABGESCHALTET ist
電源が OFF であることを確認します  确保电源关闭
5
Attach masking plate
Fixer la plaque de masquage  Coloque la placa de enmascaramiento  Collegare la piastra di mascheratura  Bevestig de maskeerplaat  
Abdeckplatte anbringen  マスキングプレートを取り付ける  连接遮蔽板
Attach mounting track
Fixer le rail de montage  Adjuntar pista de montaje  Collegare la guida di montaggio  
Bevestig het montagerail  Montageschiene anbringen  取り付けトラックを取り付 ける  
连接安装轨道
Optional  En option  Opcional  Opzionale  Opties  Optional  オプ ション     可选
D Minimum Jumper Cable bend radius 70.5 mm (2.78 in)
Rayon de courbure minimal du câble de cavalier 70,5 mm (2,78 in)
Radio de curvatura del cable de puente mínimo 70.5 mm (2.78 in)
Raggio di curvatura del cavo di ponticello minimo 70,5 mm (2,78 in)
Minimale verbindingskabel buigradius 70,5 mm (2,78 inch)
Minimaler Jumper-Kabelbiegeradius 70,5 mm
最小ジャンパーケーブル曲げ半径70.5 mm(2.78 in)
最小跳线电缆弯曲半径70.5 mm(2.78 in)
D Masking plate is eld trimable
La plaque de masquage peut être ajustée sur le terrain  La placa de enmascaramiento es de campo  La piastra di mascheratura è modellabile sul campo
De maskeerplaat kan in het veld worden bijgesneden  Die Abdeckplatte ist vor Ort trimmbar  マスキングプレートは現場でトリミング可能  遮蔽板可现场使用
Position exible joiner plate for straight runs
Positionner la plaque de jonction flexible pour les lignes droites
Posicione la placa de unión flexible para carreras rectas
Posizionare la piastra di giunzione flessibile per percorsi rettilinei
Plaats flexibele verbindingsplaat voor rechte stukken
Flexible Verbindungsplatte für gerade Läufe positionieren
直進用フレキシブルジョイナープレート  定位柔性连接板用于直线运行
Center exible joiner plate for angled runs
Plaque centrale de jonction flexible pour les pistes inclinées
Placa de unión flexible en el centro para carreras en ángulo
Piastra di giunzione centrale flessibile per percorsi inclinati
Midden flexibele verbindingsplaat voor schuine runs
Mittige flexible Tischlerplatte für abgewinkelte Läufe
アングルラン用のセンターフレキシブルジョイナープレート
中心柔性连接板,用于倾斜运行
80 mm (3.15 in)
53.6 mm (2.1 in)
7.5 mm (0.3 in)305 mm (12.0 in), 1219 mm (48.0 in)
Flexible joiner plate
2 mm (0.08 in)
6  PureStyle Compact Powercore, IntelliHue, RGBA  Installation Instructions PureStyle Compact Powercore, IntelliHue, RGBA  Installation Instructions  7
9
Item number 120-000191-00
12NC 912400133644
UL / cUL Wiring Compartment
Compartiment de câblage UL / cUL
Compartimento de cableado UL / cUL
Vano di cablaggio UL/cUL
Compartiment UL/cUL-bedrading
UL-/cUL-konformes Anschlussfach
UL規格 / カナダUL規格 配線ボックス
UL / cUL 接线腔
Optional  En option  Opcional  Opzionale  Opties  Optional  オプ ション     可选
Ground
Terre
Toma de tierra
Terra
Aarde
Masse
アース
接地
Data
Données
Datos
Dati
Data
Daten
データ
数据
Neutral
Neutre
Neutro
Neutro
Neutraal
Neutral
中性線
零线
N
Line Voltage
T
ension de secteur
Tensión de línea
Tensione di linea
Netspanning
Netzspannung
線間電圧
线路电压
L
L
N
UL / cUL
L
N
CE /PSE
CQC
Connect leader cable to Power/data supply
Branchez le câble principal  Enchufe el cable de alimentación eléctrica principal  Collegare il cavo pilota
Sluit de geleidekabel aan  Schließen Sie das Masterkabel an  リーダー ケーブルを接続します  连接引线电缆
D Refer to the Data Enabler Pro Installation Instructions for specic
mounting and wiring instructions.
Reportez-vous aux instructions d’installation Data Enabler Pro pour les instructions de montage et
de câblage spéciques.
Consulte las instrucciones de instalación Data Enabler Pro para obtener instrucciones especícas
de montaje y cableado.
Fare riferimento a Data Enabler Pro Istruzioni di installazione per istruzioni speciche sul
montaggio e sul cablaggio.
Raadpleeg Data Enabler Pro installatie-instructies voor specieke montage- en
bedradingsinstructies.
Beziehen Sie sich auf Data Enabler Pro Installationsanweisungen für spezische Montage- und
Verdrahtungsanweisungen.
具体的な取り付けおよび配線手順については、Data Enabler Pro据付手順を参照してください。
有关具体的安装和接线说明,请参阅Data Enabler Pro安装说明。
D Tighten hinge screw to lock luminaire in place
Serrez la vis de charnière pour verrouiller le luminaire en place
apriete el tornillo de la bisagra para jar la luminaria en su lugar
serrare la vite della cerniera per bloccare l'apparecchio in posizione
draai de scharnierschroef vast om de armatuur op zijn plaats te vergrendelen
Ziehen Sie die Scharnierschraube fest, um die Leuchte zu arretieren
ヒンジネジを締めて照明器具を所定の位置にロックします
拧紧铰链螺钉,将灯具锁定到位
10
Turn the power ON.
Rétablissez le courant  Encienda la alimentación eléctrica
Attivare l’alimentazione  Schakel de voeding in
Schalten Sie die Stromzufuhr EIN
電源を ON にします  打开电源
11
12
Aim the luminaires
Ajustez l’orientation des appareils d’éclairage
Richten Sie die Beleuchtungskörper aus
Oriente las lámparas
Orientare i gruppi di illuminazione
Richt de armaturen
フィクスチャの方向を調整します
对准灯具
E Address and Congure: https://www.colorkinetics.com/global/support/install-tool
Address luminaires with QuickPlay Pro software.
Configurer les luminaires à l’aide du logiciel QuickPlay Pro
Direccionar las luminarias con el software QuickPlay Pro
Impostare i gruppi di illuminazione con il software QuickPlay Pro
Adresbevestigingen met QuickPlay Pro-software
Beleuchtungseinheiten mit der QuickPlay Pro-Software ansteuern
QuickPlay Pro ソフトウェアで器具を操作します
使用 QuickPlay Pro 软件配置各灯具
B Do not look into beam.
Ne regardez pas dans le faisceau
No mire directamente el rayo de luz
Non ssare il fascio di luce
Kijk niet in de lichtbundel
Nicht in den Strahl blicken
ビームが目に入らないよう注意してください
切勿直视光束
13
Attach Glare-Reducing Lens
Fixer la lentille antireflet  Adjuntar lente de reducción de deslumbramiento  Montare la lente antiriflesso  Bevestig de verblindingslens
Bringen Sie die Blendschutzlinse an   防眩レンズを取り付ける  附上眩光减少镜头
Optional  En option  Opcional  Opzionale  Opties  Optional  オプ ション     可选
B Align both ends of
glare-reducing lens
Aligner les deux extrémités de la
lentille antireet
Alinee ambos extremos de la lente
que reduce el deslumbramiento
Allineare entrambe le estremità
dell'obiettivo antiriesso
Lijn beide uiteinden van de
verblindende lens uit
Richten Sie beide Enden der
Blendschutzlinse aus
防眩レンズの両端を合わせる
对准眩光降低镜头的两端
2.5 mm hex
Torque to
0.54 – 0.66 N-m
(5 – 6 in-lbs.)
A Ensure that main power supply is o before installing or wiring a
luminaire.
Assurez-vous que l’alimentation principale est coupée avant d’installer ou de câbler un appareil
d’éclairage.
Antes de instalar o cablear una lámpara, asegúrese de que la alimentación eléctrica esté
desconectada.
Accertarsi che la tensione di rete principale sia disattivata prima di installare o cablare un
gruppo di illuminazione.
Zorg dat de stroomvoorziening is uitgeschakeld voordat u een armatuur installeert of
bedrading aanbrengt.
Vergewissern Sie sich, dass die Stromzufuhr unterbrochen ist, bevor Sie einen Beleuchtung-
skörper installieren oder ans Stromnetz anschließen.
フィクスチャを設置または配線する前に、主電源がオフであることを確認してください。
对灯具进行安装或接线时,需确保主电源已关闭。
B Do not attempt to install or use a luminaire until you read and
understand the installation instructions and safety labels.
Assurez-vous d’avoir lu et compris les instructions d’installation et les autocollants de sécurité
avant d’installer ou d’utiliser un appareil d’éclairage.
No intente instalar o utilizar una lámpara sin previamente haber leído y comprendido las
instrucciones de instalación y las etiquetas de seguridad
Non provare a installare o utilizzare un gruppo di illuminazione se non sono state lette e
comprese le istruzioni per l’installazione e le etichette di sicurezza.
Probeer geen armaturen aan te brengen of te gebruiken voordat u de plaatsingsinstructies en
veiligheidslabels hebt gelezen en begrijpt.
Installieren oder verwenden Sie einen Beleuchtungskörper erst, nachdem Sie die Installation-
sanweisungen und Sicherheitsetiketten gelesen haben.
置手順と安全ラベルを読み理解してから、フィクスチャの設置または使用を始めてください。
阅读并理解安装说明和安全标签之前,切勿试图安装或使用灯
B Do not use a luminaire if the lens, housing, or power cables are
damaged.
N’utilisez pas un appareil d’éclairage si la lentille, le boîtier ou les câbles d’alimentation sont
endommagés.
No utilice una lámpara que presente daños en el cristal o plástico, estructura o en los cables de
alimentación eléctrica.
Non utilizzare un gruppo di illuminazione se il gruppo ottico, l’alloggiamento o i cavi di
alimentazione sono danneggiati.
Gebruik een armatuur niet indien de lens, behuizing of voedingkabels zijn beschadigd.
Verwenden Sie den Beleuchtungskörper nicht, wenn das Lampenglas, Gehäuse oder ein
Netzkabel beschädigt ist.
レンズ、ハウジング、または電源ケーブルが損傷している場合は、フィクスチャを使用しないでください。
如果灯镜片、灯壳或电线受损,切勿使用产品。
B Luminaires have line voltage risk of shock and no user serviceable
parts. Do not attempt to open them.
La tension composée des appareils d’éclairage présente un risque de choc électrique et les
pièces ne sont pas réparables par l’utilisateur. Ne tentez pas de les ouvrir.
Al manipular las lámparas existe riesgo de descarga eléctrica. Las lámparas no contienen
piezas que puedan ser reparadas por el usuario. No intente abrirlas.
I gruppi di illuminazione presentano rischi di scosse elettriche e non contengono componenti
sostituibili dall’utente. Non aprirli.
Bij armaturen is een risico op schokken door lijnspanning aanwezig en armaturen bevatten
geen onderdelen die door de gebruiker kunnen worden onderhouden. Probeer armaturen niet
open te maken.
Die elektrischen Leiter der Beleuchtungskörper können einen Stromschlag verursachen, und
die Beleuchtungskörper enthalten keine vom Benutzer wartbaren Teile. Versuchen Sie nicht,
einen Beleuchtungskörper zu önen.
フィクスチャには、感電の危険がある電流が流れており、ユーザーが保守できる部品はありません。フィク
ス チャを 開 け ようとし な い でくだ さ い 。
灯具存在线电压电击的危险,且无用户可修理的部件。切勿试图打开产品。
BDo not use a luminaire for any voltage for which it is not rated. Do
not exceed the specied voltage and current input for any luminaire.
N’utilisez pas un appareil d’éclairage sous une tension autre que la tension nominale. Ne
dépassez jamais la tension et la consommation de courant spéciées pour un appareil
d’éclairage.
No conecte la lámpara a un voltaje distinto al especicado. No sobrepase el voltaje o la
corriente eléctrica especicados en ninguna de las lámparas.
Non utilizzare un gruppo di illuminazione su una rete elettrica non classicata. Non superare la
tensione e la corrente di ingresso specicate per il gruppo di illuminazione.
Gebruik een armatuur niet bij een spanning waarvoor deze niet is bestemd. De opgegeven
spannings- en stroomwaarden mogen voor een armatuur niet worden overschreden.
Verwenden Sie den Beleuchtungskörper nicht bei Stromspannungen, für die der Beleuchtung-
skörper nicht bestimmt ist. Die für einen Beleuchtungskörper angegebene Spannung und der
angegebene Eingangsstrom dürfen nicht überschritten werden.
規定以外の電圧でフィクスチャを使用しないでください。フィクスチャに供給される電圧および電流が、
指定された値を超えないようにしてください。
切勿在任何非额定电压的情况下,使用产品。切勿超出灯具规定的电压与输入电流.
C Do not hot swap luminaires. Ensure that power to the series is o
before connecting or disconnecting individual luminaires.
Ne remplacez pas les appareils d’éclairage à chaud. Assurez-vous que l’alimentation série est
coupée avant de brancher ou de débrancher chaque appareil d’éclairage.
No sustituya lámparas mientras estén calientes. Asegúrese de que la alimentación eléctrica
de toda la serie de lámparas esté desconectada antes de conectar o desconectar una lámpara
individual.
Non sostituire a caldo i gruppi di illuminazione. Accertarsi che l’alimentazione in serie sia
disattivata prima di collegare o scollegare i singoli gruppi di illuminazione.
Vervang een armatuur niet terwijl deze aan is. Zorg dat de voeding naar de reeks is
uitgeschakeld voordat u afzonderlijke armaturen aansluit of loskoppelt.
Tauschen Sie einen Beleuchtungskörper nicht im eingeschalteten Zustand aus. Vergewissern
Sie sich, dass die Stromzufuhr zu einer Serie von Beleuchtungskörpern unterbrochen ist, bevor
Sie einzelne Beleuchtungskörper anschließen oder vom Stromnetz trennen.
電源を入れたままフィクスチャを交換しないでください。個々のフィクスチャを接続または取り外す前
に、直列フィクスチャへの電源がオフであることを確認してください。
切勿热插拔产品。连接或断开单个灯具之前,必须确保供该系列之电源已关闭。
C When installed according to these instructions:
This device complies with Part 15 of the FCC Rules. Operation is subject
to the following two conditions: (1) this device may not cause harmful
interference, and (2) this device must accept any interference received,
including interference that may cause undesired operation.
This equipment has been tested and found to comply with the limits
for a Class B digital device, pursuant to Part 15 of the FCC Rules.
These limits are designed to provide reasonable protection against
harmful interference when the equipment is operated in a residential
environment. This equipment generates, uses, and can radiate radio
frequency energy and, if not installed and used in accordance with
the instruction manual, may cause harmful interference to radio
communications.
C This Class B digital apparatus complies with Canadian ICES-005. Cet
appareil numerique de la classe B est conforme a la norme NMB-005
du Canada.
© 2019 Signify Holding. All rights reserved. Specifications are subject to
change without notice. No representation or warranty as to the accuracy
or completeness of the information included herein is given and any
liability for any action in reliance thereon is disclaimed. www.colorkinetics.com
Other COLORKINETICS Lighting Equipment manuals

COLORKINETICS i mops- 150 User manual

COLORKINETICS

COLORKINETICS i mops- 150 User manual

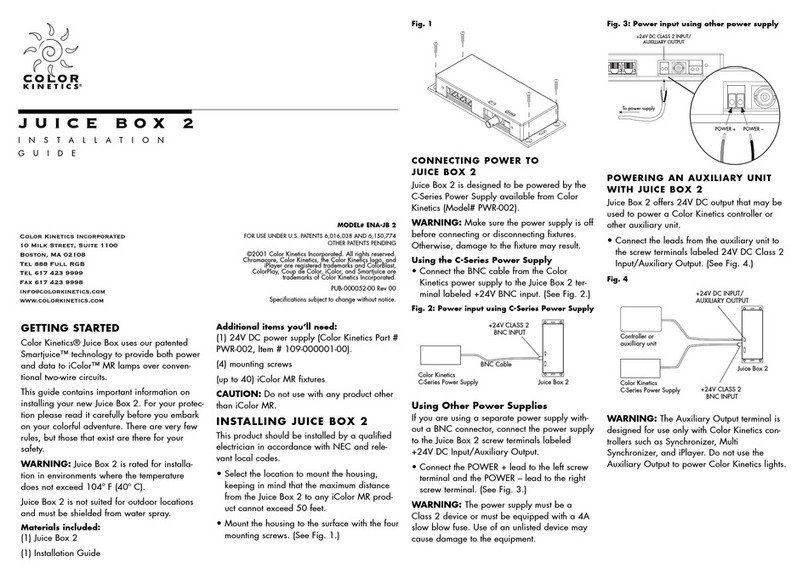
COLORKINETICS JUICE BOX 2  ENA-JB 2 User manual

COLORKINETICS

COLORKINETICS JUICE BOX 2 ENA-JB 2 User manual

COLORKINETICS Accent MX Powercore gen3 User manual

COLORKINETICS

COLORKINETICS Accent MX Powercore gen3 User manual

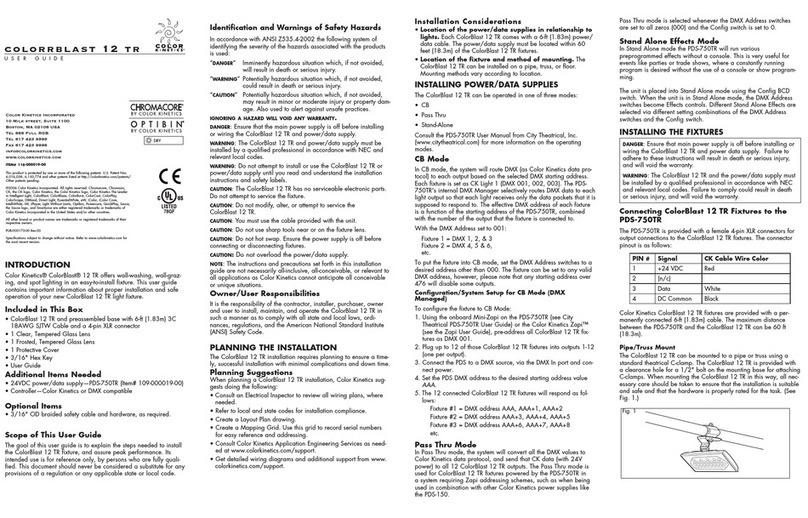
COLORKINETICS Colorrblast 12 TR User manual

COLORKINETICS

COLORKINETICS Colorrblast 12 TR User manual

COLORKINETICS ColorDial User manual

COLORKINETICS

COLORKINETICS ColorDial User manual

COLORKINETICS vaya Series User manual

COLORKINETICS

COLORKINETICS vaya Series User manual

COLORKINETICS ReachElite Powercore 100 User manual

COLORKINETICS

COLORKINETICS ReachElite Powercore 100 User manual

COLORKINETICS Vaya Series User manual

COLORKINETICS

COLORKINETICS Vaya Series User manual

COLORKINETICS ReachElite Powercore 200 User manual

COLORKINETICS

COLORKINETICS ReachElite Powercore 200 User manual

COLORKINETICS ReachElite Powercore 300 User manual

COLORKINETICS

COLORKINETICS ReachElite Powercore 300 User manual

COLORKINETICS Graze Inground Enclosure User manual

COLORKINETICS

COLORKINETICS Graze Inground Enclosure User manual

COLORKINETICS ReachElite Powercore 200 User manual

COLORKINETICS

COLORKINETICS ReachElite Powercore 200 User manual

COLORKINETICS LLP115F1TTO102CPL2220W120000 Operating manual

COLORKINETICS

COLORKINETICS LLP115F1TTO102CPL2220W120000 Operating manual

COLORKINETICS Graze Compact Powercore User manual

COLORKINETICS

COLORKINETICS Graze Compact Powercore User manual

COLORKINETICS Data Enabler Pro User manual

COLORKINETICS

COLORKINETICS Data Enabler Pro User manual

COLORKINETICS eW Burst Powercore gen2 User manual

COLORKINETICS

COLORKINETICS eW Burst Powercore gen2 User manual

COLORKINETICS ColorBlast 12 Powercore User manual

COLORKINETICS

COLORKINETICS ColorBlast 12 Powercore User manual

Popular Lighting Equipment manuals by other brands

Lumisky STANDY MINI user guide

Lumisky

Lumisky STANDY MINI user guide

Griven Moon RGBW user manual

Griven

Griven Moon RGBW user manual

Feniex FUSION-S 800 LIGHTSTICK instruction manual

Feniex

Feniex FUSION-S 800 LIGHTSTICK instruction manual

on 23.8757.15 user manual

on

on 23.8757.15 user manual

ThePondguy 160326 instruction manual

ThePondguy

ThePondguy 160326 instruction manual

Lucibel LIFI DEMO KIT Instruction guide

Lucibel

Lucibel LIFI DEMO KIT Instruction guide

Inspire VENOSA YW3865 Assembly-Use-Maintenence Manual

Inspire

Inspire VENOSA YW3865 Assembly-Use-Maintenence Manual

Conrad 57 19 00 operating instructions

Conrad

Conrad 57 19 00 operating instructions

PR LED Studio 3500T manual

PR

PR LED Studio 3500T manual

Chalmit Curie Elite ATEX Installation, operation and maintenance instructions

Chalmit

Chalmit Curie Elite ATEX Installation, operation and maintenance instructions

ACME BRIGHT user manual

ACME

ACME BRIGHT user manual

Qazqa Cage Rack WL 2 Black 105135 instruction manual

Qazqa

Qazqa Cage Rack WL 2 Black 105135 instruction manual

EuroLite 52500200 user manual

EuroLite

EuroLite 52500200 user manual

Solight 1V46 user guide

Solight

Solight 1V46 user guide

Emos Cherry ZY0902T manual

Emos

Emos Cherry ZY0902T manual

Avantes AVASPHERE-50-LS-HAL-12V Operation and installation manual

Avantes

Avantes AVASPHERE-50-LS-HAL-12V Operation and installation manual

PLG NEPTUN 12 user manual

PLG

PLG NEPTUN 12 user manual

Blizzard Lighting HotStik 5 COB Mini user manual

Blizzard Lighting

Blizzard Lighting HotStik 5 COB Mini user manual

manuals.online logo
manuals.online logoBrands
  • About & Mission
  • Contact us
  • Privacy Policy
  • Terms and Conditions

Copyright 2025 Manuals.Online. All Rights Reserved.