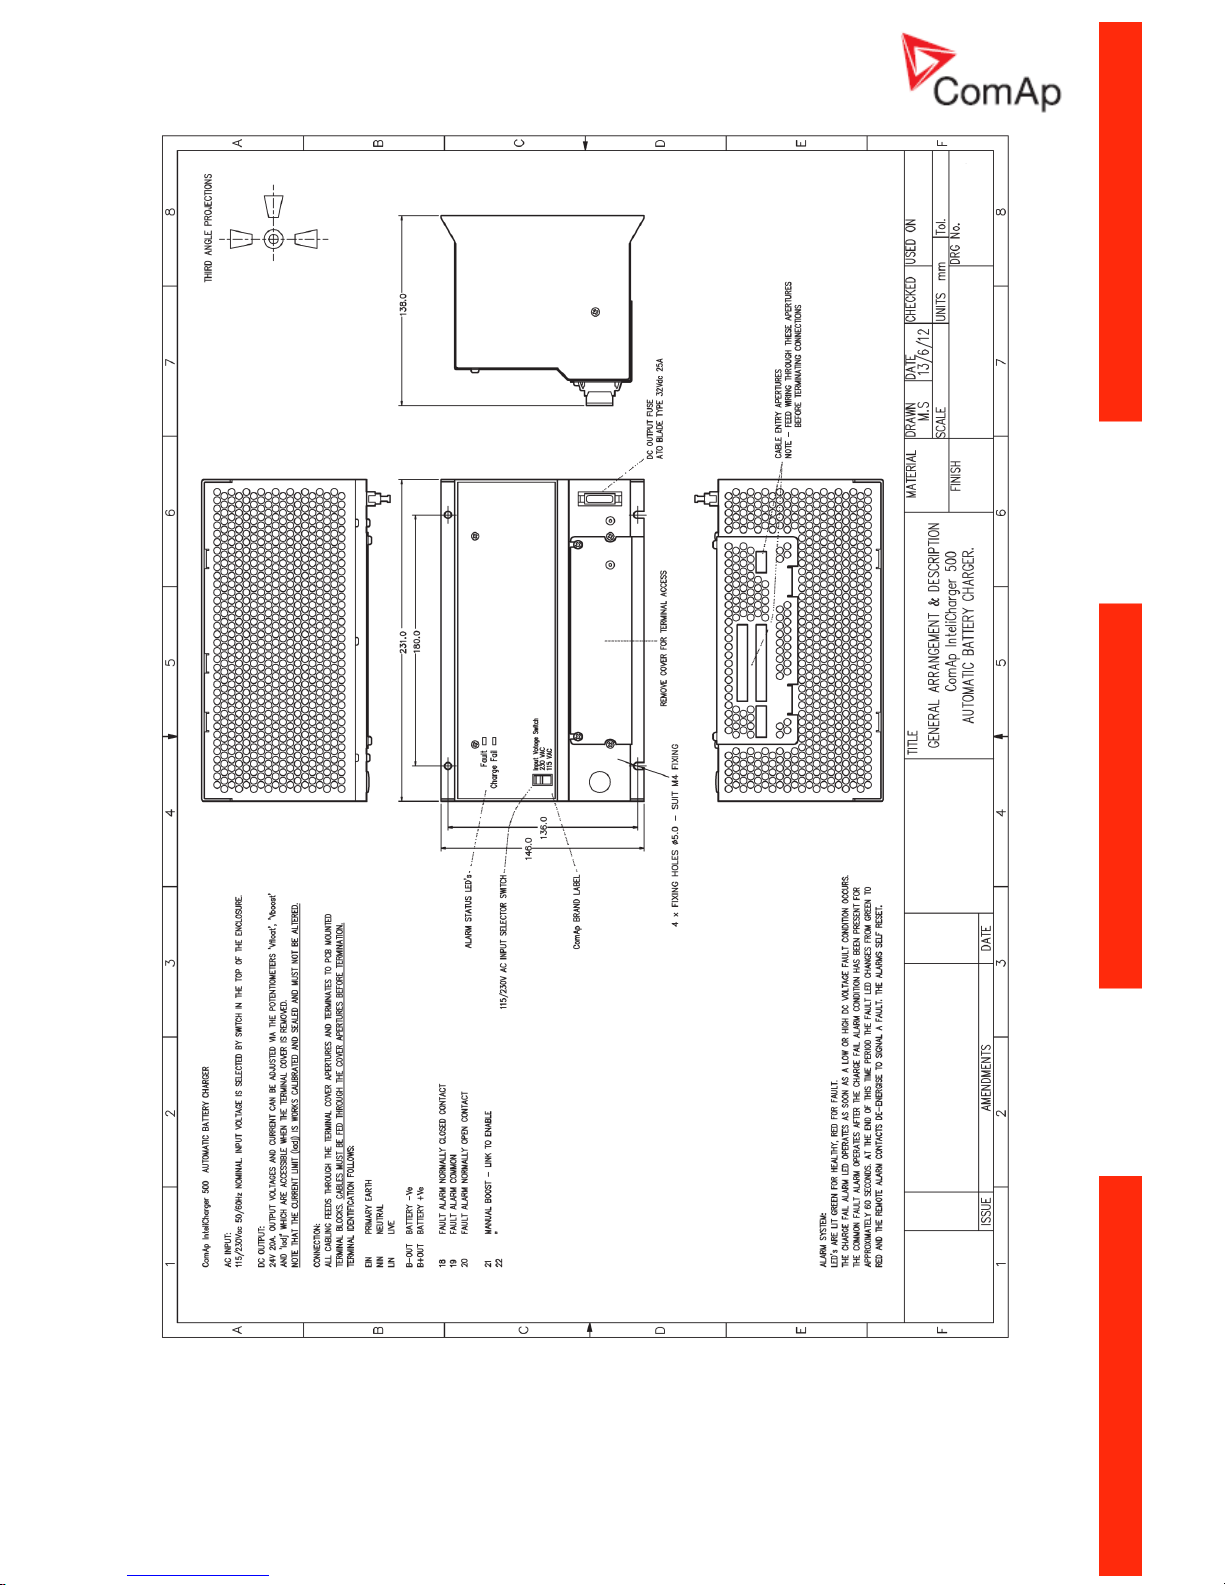
InteliCharger 500, ©ComAp –June 2012 6
ICHG-500 - Reference Guide.pdf
APPENDIX B - Manual Calibration Routine
When the automatic calibration levels are not suitable a manual calibration can be performed.
NOTE:
The battery MUST be disconnected from the charger before proceeding.
Power down the unit, hold the ‘PROG’ push-button down and power up the charger. Release
the 'PROG' push-button and the LED's will flash Red/Green in quick succession to indicate
manual calibration mode.
The following sequence must be followed by adjusting the float voltage potentiometer to the
desired voltage level at each stage:
Charger Fault Setting Procedure
Fail LED LED
Red Red Set Boost on Voltage, operate PROG push button.
Green Green Set Boost off Voltage (high level), operate PROG push button.
Red Green Set Boost off Reset Voltage (low level), operate PROG push button.
Red Red Set Charger Fail Low Voltage Alarm, operate PROG push button.
Green Red Set Charger Fail Low Voltage Reset, operate PROG push button.
Red Red Set Charger Fail High Voltage Alarm, operate PROG push button.
Green Red Set Charger Fail High Voltage Reset, operate PROG push button.
11 APPENDIX C - DEFAULT FACTORY
All units leave the factory calibrated to the following levels:
AC Input 230 Vac
DC Output Float Voltage 27.50 V
DC Output Boost Voltage 28.80 V
DC Output Current 20.00 A
Charger Fail Low Volts Alarm 25.50 V
Charger Fail Low Volts Reset 26.00 V
Charger Fail High Volts Alarm 29.05 V
Charger Fail High Volts Reset 28.50 V
Boost On Voltage Level 25.75V
Boost Off Voltage Level 28.6V
Fault Alarm Timer 60 Seconds
Absorb Timer (Boost run on) Variable 2-60 minutes.