manuals.online logo
Brands
  1. Home
  2. •
  3. Brands
  4. •
  5. COMECO
  6. •
  7. Transmitter
  8. •
  9. COMECO TRA1 User manual

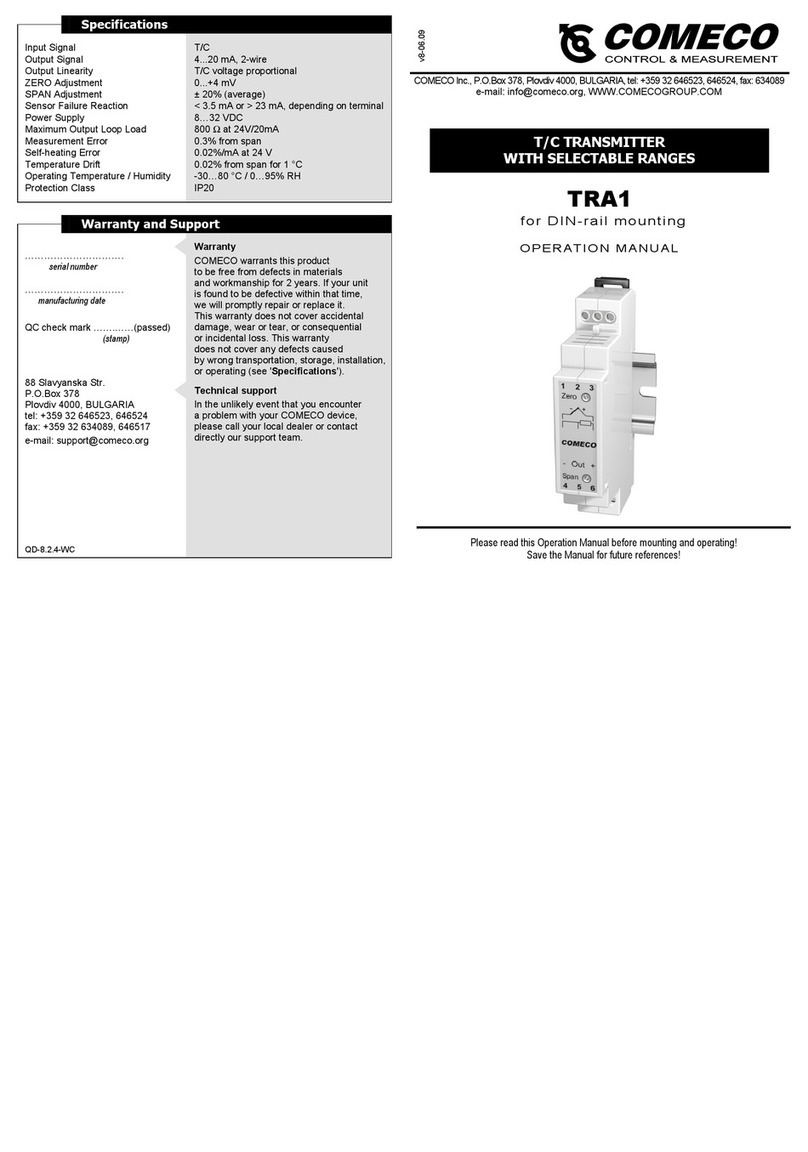
COMECO TRA1 User manual

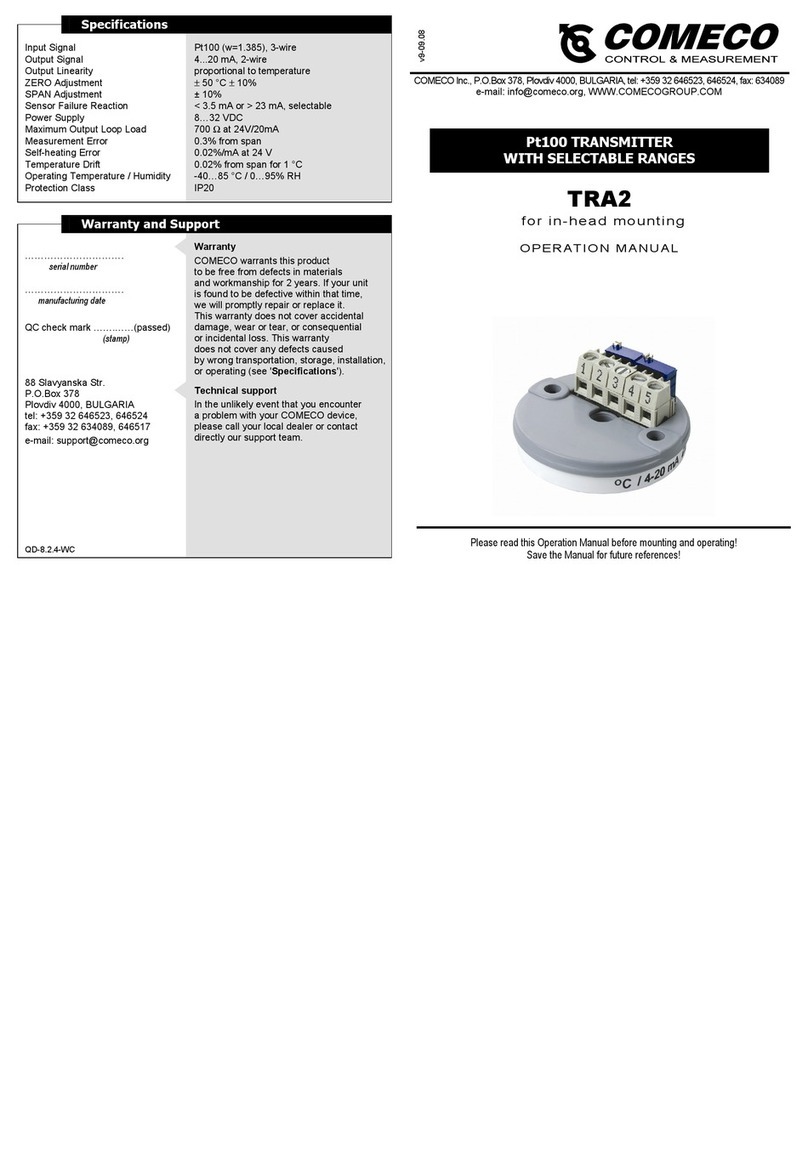
Specifications
Input Signal
Output Signal
Output Linearity
ZERO Adjustment
SPAN Adjustment
Sensor Failure Reaction
Power Supply
Maximum Output Loop Load
Measurement Error
Self-heating Error
Temperature Drift
Operating Temperature / Humidity
Protection Class
Pt100 (w=1.385), 3-wire
4...20 mA, 2-wire
proportional to temperature
±50 °C ±10%
± 10%
< 3.5 mA or > 23 mA, depending on terminal
8…32 VDC
620 Ωat 24V/20mA
0.3% from span
0.02%/mA at 24 V
0.02% from span for 1 °C
-30…80 °C / 0…95% RH
IP20
Warranty and Support
………………………….
serial number
………………………….
manufacturing date
QC check mark …….……(passed)
(stamp)
88 Slavyanska Str.
P.O.Box 378
Plovdiv 4000, BULGARIA
tel: +359 32 646523, 646524
fax: +359 32 634089, 646517
e-mail: support@comeco.org
QD-8.2.4-WC
Warranty
COMECO warrants this product
to be free from defects in materials
and workmanship for 2 years. If your unit
is found to be defective within that time,
we will promptly repair or replace it.
This warranty does not cover accidental
damage, wear or tear, or consequential
or incidental loss. This warranty
does not cover any defects caused
by wrong transportation, storage, installation,
or operating (see 'Specifications').
Technical support
In the unlikely event that you encounter
a problem with your COMECO device,
please call your local dealer or contact
directly our support team.
COMECO Inc., P.O.Box 378, Plovdiv 4000, BULGARIA, tel: +359 32 646523, 646524, fax: 634089
e-mail: [email protected]g, WWW.COMECOGROUP.COM
TRA1
for DIN-rail mounting
OPERATION MANUAL
Please read this Operation Manual before mounting and operating!
Save the Manual for future references!
Pt100 TRANSMITTER
WITH SELECTABLE RANGES
v8-07.08
Overview
The Pt100 transmitter TRA accepts
3-wire Pt100 sensor input signals.
It allows on-site selection of the input range
and converts the input into standard
2-wire 4…20 mA signal, proportional
to the measured temperature.
Mounting and Wiring
Mounting
TRA for DIN-rail mounting is designed
to be easily mounted on every 35 mm rail
conforming to EN50022.
Wiring
♦Connect the Pt100 sensor
to the transmitter input
as illustrated on the wiring diagram.
♦Wire the output current loop accordingly.
♦In order to minimize measuring errors,
make sure the connecting screws
are tightened enough.
Configuring and Calibrating
Case Opening
♦Insert the tip of appropriate screw-driver
into rectangular openings and press
as shown.
♦Repeat the above operation
from the opposite site of the case.
After closing the case,
do not forget to insert
the two black spring-type brackets.
Configuration
To be carried out
before calibration!
♦Open transmitter case to expose
the nine soldering jumpers,
each of which consisting
of 3 solder pads.
♦Select span range from the chart.
♦To set the desired input range,
solder the respective jumper pads
according to the chart.
♦Close the plastic case.
Calibration
It is suggested that
the calibration be checked
at least once a year.
♦Connect the transmitter
(see 'Wiring').
♦Apply an input signal to give
an output of approximately 12 mA
and leave the unit for 15 min,
if possible at the ambient
temperature it is intended
to work at.
♦Apply INmin corresponding
to the desired minimum
input signal.
♦Adjust ‘Zero’ potentiometer
to get Iout = 4.00 mA.
♦Apply INmax corresponding
to the desired maximum
input signal.
♦Adjust ‘Span’ potentiometer
to get Iout = 20.00 mA.
♦Repeat the last 4 steps
until readings converge.
♦Secure the potentiometers
with lacquer.

Other COMECO Transmitter manuals

COMECO TRA1 User manual

COMECO

COMECO TRA1 User manual

COMECO TRA2 User manual

COMECO

COMECO TRA2 User manual

COMECO TRA1 User manual

COMECO

COMECO TRA1 User manual

COMECO PHG User manual

COMECO

COMECO PHG User manual

COMECO TRA1 User manual

COMECO

COMECO TRA1 User manual

Popular Transmitter manuals by other brands

Abilia Gewa IR-1SP Micro manual

Abilia

Abilia Gewa IR-1SP Micro manual

Omega OS102E quick start

Omega

Omega OS102E quick start

Smart-Fly Ignition Cutoff user guide

Smart-Fly

Smart-Fly Ignition Cutoff user guide

RKI Instruments 65-2443-100 Operator's manual

RKI Instruments

RKI Instruments 65-2443-100 Operator's manual

Vaisala HUMICAP HMD70U operating manual

Vaisala

Vaisala HUMICAP HMD70U operating manual

Jensen JC100 owner's manual

Jensen

Jensen JC100 owner's manual

GE 99001 user manual

GE

GE 99001 user manual

Community Controls CHAMELEON 318LIPW4CK quick start guide

Community Controls

Community Controls CHAMELEON 318LIPW4CK quick start guide

Omega Engineering TX801R user guide

Omega Engineering

Omega Engineering TX801R user guide

Woxcon TPHD463 user manual

Woxcon

Woxcon TPHD463 user manual

Listen LT-82 Quick reference card

Listen

Listen LT-82 Quick reference card

Amana DT01* installation instructions

Amana

Amana DT01* installation instructions

turck IM31-12Ex-i U Series quick start guide

turck

turck IM31-12Ex-i U Series quick start guide

Motorola Omnistar GX2-DM1000B10/CH Series datasheet

Motorola

Motorola Omnistar GX2-DM1000B10/CH Series datasheet

Honeywell STT850 SMARTLINE user manual

Honeywell

Honeywell STT850 SMARTLINE user manual

NIEUWKOOP GT3000 user manual

NIEUWKOOP

NIEUWKOOP GT3000 user manual

Abus FUAT50000 manual

Abus

Abus FUAT50000 manual

Emerson Rosemount 702 quick start guide

Emerson

Emerson Rosemount 702 quick start guide

manuals.online logo
manuals.online logoBrands
  • About & Mission
  • Contact us
  • Privacy Policy
  • Terms and Conditions

Copyright 2025 Manuals.Online. All Rights Reserved.