Introduction Catalogs
Paramenters
Disclaimer
Install LightBurn
Open The LightBurn
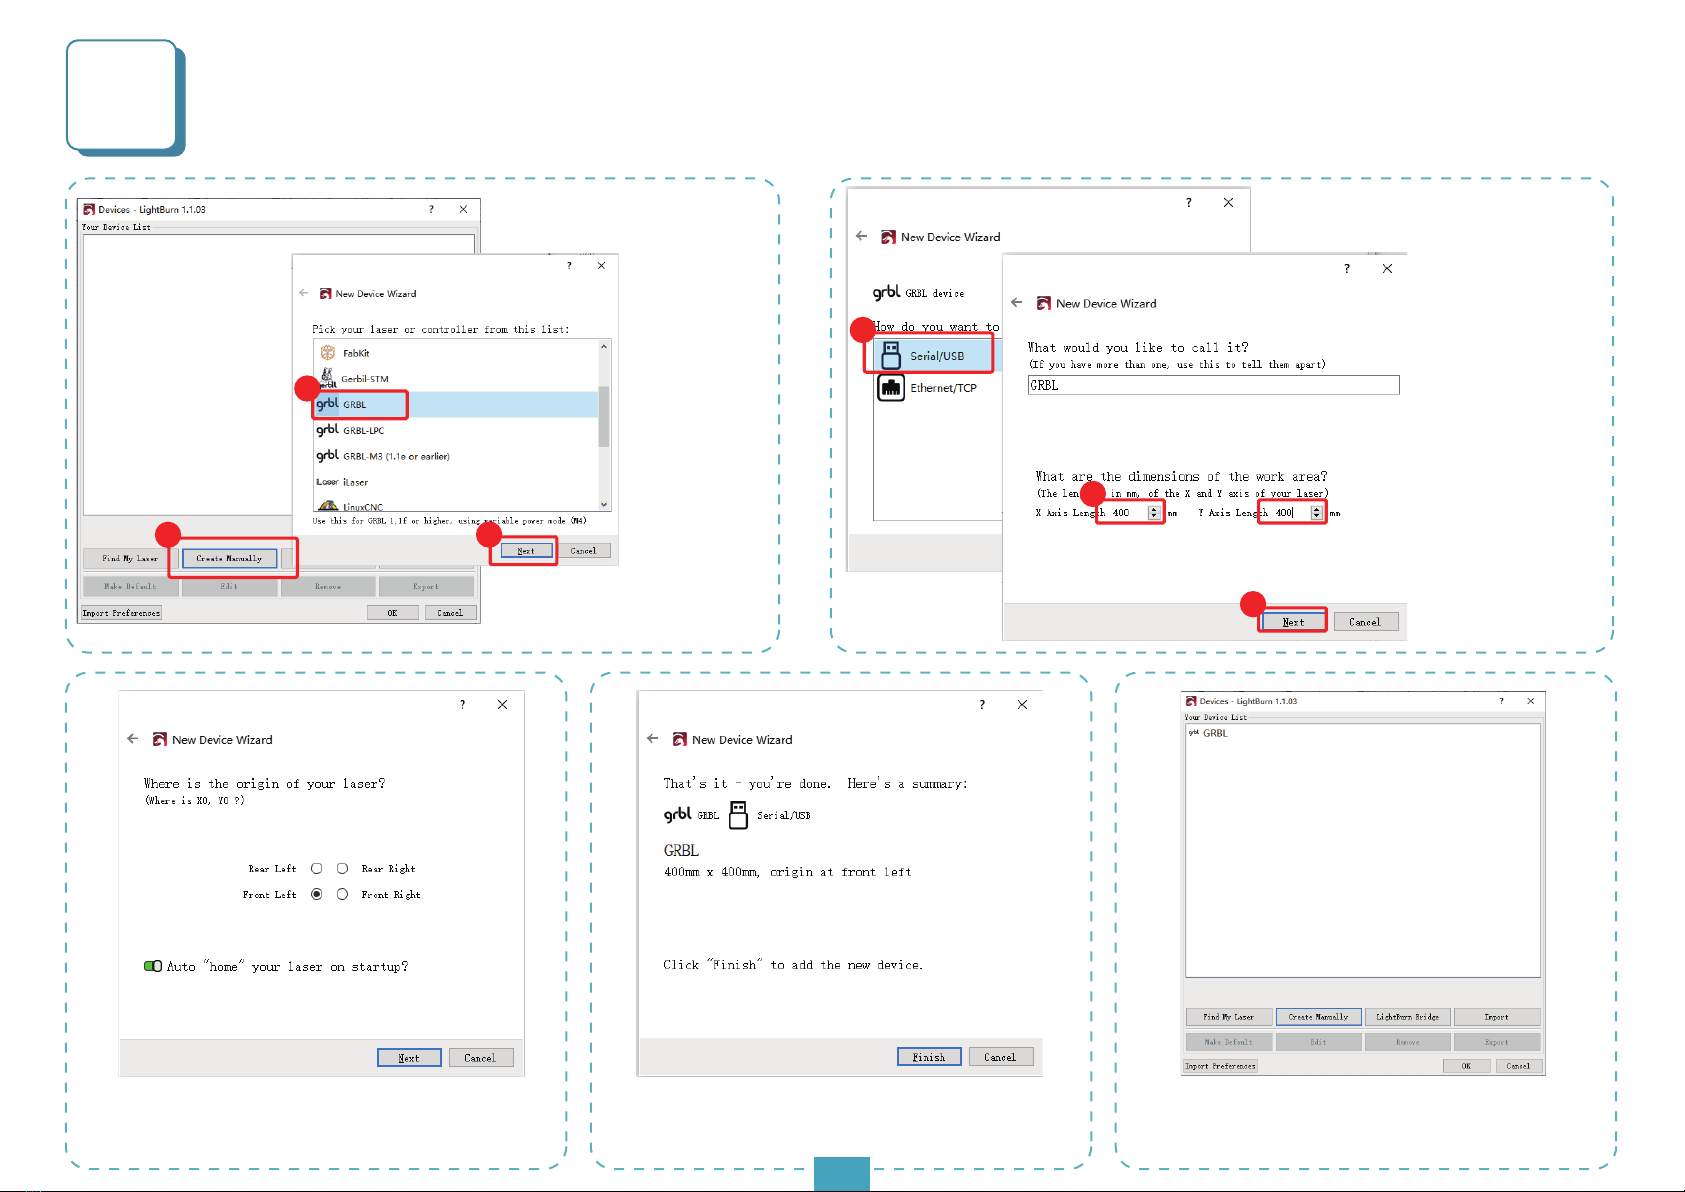
Manual Creation Devices
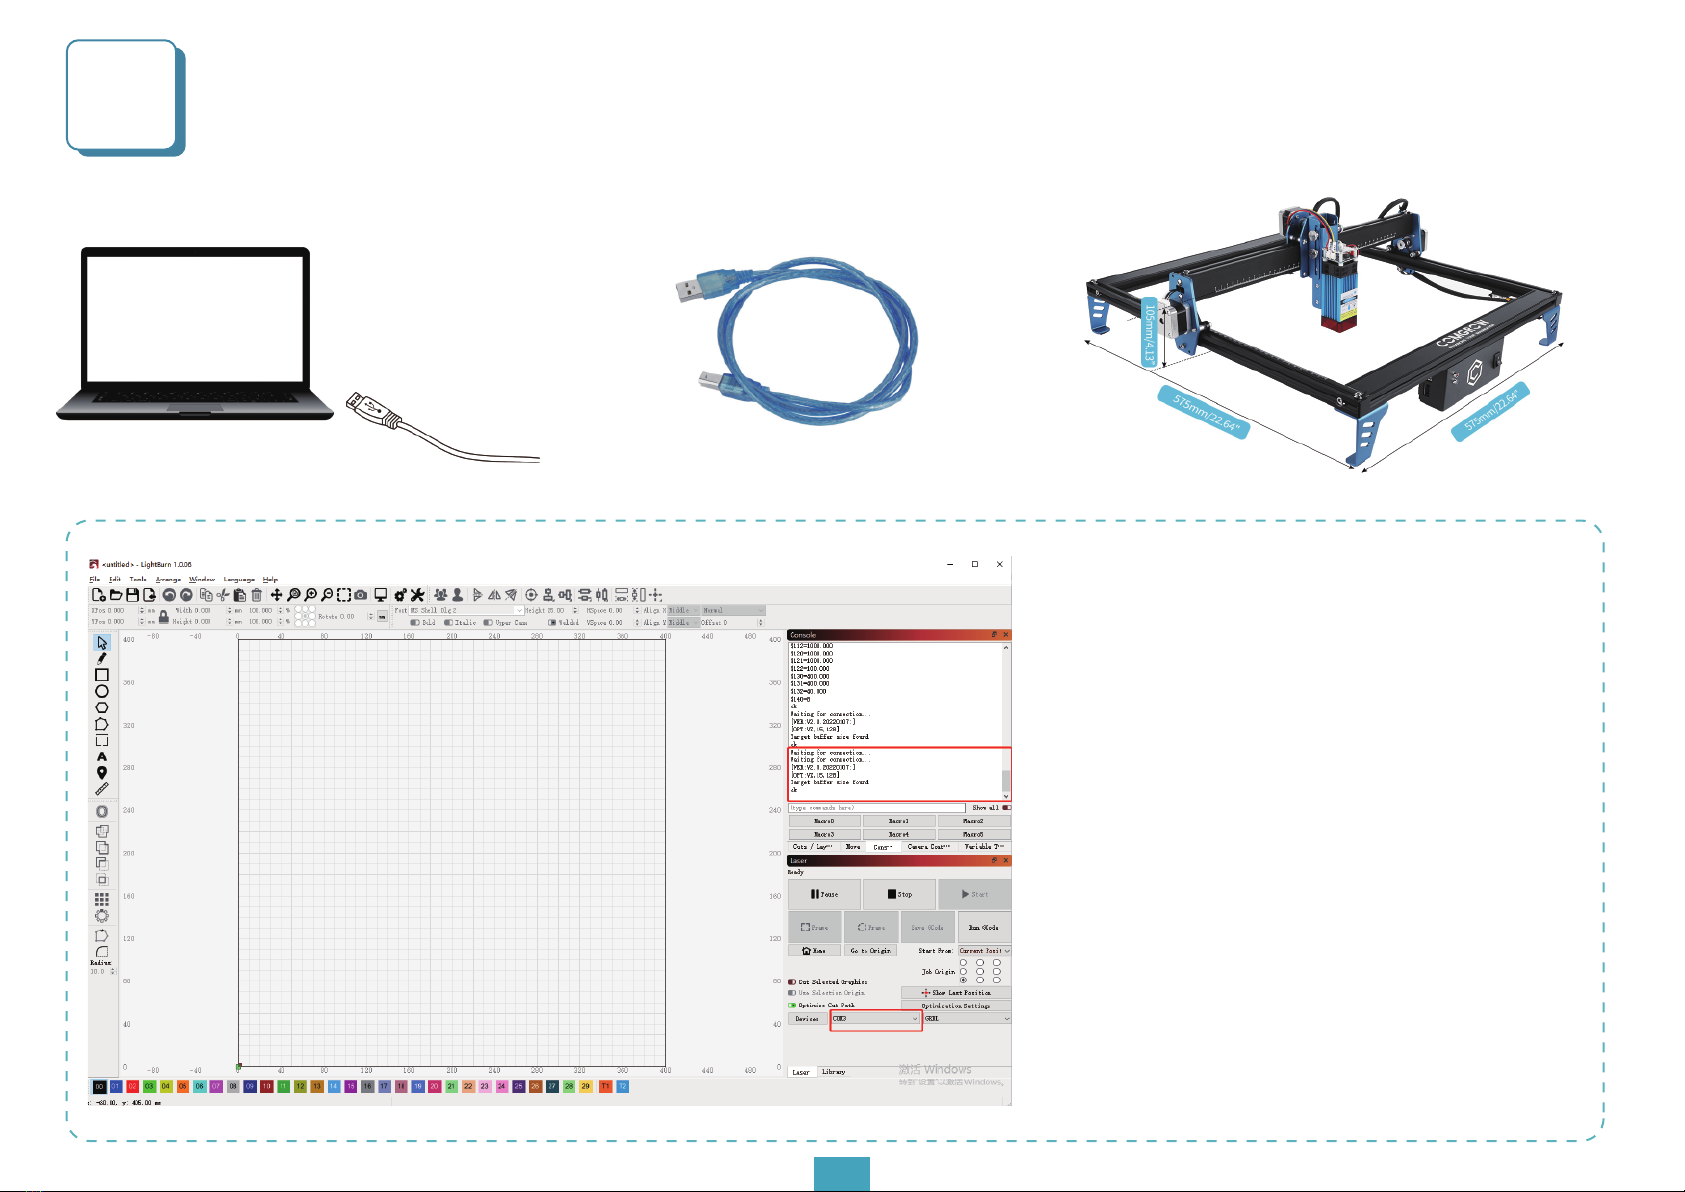
USB Online
Confirmation Before Use
USB Online Debugging
Importing Images
Set The Starting Point And Running The Device
Engraving Parameters
Troubleshooting
Dear Customers,
Thank you for choosing the COMGO Z1 Laser Engraver!
The COMGO Z1 Laser Engraver is a desktop laser engraver.
Before operating the COMGO Z1 Laser.Engraver, please read
the manual carefully and follow the instructions for assembly
and operation. If this manual does not effectively solve your
problem, please contact our support team.
Comgrow was founded in 2017 by people who have a serious
passion for technology that helps you make things. With this
deep-rooted dedication, we wanted to make the digital
manufacturing pro-cess more accessible, giving educators,
engineers, manufacturers, small businesses and tinkerers the
power to make anything.Headquartered in Southern Chi-
na,Shenzhen, Comgrows' dedicated staff is committed to
providing the kind of service that makes you go "wow."
Our amazing gals and guys in customer service are here
Monday through Saturday to help with anything you may
need, from finding the right material to package your specific
product, to discussing which printer is best for you.Bottom line
is, we're here to make 3D printing, laser cutting, and CNC
milling magic happen.Contact us.
01
02
03
05
06
07
09
10
11
13
14
16