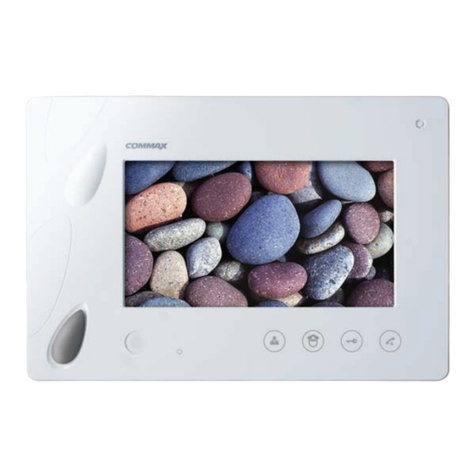
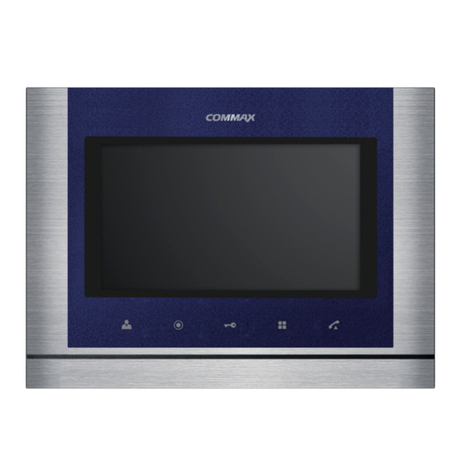
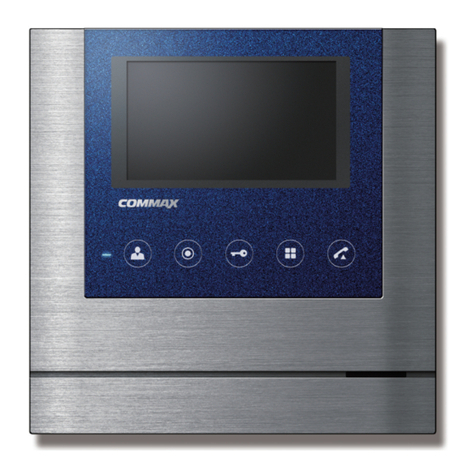
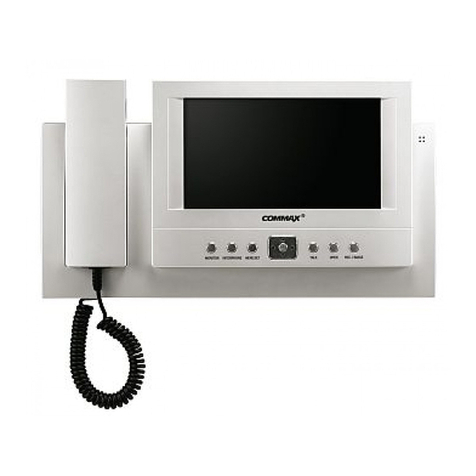
Commax CDV-704MF User manual

•Thank you for purchasing COMMAX products.
•Please carefully read this User’s Guide (in particular, precautions for safety) before using a product and follow
instructions to use a product exactly.
•The company is not responsible for any safety accidents caused by abnormal operation of the product.
513-11, Sangdaewon-dong, Jungwon-gu, Seongnam-si, Gyeonggi-do, Korea
Int’l Business Dept. Tel. : +82-31-7393-540~550 Fax. : +82-31-745-2133
Web site : www.commax.com
•Thank you for purchasing COMMAX products.
•Please carefully read this User’s Guide (in particular, precautions for safety) before using a product and follow
instructions to use a product exactly.
•The company is not responsible for any safety accidents caused by abnormal operation of the product.
User Manual
Color Video Door Phone CDV-704MF
513-11, Sangdaewon-dong, Jungwon-gu, Seongnam-si, Gyeonggi-do, Korea
Int’l Business Dept. Tel. : +82-31-7393-540~550 Fax. : +82-31-745-21 33
Web site : www.commax.com
PM0770H00010
Printed In Korea / 2016.06.104

1
●Thank you for choosing COMMAX.
●Please read this manual carefully before you use the product.
Greetings
Table of contents

2
Please follow the things described below in order to prevent any
danger or property damage.
Warning
Caution
Prohibition.
No disassembly
No touch
Must follow strictly.
Shows plugging out the power cord
without an exception
Shows the warning and caution for an electric shock.
Shows the warning and caution for a fire.
It may cause a minor damage or injury if violated.
It may cause a serious damage or injury if
violated.
Power & Installation
Warning
Please don’tuse several
products at the same time on
one power socket.
·It may cause a fire due to an
abnormal overheating.
Please don’t bend the power
cable excessively or it may
cause an electric shock.
·fire when using a damaged
power cable.
Please don’thandle the power
cable with a wet hand.
·It may cause an electric
shock.
Please plug out the power
cable from the socket when
not using it for a long period
of time.
·It may shorten the product
lifespan or cause a fire.
Please don’tinstall the
product in the place where
there is much oil, smoke or
humidity.
·It may cause an electric
shock or fire.
Please don’tinstall the
product with the lightening
and thunder.
·It may cause an electric
shock or fire.
Please don’tuse and connect
this product with other
products with different rated
voltage
·It may cause a disorder or
fire.
When installing the product
that generates heat, please
install the product away from
the wall (10cm) for the
ventilation.
·It may cause a fire due to
the increased internal
temperature.
1. Warnings and caution
3
Cleaning & Use
Please don’tdisassemble,
repair or rebuild this product
arbitrarily (please contact the
service center if a repair is
needed.
·It may cause an electric
shock or fire.
Please plug the power cable
firmly into the inner end
·It may cause a fire.
Please hold the plug tightly
when unplugging the power
cable (a part of the copper
wire may be disconnected if
the grabbing is only made on
the cord when pulling out the
cable).
·It may cause an electric
shock or fire
When connecting the power
cables after cutting the cable,
please install the product with
power off
·It may cause an electric
shock or fire
When installing the product,
please fix it firmly while using
the wall-mounting unit and
screws.
·It may cause an injury from
the falling object.
Please be careful when using
an AC circuit breaker since
there is a possibility of an
electric shock.
When cleaning the product,
please rub it with a soft and
dry cloth after plugging out
the power cable. (Please don’t
use any chemical products
such as wax, benzene, alcohol
or cleanser.)
Please don’tdrop the product
on the ground and don’tapply
ashock .
·It may cause a failure.
Please use the designated
connection cable within the
maximum calling distance
designated for the product
·It may reduce the product
performance.
Please check the use voltage
and current for the DC-only
products and use the
appropriate rectifier.
·It may cause a fire.
Please avoid direct rays of the
sun or heating devices at a
time of installation.
·It may cause a fire.
Please don’tinstall the
product on an unstable place
or small support board.
·It may cause an injury if it
falls down while in use.
If an abnormal sound, burning
smell or smoke is coming out
of the product, please plug out
the power cable and contact a
service center.
·It may cause an electric
shock or fire.
Please don’tinsert any
metallic or burnable materials
into the ventilation hole.
·It may cause an electric
shock or fire.
Please use only the designated
batteries for the products of
using DC power.
·It may cause an electric
shock or fire.
Cleaning & UsePower & Installation
Warning
Caution
2. Parts Names
4
1R 3DUWV 1R 3DUWV 1R 3DUWV
7RXFK/&' 6SHDNHU 3RZHU/('
0LFURSKRQH 3RZHUVZLWFK 0LFUR6'FDUGVORW
&RQQHFWLRQWHUPLQDO

3.How to use theproduct
4 5
/CKPUETGGP
1R0HQX 'HWDLOV
0RQLWRU View the door camera
- You cannot use it if door camera is not connected
&&79 Monitoring CCTV
- You cannot use it if CCTV is not connected
,QWHUSKRQH Move to Interphone menu
3OD\EDFN Move to the list of recorded images and videos
2SWLRQ Move to the menu 'Options’
0XWH,FRQ Indication of mute status
'DWH7LPH Indication of Date and Time, Touch to move to the menu 'Set-up’
* Cautions
- Please set up date and time before use.
. If you do not set up, some problems in saving still-cut image and video-clip might happen.
- When some monitors reboot for any reason, other monitors which are connecting can be
stopped for normal operation.
8
Security Move to Security menu.

6
/QPKVQT
6JGHQNNQYKPIUETGGPYKNNDGUJQYPYJGPECNNKPIHTQOFQQTECOGTCQTVQWEJKPI
VJGDWVVQPĞ/QPKVQTğ
6JGDGNQYUETGGPYKNNNCUVHQTUGEQPFU
/QPKVQTKPIKUPQVCXCKNCDNGKPECUGQHPQEQPPGEVKQPQHVJGFQQTECOGTC
When you use a one monitor, you cannot use other monitors for monitoring/ CCTV/
Interphone.
£6HOHFWHGFDPHUD6HOHFWHGFDPHUDZLOOEHVKRZQRQWKHVFUHHQ
¤'DWH7LPH&XUUHQWGDWHDQGWLPHZLOOEHLQGLFDWHG
¥ 6WRUDJH6DYLQJLFRQV,FRQVIRUPRWLRQGHWHFWLRQDQGUHFRUGLQJZLOOEHLQGLFDWHG
'HWDLOVRILFRQV
6WRUDJHIRUPDW,PDJHV9LGHRV,Q0RWLRQGHWHFWLRQPRGH
6WRUDJHPRGH0$18$/$872
¦6SOLWVFUHHQYLHZ6SOLWPRQLWRULQJRIGRRUFDPHUDVLVDYDLODEOH
,WĜVQRWDYDLODEOHWRXVHLIWKHUHLVRQO\RQHFDPHUDLQVWDOOHG
§Video quality adjustment: Door camera Display setting
%ULJKWQHVV/XPLQRVLW\&KURPDDGMXVWPHQWLVDYDLODEOHDIWHUSXVKLQJWKHEXWWRQ
7KHUDQJHIRUDGMXVWPHQWLV207KHUHLVDEXWWRQORFDWHGRQWKHULJKWXSSHUIRU
LQLWLDOL]DWLRQ
SD card status: Insertion / Full memory

6 7
¨ 9ROXPHFRQWURO<RXFDQFRQWUROFDOOLQJWRQHYROXPHDQGUHFHLYLQJWRQHYROXPH
3XVKWKHEXWWRQLQRUGHUWRDGMXVWWKHYROXPH
9ROXPHDGMXVWPHQWOHYHO5LQJ6SHDNHU
© &DOOFRQQHFWLRQ7RFDOODQVZHUWKHFDOO
$IWHUFDOOLVFRQQHFWHGEXWWRQVZLOOEHFKDQJHGDVIROORZV
'RRURSHQ1R7RRSHQWKHGRRU
(QGFDOO1R7RHQGDFDOO
&DXWLRQV
If you set 'Fast mode’ in the menu option 'Open door mode’, there will be shown only
'Door open’ icon. In this case, opening door is possible only.
ª&DOOFDQFHOODWLRQ7RFDQFHOWKHFDOOZKHQ\RXJHWDFDOOIURPGRRURUOREE\
«CCTV monitoring : To check CCTV video during call or monitoring.
( If CCTV is not connected, the icon is not displayed. )
⑩Video-clip storage (saving): To store (save) a video-clip.
- When you touch a button, you can store a video-clip.
(When you set an auto-storage mode, a video-clip is automatically stored)
- Max 90 seconds per one storage (Call connection 30 seconds + Calling 60 seconds)
- The below icon will be shown during storage, and the remaining time will be shown
on the right upper.
,I\RXZDQWWRVWRSVWRUDJH\RXVKRXOGWRXFKWKHLFRQ
⑪,PDJH6WLOOFXWLPDJHVWRUDJH7RVWRUHVDYHDVWLOOFXWLPDJH
:KHQ\RXWRXFKDEXWWRQ\RXFDQVWRUHLPDJHV$QGWKHEHORZLFRQZLOOEHVKRZQGXULQJ
VWRUDJH
%CNNKPIQHXKUKVQT
£ :KHQDYLVLWRUFDOOVIURPHQWUDQFH\RXFDQKHDUFDOOLQJWRQHVRXQGDQGWKHYLVLWRUĜVLPDJH
DSSHDUVRQWKHPRQLWRU
0D[VHFRQGVIRUFDOOFRQQHFWLRQWLPH

7.Installation
8
:KHQ\RXVHWDQDXWRVWRUDJHPRGHYLGHRFOLSDQGLPDJHDUHDXWRPDWLFDOO\
6WRUHG
¤ :KHQ\RXWRXFKDFDOOFRQQHFWLRQEXWWRQ\RXFDQWDONWRDYLVLWRU$QGZKHQ\RXWRXFKD
GRRURSHQEXWWRQWKHGRRUZLOOEHRSHQHG
0D[VHFRQGVIRUFDOOLQJWLPH
:KLOHDYLGHRFOLSLVEHLQJVWRUHG\RXFDQUHVWRUHDYLGHRFOLSIRUVHFRQGVIURP
FDOOFRQQHFWLQJPRPHQW
<RXFDQRSHQWKHGRRUZKHQWKHVFUHHQLVRQ$QGLWLVSRVVLEOHRQO\ZKHQGRRUFDPHUDLV
LQWHUORFNHGZLWKGRRUUHOHDVHIXQFWLRQ
:KHQ\RXWRXFKDGRRURSHQEXWWRQWKHEHORZGRRURSHQLFRQ ZLOOEHVKRZQLQ
WKH FHQWHU RI VFUHHQ %XW GRRURSHQ VRXQG ZLOO QRW ZRUN GXULQJ YLGHRFOLS DQG LPDJH
VWRUDJH
¥ :KHQWKHRWKHUFDOOFRPHVIURPWKHRWKHUHQWUDQFHWKHFXUUHQWFDOOLVILQLVKHGDQGWKHRWKHU
FDOOLVFRQQHFWHG
¦ :KHQ\RXSUHVVDFDOOHQGEXWWRQWKHFDOOLVHQG$QGWKHPDLQVFUHHQZLOOEHVKRZQ
%CNNKPIQHCFFKVKQPCNOQPKVQTU
£ ,QFDVHRIPRUHWKDQPRQLWRUVZKHQDYLVLWRUFDOOVIURPGRRUFDPHUDHQWUDQFHDFDOOLQJ
WRQHVRXQGZLOOEHULQJHGLQDOOPRQLWRUV$QGDYLVLWRUĜVLPDJHZLOOEHVKRZQLQDOOPRQLWRUV
0D[VHFRQGVIRUFDOOFRQQHFWLRQWLPH
¤ :KHQRQHPRQLWRU FRQQHFWVZLWKGRRUFDPHUD WKHPDLQ VFUHHQ ZLOOEHVKRZQLQRWKHU
PRQLWRUV$QG0RQLWRULQJ&&79,QWHUSKRQHEXWWRQVRIRWKHUPRQLWRUVZLOOEHGHDFWLYDWHG
¥ :KHQ\RXWRXFKDGRRURSHQEXWWRQDIWHUFDOOLQJWKHGRRUZLOOEHRSHQHG
0D[VHFRQGVIRUFDOOLQJWLPH
<RXFDQRSHQWKHGRRUZKHQWKHVFUHHQLVRQ
¦ :KHQ\RXSUHVVDFDOOHQGEXWWRQWKHFDOOLVHQG$QGWKHPDLQVFUHHQZLOOEHVKRZQ
$QGWKHQ0RQLWRULQJ&&79DQG,QWHUSKRQHEXWWRQVRIRWKHUPRQLWRUVZLOOEHDFWLYDWHG
⑤ When you touch a call connection button at additional monitors (ID2/ID3/ID4), the master monitor
(ID1) will stop any of operating functions (Saving of images/video-clips, etc.,) and will display the main
screen.

7.Installation
2. Installation Method of camera
Note
①Do not install the camera where
it is exposed to Direct sunlight
②Keep cleaning up its lens to
capture good views.
1. Installation Method of camera monitor
Note
①Avoid the range of direct sunlight
②Recommended height is pertinent
from 1450 ~ 1500mm
③Avoid the installation near magnetic
activity, humid temperatures and gas
8 9
%%68
9JGP[QWVQWEJC%%68DWVVQPVJGDGNQYUETGGPYKNNDGUJQYP
/QPKVQTKPIVKOGKU/CZUGEQPFU
;QWECPUCXGVJGXKFGQENKRYKVJKPOQPKVQTKPIVKOG
;QWECPPQVWUG%%68HWPEVKQPUKHECOGTCUCTGPQVKPUVCNNGF
When you use a one monitor, you cannot use other monitors for monitoring/ CCTV/
Interphone.
£G &&79VLJQ7RVKRZWKHFXUUHQWZRUNLQJ&&79
¤G 'DWH7LPH&XUUHQWGDWHDQGWLPHZLOOEHLQGLFDWHG
¥G ,FRQVHW7RVKRZPRWLRQGHWHFWLRQDQGYLGHRVWRUDJH0RQLWRUVHFWLRQIRUPRUHGHWDLOV
¦G &&79VFUHHQFKDQJH7RVHH&&79VFUHHQDQG&&79VFUHHQ
<RXFDQQRWXVHWKLVIXQFWLRQZKHQRQO\RQHFDPHUDLVFRQQHFWHG
§G Video quality adjustment: To change Brightness/Light & Shade/Chroma. of CCTV
0RQLWRUVHFWLRQIRUPRUHGHWDLOV
¨ 9LGHRVWRUDJH7RVWRUHVDYHDYLGHRFOLS
:KHQ\RXWRXFKDEXWWRQWKHVWRUDJHZLOOEHVWDUWHG
7KHEHORZLFRQZLOOEHVKRZQGXULQJLPDJHVWRUDJH$QGWKHUHPDLQLQJWLPHZLOOEHVKRZQ
RQWKHULJKWXSSHU
,I\RXZDQWWRVWRSVWRUDJH\RXVKRXOGWRXFKWKHLFRQ
© ,PDJHVWRUDJH7RVWRUHVDYHDVWLOOFXWLPDJH
:KHQ\RXWRXFKDEXWWRQ\RXFDQVWRUHLPDJHV$QGWKHEHORZLFRQZLOOEH
VKRZQGXULQJVWRUDJH

10
4GHGTGPEG&QQTECOGTCCPF%%68CTGUCOGKPVJGDGNQYKUUWGU
+PVGTRJQPG> ([WHQVLRQPRQLWRUV0DVWHUPRQLWRU6ODYHPRQLWRUV@
9JGP[QWVQWEJ+PVGTRJQPGDWVVQPVJGDGNQYUETGGPYKNNDGUJQYP
When you use a one monitor, you cannot use other monitors for monitoring/ CCTV/
Interphone.
£,'VLJQ7RVKRZP\FXUUHQWLQWHUSKRQH,'
① Video-clip cannot be stored while SD card is not inserted.
- The images can be stored in the monitor's embedded memory. (Max 50 images).
- You can use as below when you need back-up of images which are stored in the
monitor's embedded memory.
1) Turn off the monitor and then insert SD card. Turn on the monitor. And then the
images are automatically stored in SD card.
2) You can check the file through your computer. ([backup folder] in SD card)
3) You can check the date, storage time and information (camera source, saving
format, emergency storage).
- File name: YYYYMMDD_HHMMSS_AB.AVI or JPG
Note : The meaning of the last two digits (denoted by AB)
A : 1 - DOOR1 / 2 - DOOR2 / 3 - CCTV1 / 4 - CCTV2
B : 1 – MANUAL(manual recording)/2 – AUTO/3 - MOTION/4-Always monitoring
/ 5 - ALARM
ex : The meaning of the file ’20180109_045740_12.avi’
-> Video automatically recorded by visitors calling from door1 on January 9,
2018 at 4:57:40
② The image and video-clip can be stored while SD card is inserted. The maximum
storage size depends on the capacity (storage size) of SD card.

10. Safe Operation guide
●Make sure to turn on the product
●In case if physical damage or operation failure is detected, do not hesitate to
contact Service Center
●All electric power must be blocked by the building blocking device
●Do not place water bottles or flowerpots upon the product
●
●This apparatus shall not be exposed to dripping or splashing and that no objects
●Plug as disconnection device shall remain to be readily approached by user.
Please, turn the power off when installing or repairing the product
filled with liquids, such as vases, shall be placed on the apparatus.
8
9. Specifications and Features
10 11
¤,QWHUSKRQHVHOHFWLRQ7RVHOHFWDQLQWHUSKRQHZKLFK,ZDQWWRFRQQHFW
GXSOLFDWHGRXEOHVHOHFWLRQVDUHSRVVLEOH
¥&DOOFRQQHFWLRQ7RFDOODQGDQVZHUDVHOHFWHGLQWHUSKRQH
$IWHU\RXVHOHFWDQLQWHUSKRQHDQGWRXFKDFDOOFRQQHFWLRQEXWWRQLQWKHDERYHVFUHHQDQHZ
VFUHHQLQWKHQH[WSDJHZLOOEHVKRZQDQGFDOOLQJWRQHVRXQGIURPWKHVHOHFWHGLQWHUSKRQH
ZLOOEHULQJHG
7KH VLPXOWDQHRXV FDOO FRQQHFWLRQV WR DOO LQWHUSKRQHV DUH SRVVLEOH DQG WKH PXWXDO FDOOLQJ
DPRQJLQWHUSKRQHVDUHSRVVLEOH
7KHEXWWRQRIXQVHOHFWHGLQWHUSKRQHVZLOOEHGHDFWLYDWHGGXULQJWKHPXWXDOFDOOLQJEHWZHHQ
VHOHFWHGLQWHUSKRQHV$QGPDLQVFUHHQZLOOEHVKRZQIRUXQVHOHFWHGLQWHUSKRQHVGXULQJWKH
PXWXDOFDOOLQJEHWZHHQVHOHFWHGLQWHUSKRQHV
,QWHUSKRQHĜVVFUHHQRIVHQGLQJFDOOFRQQHFWLRQ
£ &DOOFRQQHFWLRQ&DOOLQJWLPH
7RVKRZUHPDLQLQJFDOOFRQQHFWLRQWLPHDQGUHPDLQLQJFDOOLQJWLPH
0D[VHFRQGVIRUFDOOFRQQHFWLRQ
0D[VHFRQGVIRUFDOOLQJWLPH,QFDVHRIUHFHLYLQJFDOOFRQQHFWLRQVIURPDOOLQWHUSKRQHV
WKHFDOOLQJWLPHZLOOEHFDOFXODWHGIURPWKHODWHVWFDOOFRQQHFWLRQIRUVHFRQGV
¤ 7KHRWKHUSDUW\ĜV,'VLJQ7RVKRZWKHRWKHUSDUW\ĜV,'
:KHQ\RXFDOOPRUHWKDQLQWHUSKRQHVDOO,'VZLOOEHVKRZQRQWKHVFUHHQ
¥ 9ROXPHFRQWURO7RFRQWUROUHFHLYLQJYROXPHOHYHO
¦ &DOOHQG7RILQLVKFDOOFRQQHFWLRQDQGFDOOLQJ
,QWHUSKRQHĜVVFUHHQRIUHFHLYLQJFDOOFRQQHFWLRQ

12
£&DOOFRQQHFWLRQ&DOOLQJWLPH
7RVKRZUHPDLQLQJFDOOFRQQHFWLRQWLPHDQGUHPDLQLQJFDOOLQJWLPH
0D[VHFRQGVIRUFDOOFRQQHFWLRQ
0D[VHFRQGVIRUFDOOLQJWLPH,QFDVHRIFDOOFRQQHFWLRQVIURPDOOLQWHUSKRQHVWKH
FDOOLQJWLPHZLOOEHFDOFXODWHGIURPWKHODWHFDOOFRQQHFWLRQIRUVHFRQGV
¤G7KHRWKHUSDUW\ĜV,'VLJQ7RVKRZWKHRWKHUSDUW\ĜV,'
¥G9ROXPHFRQWURO7RFRQWUROFDOOLQJYROXPHOHYHO
,WZLOOEHFKDQJHGWRWKHEXWWRQIRUUHFHLYLQJWRQHYROXPHDIWHUVWDUWLQJFDOOLQJ
¦G&DOOFRQQHFWLRQ7RFRQQHFWFDOO
§G&DOOHQG7RILQLVKFDOOFRQQHFWLRQDQGFDOOLQJ
2NC[DCEM
- When you touch Playback button, the below screen will be shown.
- Select the image. (Selected image will be enlarged and video will be displayed.)

413
7RYHULI\LPDJHV
£6WRUDJHVRXUFHILOH1R
¤/HIW5LJKWPRYHPHQW7RPRYHWKHSUHYLRXVQH[WILOH
¥'DWH7LPH&XUUHQWGDWHDQGWLPHZLOOEHLQGLFDWHG
¦'HOHWHILOHV7RGHOHWHLPDJHV
7RYHULI\YLGHRFOLS
£ 6WRUDJHVRXUFHILOH1R
¤ /HIW5LJKWPRYHPHQW7RPRYHWKHSUHYLRXVQH[WILOH
¥3OD\LQJWKHILOH7RSOD\WKHFXUUHQWYLGHRFOLS
'XULQJSOD\EDFNWKHLFRQLVFKDQJHGE\WKHSDXVHEXWWRQ
¦'HOHWHWKHILOH7RGHOHWHWKHFXUUHQWSOD\LQJILOH
§'DWH7LPH&XUUHQWGDWHDQGWLPHZLOOEHLQGLFDWHG
¨Video-clip time indication: The remaining time is displayed
① Page information : Current page / Total page
② Move the page: ◀ : previous page / ▶ : next page
③ File information
:Image file, : Video file, : New file
④ Emergency Recording: File saved when emergency occurs by sensors.
- When 'Auto Rec' is set in Security menu, CCTV video is recorded for 10 secs when emergency occurs.
(CCTV1 is automatically saved when sensor # 1 is detected and CCTV2 is saved by sensor # 2. But,
if there is no SD card inserted, only steel cut image is saved and the sensor need to be connect to CCTV.)
- If visitor call is received during emergency, the video of visitor will be saved automatically on ‘Auto
Recording’ setting or also can be saved manually.
(During emergency situation, the visitor communication is restricted and only the visitor image can be
checked.)
<Note>
Immediately after inserting SD card, the loading time depends on the
number of stored file size.
If you press Playback button before loading completes, pop-up window
will appear.
In this case, please wait a moment.

14
3-6. Security (Can be used with security sensor)
-
-
-
Touch the Security button to display the following screen.
Using this function, the door is detected when the sensor is connected.
This function setting (On and Off/ save video / log view) is possible only by ID1 (MASTER device).
(In case of extension phone (ID2 ~ ID4), only the alarm rings.)
< Before operation > < During Operation >
1) Before operating Security mode
※Caution
Be aware of the password before proceeding.
You cannot turn off the alarm if you don’t know current password. (Factory default : 1234)
①Security Sensor 1, Security Sensor 2: Select sensor to operate.
②Select check box : If the sensor is selected by check box. (Turn on & Turn off)
③Execute button: Activate the selected sensor. (Please note that the alarm occurs when sensor is detected)
④Emergency log : You can check emergency log. (Up to 255 log can be stored)
⑤Auto recording: CCTV is automatically recorded for 10 seconds when an emergency occurs.
- When the function is active (red), the corresponding function is activated. (You can turn off it by click.)
- CCTV1 is recorded in case of sensor 1 emergency, and CCTV2 is automatically recorded in case of sensor 2.
(If there is no SD card, it will be replaced with steel cut image. If CCTV is not connected to the sensor, it will
not be recorded.)
2) During Security mode : The LED light of MASTER unit is flickering on red.
⑥Indicates the security sensor being executed.
⑦End the security function.
- Press the button and enter the four-digit password. (Factory default password: 1234)
- If the password is correct, the mode is turned off and the screen returns to the main screen.
(If the password is incorrect, you can not turn the mode and please progress initialization of the device.)
<<Password input screen to turn off the mode> <Sensor detected screen during security mode>

615
:KHQ\RXWRXFKRSWLRQEXWWRQWKHEHORZVFUHHQZLOOEHVKRZQ
:KHQ\RXVHOHFWHDFKLWHPWKHFRUUHVSRQGLQJVXELWHPLVGLVSOD\HGRQWKHULJKW
If you do not do any action for 30 seconds after you get in Option menu, the main screen
will be shown.
£ 5HFRUGLQJ
$XWRUHFRUGLQJ
7RVHWWKHDXWRVDYHPRGHSelect between Photo / Video)
+RZHYHULIWKHUHLVQR6'FDUGYLGHRPRGHFDQQRWEHVHOHFWHG
(If video is selected when SD card is removed, it is replaced with photo and saved in internal memory)
7KLVIXQFWLRQLVRQO\DYDLODEOHZKHQDFDOOFRPHVIURPDGRRUFDPHUDHQWUDQFH$QG\RX
FDQQRWVDYHSKRWRVDQGYLGHRFOLSPDQXDOO\XQWLOWKHDXWRPDWLFVDYLQJLVVWDUWHG
6HOHFWLQJ2))GLVDEOHVWKHDXWRVDYHIXQFWLRQ
71RVKQP
3)
-
When security alarm occurs
When a sensor is detected during security mode, an alarm is generated, and the sensor number
-
-
-
-
-
(Sensor1 or Sensor2) and the time of occurrence are displayed.
If the emergency situation is canceled, press 'Stop' button at the bottom.
(You can turn off the alarm if the corresponding sensor is recovered to normal status.)
When the password input window appears, enter the four-digit password using the key buttons.
Alarm sound occurs for 3 minutes and then only alarm screen is displayed after then.
If an alarm occurs, it will not be possible to communicate with visitor even if the call is received.
Please turn off the alarm first.
(During the alarm occurs, the calling sound rings by the camera to indicate the emergency
situation.)

7.Installation
16
2QFHDFWLYDWHG\RXFDQVHWWKHWLPHUVWDUWHQGWLPH
* Reference
- When detecting motion, the photo is saved for 1 scene and the video-clip is saved
for 10 seconds.
- The LED is flickering during the saving of the video-clip. And, when you touch the screen,
the saving is stopped.
- After saving, the front LED stops blinking, and the motion detection is started within
3 seconds.
- This function can be set / used only for an Interphone (monitor) set to master. (ID 1)
- In the night or dark place, the LED of door camera is always on while this function
is working.
0RWLRQGHWHFWLRQ: Can be used only with ID1 (MASTER)
7RVHWPRWLRQGHWHFWLRQRIWKHSUHYLRXVO\VHWFDPHUD
)XQFWLRQVRIHDFKPHQXDUHDVIROORZLQJ
0RWLRQGHWHFWLRQ7RVHWenable / disable function.
6HOHFWLRQRI&DPHUD7RVHOHFWFDPHUDIRUPRQLWRULQJ6HOHFWIURP'RRU&&79
6DYLQJIRUPDW7RVelect storage method.6HOHFWEHWZHHQ3KRWR9LGHR
6HQVLQJRIVHQVLWLYLW\7RVHWVHQVLWLYLW\6HOHFWDPRQJ+LJK0LGGOH/RZ
0RWLRQWLPHU7RVHWXSWKHWLPHUIXQFWLRQDFWLYDWLRQ0RWLRQGHWHFWLRQDFWLYDWLRQWLPH
- LCD is on for motion detection : During video recording, it shows video on LCD. (for 10 seconds)
3) Always monitor : Can be used only in ID1 (MASTER)
-
-
-
Always-on monitoring and video saving can be possible. (When the call is receiving, the operation will
be terminated automatically)
DOOR1 -> DOOR2 -> CCTV1 -> CCTV2 -> DOOR1…Operated in order.
If there is an SD card, the movie will be saved at the same time. Without SD card, the photo is saved.
①10 seconds per camera : Video saving and monitoring changes every 10 seconds.
②30 seconds per camera : Video saving and monitoring changes every 30 seconds.
③60 seconds per camera : Video saving and monitoring changes every 60 seconds.

7.Installation
2. Installation Method of camera
Note
①Do not install the camera where
it is exposed to Direct sunlight
②Keep cleaning up its lens to
capture good views.
1. Installation Method of camera monitor
Note
①Avoid the range of direct sunlight
②Recommended height is pertinent
from 1450 ~ 1500mm
③Avoid the installation near magnetic
activity, humid temperatures and gas
817
¤ 9ROXPH
< 1. SD card inserted> < 2. SD card not inserted>
1. If SD card is inserted: Video recording starts at the same time as monitoring.
①
②
③
④
: The camera is changed every set time (CAM1 -> CAM2 -> CCTV1 -> CCTV2 in order)
: Press the icon to change, the current camera will be fixed and monitored.
: Save the video.(it will be recorded repeatedly even if the camera is changed).
: Press the icon to change. Repeat monitoring without saving the video.
2. If the SD card is not inserted: The monitoring is changed every set time and the image is saved
automatically once.
⑤: Click the icon to save the image once more.
(During saving the image, the icon is temporarily changed and displayed.)

18
)RUPDWRI6'FDUG
7RLQLWLDOL]HWKH6'FDUG
,WWDNHVDERXWPLQIRULQLWLDOL]DWLRQ
(It can be different by types of SD card).
6HOHFWLRQRIGHOHWLRQILOH
7RGHOHWHWKHVDYHGLPDJHVDQGYLGHRV
7KHWLPHUHTXLUHGYDULHVGHSHQGLQJRQWKHILOHVL]H
&DXWLRQV
,WLVQRWDYDLODEOHWRUHFHLYHDFDOOZKLOHLQLWLDOL]LQJ6'FDUGRUGHOHWLQJVDYHGILOHV
,I\RXVWDUWLQLWLDOL]DWLRQRI6'FDUGLWLVQRWSRVVLEOHWRVWRSLW
,QFDVHRILQHYLWDEOHHQGLQJLQLWLDOL]DWLRQLWLVQHFHVVDU\WRVWDUWDJDLQIURPWKHEHJLQQLQJ
9ROXPH
:KHQLQGLYLGXDOGRRUFDPHUDHQWUDQFHDQGLQWHUFRPFDOOV\RXFDQFKDQJHWKHFDOOLQJWRQH
DQGUHFHLYLQJWRQHLQGLYLGXDOO\
<RXFDQFKDQJHWKHFDOOLQJWRQHIURPPXWHWROHYHODQGWKHUHFHLYLQJWRQHIURP
WROHYHO
7RXFKWRQH
7RWXUQRQRIIWKHWRXFKWRQH
,QWHUSKRQH'RRU'RRUFDOOLQJWRQH
<RXFDQVHOHFWFDOOLQJWRQHRILQWHUSKRQHDQGLQGLYLGXDOGRRUFDPHUD'RRU'RRU
W\SHVRIFDOOLQJWRQHVDUHDYDLODEOH
¥ 6WRUDJH

10. Safe Operation guide
●Make sure to turn on the product
●In case if physical damage or operation failure is detected, do not hesitate to
contact Service Center
●All electric power must be blocked by the building blocking device
●Do not place water bottles or flowerpots upon the product
●
●This apparatus shall not be exposed to dripping or splashing and that no objects
●Plug as disconnection device shall remain to be readily approached by user.
Please, turn the power off when installing or repairing the product
filled with liquids, such as vases, shall be placed on the apparatus.
8
9. Specifications and Features
10 19
6\VWHPWLPH
7R6HWXS'DWHDQG7LPH
7KHFKDQJHGWLPHZLOOEHGLVSOD\HGRQWKHPDLQVFUHHQDIWHUZDUG
§ 'LVSOD\
6FUHHQDGMXVWPHQW
(In this case, you can adjust the display of door camera1.)
- When you use a one monitor, you cannot use other monitors for monitoring/ CCTV/
Interphone.
7KHUDQJHIRUDGMXVWPHQWLV20OHYHO7KHUHLVDEXWWRQORFDWHGRQWKHULJKWXSSHU
IRULQLWLDOL]DWLRQ
¦ 'DWH7LPH
Table of contents
Other Commax Intercom System manuals

Commax
Commax DP-RS User manual

Commax
Commax TP-1L User manual

Commax
Commax DRC-40K User manual

Commax
Commax DP-LA01M User manual

Commax
Commax CDV-50AM User manual

Commax
Commax DRC-703LC/RF1 User manual

Commax
Commax DRC-4FC User manual

Commax
Commax CDV-50 User manual

Commax
Commax CDV-71UM User manual

Commax
Commax CMV-77K User manual

Commax
Commax CAV-705U User manual

Commax
Commax CDV-40Q User manual

Commax
Commax TP-6AC User manual

Commax
Commax CDV-43Y User manual

Commax
Commax CAV-43MHG User manual

Commax
Commax DP-ML User manual

Commax
Commax DRC-40K User manual

Commax
Commax DRC-nAB2 User manual

Commax
Commax Fineview CDV-70H2 User manual

Commax
Commax Interphone TP-NR User manual