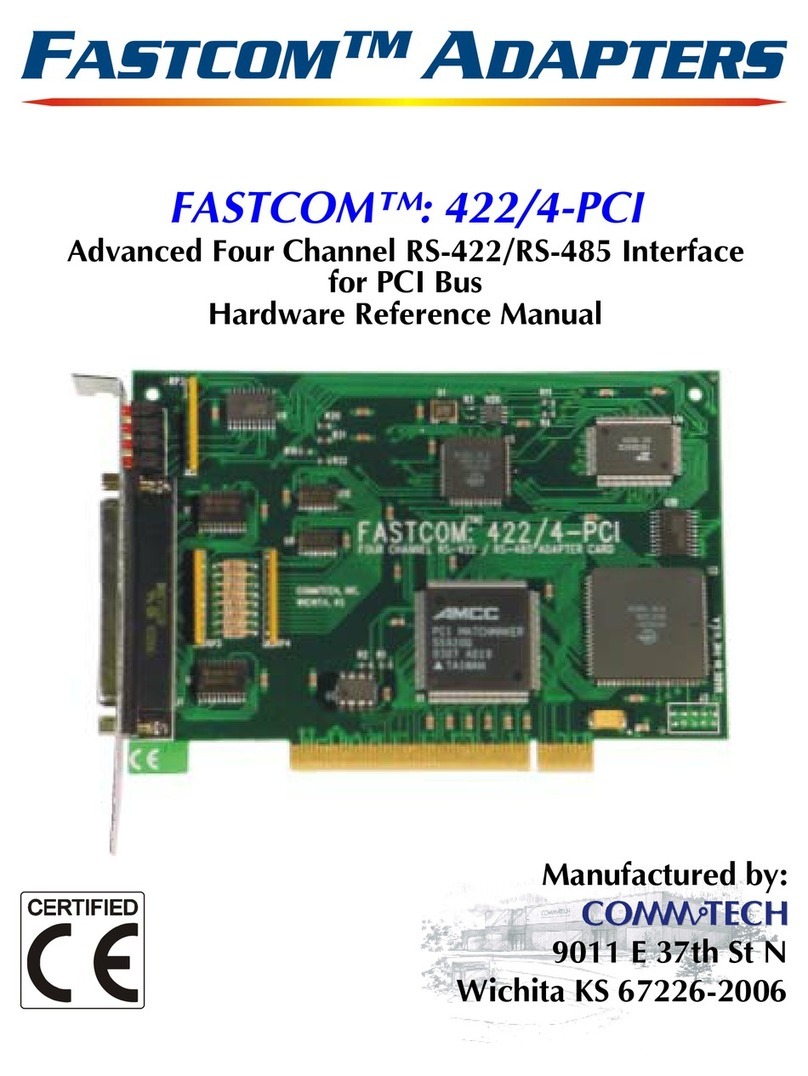
CommTech Fastcom 232/4-LPCI-335 User manual


9011 E. 37TH STREET N
WICHITA, KANSAS 67226-2006
(316) 636-1131
FAX (316) 636-1163
http://www.commtech-fastcom.com/
COPYRIGHT (C) 2004, 2006, 2010
All rights reserved, including those to reproduce this document or parts thereof in
any form without permission in writing from Commtech, Inc.
FASTCOM and the “Alpha Lemur” are registered trademarks of Commtech, Inc.
Microsoft is a registered trademark of Microsoft Corporation.
WINDOWS is a trademark of Microsoft Corporation.

REVISION NOTES
REVISION
PAGE NUMBER
CHANGES MADE
1.0
Document created
1.1
2
Added information about digital I/O ports
1.2
8
Added to fastcom serial settings
1.3
13
Changed warranty period to limited lifetime
1.4
13
Updated Limitation of Liability

TABLE OF CONTENTS
EUROPEAN UNION DECLARATION OF CONFORMITY ........................................................1
INTRODUCTION........................................................................................................................2
SPECIFICATIONS ........................................................................................................................3
FEATURES.................................................................................................................................3
BOARD LAYOUT ......................................................................................................................4
INSTALLATION.........................................................................................................................5
HARDWARE INSTALLATION ..........................................................................................................5
SOFTWARE INSTALLATION ..........................................................................................................5
TESTING THE INSTALLATION ................................................................................................6
TESTING THE FASTCOM ASYNC PCI PORT IN WINDOWS ...............................................................6
FASTCOM ASYNCPCI-335 SERIAL SETTINGS......................................................................7
FASTCOM: 232/4-LPCI-335 ADAPTER CABLE ......................................................................9
DB44 PIN DESCRIPTION ............................................................................................................9
DB25 PIN DESCRIPTION ..........................................................................................................10
PROGRAMMING .....................................................................................................................11
MAXIMUM DATA RATE ..........................................................................................................12
TECHNICAL SUPPORT ..........................................................................................................13
APPENDIX A ...........................................................................................................................14
17D154 UART DATA SHEET ...................................................................................................14

1
EUROPEAN UNION DECLARATION OF CONFORMITY
Information Technology Equipment
The Company COMMTECH, INC. declares under its own and full responsibility that the product
" Fastcom 232/4-LPCI-335 - Revision 1.1 "
on which is attached this Certificate is compliant to the "89/336/EEC" Directive, amended by 92/31/EEC and
93/88/EEC.
[ ] The product identified above complies with the requirements of the above EU Directive by meeting the
following standards:
• EN 50081-1 (1992) EMC Generic Emission Standard - Part 1, Residential, Commercial and Light Industry
- EN 55022 (1995), CISPR 22 (1993) Limits and Methods of Measurement of Radio Disturbance
Characteristics of Information Technology Equipment, 30 MHz - 1 GHz, Class B Limits
• EN 50082-1 (1992) EMC Generic Immunity Standard - Part 1, Residential, Commercial and Light Industry
- IEC 801-2 (1984), Method of Evaluating Susceptibility to Electrostatic Discharge, Level 4
- IEC 801-3 (1984), Radiated Electromagnetic field Requirements, Level 3
- IEC 801-4 (1988), Electrical Fast Transient/Burst Requirements, Level 2
Products listed on this declaration are exempt from the requirements of the 73/23/EEC directive due to the input
voltage specification as stated in Article 1 of the directive.
The technical documentation required to demonstrate that this product meets the requirements of the EMC
Directive has been compiled by the signatory below and is available for inspection by the relevant enforcement
authorities.
In WICHITA, KS on July 1st of 2004
9011 E. 37th Street North
Wichita, KS 67226-2006
(316) 636-1131
Fax (316) 636-1163
Mr. Glen R. Alvis
Chief Engineer

2
INTRODUCTION
The new Fastcom Low Profile, Universal PCI Bus, Asynchronous RS232 adapter utilizes the latest technology to
live up to today’s requirements for high bandwidth in communication systems. The new Fastcom: 232/4-LPCI-
335 is capable of operating at virtually any baud rate up to and above 1 Mbps (See Maximum Data Rate section).
There is no fine print or asterisks pointing to notes; this card is capable of running at the maximum data rate,
without any jumpers or hardware changes, right out of the box.
Designed to comply with the latest PCI specifications, the Universal PCI adapter will operate in both 5V and 3.3V
PCI slots. This means the card will work in the high speed PCI-X slots that commonly found in most new servers
as well as the standard PCI slots in desktop PCs. It also conforms to the Low Profile PCI specification so that it
can fit into a 2U chassis, without the use of cumbersome PCI riser cards. This flexibility allows for a single serial
interface board to be used across a wide range of different types of computers including both current and future
computing systems.
The Fastcom: 232/4-LPCI-335 adapter utilizes an advanced quad Universal Asynchronous Receiver and
Transmitter (UART). Each channel of the 17D154 UART is independently controlled and has its own 16C550
compatible register set. Each UART contains its own receive and transmit FIFOs of 64 bytes with programmable
trigger levels.
Each board utilizes a programmable clock generator to create the UARTs input frequency. The clock generator is
capable of generating frequencies from 6 to 50 MHz. Utilizing this feature, it is possible to configure the board to
operate at virtually any serial data rate that the user desires (1 Mbits/second and faster).
Additionally, this board is equipped with two general-purpose digital input and output pins. These software-
controlled digital I/O pins can be used to send or receive a TTL level digital signal to or from any other TTL level
source. For voltage and current tolerance information, please refer to the TTL information for any standard
74LS00.
With the supplied software driver, the ports on the Fastcom: 232/4-LPCI-335 will be seen as standard COM ports
and can utilize all the same functions as a standard serial device. With the addition of a few simple I/O
commands to control the unique features of the board, the standard software interface to a serial port can be used
to simplify program design. Example C programs are provided to demonstrate how to effectively use the serial
interface as well as control the board specific features.
Overall, the new Fastcom: 232/4-LPCI-335 Universal PCI Bus RS-232 adapters are the ideal board for
commercial and industrial applications demanding high data rates, reliability and ease of use.
Software drivers for Windows 2000/XP are supplied; Linux drivers are pending. Multiple Fastcom: 232/4-LPCI-
335 adapters can be installed in all operating systems.

3
Specifications
UART: Exar 17D154
OS Support: Windows XP, 2000 (Linux pending)
Data Rates: All baud rates up to and above 1 Mbit/s (See Maximum Data Rate
section)
Buffering: 64 byte Tx FIFO each channel
64 byte Rx FIFO each channel
Drivers/Receivers: High Speed RS-232
Interface: RS-232F
Signals: TXD, RXD, DTR, DSR, DCD, RTS, CTS, RI
DIN1, DIN2, DOUT1, DOUT2
Connector Configuration: DB44 male to 4 DB25 male
Bus Interface: 32-bit PCI Version 2.3
Dimensions: Low Profile PCI - MD1
Power Requirements: 600mA @ +5V (typical)
Certification: FCC compliant, CE marked
Operating Temperature
Range:
0°C to 70°C
Humidity: 0 to 90% (non-condensing)
Features
New high performance 17D154 UART
Standard or the Fastcom: 232/4-LPCI-335
All baud rates up to and above 1 Mbps (See Maximum Data Rate section)
64 byte FIFOs for improved throughput
Four independent channels
Software programmable baud rates
Switchless design for durability and reliability
Status LED’s for system development / debugging
Durable cables with RFI shielding
Hardware documentation, software, and example programs provided on the Fastcom CD
Made in Wichita, Kansas USA

4
BOARD LAYOUT
Universal PCI Bus (5V & 3.3V), PCI-X Compatible
DB44
Connecto
r
Status LED’s
Rx = Yellow
Tx = Red
Dimensions: 2.536 X 4.721 in
Low Profile, Short (MD1 length)
Universal PCI.
PACKING LIST
Fastcom: 232/4-LPCI-335 Card
232/4 Cable Assembly
Fastcom CD
If an omission has been made, please call technical support for a replacement.

5
INSTALLATION
Hardware Installation
Important: Static electricity can harm system boards. Perform service at an ESD workstation and follow
proper ESD procedure to reduce the risk of damage to components. Commtech, Inc. strongly encourages
you to follow proper ESD procedures, which can include wrist straps and smocks, when handling
Fastcom: 232/4-LPCI-335 boards.
1. Turn off PC power. Disconnect the power cord.
2. Remove the PC case cover (if applicable).
3. Unpack the Fastcom: 232/4-LPCI-335. Keep the box and static bag for warranty repair returns.
4. Select an open PCI slot in your PC.
5. After removing the blank bracket from your PC, install the Fastcom: 232/4-LPCI-335 in the PC by
pressing it firmly into the slot. Install the bracket screw to hold it firmly in place.
6. Re-install the cover on your PC.
7. Refer to Software Installation in the next section for information on installing the software for the board.
Software Installation
1. Click here to open the Installation Manual located on your Fastcom CD. If you do not have the Fastcom
CD, you can click here to download the installation manual from our web site.
2. Find Fastcom-Async-PCI-335 series cards select your operating system and follow the instructions to
install the software for your board.
3. When you are finished, select Fastcom: 232/4-LPCI-335 from the list at the end of the Fastcom-Async-
PCI series section to return to this manual.

6
TESTING THE INSTALLATION
To fully test the installation of your Fastcom: 232/4-LPCI-335, you will need to build a "loop back plug". Materials
needed are a DB25 female receptacle, solder cup style, and two short pieces of 20 or 24 AWG stranded wire.
This loop back plug can be used to test each RS-232 port. Jumper the pins together on the DB25 as illustrated
below:
RxD Pin 3
TxD Pin 2
Testing the Fastcom Async PCI Port in Windows
These instructions assume that you have already installed the card and have followed the installation instructions.
The Device Manager should show the boards/ports that are installed, and the COM numbers assigned to those
ports.
1. Attach the supplied 232/4 Cable Assembly to the DB44 connector. Install the loopback plug on the port to
test.
2. Open an MS-DOS or Command prompt windows and change to the directory (C:\> cd
directoryname ) where you saved the Fastcom software files that were either copied from the CD or
downloaded from our website. Change to the examples directory, then change to the loop_back
directory.
3. Type: loop_back X Where X is the COM port you wish to test.
4. This test will transmit data out of the specified COM port and receive the data on the same port, checking
to see that the data is still the same.
If you get error messages during the loop_back test, some possible reasons are:
1. You have an incorrect or faulty loop back plug construction or a bad connection. Verify that the wiring is
correct in your plug and correct any problems you may find.
2. The Fastcom board did not install correctly. Open the Device Manager (Start -> Run -> devmgmt.msc ->

7
OK). Expand the “Multiport Serial Adapter” tab and double click on the Fastcom device listed in that
class. Verify that the Device Status box on the General class lists “The device is working properly.”
3. The Fastcom ports did not install correctly. Open the Device Manager (Start -> Run -> devmgmt.msc ->
OK). Expand the “Ports (COM & LPT)” class and double click on the Fastcom ports listed in that class.
Verify that the Device Status box on the General tab lists “The device is working properly.”
4. The loop back plug is not connected to the correct port/cable.
FASTCOM ASYNCPCI-335 SERIAL SETTINGS
The Serial Settings property page can be found by opening the Device Manager (Start -> Run -> devmgmt.msc ->
OK), expanding the “Ports (COM & LPT)” class and double clicking on one of the installed “Fastcom Async335
Communications Port” devices, and then clicking on the “Fastcom AsyncPCI-335 Serial Settings” tab.
Each port on the Fastcom board has all of the settings available to it. However there is one option that will affect
all other ports on that particular Fastcom board: Clock Generator Frequency, all other settings are will affect only
the selected port.
Clicking on each individual setting will bring up a description of the setting in box at the top of the page. This is a
slightly more detailed version of those same descriptions.
• Clock Generator Frequency
The clock generator frequency divided by the sampling rate will directly determine the maximum available
bit rate that you may use with the Fastcom board. It works like this: Windows must be able to divide the
clock frequency by the sampling rate and then by any whole number and get to your bit rate as the
answer. By default, the clock is set to 14.7456 MHz (14745600 Hz). This frequency can be divided by
whole numbers to get all of the standard bit rates (i.e. 9600, 19200, 115200, etc). Minimum = 6 MHz,
Maximum = 50 MHz.
For Example:
Frequency / Sampling rate (8 or 16) / n = bit rate
14,745,600 / 16 / 96 = 9600
This setting is global. Changing the clock generator frequency will affect all Fastcom ports on the board.
Setting the clock for one port will set it for all port of the same board.
• Sampling Rate
Determines the number of times a data bit is sampled. It can be set to either 8 or 16 on a per port basis.
It is used in conjunction with clock generator frequency to determine attainable bit rates. As a general
rule, if your bit rate will be less than or equal to 3.125 Mbits/sec you should use 16 times sampling. 8
times sampling should only be used if you wish to run at bit rates over 3.125 Mbits/sec.
• Digital Input 1 & 2
This board has two general-purpose digital inputs that are only accessible on the DB44 connector. DIN1
is DB44 pin 31 and DIN2 is DB44 pin 16. These are not RS232 signals; they are TTL level digital inputs.
The Digital Input 1 and Digital Input 2 checkboxes display the current status of the two input pins. A
checked box indicates a logic high input and no check indicates a logic low input. Clicking the Check/Set
Digital I/Os button or the Set Now button or the OK button will update the status of these pins.
• Digital Output 1 & 2
This board has two general-purpose digital output pins that are only accessible on the DB44 connector.
DOUT1 is DB44 pin 15 and DOUT2 is DB44 in 30. These are not RS232 signals; they are TTL level
digital outputs. The Digital Output 1 and Digital Output 2 checkboxes are used to set the two digital

8
output pins. A checked box will output a logic high while unchecked outputs logic low. Clicking the
Check/Set Digital I/Os button or the Set Now button or the OK button will update the status of these pins.
Note: The state of each output pin will be remembered, but only if you open the same port that you used
to set the output. If you open a different port, the outputs that were last written by that port will be
displayed.
• Max Baud
This field reads the values that you have entered in the clock generator box and the sampling box and
calculates the maximum bit rate possible using those settings. The formula used to calculate the
maximum bit rate looks like this:
Frequency / Sampling = Maximum bit rate
Or
Frequency / Sampling rate (8 or 16) / 1 = Max bit rate
• Rx FIFO Trigger Level1
The Rx FIFO level generates an interrupt whenever the receive FIFO level rises above this preset trigger
level (high water mark). Raising or lowering this value can help to reduce the number of interrupts
generated by the Fastcom port during receives. This setting affects only the selected port. Modify this
value only if necessary in your application or if the receiver is generating too many interrupts for your
CPU to handle.
• Tx FIFO Trigger Level1
The Tx FIFO level generates an interrupt whenever the transmit FIFO level falls below this preset trigger
level (low water mark). Raising or lowering this value can help to reduce the number of interrupts
generated by the Fastcom port during transmits. This setting affects only the selected port. Modify this
value only if necessary in your application or if the transmitter is generating too many interrupts for your
CPU to handle. Tx FIFO Trigger + Tx Write Size must not exceed 64.
• Tx Write Size1
Tx Write Size is the number of bytes that get written to the Tx FIFO when the low water mark is reached.
Raising or lowering this value can help to reduce the number of interrupts generated by the Fastcom port
during transmits. This setting affects only the selected port. Modify this value only if necessary in your
application or if the transmitter is generating too many interrupts for your CPU to handle. Tx FIFO Trigger
+ Tx Write Size must not exceed 64.
• Software 9-Bit Mode
Turns on or off software 9-bit mode emulation. A feature of some UARTS and microcontrollers "MCS-51
9-bit format.” If you don't know what this is, you probably do not want to use it.
• Return 9-Bit data
Turns on or off the returning of the 9th data bit as its own character. A feature of some UARTS and
microcontrollers "MCS-51 9-bit format." If you don't know what this is, you probably do not want to use it.
• Custom Speed
When enabled, this allows you to use a non-standard, custom baud rate inside of an application that does
not support custom rates. When this is enabled, the 9600 baud rate will be overridden with the Max Baud
rate. Just select a baud rate of 9600 in your application and you will get whatever rate you have in the
Max Baud field.
1The results of changing the Rx FIFO Trigger, Tx FIFO Trigger, and Tx Write Size will depend entirely upon the
host PC. What lowers the number of interrupt requests on one PC will raise the number of interrupt requests on
another PC. You will have to experiment with these values to find the settings that yield the best performance
with the lowest number of interrupt requests that must be serviced by your CPU. If you do not experience
problems using the card in you PC, you should leave these at their default settings.

9
FASTCOM: 232/4-LPCI-335 ADAPTER CABLE
We provide access to the four channels of the FASTCOM: 232/4-LPCI-335 through a shielded DB44 connector
and an adapter cable (supplied with the board). The adapter cable consists of a DB44 male plug fanning out to
four standard DB25 male plugs.
DB44 Pin Description

10
DB25 Pin Description
The FASTCOM: 232/4-LPCI-335 features four RS-232 channels, which are accessed through four DB25
connectors on the cable assembly.
The following is a pin description of the DB25 connectors:
PIN NO. SIGNAL NAME DIRECTION
1 No Connect
2 TRANSMIT DATA (TxD) OUTPUT
3 RECEIVE DATA (RxD) INPUT
4 REQUEST TO SEND (RTS) OUTPUT
5 CLEAR TO SEND (CTS) INPUT
6 DATA SET READY (DSR) INPUT
7 SIGNAL GROUND (GND) GROUND
8 CARRIER DETECT (CD) INPUT
9 – 19 No Connect
20 DATA TERMINAL READY (DTR) OUTPUT
21 No Connect
22 RING INDICATOR (RI) INPUT
23-25 No Connect

11
PROGRAMMING
To interface with the serial ports on the Fastcom: 232/4-LPCI-335 in a Windows application, your code will use
the standard Win32 COM API. Documentation pertaining to how to use the Win32 API is beyond the scope of
this document. For more information on using the API, refer to the “Using Communications Resources” in the
MSDN.
In addition to the Win32 API, you can also use several special Fastcom specific commands that allow you to
accomplish all of the options from the Fastcom AsyncPCI-335 Serial Settings property page. These commands
as well as the custom structures used in them are defined in the fcapi.h header file.
Fastcom AsyncPCI-335 Serial Setting DeviceIOControl dwIoControlCode
Clock Generator Frequency IOCTL_FASTCOM_SET_CLOCK
Rx Echo Cancel IOCTL_FASTCOM_SET_RXECHO
Sampling Rate IOCTL_FCPORT_SET_SAMPLING
Digital Output 1 & 2 IOCTL_FCPORT_SET_DIGI_OUT
Digital Input 1 & 2 IOCTL_FCPORT_GET_DIGI_IN
Tx FIFO Trigger Level IOCTL_FCPORT_SET_RXTX_TRIG
Tx Write Size IOCTL_FCPORT_SET_RXTX_TRIG
Refer to the AsyncPCI335\examples directory on the Fastcom CD or in the downloaded zip file for some example
C programs that demonstrate how to use the Fastcom specific serial settings as well as give a general sense of
how to use the Win32 API.

12
MAXIMUM DATA RATE
Due to the nature of RS-232 communications, attainable baud rates tend to vary greatly. The ability to achieve
higher baud rates depend on many factors including the interrupt handling ability of target machine, environment
noise and especially cable lengths.
In order to make cable length determination easier, we have developed an equation based on an interpolation of
recorded laboratory data. By measuring the maximum attainable baud rates at varying cable lengths and plotting
the data, we were able to create a linear approximation of the data set.
Please use the equation below to determine approximate correlations between maximum baud rate and cable
length up to a typical maximum of 2,062,500 bps (rates above 1 Mbps are possible but not guaranteed).
• To determine the max length at a given baud use:
d = ( -9.04*10-5 * bps ) + 192
• To determine the max baud at a given cable length use:
bps = ( -11,000 * d ) + (2.13*106)
d = approximate MAX cable length in feet
bps = estimated MAX baud rate in bits per second
Equations are based on experiments using Olympic cable number 2829 with 30pf/ft nominal capacitance at a
maximum of 83 ft (CL not to exceed 2500 Pico farads per EIA-232). These equations are an estimate of the
maximum capabilities in the user’s environments; different cable capacitance will yield different results. These
equations are only valid when using a Fastcom: 232/4-LPCI-335 adapter, they cannot be utilized when dealing
with other Fastcom boards.

13
TECHNICAL SUPPORT
Commtech provides extensive technical support and application suggestions. Most of the problems that occur
with the FASTCOM: 232/4-LPCI-335 can be corrected by double-checking the switch positions, your cables and
your program. We recommend that you build the loop back plug that is described in the Programming section of
this manual. With that plug, you can quickly isolate the problem to the board, cables, or software.
If you still have unresolved questions, use the following procedure to get technical support:
1. Call our Technical Support Staff at (316) 636-1131. They are on duty from 9:00 AM to 5:00 PM Central Time.
2. Ask for technical support for the FASTCOM: 232/4-LPCI-335. Be ready to describe the problem, your
computer system, your application, and your software.
3. If necessary, our staff will give you an RMA number (Return Material Authorization). Use this number on the
mailing label and in all references to your board. Put the board back in its static bag and in its box. Ship the
board back to us as directed.
4. If you prefer, you may FAX a description of the problem to us at (316) 636-1163, or we can be reached on the
Internet at http://www.commtech-fastcom.com/TechSupport.html or by email at techsupport@commtech-
fastcom.com.
FASTCOM LIMITED LIFETIME WARRANTY
Commtech’s entire FASTCOM product line is covered by a limited lifetime warranty against defects in workmanship. This
warranty is available only to the original purchaser and only covers defects in our workmanship. Any FASTCOM board that is
returned to Commtech will, at the option of Commtech, be repaired or replaced at no charge -- except for circumstances
excluded by this warranty.
A Return Materials Authorization (RMA) number must be obtained from Commtech before a return will be accepted. Please
contact us via telephone or email to obtain an RMA number.
You are responsible for shipping charges when you return a FASTCOM board to Commtech. We will pay the shipping
charges to send the board back to you if a defect in workmanship is found. However, if no defect in workmanship is found, or
the board is not found to be defective, or the any of the following warranty exclusions occur, you will be responsible for
shipping charges both ways.
Warranty Exclusions
This warranty does not cover problems or damage resulting from, but not limited to, the following:
1. Any modification, misuse, abuse, disassembly, misapplication, or unauthorized repair by anyone other than
Commtech.
2. Any improper operation, including any use not in accordance with any verbal product instructions or documentation.
3. Connection to an improper voltage supply or ESD damage.
4. Any other cause not related to workmanship.
Non-Warranty Repairs
We can provide a quote for non-warranty repairs upon request.
If any Commtech product is damaged such that it cannot be repaired, you can return it to Commtech for replacement under
our Non-Repairable Replacement policy, regardless of the cause of damage. Commtech will replace the unit at 60% of the
then-current list price.
Limitation of Liability
Commtech shall not be liable for any special, incidental, indirect, or consequential damages whatsoever, including but not
limited to loss of profits, revenue, or data (whether direct or indirect), or commercial loss for breach of any express or implied
warranty on your product even if Commtech has been advised previously of the possibility of such damages. Commtech does
not warrant that its products will work in every system or every system configuration. We do not warrant that our products will
be suitable for your application. If you are dissatisfied with our product, contact customer service to arrange for a return of our
product and refund of your money. Commtech’s liability, in any case, is limited to the original product purchase price and is
available to the original customer only.

14
APPENDIX A
17D154 UART
Data Sheet
View from CD
Download from web
Table of contents
Other CommTech PCI Card manuals