Comodita COM301 User manual

USER GUIDE • 1-7
GUIA DEL USUARIO • 8-14
COMODITÀ BRAVA
COMPACT ROLLING WALKER WITH SEAT
ANDADOR DE RUEDAS COMPACTO
CON ASIENTO

Model Number: COM301

Comodità is a company concerned with your comfort, safety and
mobility. Our products will simplify your movements, offering
support and safety for your daily activities, helping you do what
you want, when you want it.
The modern design and sturdy construction of the Comodità
Brava Rolling Walker Ref. COM301 make it one of the safest
walkers on the market, built to support weights of up to 300 lbs
(136 kgs). The unique design of the frame provides extra room
for the feet to move, helping to avoid tripping and falling. Our
rolling walker is built with the best materials available to ensure
the highest safety you can find.
for the feet to move.
1
E x c e l l e n c e i n D e s i g n a n d S a f e t y
Other Features:
•Reinforced frame for maximum security
•Adjustable handle height
•Extra large 8” wheels for safer indoor and outdoor use
•Rubber tires provide superior grip when brakes are applied,
even on smooth indoor surfaces like ceramic tiles, wood and
carpet.
•Hand brake locks for safety while seated
•Comfortable extra wide backrest
•Convenient storage bag
•Convenient transport bag
Product Dimensions and Specifications:
•Height (min /max)...... 31 ½" / 36 ½"
80 cm / 93 cm
•Length................. 27"
69 cm
•Width................. 27"
69 cm
•Seat Depth........... 9 3/4"
25 cm
•Seat Width........... 18"
46 cm
•Seat Height.......... 21"
54 cm
•Folded Width........ 13"
33 cm
•Wheel Diameter.... 8"
20 cm
•Unit Weight.......... 18 lb
8.25 kg

•Weight Capacity.... 300 lb
136 kg
2
Assembly Instructions:
1. Remove all packaging.
2. Remove the two knobs located on both sides of the walker.
3. Unfold the front and back wheels so they will be in the same
position as the image shown above.
4. Once the front and back wheels are in the correct position,
insert the two knobs again, making sure they go through the
frame of the back wheel and the upper suport of the front
wheel.
5. Tighten the knobs on the opposite side of the metal frame.
3
E x c e l l e n c e i n D e s i g n a n d S a f e t y
Assembly Instructions:
6. Once all wheels are tightened and locked, unfold the walker as
shown in the images below.
7. Lock the seat to the frame by applying pressure on both sides
of the seat (see arrows on picture above) until you hear a click
on each side , indicating the seat is locked to the frame.
8. Adjust the height of the
handles by standing upright
behind the walker with your
shoulders relaxed and arms
hanging at your sides. The
handgrips should be at a
height even with your wrists.
9. To fold the walker gently pull
the nylon strap at the center of the seat. This will unlock the
cross bars from the frame, allowing the walker to fold.

4
Operating Instructions:
To Walk
•Position yourself behind the walker and hold both handles
firmly.
•Roll your walker slowly forward so that the rear wheels are a
few inches ahead of your body.
•While maintaining a steady and safe roll forward, place your
foot in line with the rear wheels.
•Repeat the movement with your other foot.
•To slow down, pull the brake handles up.
To Lock and Unlock Brakes
•To lock the brakes, push down on the brake handles until the
brakes click into locked position, as shown below.
Do not push it any further than this point.
•To unlock the brakes and resume walking, pull up the brake
handles until you hear a "click.”
To Use as a Seat
•Make sure your walker is on a flat surface, not on an incline.
•Lock the brakes before sitting.
•Make sure your feet rest flat on the ground.
5
E x c e l l e n c e i n D e s i g n a n d S a f e t y
Care & Maintenance:
Periodic Brake Adjustment
To adjust the sensitivity of the brake:
•Turn locking nut clockwise to reduce brake sensitivity.
•Turn locking nut counter-clockwise to increase sensitivity.
Warning!
•Over adjustment of the brake might prevent the wheels from
moving freely.
•Under adjustment of the brake may cause the brake pad not
to engage at all.
•Do not use walker if brakes are not working properly.
•Do not use walker as a transport chair.

6
Safety Instructions:
Warning! Failure to follow safety instructions may
result in serious injury.
•DO NOT use this product as a wheelchair.
•DO NOT transport someone while sitting on this walker.
•DO NOT exceed maximum weight capacity.
•BRAKES MUST be in locked position before sitting on the
seat.
•DO NOT self-propel the walker while seated.
•DO NOT sit on the walker on an incline.
•INSPECT BRAKES before each use.
•ALL WHEELS MUST be in contact with the floor or ground at
all times.
•BACKREST IS NOT intended to support your full weight.
It is intended to provide back support while seated.
•DO NOT use in escalators, stairs, moving sidewalks, or
uneven surfaces.
•BOTH FEET should rest flat on the ground when sitting.
•RECOMMENDED USER’S HEIGHT from 5’4” to 6’4”.
Warranty:
Your Comodità Brava Rolling Walker is warranted to be free of defects in material
and workmanship for a period of one year from the date of purchase for the
original owner. This warranty does not cover device failure due to user negligence,
misuse of the product, failure to adhere to instructions, or normal wear and tear.
In the event of a defect covered by this warranty, we will, at our option, repair or
replace the device. This warranty does not include any labor or shipping charges.
provide a return authorization number. You will be required to include a
copy of your original receipt.
7
Comodità es una empresa preocupada por su confort, seguridad
y movilidad. Nuestros productos simplifican sus movimientos,
ofreciendo apoyo y seguridad en sus actividades diarias, le
ayudando a hacer lo que quiera, cuando quiera.
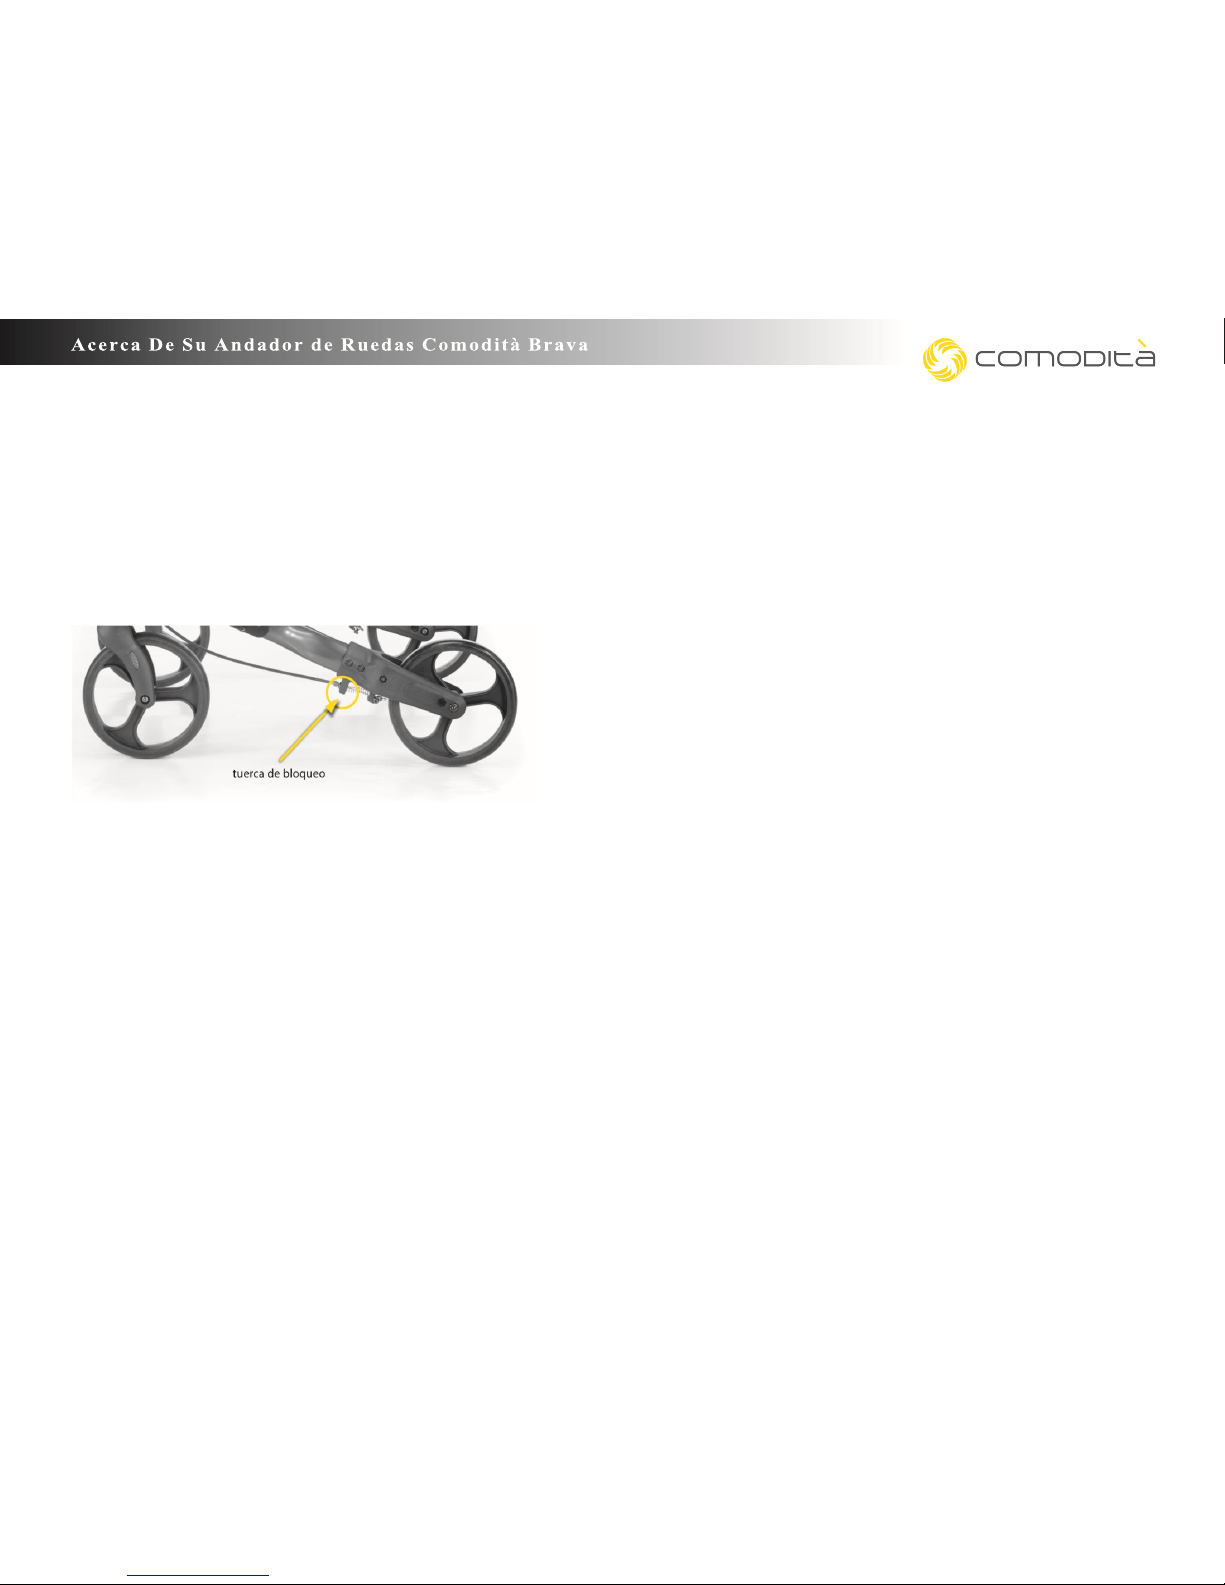
El diseño moderno y la construcción robusta del andador
Comodità Brava Ref. COM301 lo convierten en uno de los
andadores más seguros del mercado, construido para soportar
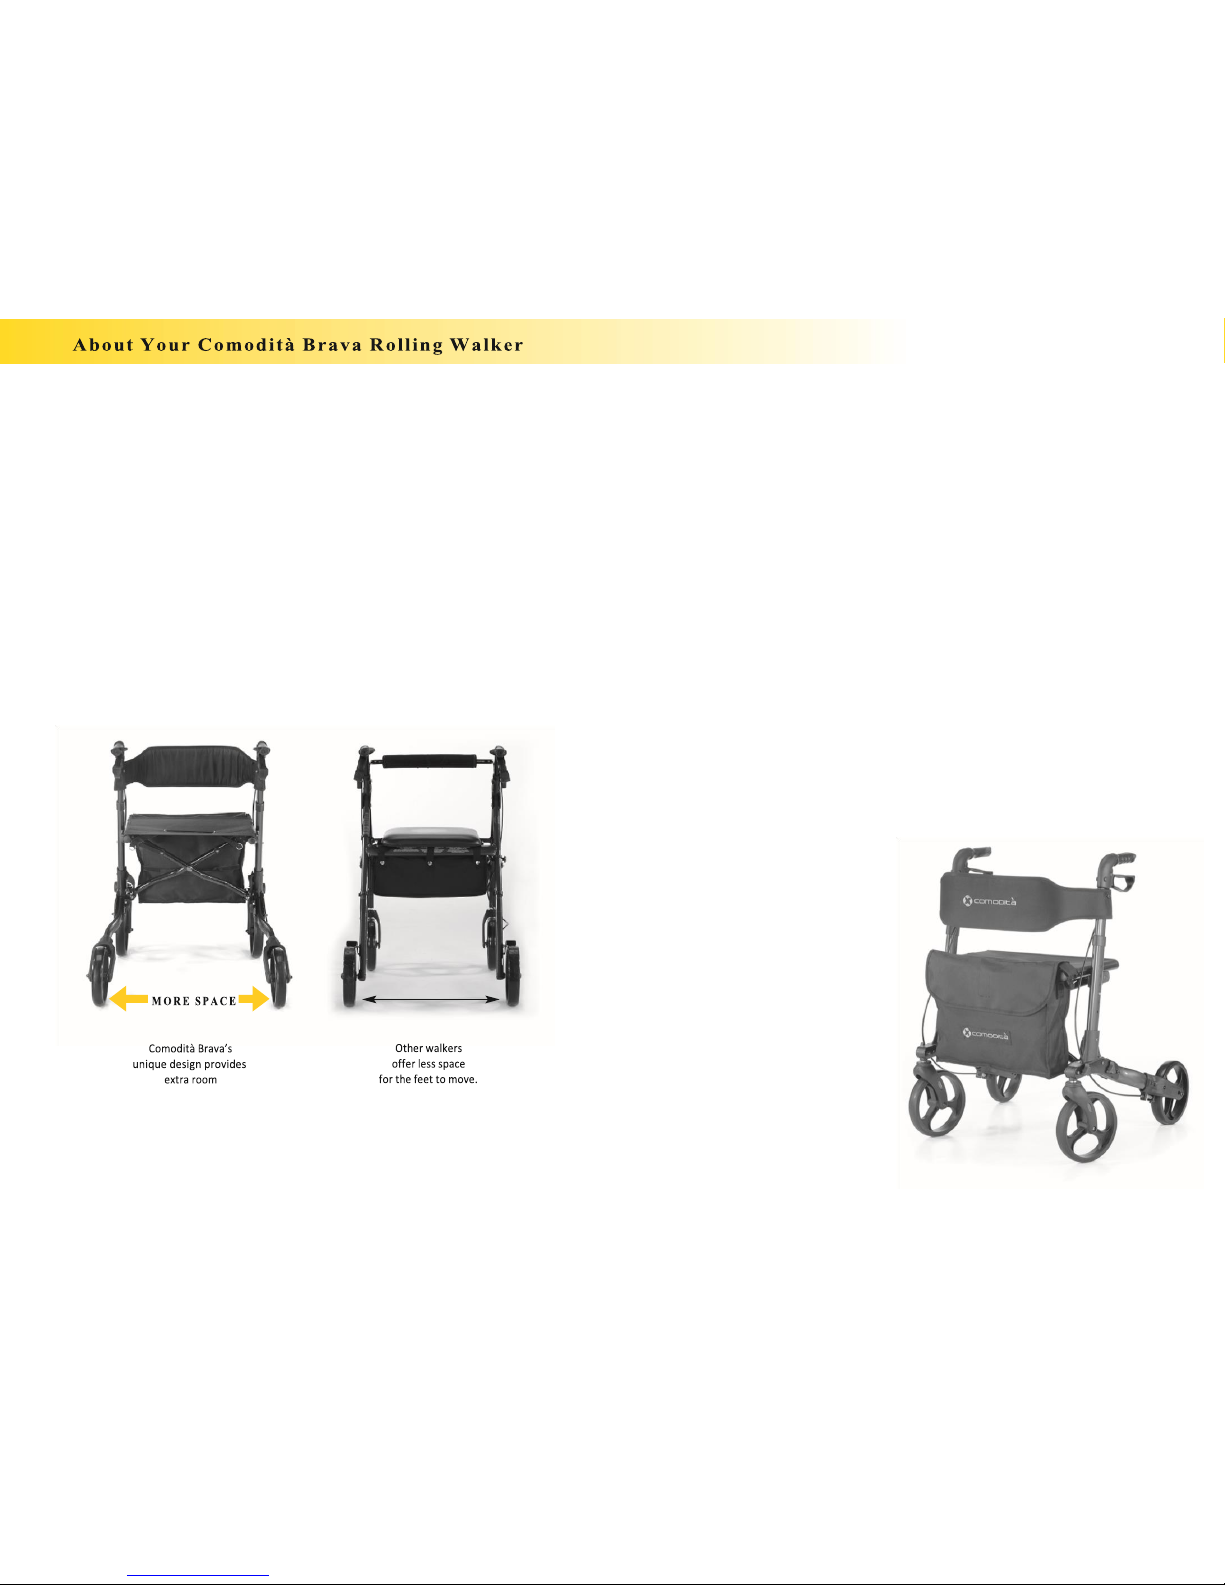
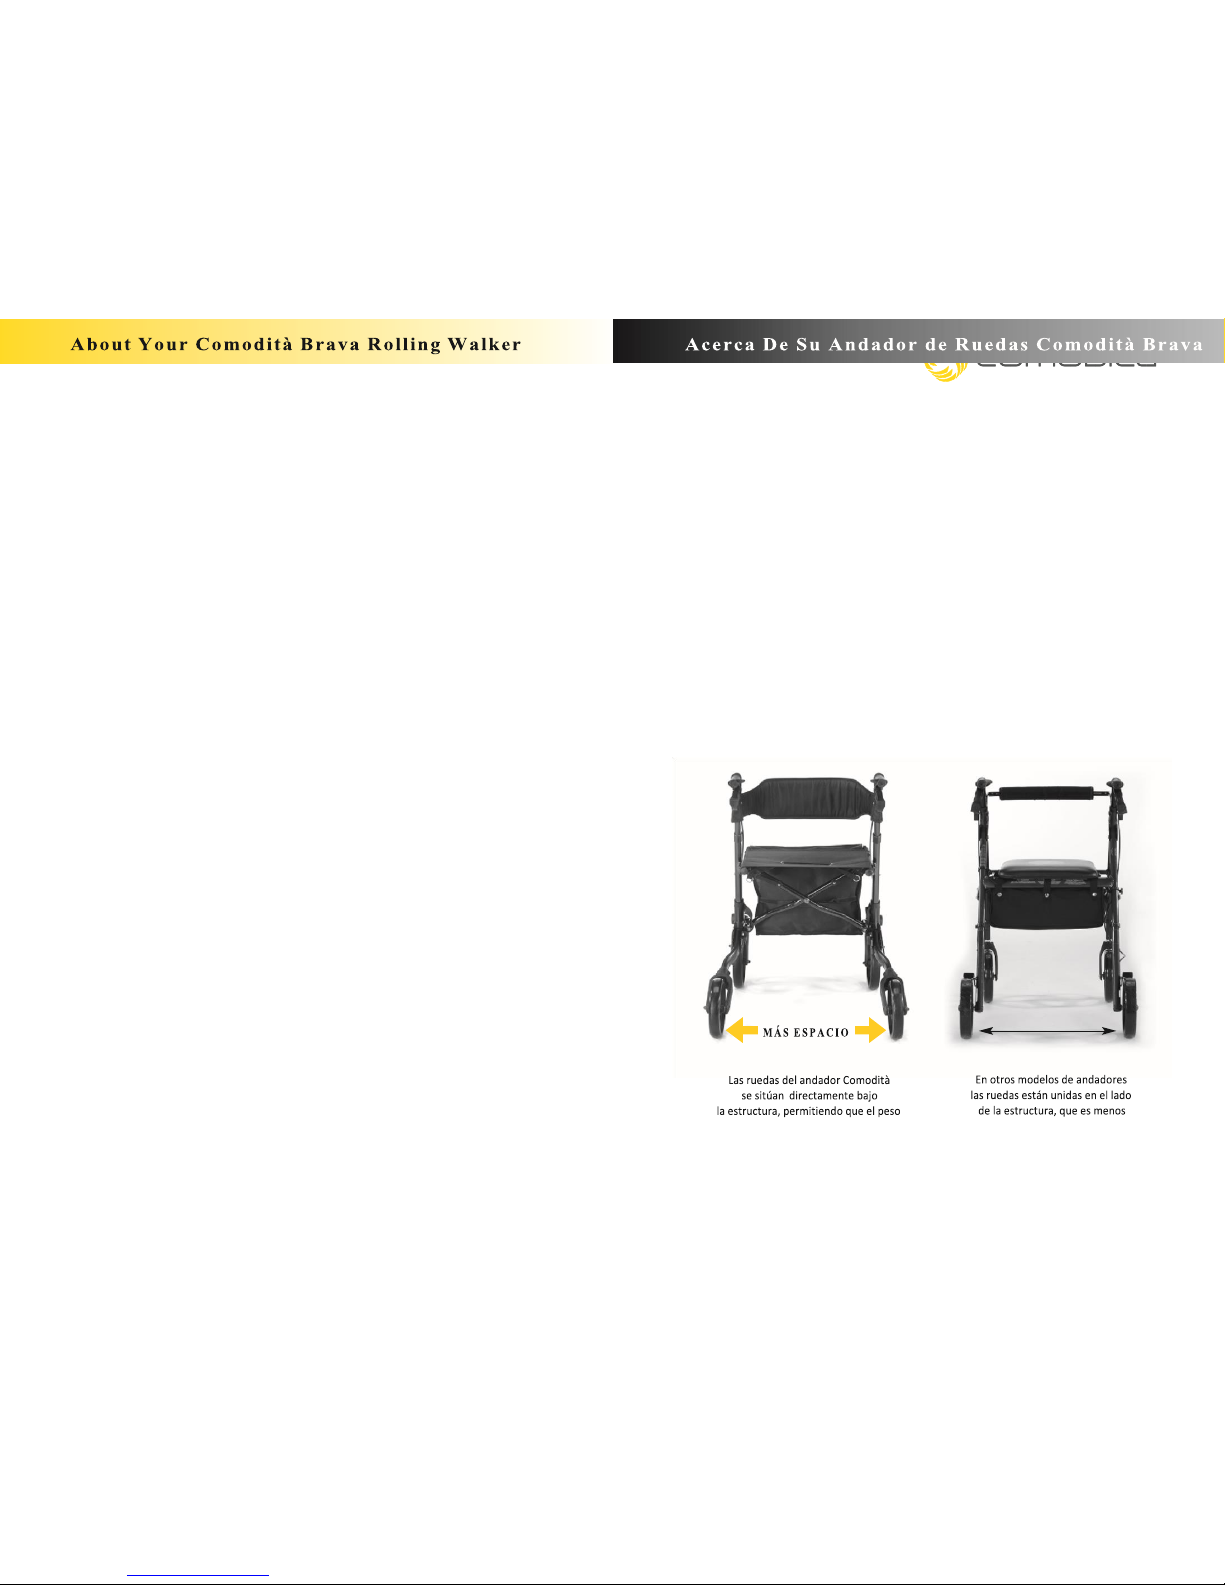
pesos de hasta 300 libras (136 kg). Su diseño único de las ruedas
traseras proporcionan espacio adicional para los pies, evitando
tropezones y caídas. También permite que el peso sea puesto
justo encima de las ruedas, y no al lado de las ruedas como la
mayoría de los modelos en el mercado. Nuestro andador es
construido con los mejores materiales disponibles para
garantizar su máxima seguridad.
completo de usuario sea colocado seguro y menos estable.
sobre las ruedas.
8

Otras Características :
•Ruedas extra-grandes de 20 cm, más seguras para el
uso interior y exterior
•Respaldo ergonómico acolchado
•Estructura reforzada para mayor seguridad
•Altura de mango ajustable
•Cómoda bolsa de almacenamiento
•Bloqueo de freno de mano para la seguridad mientras
sentado
•Conveniente bolsa de transporte
Dimensiones y Especificaciones :
•Altura (min /max)...... 80 cm / 93 cm
31½" / 36½"
•Longitud.............. 69 cm
27"
•Ancho................. 69 cm
27"
•Profundidad ..........25 cm
del asiento 9 3/4"
•Ancho del asiento... 46 cm
18"
•Altura del asiento... 54 cm
21"
•Ancho plegado...... 33 cm
13"
•Diámetro .............. 20 cm
de la rueda 8"
•Peso de la unidad....8.25 kg 18 lb
•Capacidad ............ 136 kg de carga 300 lb
9
E x c e l l e n c e i n D e s i g n a n d S a f e t y
Instrucciones de Montaje :
1. Quitar todo el material de embalaje.
2. retire los dos botones situados a ambos lados de lo andador
3. Desplegar las ruedas delanteras y traseras para que estén en la
misma posición que la imagen de arriba.
4. Una vez que las ruedas delanteras y traseras están en la posición
correcta, inserte los dos botones de nuevo, asegurándose de
que vayan a través del bastidor de la rueda trasera y el soporte
superior de la rueda delantera.
5. Apretar los botones para el lado opuesto de la estructura de
metal.
10
Instrucciones de Montaje :

6. Una vez que las ruedas estén bien apretadas, desplegar
el andador según imágenes de abajo.
7. Fijar el asiento a la estructura mediante la aplicación de
presión en ambos lados del asiento (como indican las
flechas en la imagen de arriba) hasta que escuche un clic
en cada lado, indicando que el asiento está bloqueado a
la estrutura.
8. Para ajustar la altura del manillar
póngase de pie detrás del andador
con los hombros relajados y los
brazos os colgando a su lado. Los
mangos deben estar a la altura de
sus muñecas.
9. Para plegar el andador, tire
suavemente la correa de nylon en el centro del
asiento.Esto desbloqueará las barras trans versales del
bastidor, lo que permitirá doblar el andador.
E x c e l l e n c e i n D e s i g n a n d S a f e t y
Instrucciones de Uso :
Para Caminar
•Colóquese detrás del andador y sostenga firmemente los
mangos.
•Empuje el andador lentamente hacia el frente hasta que las
ruedas traseras estean unos centímetros por delante de su
cuerpo.
•Coloque el pie en línea con las ruedas traseras.
•Repita el movimiento con el otro pie.
•Para diminuir la marcha, apriete la manija del freno.
Para Bloquear y Desbloquear Los Frenos
•Para bloquear los frenos, empuje hacia abajo las manijas de los
frenos hasta que hagan un "clic" en la posición de bloqueo como
muestra la imagen. No lo fuerce más allá de este punto.
•Para desbloquear, tire las manijas de los frenos hacia arriba
hasta oir un “clic.”
Para Usar Como un Asiento
•Asegúrese de que el andador se encuentra en una superficie
plana, no en una pendiente.
•Bloquear los frenos antes de sentarse.
•Asegúrese de que sus pies descansen en el suelo.
11 12

Cuidado y Mantenimiento:
Ajuste Periódico del Freno
Para ajustar la sensibilidad del freno:
•Gire la tuerca de bloqueo hacia la izquierda para aumentar
la sensibilidad del freno.
•Gire la tuerca de bloqueo hacia la derecha para reducir la
sensibilidad.
¡Advertencia!
•El ajuste excesivo del freno puede evitar que las ruedas se
muevan libremente.
•El ajuste insuficiente del freno puede hacer que el andador
no frene adecuadamente.
•No utilice el andador si los frenos no estean funcionando
correctamente.
E x c e l l e n c e i n D e s i g n a n d S a f e t y
Instrucciones de Seguridad:
¡Atención! No seguir las instrucciones de seguridad puede causar
lesiones graves.
•NO utilice este producto como una silla de ruedas.
•NO transporte a alguien mientras esté sentado en el andador.
•NO exceda la capacidad máxima de peso.
•LOS FRENOS DEBEN ESTAR en la posición de bloqueo antes de
sentarse en el asiento.
•NO autopropulsione el andador mientras esté sentado.
•NO se siente sobre el andador en una pendiente.
•INSPECCIONE LOS FRENOS antes de cada uso.
•TODAS LAS RUEDAS DEBEN ESTAR en contacto con el suelo en
todo momento.
•EL RESPALDO NO ESTÁ DISEÑADO para soportar todo su peso. Su
objetivo es proporcionar apoyo para la espalda mientras esté
sentado.
•NO UTILIZAR en escaleras mecánicas, escaleras, aceras móviles o
superficies irregulares.
•AMBOS PIES deben descansar en el suelo cuando esté sentado.
•ALTURA DEL USUARIO: 5’4” / 6’4” ( 1.63 m / 1.93 m)
Garantía:
Su andador de ruedas Comodità está garantizado como libre de defectos en materiales
y mano de obra por un período de un año a partir de la fecha de compra por el
propietario original. Esta garantía no cubre fallas del aparato debido a la negligencia del
usuario, mal uso del producto, si no se siguen las instrucciones, o desgaste normal por
el uso. En el caso de un defecto cubierto por esta garantía, nosotros, a nuestra opción,
podemos elegir reparar o reemplazar el dispositivo. Esta garantía no incluye ningún
labor o cargos por envío.
Por favor, póngase en contacto con nuestro servicio de atención al cliente em:
[email protected]. Le proporcionaremos un número de autorización de
devolución. Usted tendrá que incluir una copia de la factura original de venta.

13 14

COMODITÀ BRAVA
Compact Rolling Walker with Seat Model COM301 Andador de
ruedas compacto con asiento modelo COM301
Manufactured in China for: Comoditá
LLC USA www.comoditausa.com
info@comoditausa.com
Table of contents
Languages:
Other Comodita Mobility Aid manuals
Popular Mobility Aid manuals by other brands

Sunrise Medical
Sunrise Medical Hoyer OXFORD Fitting instructions

ADAPT SOLUTIONS
ADAPT SOLUTIONS XL-SEAT installation manual

Antar
Antar AT51040 user manual

Quantum Rehab
Quantum Rehab ACN 088 609 661 Basic operation instructions

Mobiclinic
Mobiclinic HERCULES instruction manual

Anatomic SITT
Anatomic SITT Zitzi Pengy user manual