Connect-A-Port XL6 Floating Dock Attachment
Note: If mounting port to wooden floating dock use 3/8” (9 mm) Lag Bolts (screw based)
4
5
6
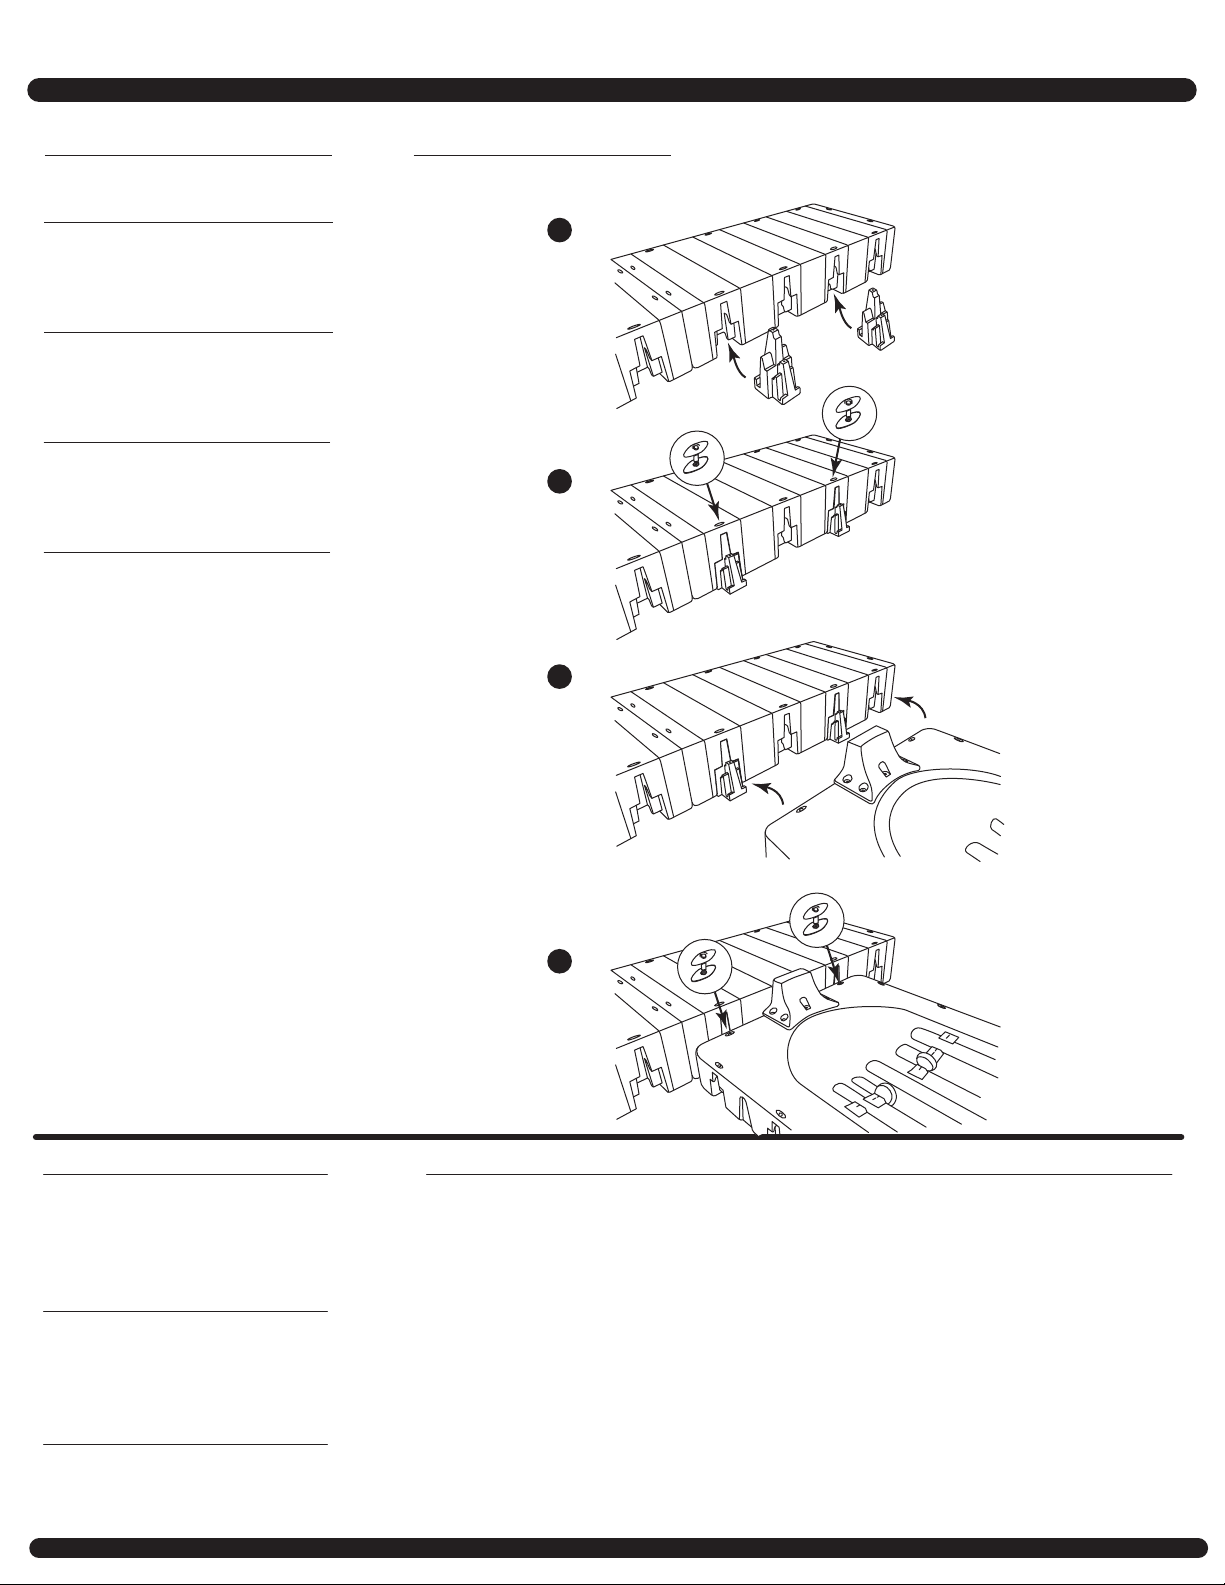
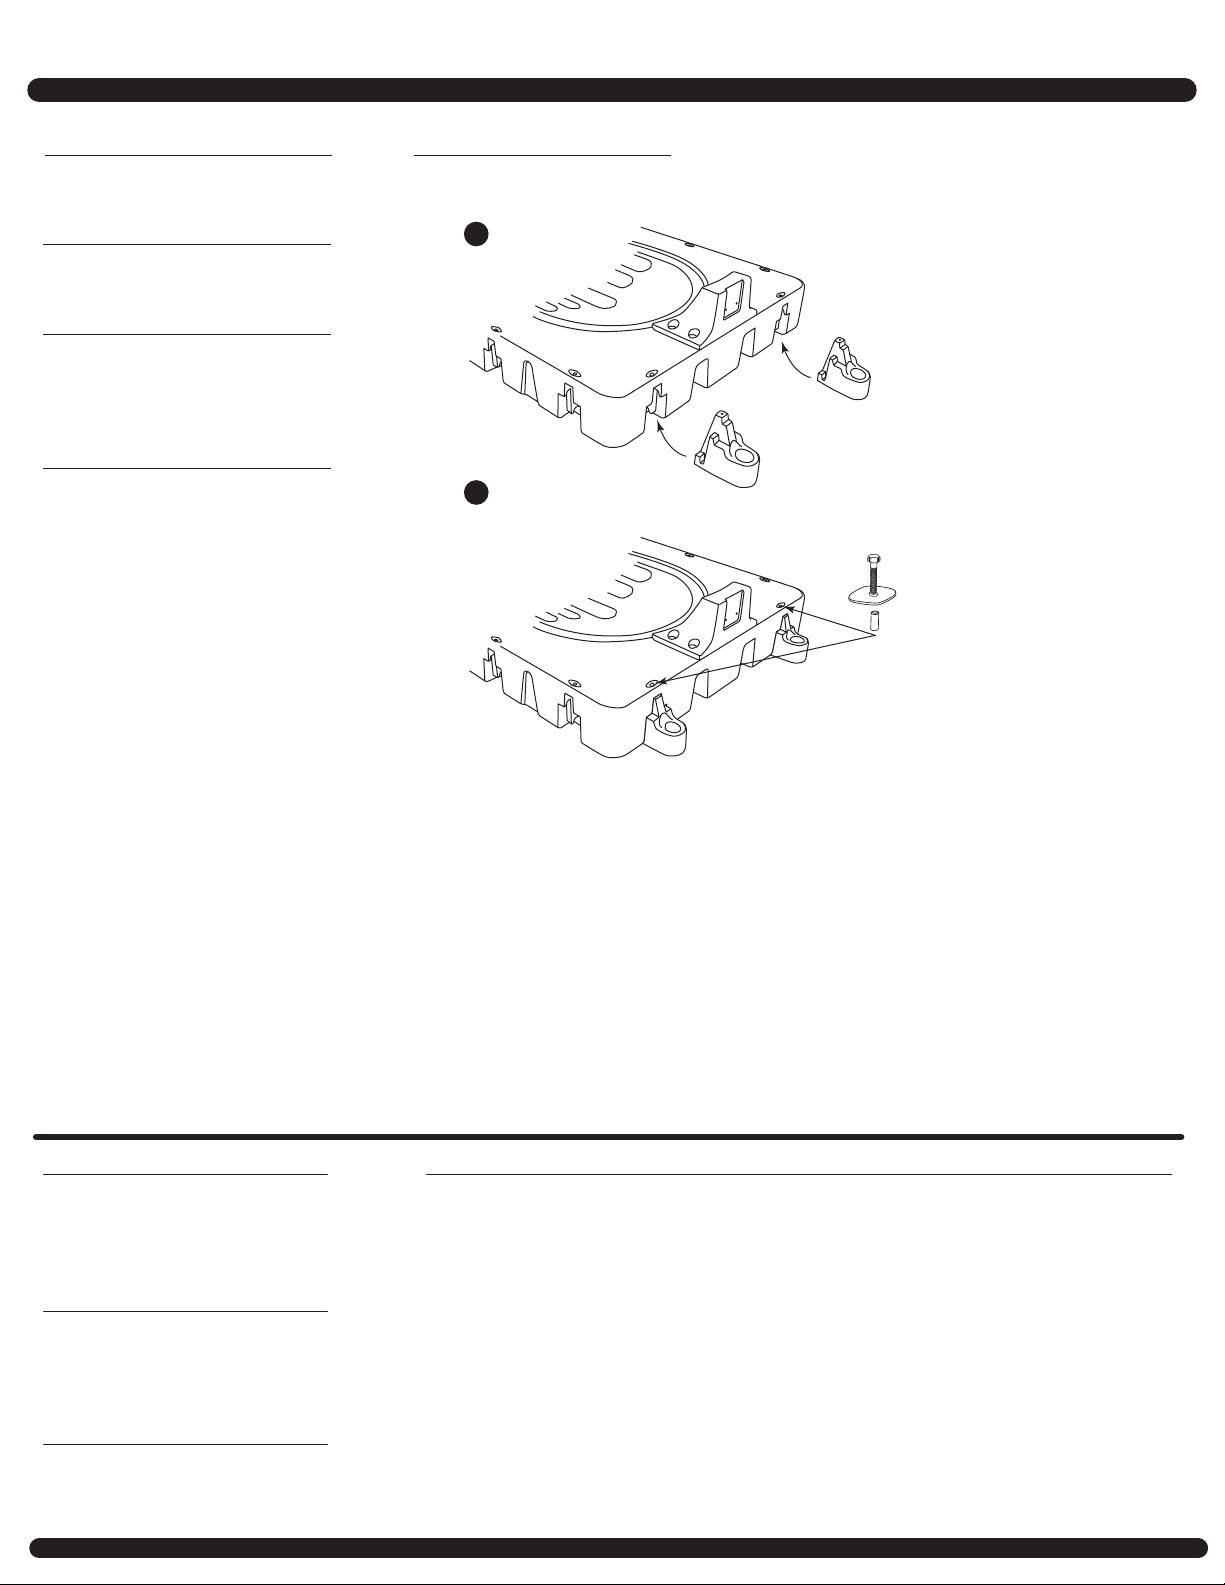
Step 4
(a) Determine XL6 mounting
location. You may want to put your
PWC on the port at this time to see
how the float set in the water. The
entrance end of the port is high with
the craft on it you will want to raise
the front of the port to give is a slight
downhill appearance for easy roll
off. Remember, if it rolls off too hard
the mount is too low. IF it rolls off too
easy it is too high.
(b) Mark the drill holes and remove
Metal Dock Channel for mounting
on the dock. Recommended 4 to 6
mounting holes.
(b) (a)
(b)
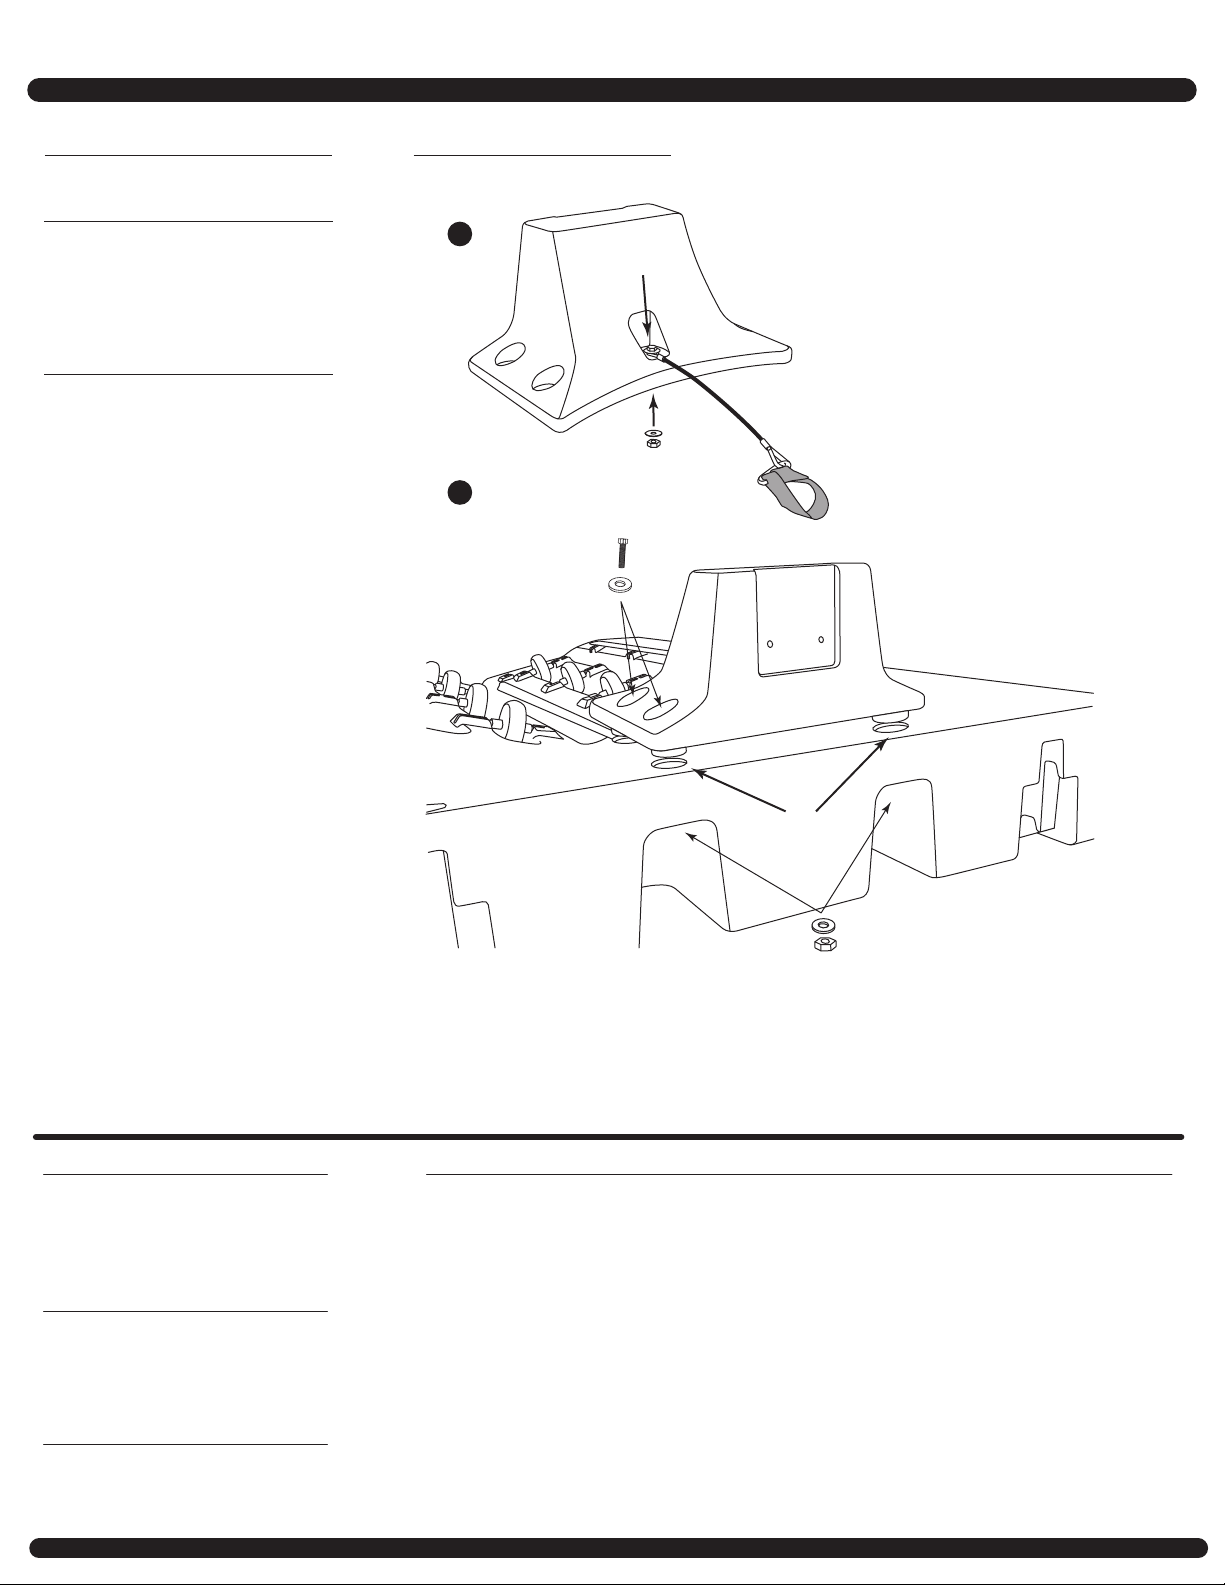
Step 5
Hardware to mount the XL6 Hinge
Connector not included.
Attaching with Lag Bolts:
Mark location for Drilling the (4) 1/4”
Pilot holes. Drill the holes.
Use 9/16” Wrench to install the 3/8”
Lag Bolts.
Attaching with Bolts, Nuts & Washers:
Mark location for Drilling the (4) 9/16”
Pilot holes. Drill the holes.
Use 3/4” Wrench to install the 1/2”
Bolts, Nuts & Washers.
(a) Drill the holes for the Bolts. (b)
Align Metal Dock Channel to the dock
and secure with hardware.
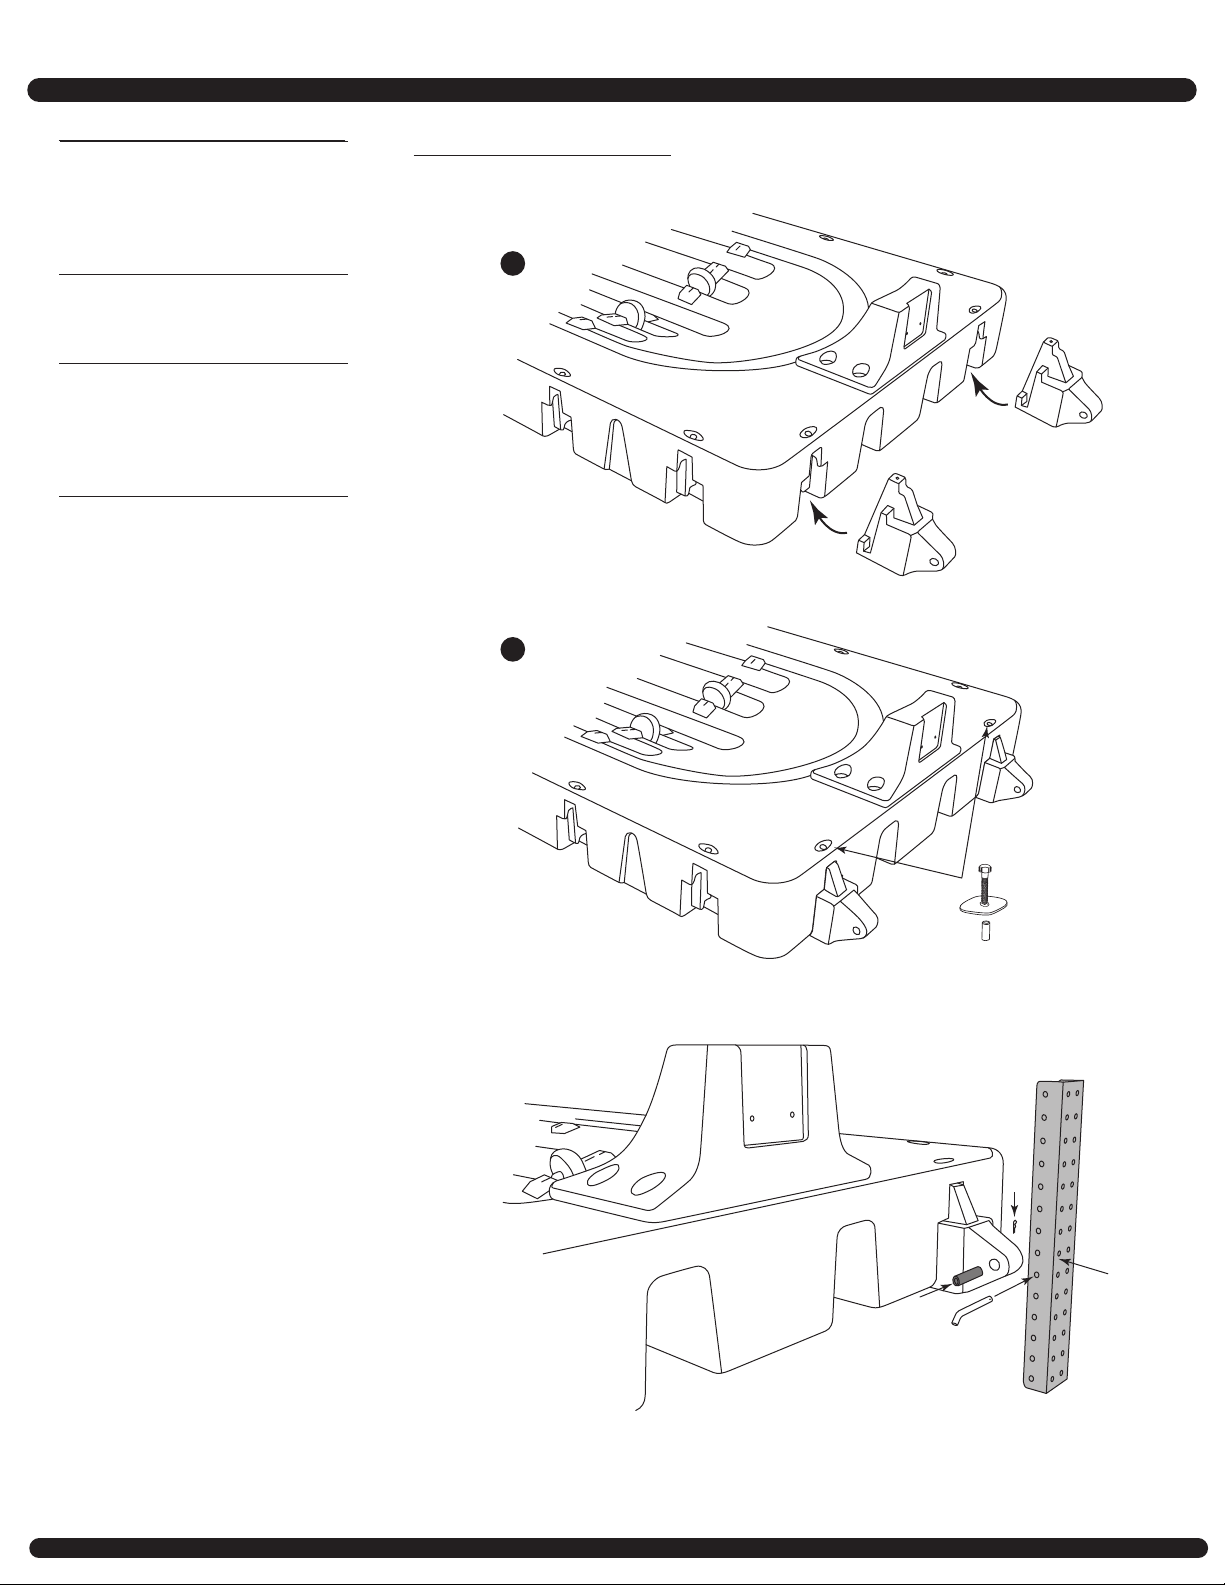
Step 6
Repeat Steps 3 to 5 for the other
anchoring connection.
1/21/21
Please note that placing a port in an
unsuitable location may void any warranty
provided by Connect-A-Dock. Please contact
PWC Port or your local distributor or dealer if
you have any questions regarding the
suitability of your particular dock location.
Installation
All specifications provided by PWC Port are based upon PWC Port test data and are provided without representation or warranty. Actual
specifications, weights and dimensions may vary for a variety of reasons, including, without limitation, due to the rotational molding process.
Specifications should be regarded as nominal values only and not as binding actual values. Please contact PWC Port if you have specific
questions regarding the specifications of any PWC Port product.
PWC Port Product Installation and Use Warning Disclaimer
Repairs of a PWC Port should only be performed
by an authorized PWC Port technician. If repair
is performed by unauthorized persons, serious personal
injury and/or property damage could occur.
If unauthorized personnel repair a PWC Port,
PWC Port hereby disclaims any and all
warranties, expressed or implied. PWC Port
limits its warranty to PWC Port's published
PWC Port warranty furnished with each product.
No other warranty of any kind either verbal or implied
including warranties of merchantability and fitness for
a particular purpose are recognized.
The contents of this manual are subject to change
without notice and should not be construed as a
commitment, representation, warranty or guarantee
of any method, product or device by PWC Port.
Reproduction or translation of any part of this
manual, without the written permission of PWC Port,
is prohibited.
Any inquiries concerning the PWC Port published
warranty or this manual and its contents please
contact PWC Port.
For low maintenance cleaning use a stiff
broom or brush with a garden hose. A
pressure washer with no heat can also
be used. When using soap, use an
environmentally safe product.
Cleaning
Dock anchoring methods listed in this
instruction manual are only suggestions.
It is up to you to determine which
method suits your needs.
Anchoring
Part #S01108connectadock.com | 1501 Owner Avenue, Atlantic, IA 50022 USA