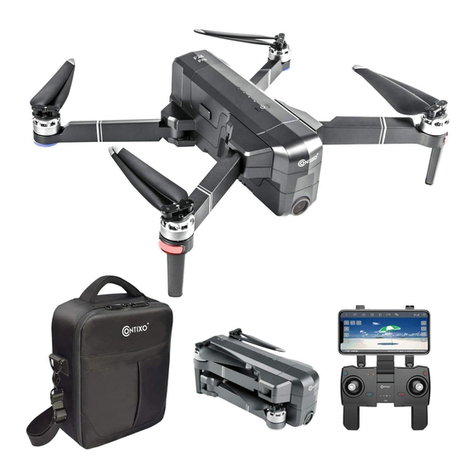
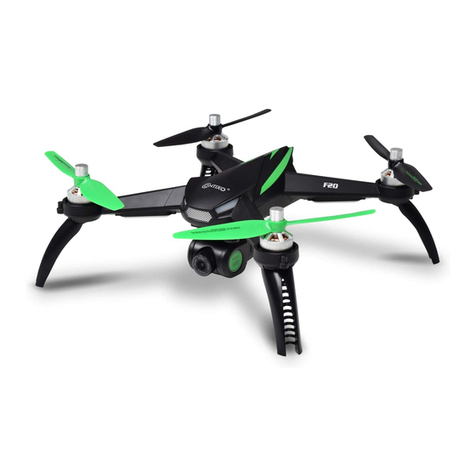
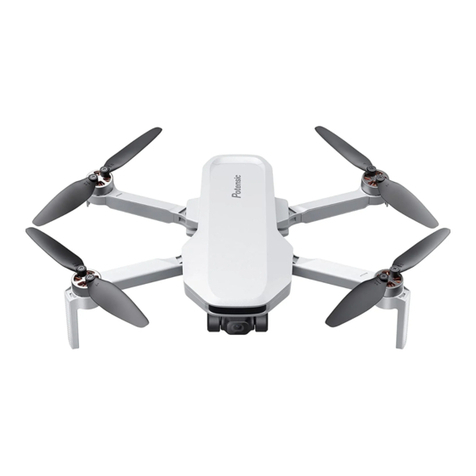
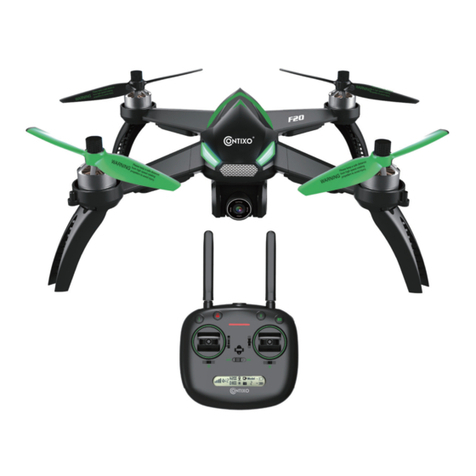
Contixo F10 User manual

TROUBLESHOOTING @Nnxo'
F1O DRONE
@
INSTRUCTION JVIANUAL
lssue Po$sibl6 Cas6 Sqluflon
The F10 will not
initialize
The F10 was moved
during initialization.
Turn the Fl 0 offthen back on again,
and ensure it does not move during
the ihitialization process.
Flight battery will not
charge
Poor connection
behreen the USB
cable and the flight
battery.
Check your connections on both the
USB cable and the flight battery.
F10 motors will nol
siart
F10 is ln No Fly
Zone.
Move at least 4 miles away from no
fly zone. lvlost major airports are no
fly zone areas.
F10 is above 8,000
feet above I\,4SL.
Move the F10 below 8,000 feei
above MSL.
lncorrect motor
startup procedure Review Motor Starting/Stopping
procedure in manual.
F10 is too close to a
metal oblect or metal
surface-
Move the F10 alay from large metal
olljects or surfaces.
F'10 beeps
constantly and
motors won't start
FMFRGENCY
Ivlode. Possibly due
to obstructed
propeller during
motor start up.
Check that nothing is obstructing any
propeller/motor, tum the F10 off then
back on again.
F10 will not hold
position in hover Weak wireless
signal.
Conflrm that the flying area has 1 00
degrees of clear view of the sky.
CONTACT CONTIXO:
rrrrwnrv.contixo.com
CONTIXO is a trademark of Contixo lnc.
o2016 Contixo lnc. All rights reserved.

IMPORTANT NOTEI All safety precaution,c "rc \i,,amings, insttui.tlons.
warrantres and other collateral rnfonnation ts :- l change at the sole dlsc.eirca,
of Contixo. For the most upto{ate informatror, ;rlease visil lhe mr,.esDomi^g
product page at www.contixo.com or conlact tlle nearest Contlxo ofic€ or 3u:for',:+-f
distribrutor,
The followlng special language terms are used throughout the producl l#erairlre lo
indicate vanous levels of po.tential harm when operatlng this product:
NOTleEl Procedures, which if noi proper"iy followecl, ffeate a possibility of
property damage andlor litile to no possibility of in1ury.
CAUTION: Proecdures, whieh if nol properiy followed, crcate the probratrllity oJ
prop,eriy danrage aneVor a pEssibil*y of sedous injury.
WARNING: Pr'oeedures, whieh if not properly fullowed, ereate ihe probability of
prop-er.ty damaqe, eollaterat damaqe andlor sefious iniury..or ercale a high
probability oJ superfroial iniury.
WARNINGI Reed the ENTIRE quiek start guide and instruclion menuatto become
famitiar wilh the features of the product brofore operating. Failure lo oper-ate the
onaduot eorreelly ean r'esult in damaqe to ihe producl, proporty aneyqr cause serious
injury.
WARNING: This is a sophistioatcd c.onsumcr produeJ. lt must be opeiated v.lth
eaution and oommon sense, and tequires some basic nrechanical abilrS. Fatlure to
operatc this produet in a safc and responsiblc manncr could rcsutt in dam4e to
the producJ, propefty andlor eausc scnous injury. Ths p@uct is mt fitended fut"
usc by ehitdren wthout direeJ adutt supen*isxrn. Do not use with tneomeaeE
e.empoReRts or aher this produe-t in any way outsde of tlre krstnrBons Frovkled b-y..
Oontixo, The quiok sJad qurde and instrueton manual oontain nstrtietions fur
6aety, opcration and maintenanee. lt is essentialto read and fukrw allthe
inskUOtiORS and wamings pnor to agsCmbty, Se,tup and/Or use in Order tO OpCratC
thc produeJ eir€etly and avokl dan@e ff ggrious inju.y.
AGE RECOMMENDATION: NOT FO,R OHIIDREN UNDER 14 YEARS.
KEEP CLEAR OF
THE SPINNING
PRORELLERSI
DO NOT FLYOVER DO NOT FLY
CROWDAI NEAR AIRPORTSI
DO NOT RLY NEARBY TALL THE MAXII\A UM FLYING
BUILDINGS/OtsSTRUCTION ALTITUDE FOR THIS
S(1OOO N4INIMUM AIRCRAFT IS BOCOFT
CI IARANCT RTQUIRFD) ABOVf SfA LEVFI !
DO NOT FLY IN WINDS
THAT EXCEED B'12
MPH (13-lSKPH)l
WARNING: Failure to use this product in the intended manner as descnbecl in the
instruction manual can result in dan.rage to the product, property and/or cause senous
inlury. lf misused it can ca{.rse serious bodily harm and damage to property,
WARNINGI As the user of this product yoll are solely and entirely responsible for
operating it in a manner that does not endangor yourself and others or result in damage to
the product or the propefiy of others.
o Keep your hands, face and other parts of your body away from the spinning propellersl
rotor blades and other moving parts at all times. Keep items that could rmpact or become
entangled away from the propellerslrotor blades including dellris, parts, tools, loose
clothing. etc.
. Always operate your aircraft in open areas that are free from people, vehicles and other
obstructions. Never fly near or above crowds, airpofts or buildings.
r To ensure proper operation and safe flight perfomrance never attempt to operate your
aircraft nearby buildings or other oblstructions that do nol offer a clear view of the sky and
can restrict GPS reception.
. Do not attempt to operate your aircraft in areas with potential magnetic and/or radio
interference including areas nearby broadcast towers, power transmission stations, high
voltage power lines, electrical storms, etc.
. Always keep a safe drstance in all directions around your aircraft to avoid collisions and/
or inlury. This aircraft is controlled by a radio signal subject to interference from many
sources outside your control. lntederence can cause momentary loss of control.
. To ensure proper and safe operation of the automatic landing function in Hcrne 1.,!c3. ,c-
must start the motors with the a rcraft in a position that has at least 10 feei (app.c.< ra:er."' 3
meters) of clear and open space around it and achieve a proper GpS lock.
r Do not attempt to operate your arrcraft with any worn and/or damaged componeris. cals.
etc. (includ nq, bui not limiteci to, Camaged propellers/rotor blaoes, oic battenes. e:-c.].
. Never operate your aircraft in poor or severe weather conditlons tnciuorng hea\.,),/ \yitos.
precipitation, I ghtning, etc.
o Always operate your arrcraft staftrng \/iih a fully charged battery. Always and as soon as
possible after the first leve low voltage battery warning or land mmediately after the second
level low voltage battery \ /arning (as indicated by the vibrations and audible alerts frorn the
transmitter/personal ground station).
o Always operate your aircraft when the voltage of the battery in the transmitier/personal
ground station is rn a safe range (as rndicateC by the battery charge status icon on the screen
of tire transmitter/personal ground station).
. Always keep the aircraft in clear line of sight and under control, and keep the transmrtter/
personal ground station pov,rered on while the aircraft is powered on.
. Allvays move the throttle control loystick down fully and turn off the motors in the evenl the
propellers/rotor blades come rnto contact \,vth any oblects.
o Alurays allow components and pafts to cool after use before touching them and flying agarn.
r Always remove iratteries after use and storeltranspod them per the corresponding gLridelines
. Avoid lvater exposure to all electronic components, parts, etc. not speciflcally designed and
protected for use in water. l\loistlrre causes damage to electronic ccmponents and pafis.
o Never place any portion of the aircraft or any related accessortes, components or parts in
your mouth as doing so could cause serious injury or even death.
. Always keep chenricals, small parts and electronrc components out of the reach of chidren.
r Carefully follow the instructions and warnings included with this aircraft and any related
accessoTies, components of pads (includ ng, but not limited to, chargers, rechargeable
battenes, etc.).
CAUTION: The electronic speed controls (ESCs) installed in the F10 are not compatible with
any other product, and the F'10 is not compatible wrth any other ESCS. Use of any other ESCS
in the F10 will cause a crash, which may result in damage to the product, propefty and/or
cause serious in1ury.
Thank you for purchasing this amazing tech toys Droduct. This aircrait is suitallle for indoor
and outdoor flight. Please carefully read ihe entrre manual before operating this aircraft and
keep it for reference in the futlrre.
PACKAGE CONTENTS
F10 Remote Control-2,4GHz Spare Propellers
-------.F--'_--
H----
----"rr--
L___=\_--__>
_----->y---....--a
!-_____\___--
----\ .'.
\-______\___-J
Protection Frames LiPoBattery USB Charging Cabie
d.
rl
,,\,.
Screwdnver Screws Landrng Gears
e
H
:/
i,,
o
Lnstruction h,4anual

@ Trumbling Key
@ Power lndicator
O Left Joystlck(Up/Down,TLrril Left/Rlght)
@ turn Left/Right Trirnrrer
@ Headiess \,lode ON/OFF Sv/itch
@ Hlgnllornr Speed Sviitch
@ Antenna
@ Carnera,Vkierc.r
Right Jovstick(Forwardi Back,r.rardl
LefVRight Tunr)
Fonward/Backr,vard Tnmmer
Power Sv,/rlch
l-eft/Rlgh1 SiCe Flight Trimmer
Position Hoiding Ol\.1/OFF Switch
Requrred 4*AA" Batteries
@
@
@
@
t9
iri
rrailTlvrn i r i
II
r10 1 ic1'
1. Propellers
2. Motor
3. Front lndicator
4. Camera Lens
5. Landing Gear
6. Rear lndicator
7. Battery Level Check Button

1. lnsert and attach the camera (A) to the bottorn (B) of the atrcraft. Fasten the scrernrs
using the screvrdriver into the screw holes to secure the camera in place.
*,ru- \26:#', "p z\ s
w^,wlffi
\/ , lE/-\ AH l* Sx
2. lnsed and attach the landing gears (A) to the bottom (B) of the aircraft. Fasten the
screws using the screrr,rdriver into the screw holes to secure the gears in piace.
ss\A/
h^d ,ffi,
# +,ffi
3. lnseft and attach the protection frames (A) to the aircraft (B). Fasten the scre\,vs
usrng the scrervdriver into the screw floies to secure the frames in place.
b@M
1. Remote Controller
a. Remove the screw on the battery cover and use the top tab to pull open.
b. lnserl the four (4) AA batter'es (not included) tnto the battery compartment. Maich the
terminals on the end of the battery with the terminals on the unit. l\latch "+" to "+"
and "r' to "r . lf the batteries are not fully inserted, the unit cannot receive battery
power,
c. Replace tlre battery cover and screw once the battenes are properly instalied.
r@7 ffi
2. Aircraft
a. Place the aircraft upside dor,vn and locate povler connector and the battery slot
b. Slide the battery into the arrcraft as shown.
c. Connect the lratiery to the aircraft to turn on.
o You must always charqe the LiPo battery in a safe, well ventilated area away from
flammable nnaterials.
e Never charge the LiPo battery unattended at any time, When charging the 3attery, you
must alv,iays remain in constant obseruation to monitor the charging process and react
immedrately to any potentral probiems that may occur.
o After flying/discharging the LiPo battery you must allo\ / tt tc cool to ambienVroom
temperature before recharging.

. To charge the LiPo battery you must use only the included USB cable or a suttably
cornpatible LiPo battery charger. Failure to do so may result in a flre causinq propefry
damage and/or serious injury.
r lf at any time the LiPo bat.tery begrns to bailoon or swell, discontinue charging or
dlscharging immediately. Quickly and safely disconnect the battery, then place rt in a safe,
open area away from flarnmable materials to obser,ie it for at least "15 minutes. Continutng
to charge or discharge a battery that has begun to balloon or swell can result in a fire. A
battery that has ballooned or swollen even a small arnount rnust be removed from service
Lo'noleiety.
r Do not over{ischarge the LiPo battery. Discharg ng the battery too low can cause
damage to the battery resulting in reduced polver, flight dr-iration or failur.e of ihe batterv
erlrrely. LiPo cells should not be discharged to belov/ 3,0V each Linder load.
r Store the LrPo battery ai room tempeTature and tn a dry area for best resulls.
e V/hen clrarging. transporting or temporarily storing the L Po battery the temperature range
should be from approxtmatdy 4A 12A" F (5 49' C). Do not store the battery or atrcraft
in a h.Jt garage, car or dtrect sunltght. lf stored in a not garage or car the baitery carr be
darraqed or even catch fre.
o Nev-or leave batteries, chargers and power sLtpplies unattended during use.
c NJever attempt to charge low voltage, ballooned/swollen. Canlaqect or wet batteries.
. Never allow children Lrnder '14 years o{ age to charge batteries.
o Never charge a battery tf any of the wtre leads have lleen dar-naged or shorted.
o Nerrer attenrpt to disassemble the battery. charger or pov,/er supplv.
r lrjever drop batterres, chargers or pov,rer supp ies.
r Alivays inspect the battery, charger and po\ /er supply before charging.
r Always ensure correct polarity be{ore connecting batteries, chargers and power sLrljples.
o Aiways disconnect the battery after charging.
o Aiways termrnate all processes if the battery, charger or povrer supply nralflnctions.
IIVPORTANT NOTE: lt' s safer and betterforthe longevity of the battery to store tt oilly
paftialy charged for any length ci trme. Stor r.rg the battery approxrmately 50% cirarged
(which ]s around 3.85V per cell) is typlcally best, flowever, lt will take some careful
management of the charge time and the use of a volt rneter to aclrieve tl-}s ryoltage. f yori
have the equipment and skilis to achieve the 50% c;lrarge level for sjtora_qe tt is
recornmended. lf noi, simplv be sLtre to not store'ihe battery fuily charged whenever
possrble. ln faci, as iong as tlre ba'itery \^/ill be storeci at approximately roorn temperatLlre
and for no more than a few ureeks before the next use, it may be best to store the batten/ in
thedschargedstateaftertheiaslfllght(as ongasthebatiery',vasnotoverdischargecl on
the last fllqht).
WARNING: Lithium lon (Lilon) and Lithium Polymer (LiPo) batteries are signiflcantly more
volatile than alkaline, NiCd or N|MH battefles. All instructions and warnings must be follov,,ed
exactly to prevent propedy damage and/or serious injury as the rrishandlinq of Ltlon/LiPo
batteries can result in flre. By handllng, chargtng or using the tncluded Lilon/LiPo batteries
yoLr assume all risks assoclated with them. lf you do not aEree v/tth these condrttons please
.etui"n the complete product in new, unused condrtion to the place of purchase immediately.
1. Renrove the battery fron: the a rcraft. Join the red confiector on the battery cord to the
!'ed connect on the USB charging cable.
2. Pluq itre USB charging cable into a computer. The LED u;ill light up red.
3. After approxrmate y 60 minutes the LED red light ,"vill turn off. Chargtng s complete,
LED lndicator
Battery clrargiig should be done Llnde[ adult supeivtsion onlyl
Use oniy the included IJSB charging cable with thts product.
Never leave battery charging rrnattended or cvernight. w
After moLrnting the charged battery ln the bracket on the botionr of the aircraft, connect the
red socket from the crrclrit board. Your aircraft ts novr charged and ready to fly.

Before flying:
Please practice the follov,,ing moves shown in the below pictures Lrntrl you get Ltsed to
using the rentote controller.
a. Bring the aircraft to an open space, standing alignecl with the back of the atrcraft.
b. Practice each exercise ofthe remote control as sholn beloil, and repeat practtce of
throttle Lrpldown, sideways lefl/right, forvuard/backvyard, and turn lefl/right moves.
c, Flight simulation exercises are very impoftant, please repeat the exercises until you
feel comfofiable flying ysLlr- ar.,rft flawlessly,
1. Motor Starting/Stopping
a. Start by placing the F10 on the ground v/ith the battery level rndicators facing you.
b. Porrver on the aircraft.
c. Turn on the remote contmi.
d. Push ihe left joysiick uD and then down. The atrcraft will enter Ready to FIy.
e. Push the ]eft joystick up slowly to lift the aircraft off the ground.
f. Be sure you are hovering over a level surface. press the Starl/Stop button. The
aircraft will descend steadtly.
g. Return loysticks to middle position after the motors lrave stopped.
2. Basic Flying Controls
Joystick Neutral/Midfoint: Controljoysticks are in the center position.
Moving the Control Joystiok: The controljoystick is pushed arvay from the center position.
EMERGENCY
STOP
EMERGENCY STOP
Press StarVStop button, then lowerthe
left joystick to the lower left corner and
the right joystlck to the lower nght
corner, Hold this position until the
rnotors cut out. The F10 r,vill fall from
whatever height it is currently at.
\,Varning: Only do Emergency Stop in
the event of a genuine emergency.
START/STOP
Remote Cantroller Aircraft Remarks
0
liloving the left joystick Lrp and dolvn
changes the aircraft' s elevation.
Push the joystick up to ascend and down
to descend.
When booth ioysticks are centered, the
F10 \//lll hover in place.
The more the joystick is pushed away
from the center posrtron, ihe faster the
F10 wril change elevation. Always push
the loystick gently to prevent sudden and
.,rexpected e evatron chanqes.
I\lovrng ihe eft joystick to the left or rght
controls the rudder and rotation of the
atrcraft.
Pr-rsh the toystick left to rotate the aircraft
coL;nter-clockwise, pLrsh the joysilck rlght
to rotate the aircraft clockwrse. lf the
loystick is center, the F10 will maintain its
current orientatron.
The more the joystick is pushed avray
from the center position, the iaster the
F10 \/ill roiate.

c
Movrng the right joystick up
and down changes the
aircraft' s fonrvard and
backward pitch.
Push the joystick up to fly
forward and down to fly
backward. The F'10 will hover
ln place if the joyst ck is
centered.
Push the loystiok furlher away
from the center position for a
larger pi1ch angle (maxrmLrm
30" ) and fasterflight.
N,loving the right loystick control
left and right changes th€
aircraft' s left and right pitch.
Push left to fiy srdeways left and
rlght to fiy sideways rlghi. The
F'10 will hover ln place if the
joystick is centered.
4. Fine Tuning
To quickly f ne tune and calibrate the aircraft,
place it on a flat surface.
Lorver the left joystick to the lower right corner and
the right joysrick to the lower left corner. Hold this
position until the aircraft flnishes flash
continuously, The aircraft is now flne'tuned.
Slowly raise the joystick and just as the aircraft lift-off the ground, you can use the trim to correct
the action rf the arrcraft leans in a drfferent directron.
3. Tumbling Controls
Remote Controller Aiacrafi Remarks
<4 G
()
fr
.lust before the aircraft lifts-
off, the nose lean lefl/right:
r When leaning right, adjust
the trim to left side,
r When leanrng left, adlust
the trim to right side.
ct
+
Just before the alrcraft lifts-
off, the nose lean
forwardlbackv/ard:
o When leaning forward,
adjust the trim to down.
. When leaning backward,
adjust the trim up.
(r+
Just before the aircraft iifts-
off, the body lean leftlright:
r When leaning right, adlust
the trim to left side.
r When leaning left, adjust
the tdm to right side.
Remote Contr.oller Aircraft Remarks
Press the Tumbling key
on lhe left top, then
mcve the rightloystick
up and down to make
tumbling forward and
tumbling brackrn;arcl.
Press the Tumbling
key on the left top.
tiren move the rght
joystick lett or right to
make tunrbling left anci
ilrmbling right.

CONTROLLING AIRCRAFT
5. Headless Mode
Swrtch the Headless Mode ON and you will hear the controller begin to beep, indicating lt
has entered Headless Mode. No matter \^/hat direction the aircraft faces, it wil responci
according to the direction pushed on the remote, (Forward on ihe remote will make the
aircraft fly forward.)This nrakes flying stmpier and more convenient for beginner pilots. -Io
exrt Headless Mode, switch the button off and yoir return to Normal Mode.
1 . lnsed the SD card into the back of the camera.
2. Press the Camera,^/ideo key on the remote controller. F10 \vill beep once, indicating it is
tak ng a picture. Press and holci the CameraA,rideo key for about 3 seconds, then release
it. F10 will beep hvice, nreaning the camera is filminq video. To stop recorclrng. press and
hold the Camera,Video key for about 3 seconds, then release it. F10 wlll beep twice agatn,
indicating the recording is finished.
1 . Attach Phone Holder Accessory (Figure 1) Slot A & B Onto The Radio
Controller (Figure 2) Slot D & C Shown On The Diaoram.
2. Take Screws Part-PB2.3, Tighten lnto Slot E, See (Figure 3) On Diagram.
3. Extend the phone holder open and inserl phone. Warning: Ensure snug tight
f rt around phone before releasing.
Apple iOS (Supports All Models)
1. Logon Apple App Store, search App name "WlFl Camera FPV".
2. Press "+GET" followed by ''lnstall " to start the download process to your
devr ce.
3. Locate App on your device and open,
Alternative Methods
OConnect mobile phone via USB data cable to computer, find app in store
and download to phone.
https://itu nes.a p ple.com/u s/a pp/wifi-ca mera-f pvlid l" 139732788
oScan QR code in user manual be ow (QR Code App may be required).
EffihffiE
tgrttltiilIx'ff
r{l{rlf fr.#iEr
.Ir}Ilftti Ir{41
ffifffi
isffiffi
APPLE VERSION WIFI APP
Android (Supports All Models)
1. Logon Google Play Store, search App name "WlFl-CAMERA-HD'.
2, Press "INSTALL " to start the download process to your device.
3. Locate App on your device and open,
Alternative Methods
oConnect mobrle phone via USB data cable to computer, find app tn Google
Play and download to phone.
https://play.goog le.com/sto rela pps/deta ils?id = com j oyhonest. hj_ca me ra_wif i
aScan QR code in user manual below (QR Code App may be required).
ANDROID VERSION WIFI APP
Figure 3Figure 4
&@ffi@ffiffi
A
Figure 1 Figure 2

CONTROLLING AIRCRAFT
5. Headless Mode
Swltch the Headless Mode ON and you wll hear the controller begin to beep, indicating lt
has entered Headless Mode. No matter what direction the aircraft faces, it will responcl
according to the direction pushed on the rernote. (Forward on ihe remote will make the
aircraft fly forward.) This makes flying slmpier and more convenient for beginner pilots. To
exrt Headless Mode, svuitch the button off and you return to Normal Mode.
'i . lnsen the SD card into the back of the camera.
2. Press the Camera,^,/ideo key on the remote controller. F10 will beep once, indicating it is
tak ng a picture. Press and holci the CameraA,riCeo key for about 3 seconds, then release
It. F10 will beep hvice, meaning the camera is lilming video. To stop recorclrng. press and
hold the Camerafuideo key for about 3 seconds, then release it. F10 wlll beep twice agatn,
indicating the recording is flnished.
1 . Attach Phone Holder Accessory (Figure 1) Slot A & B Onto The Radio
Control{er (Figure 2) Slot D & C Shown On The Diagram.
2. Take Screws Part-P82.3, Tighten lnto Slot E, See (Figure 3) On Diagram.
3. Extend the phone holder open and inserl phone. Warning: Ensure snug tight
frt around phone before releasing.
Apple iOS (Supports All Models)
1. Logon Apple App Store, search App name "WlFl Camera FPV".
2. Press "+GET" followed by "lnstall " to start the download process to your
devi ce.
3. Locaie App on your device and open.
Alternative Methods
oConneci mobile phone via USB data cable to computer, find app in store
and download to phone.
https://itu nes.apple.co m/u s/a pplwif i-ca mera-f pvlid 1139732788
oScan QR code in user manual be ow (QR Code App may be required).
APPLE VERSION WIFI APP
Android (Supports All Models)
1. Logon Google Play Store, search App name "WlFl-CAIVERA-HD".
2, Press "INSTALL " to start the download process io your device.
3. Locate App on your device and open,
Alternative Methods
oConneci mobrle phone vla USB data cable to computer, find app rn Google
Play and download io phone"
https://play.goog le.com/sto rela p ps/deta ils?id = com j oyhonest. hj_ca me ra_wif i
aScan QR code in user manual below (QR Code App may be required).
ANDROID VERSION WIFI APP
Figure 3Figure 4
#@ffi@ffiffi
A
Figure 1 Figure 2

'l .WlFl Connection
Turn on the quadcopter and put it on a flat surface, the camera LED iight wiil
turn red. 15 seconds later the light will flash krlue indicating camera is sending
WlFl signal. Go to smartphone Settings menu to turn on the WlFl, searching lor
signal "FPV-WlFl--.- " to choose and connect. When connection is successful,
the RED llght will off , and green LED light will be on.
2. ln stru ci io n s: ffiqtf:itl.ri,.tlirr::i.,i.,i.r.,.: ,::::rj
Open the App "WlF I Camera", c hoose 7 20P, il
willgo to control interface.
3.Srnartphone App Control lnstructions
Use Smartphone to take photo/video
and playback:
1 Take photo, aLrtomatically saves to phone, You
can retrieve your photos by pressing icon 4.
2 Display.
3 Take Video.
4 Photo & Video Folder.
5 WlFl Signal.
" Use MicroSD Card to take photo/video and
playback "
6 Take photos using TF card, when finished screen
will display the images, continue by saving.
7 n fF card inserled , ffi tf carO not inserted .
I Take Video,
9 TF photo & V;deo Folder.
10 2Di3D lmage transfer, only real-time
transmission has this function.
1 1 Return.
12 lcon rnstruction I\4an.rai
Upper Body **",
*s.^
€*
Battery
{I}-
rP
Properller Pair Camera
ra- --
USB Charging Cab,le
Landlng Gears Main Frame Motor Holder
.-
- (ffiF
Molor
lI_,*\
RecUBlue Lines
(eonneot to eountcr
Clockwise Motor)
)
1'-- 'tr
RedBlaek Lines
(Connect to Reversai Molor)
Rccoiver eiroult Board
(Figure 3)
Dinrension 26inx22in x 6.1in (L x W x H)
Fuselage Weight 1.12 lbs
Flighl Area 656ft 1640fl
Charging Time 240mins
Flying Tirne Up to '13 minutes
Aircraft' s Battery 7.4V .1200mAh Lithium Polymer Battery
(lncluded)
Remote Controller' s Battery 4"l\A" (Alkaline Battery) (Not lncluded)

TROUBLESHOOTING @NTrxo'
F1 O DRONE
@
INSTRUCTION MANUAL
lssue Pcssible Case Sclu:.tr"
re ts il ..lt! lo1
infialtze
-fne -'10,i,,as r-o,'e
clurinq in ti3i zai ci. -.a'=--a'a---=:-
Flight battery \rvrll not
charqe
Poor conneciror^
bel,r/ee. ihe US3
cable and t.e flghl
battery.
F10 motors wrll noi
start
F10 is in No Fiy
Zone.
F10 is above 8.0C0
feet above llSL.
lnconect motor
startup procedure.
F10 is too close io a
metal object or rnetal
surface,
F10 beeps
constantly and
motors won't start
EMERGENCY
l\lode. Possibly due
to obstructed
propeller dunng
motor start up.
F10 will not hold
posrtion in hover Weak \,vireless
signal.
Table of contents
Other Contixo Drone manuals

Contixo
Contixo F21 User manual

Contixo
Contixo F36 User manual

Contixo
Contixo F35 User manual

Contixo
Contixo F18 User manual

Contixo
Contixo F31 User manual

Contixo
Contixo F24 User manual

Contixo
Contixo F19 User manual

Contixo
Contixo F24 User manual

Contixo
Contixo SC6 User manual

Contixo
Contixo SC2 User manual