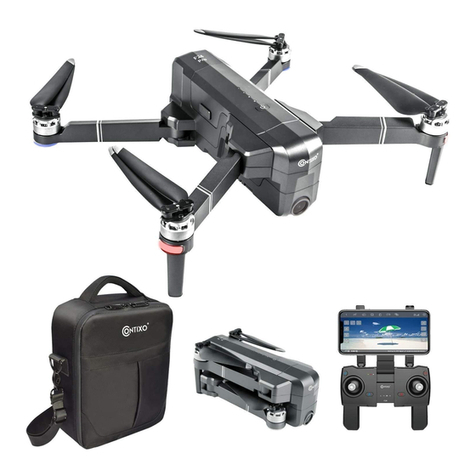
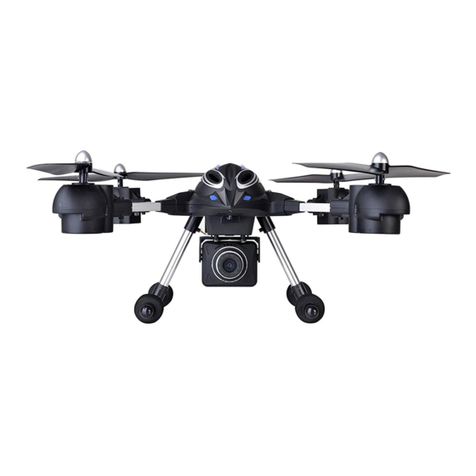
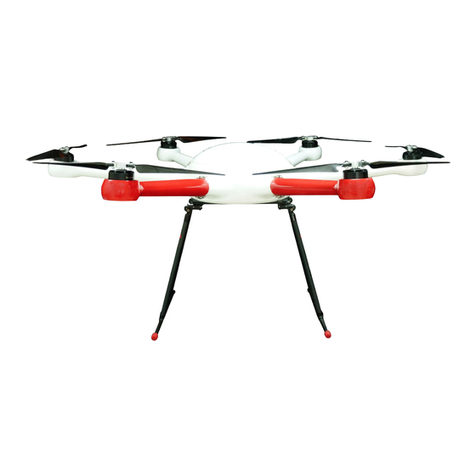
Contixo F18 User manual

Instruction Manual
Please read this instruction manual prior to first flight.
Please keep this manual for future use.
CONTACT CONTIXO:
www.contixo.com
CONTIXO is a trademark of Contixo Inc.
2017 Contixo Inc. All Rights Reserved. F18 GPS DRONE
www.contixo.com

Safety First
Always bear proper operation and safe flight guidelines in mind
Please take a careful look at the manuals before flights for important information
regarding product functions and operation tips. It is important to learn how to use
the product to achieve a safe flight. Stay informed of local laws and regulations
regarding flying this product and always abide by the law. Keep away from any
non-flight zones and always respect other people's privacy.
Safe flying
Please make sure you are in good mental shape before every flight. Never fly
under the influence of drugs or alcohol as this will increase the chances accidents,
injury, or damage. Always keep the remote controller at least 8 inches away from
your body when flying the drone.
Keep a safe distance from a flying drone
Never use your hands to touch a flying drone under any circumstances! Don't
approach and touch a landed drone before its propellers are completely locked.
Keep away from heat sources
This drone is made of metal, fiber, plastic, electronic components, and other
materials. Please keep it away from heat sources to avoid any deformation. This
drone is subject to damage caused by prolonged sun exposure at high
temperatures.
Environmental protection requirements
To protect our blue planet please recycle the drone as per local laws and
regulations dictate.
01
CAUTION:AII instructions and warnings must be followed exactly. Mishandling of LI-
Po batteries can result in a fire, personal injury, and/or property damage.
1. By handling, charging or using the included Li-Po battery you assume all risks
associated with lithium batteries.
2. If at any time the battery begins to balloon or swell, discontinue use immediately.
Never charge or discharge a battery that is ballooning or swelling, this can result in
fire.
3. Always store the battery at room temperature in a dry area for best results.
4. Always transport or temporarily store the battery in a temperature range of 40-
120°F. Do not store battery or model in a car or direct sunlight. If stored in a hot
car, the battery can be damaged or even catch fire.
5. Never use a Ni-CD or Ni—MH charger. Failure to charge the battery with a
compatible charger may cause fire resulting in personal injury and/ or property
damage.
6. Never exceed the recommended charge rate.
7. Never cover warning labels with hook and loop strips.
WARNING: Only use the charger supplied by our company. Do not use a 12V power
supply or property damage and injury could occur. When a Li—Po battery is discharged
below 3.7 V, the battery may be damaged and may no longer accept a charge. Please
land the drone immediately and recharge the drone battery.
Battery warnings and usage
The Battery Charger included with the drone has been designed to safely charge the Li-Po
battery

03
Table of Contents
3. What’s in the Box
3. Technical Parameters of the Drone
3. Drone Diagram
4. Product Assembly cont.
5. Remote Controller
6. How to Pair the Remote to the Drone
6. How to Start and Stop the Drone
7. How to Calibrate the Drone
7. How to adjust the HD camera
8. Operating the Drone
9. Operating the Drone cont.
10. How to Fine-Tune the Drone
10. Parts List
10. Drone Parameters
11. Troubleshooting
12. Troubleshooting cont.
13. Wi-Fi Operating Instructions
13. Connecting to the App
14. App Overview
15. App Overview cont.
02
What’s in the Box
Products/ spare parts included in the box
•1 Drone
•1 Charger
•1 Drone Battery
•4 Propeller Blades
•1 Propeller Changing Tool
•1 Remote Control
•Diagonal: 12.2 inches
•Overall Height: 2.95 inches
•Drone Weight(included battery): approximately 1 lb.
•Brushless Motors: 1806 KV1800
•Battery: 7.4 V 2100 mAh Li-polymer
•Charging Time: about 5 hours
•Maximum Flying Time: approximately 18 minutes
Technical Parameters of the Drone
Drone Diagram
•1 Screwdriver
•1 Mobile Phone Clip
•1 Quick Start
Installation Guide
•1 Warranty Card
•1 Instruction Manual
Thank you for choosing Contixo Products, a trusted manufacturer of high
quality drones. To make operation of this drone easy and enjoyable,
please carefully read through the user manual before operating this unit.
Please do not throw away this manual as it contains vital information for
future adjustments or maintenance reference.
Introduction
[1]
[2]
[3]
[1] Brushless Motor
[2] Propeller
[3] HD Camera
[4]
[4] SD Camera Slot
[5] Battery Knob
[6] Front Indicator Lights
[7] Battery
[8] Rear Indicator Lights
[5]
[6]
[7]
[8]

0504
Drone Battery Charging Product Assembly continued
How To Install Propeller A:
Put the propeller with marking ‘A’ into the clockwise rotating motor shaft
(the side marked ‘A’ should face upwards). Next, put the soft pad into the
center bore of the propeller. Then, choose the propeller screw with the
dot and put it onto the motor shaft; tighten the screw by turning counter-
clockwise.
How To Install Propeller B:
Put the propeller with marking ‘B’ into the clockwise rotating motor shaft
(the side marked B should face upwards). Next, put soft pad into the
center bore of the propeller. Then, choose the propeller screw with no dot
and put it onto the motor shaft; tighten the screw by turning clockwise.
How To Remove The Propellers:
Hold the drone brushless motor in place and unscrew the propeller nut
either clockwise or counter-clockwise. (Refer to the Diagram below)
Attention: Please follow the diagram below step by step. Keep in mind
that the propellers are distinguishable by A & B markings and the
propeller screws are distinguishable by a dot indentation. Please pay
attention to prevent stripping the screws
How to charge the drone battery:
1. Insert the charger plug to the power outlet, the charger indicator light
will turn green.
2. Connect the triple-line plug of the battery with the charger cable.
3. The charger indicator light will stay solid red while charging and turn
solid green once the battery is completely charged. Full charge time
takes about 5 hours.
Attention:
●Adult supervision is required when charging the batteries.
●Only batteries of the same type as recommended are to be used.
●Exhausted batteries are to be removed from the drone.
●The supply terminals are not to be short-circuited.
●The charging line to be used with the product should be regularly
examined for potential hazards, such as damage to the cable, cord, or
plug.
●If battery or charger is damaged, discontinue use immediately and call
us at 909-666-8655 for replacement parts.
Propeller Installation/ Removal
Screw with indentation Screw without indentation
Product Assembly
Mobile Phone Clip
Locate the F18 mobile phone clip and attach it to the antenna of your
remote. Simply slide the phone holder into place until you hear a “click”
indicating the clip is secured.
Please note that the WIFI
connectivity from the drone to
your mobile device can be
affected by multiple factors. If
you are experiencing WIFI
connectivity issues we
recommend you reposition
your drone while flying or fly
your drone in another location.
0706
Product Assembly continued Drone Battery Installation continued
●IMPORTANT: Propellers must be properly installed on corresponding
motors to avoid drone malfunction.
●Use caution when installing the propellers, they are a little sharp.
●Please use Contixo propellers for this drone; Extra propellers can be
ordered through Contixo, call 909-666-8566 to order spare parts.
Drone Battery Installation
How to install the battery
Exerting mild pressure, slide battery into battery compartment. Listen
for a clicking sound indicating battery is firmly installed. Locate the lock
located on the bottom of the drone and turn it 90 degrees to the “LOCK”
position.
Attention: Failure to properly secure the battery before flight
engagement may result in battery dislodgment and drone malfunction.
How to remove the battery
Turn the lock located on the bottom of the drone 90 degrees to the
“UNLOCK” position. Next, using your thumb and index finger press down
on the battery and pull the battery backward to remove it from the
drone.
Attention: Please keep your fingers and your drone dry and clean to
avoid dropping the battery.

[8] One key takeoff/ landing
[9] Unlock Button
[10] Photo/Video
[11] Return-to-Home(RTH)
0908
Remote Controller Remote Controller continued
[1] Left stick
[2] GPS mode Switch
[3] Power indicator
[4] Power switch
[5] Right stick
[6] Headless mode Switch
[7] LCD Display
Remote Controller Battery Installation
Unscrew counter clockwise to open the battery compartment cover,
install 4x AA batteries into the battery compartment according to the
given polarity, screw clockwise to close the battery compartment.
●Insert 4 x AA batteries as indicated.
●Do not mix old and new batteries.
●Do not mix alkaline, standard (carbon-zinc), or rechargeable (nickel-
cadmium) batteries.
●If using rechargeable batteries, remove prior to charging. Children should
handle rechargeable batteries under adult supervision only.
●Exhausted batteries are to be removed from the remote.
●The supply terminals are not to be short-circuited.
[1]
[2]
[3]
[4]
[5]
[6]
[7]
[8]
[9]
[10]
[11]
GPS Icon
Altitude from
Home Point in meters
Distance from
Home Point in meters
Remote Control
Signal Strength
Satellite Number
Remote Control
Battery Level
Photo
Video Headless Mode
Icon
Return-to-home
Icon
Drone Battery
Level
Remote Control
Throttle Mode
Below is a diagram of the remote control. Get comfortable with the
control remote prior to flight to prevent accidents!

1110
Product Assembly cont.
Remote Control Signal Connection
The throttle control mode is set to mode 2 by default.
Left hand and right hand throttle are available control modes for users
who prefer non-standard controls. There are 4 control modes.
The drone must be turned off for this to work.
All you need to do is Simultaneously press the red button on top of the
remote and turn on the remote controller. The remote will send out 2
beeping sounds and the indicator light will keep flashing indicating that
the remote controller is now ready to pair.
At this point, prior to pairing to the drone, you are able to select the
control mode which best suits you, please see pg. 11 –13 for throttle
control options.
Attention:
●Any interruption during pairing process will disrupt pairing
●You must not turn on the drone prior to this step otherwise you will
not be able to connect the drone and the remote successfully.
●This is the only time you can change between Remote Control Throttle
modes, if you wish to change modes after pairing you must turn off the
drone and the remote and repeat this process again.
Attention: To change between control modes, please make sure that
your drone is under signal connection status (the indicator light will keep
flashing). If not, the control mode can not be changed.
How To Change Between Control Modes
Long-press the return home button for 3 seconds to choose the desired
throttle control mode. The remote will beep when you change from one
control mode to the next. The mode number is shown on the LCD screen.
Control Mode Selection
Remote Control
Throttle Mode

1312
Product Assembly cont.
Control Mode Selection continued Control Mode Selection continued
Forward Control
Backward
Control
Turn Left/ Right
Controls
Throttle Control
Fly Left/ Right
Controls
MODE 1
MODE 2
Throttle Control
Turn Left/ Right
Controls
Forward Control
Backward
Control
Fly Left/ Right
Controls
MODE 3
MODE 4
Forward Control
Backward
Control
Fly Left/ Right
Controls
Throttle Control
Turn Left/ Right
Controls
Throttle Control
Fly Left/ Right
Controls
Forward Control
Backward
Control
Turn Left/ Right
Controls

1514
Product Assembly cont.
How to Pair the Remote to the Drone
After mode selection is complete, begin the pairing process. With the
remote controller still in signal connection status, power on your drone.
After a beep sound the connection signal icon is shown on the LCD screen.
It means that the drone has successfully linked to the remote controller.
Pairing will need to be done every time you want to fly the drone
Remote Control Status Indicator Lights
No.
Status
Meaning
1
Indicator lights flash
quickly.
The remote controller is under signal
connection status.
2
Indicator lights flash slowly
with steady beep...beep
sound and the battery icon
“ ” on the LCD display is
flashing.
The remote controller battery is low.
3
Battery icon “ ” on LCD
display is as shown, with
steady beep...beep...beep
sound.
Battery is running out “ ”; the
drone will return when the altitude is
over 100m or the distance is over
300m.
4
Battery icon “ ” on LCD
display is as shown, with
steady long beep sound.
The Battery is low “ ”; the drone
will return when the altitude is over
15m or the distance is over 15m, or
land immediately.
5
Signal icon on LCD display
is less than two bars or not
displaying, with steady
beep...beep...beep sound.
1.The distance between the drone
and remote controller is so long that
the signal is weak.
2.The battery is removed nearly after
the drone connects to the remote
controller.
Drone Initialization Detection
After signal connection has been successful, the drone enters into
initialization detection procedure. The front and rear lights on the drone
will flash red, light green, and green alternately. Make sure that the
drone is set on a flat and level surface for the initialization detection. The
drone initialization detection takes about 8 seconds. The initialization
detection is done once the front and the rear lights glow light green and
flash alternately. Now the drone will enter compass calibration mode.
Two steps of compass calibration:
Step 1 Horizontal Calibration
When the drone's front and rear lights flash light green alternatively, hold
the drone upright and rotate it 360 degrees along the horizontal axis for
about 3 circles. The drone’s front and rear lights will change from flashing
light green alternatively to flashing dark green alternatively when
complete.
Drone Compass Calibration
Attention: Make sure that the drone is set on a flat and level surface for
the initialization detection procedure to be successful.
Drone compass calibration should be done for every flight. That is to
say, if changing new battery or the battery is reinstalled, compass
calibration should be done again. Compass calibration must be
performed after successful drone initialization detection.

1716
Drone Compass Calibration
Step 2 Vertical calibration
Hold the drone with its camera facing down, and rotate it 360 degrees
along its horizontal axis for about 3 circles until the front light and rear
light of the drone change from flashing to solid. The front lights will be
solid red and the rear lights will be solid green. The compass calibration
is successful when the lights are no longer flashing and you are now
ready for lift off!
Attention:
●To fly at GPS mode, choose a open and wide space for the flight, and
make sure that the satellite number is more than 7.
●DO NOT calibrate drone compass in an area with a strong magnetic
field, such as: A parking place or construction area with underground
reinforcement.
Gyroscope Calibration
Once drone is calibrated, set drone on a flat surface; push down both of
the control sticks to the lower left corner and release (indicated as below
photo). Once the front and rear lights are both green and flashing
rapidly, it means that gyroscope is under calibration status. When the
lights turn solid, calibration is successful.
●The gyroscope calibration has been done in factory by default.
Gyroscope calibration is not required to be performed unless the drone
can not exit the drone initialization detection procedure while the drone
initialization detection is finished.
●Please make sure to set the drone on a level horizontal surface when
performing calibration, failure to do this will affect the flight
performance.

Remote
Control
Drone
1918
How To Lock and Unlock the Drone One Key Takeoff/ Landing
Unlock the drone:
Short-press the red button. The motors will begin to rotate and the drone
will be ready for liftoff.
1. After the drone is unlocked, short-press the take off button (as indicated
below), the drone will automatically takeoff and hover at a 5 ft. altitude.
2. When the drone is flying, short-press the landing button (indicated as
below), the drone will automatically land on the ground.
Flight Operation (Mode 2)
Flight Modes
Manual Controls:
Slide the GPS button to the off position. The drone’s GPS function is now
turned off and the drone will be operated manually. You will see the GPS
Icon disappear from the LCD display.
Lock the drone:
Pull down the throttle stick to the bottom position, long-press the red
button for 3 seconds, the motors will stop immediately. The remote will
beep indicating that the drone is now locked.
Remote
Control
Drone
Up
Back
Forward
Turn
Left
Left Side Flight
Right Side Flight
Turn
Right Front
Rear
Front
Rear
The drone can not fly with precise positioning and hovering without
GPS. We recommend you only try this if you are a experienced pilot.
Down

2120
Flight Modes Continued Flight Modes Continued
GPS Mode
GPS mode enables precise positioning and prevents drone loss.
Simply move the GPS switch to the on position before operating the
drone to use all of the GPS features such as Return to Home and
Low Voltage Return To Home. You must wait approximately 1-2
minutes until you achieve a GPS signal of at least 7.
Headless Mode
Headless Mode will cause the flight controller to “remember” which
direction is "forward" when the drone is ready to fly, and use that
direction as "forward“, “backward”, “left”, or “right” regardless of the
current orientation of the drone.
To enable headless mode move the headless mode switch to the on
position before the drone takes off. Next, you’re required to position the
drone in such a way that it’s front end faces away from you and the
drone’s back end is facing you. You can give up worrying about
orientation altogether with headless mode enabled and it is a great way
for novice pilots to get used to flying a drone.
The Return-to-Home(RTH) procedure brings the drone back to the last
recorded Home Point. There are 3 types of RTH procedures: smart RTH,
failsafe RTH and low battery RTH.
The following section describes the home point and GPS signal in detail.
Smart RTH
If a strong GPS signal is available (more than 7 satellites on the LCD
screen) and the home point is recorded at takeoff, press the return
home button. The drone will fly back to the home point. You can use the
remote controller to guide the drone around obstacles during the smart
RTH procedure. You can press the RTH button again to exit RTH
procedure and regain the control of the drone.
GPS Description
Home
Point
The Home Point is the location from
where the drone takes off. A strong
signal of at least 7 must be present
prior to take off in order for the drone
to remember the home point.
Please not that the drone does not have sensors allowing it to avoid
obstacles. The drone must always be flown in a wide open area and
must be manually controlled to avoid obstacles. Use caution when using
the return home function and make sure the drone does not end up on
a rooftop, a tree, or any other obstacle that may be in the way during
return and descent.

2322
Capturing Photos and Videos
Failsafe Return
Failsafe RTH will be triggered if the remote controller signal is lost for
more than 6 seconds, the GPS control system will guide the drone
automatically to the last recorded Home Point. Regain control of the
drone by press the RTH button if the remote controller signal is
recovered.
●During the Failsafe Return procedure, the drone can not avoid
obstacles.
●The drone cannot Return-to-Home if the GPS signal is weak (satellites
number is less than 7).
●If there is no GPS signal and remote controller signal lost for more than
6 seconds, the drone will not Return-to-Home but descend slowly until
land to the ground and lock the drone.
Low Voltage RTH
The drone will perform a Low Voltage Return To Home function when
the battery is low. If the battery icon on the LCD screen shows “ “,
the rear lights flash red slowly, and you hear a steady Beep, Beep sound
this is a notification that your drone’s battery is low and it is time to
bring it home. If the drone’s altitude is over 300 ft. or the drones
distance is 900 ft. away the drone will automatically fly back to the
original Home Point.
If the battery icon on the LCD screen shows “ “, and you hear a
steady Beep, Beep sound this is a notification that your drone’s battery is
very low and it is time to bring it home. If the drone’s altitude is over 45
ft. or the drones distance is over 45 ft. away the drone will automatically
fly back to the original Home Point.
If the drone flying altitude is less than 45 ft. or the flying distance is less
than 45 ft., the drone will automatically land to the ground.
Attention: When drone is in low voltage RTH status you can not regain
control of the drone by pressing the RTH button.
Photo:
To capture breath taking photos simply short-press the photo/ video
button. The LCD screen camera icon will flash once and the remote will
beep once notifying you that the image has been captured.
Video:
To capture breath taking videos simply long-press the photo/ video
button. The remote will beep twice and the LCD video icon will flash
during recording. To stop recording simply long press the photo/ video
button, the remote will beep twice and the video icon will disappear
from the LCD screen.
Attention: It is not possible to capture photo or video when the drone
does not have a SD card inserted or the SD card malfunctions. You can
always capture photo and video by using the Contixo F18 app interface.
Low Voltage Warning
Keep an eye out for the Low Voltage Warning, the drone and the remote
will notify you when you are running low on battery. The drones front
indicator lights will remain solidly lit while the rear indicator lights will
flash slowly when the battery is beginning to run out.
The drones front indicator lights will remain solidly lit while the rear
indicator lights will flash rapidly when the battery is near depletion. At
this point we recommend bringing the drone in for a safe landing.
Flight Modes Continued

2524
Signal Strength Indicator
Flight Preparation
Signal strength icon shows the strength of the received signal. The more,
the better. If the signal is weak or irregular do not fly the drone in the
same area.
●DO NOT attempt to fly over populated areas in case you lose
connection.
●During the Failsafe Return procedure, the drone can not avoid
obstacles.
●The drone cannot Return-to-Home if the GPS signal is weak (satellite
number is less than 7).
●If there is no GPS signal and the remote controller signal is lost for
more than 6 seconds, the drone will not Return-to-Home but instead
descend slowly until it lands on the ground and locks itself.
1. Link the remote controller with the drone.
2. Perform the drone initialization detection.
3. Perform the drone compass calibration.
4. Unlock the drone.
5. Slowly push the throttle stick upward and the drone will take off.
6. After you are done with your flight you must slowly pull the throttle
stick to bottom position to safely land the drone. Once it has landed the
drone will automatically lock itself.
7. Take out the battery from battery compartment of the drone and
store or recharge it for your next flight.
Pre-Flight Preparation
Before you take off, make sure that:
1. The drone and the remote controller are completely charged.
2. The propellers are installed correctly.
3. The motors work normally after unlocking.
Mobile Device Application
The Contixo F18 mobile APP is essential to operate your F18 Drone.
Please make sure that you have downloaded the “Contixo F18” APP to
your mobile device before you fly your drone.
Where to download "Contixo F18" APP:
For Android users, please go to Play Store, search "Contixo F18" and
download.
For Apple (iOS) users, please go to Apple store, search "Contixo F18" and
download.
How to link the " Contixo F18” App to the
camera:
Turn on the drone, then enter the phone
settings option. Turn on WIFI, find “Contixo
F18_XXXX” on the list and connect your
device to that WIFI signal.
Make sure that the mobile device and the
drone have successfully connected. Next,
exit settings and tap open the "Contixo
F18" App on your mobile device; click
‘START’ to enter the APP interface. You will
see a live feed from the drone camera and
you will be ready to use your app to record
videos, take photos, view your gallery, and
enter the VR Headset FPV viewer (VR
headset not included).

2726
Mobile Device Application continued Mobile Device Application continued
3D VR viewer: Press this icon to enter the 3D VR
viewer, you will need a VR headset for this feature to
work. Icon will turn red when activated.
Photo capture: Press this icon to capture a photo.
Icon will turn red when capturing a image.
Video capture: Press this icon to capture a video.
Icon will turn red while capturing a video and will be
saved to your device.
Gallery: Press this icon to enter the gallery. Icon will
turn red when you enter the gallery.
Rotate View: Press this icon to rotate the orientation
of the camera feed if it is upside down. Icon will turn
red while activated.
Gallery Viewer
You can view all of your captured files via the App interface. Simply press the
Gallery icon to enter the gallery interface.
Attention: Please make sure that your mobile device supports 5G WIFI
before linking to the Contixo F8 App.
Hide Buttons: Press this icon to hide the icons on the
app. Icon will turn red while activated.
Return button: Press this icon to return to the
previous menu. Icon will turn red when pressed.
Video SD card viewer: Press this icon to access the video
files recorded on the SD card inserted into your drone.
Photo SD card viewer: Press this icon to access the
photo files recorded on the SD card inserted into your
drone.
Video Internal viewer: Press this icon to access the
video files recorded internally on your device.
Photo Internal viewer: Press this icon to access the
photo files recorded internally on your device.

2928
Troubleshooting Troubleshooting continued
No.
Status
Meaning
14
The front and rear lights of
the drone flash
green
rapidly
Remote controller and drone not
successfully paired
15
The front and rear lights of
the drone flash
red, light
green
and green
alternately and do not
change
1. Check to see if the drone is in
pairing
mode
2. Re
-calibrate the gyroscope
16
The front and rear lights of
the drone flash
green
alternately
1. Take the compass horizontal
calibration
steps
2. The compass of the drone is
broken, it needs to be
replaced
17
The front and rear
green
indicator lights of the
drone flash alternately
1. Take the vertical compass
calibration steps
2
. The compass of the drone is
broken, it is need to be
replaced
18
The
drone’s GPS fails
The GPS signal is weak, please fly in
another wide
open place
19
The return point of the
drone is far away from the
take
-off point
1
. The GPS signal is weak, please fly it
in another
wide open place
2
. The drone can not receive satellite
signal while taking off, fly the drone
again when it receives signal from
at
least
seven satellites
20
The drone fails to unlock
1
. The battery of the drone is low,
please replace the
battery
2
. The drone is in initialization status,
please re
-calibrate the gyroscope
No.
Status
Meaning
1
Front and rear lights flash
green
light rapidly
Signal between drone and transmitter
has been interrupted
2
Front and rear lights flash
red
, light green and solid
green
alternately
Drone initializing and pairing
3
Front light glows solid
red
,
rear light glows solid
light
green
No GPS signal, drone is in manual
mode
4
Front light glows solid
red
,
rear light glows solid green
Good GPS signal, drone is preparing
for GPS mode
5
Front and rear lights flash
green
rapidly
Gyroscope is calibrating
6
The indicator lights on the
front and rear flash
light
green
alternately
Drone’s horizontal compass is
calibrating
7
Front and rear lights flash
green
alternately
Drone’s vertical compass is calibrating
8
Front light glows solid
red
,
rear light flashes
red
slowly
(25%) battery life remaining
9
Front light glows solid
red
,
rear light flashes
red
rapidly
15% battery life remaining
10
Front and rear lights flash
once then stop for 1.5
seconds
Gyroscope malfunction
11
Front and rear lights flash
twice then stop for 1.5
seconds
Barometer malfunction
12
Front and rear lights flash
three times then stop for
1.5 seconds
Compass malfunction
13
Front and rear lights flash
four times then stop for
1.5 seconds
GPS module malfunction
Table of contents
Other Contixo Drone manuals

Contixo
Contixo F35 User manual

Contixo
Contixo F24 User manual

Contixo
Contixo F20 GPS User manual

Contixo
Contixo F21 User manual

Contixo
Contixo F20 User manual

Contixo
Contixo F10 User manual

Contixo
Contixo F35 User manual

Contixo
Contixo F36 User manual

Contixo
Contixo F19 User manual

Contixo
Contixo F31 User manual