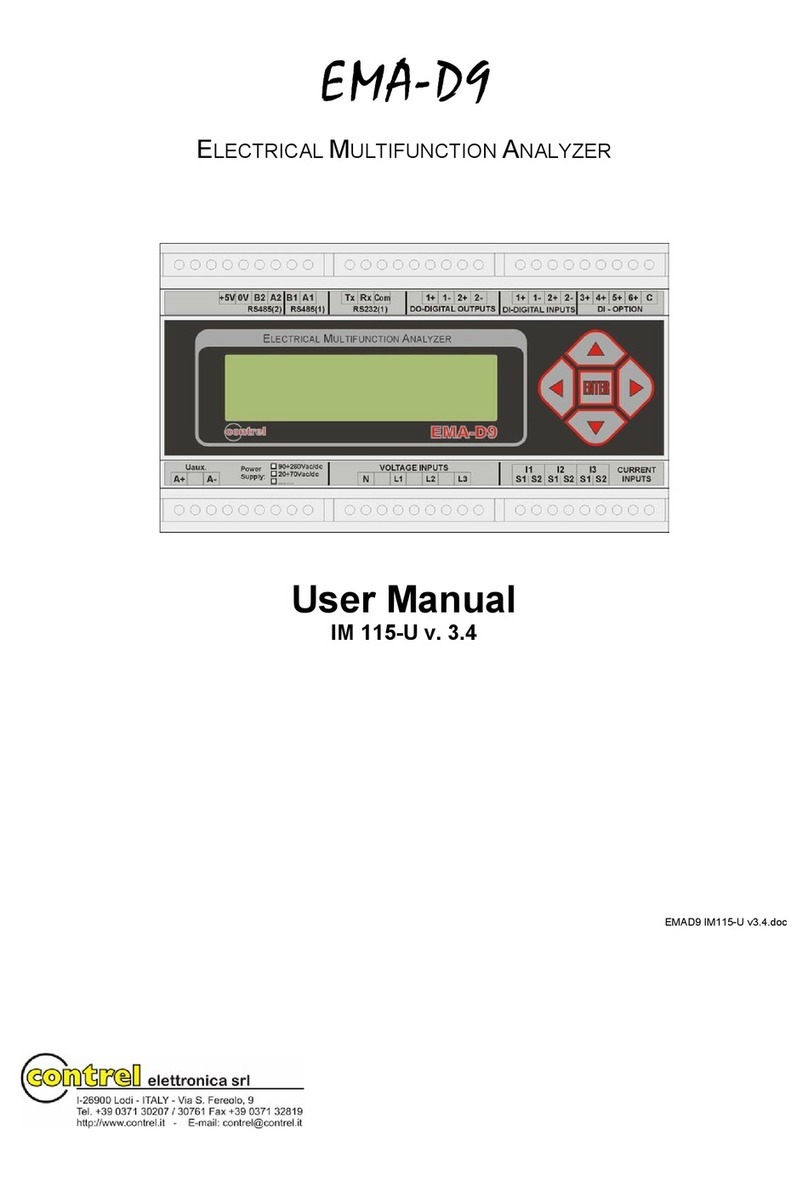
Contrel CTT8 User manual

CTT8 instruction manual IM302-U v2.3 pag. 1 / 8
INSTRUCTION MANUAL
IM302-U v2.3
CTT8 TEMPERATURE MONITOR DEVICE
GENERALITY
The device of control temperatures CTT8 is used in the control of electric
machine, transformer, motor, etc. where it’s possible to control the
temperature level signalling the critical temperature condition or to disable the
machine under control. For example for the control the temperature of
supplying transformer, where it’s possible to control the temperatures of three
coils of phase and the nucleus, using the tripped output (TRIP) to cut off the
load and eventually the functions of ventilation control.
Another important function is the presence of one port of serial
communication RS485, that allows the connection to system of acquisition
(PC, PLC, scada, etc.) of the measure data, control and programming of the
device. The MODBUS-RTU is the protocol used, it’s documented in a specific
manual.
A software for Windows environment is available for a management of the
devices with complete function of control, storing data, recording alarm, etc.
It’s available a analogue output settable 0-20 or 4-20 mA with end-scale
200°C to join to one of channel or to the higher of the 4 temperature channels.
INTRODUCTION
The device type CTT8 allows the control and the visualization of temperature read with probe type RTD PT100 ().
For each channel of measure are available two levels of alarm (alarm-tripped) that active the commutation of the relative
output relay for signalling at distance or to disable the machine under control. On front of the instrument on a double
display at 3 digit, it’s possible the visualization of the temperatures, the visualization of the status of the alarm of the
measure channels and 5 button for the programming. The instrument is completed by the functions of ventilation control,
storing maximum values and storing of the tripped.
ACCESSORIES AND OPTION
accessories: transparent cover of frontal protection
options:serial output RS485
analogical output 0-20mA / 4-20mA user selectable
INSTALLATION
Foreward.
Read carefully the present manual before to install and use the device.
The device described in this manual must be installed and used by personal opportunely learned.
Security.
Before to proceed at the installation it’s necessary verify if the device is intact and it haven’t damages caused by transport. The power
supply must be compatible with the tool range. The instrument installation must be done in total absence of voltage and observing the
security norm in force. All operation of maintenance and reparation executed by not authorized person are forbidden. If during of
functioning the device loose the security, it’s necessary to put it out of service and to be sure that this device will not use unintentionally.
The use can be considered insecure when the instrument: - don’t function regularly / - have damage clearly visible / - have
damage caused of transport / - is stored in bad condition
CONNECTION OF THE THERMOMETER SENSORS
For the connection of the thermometer sensor RTD Pt100 it’s necessary to follow the indication of the wiring diagram of
this manual: pay attention not to invert the position between the conductors with red insulator and the conductor with
white insulator. The probes type PT100 with 3 wires use a third wire to compensate the resistance of the conductors (max
20 ohm). If the sensor has 2 wires (normally white and red) it’s necessary to short-circuit the terminals with the red wires
(1-2, 4-5, 7-8, 10-11, 13-14, 16-17, 19-20, 22-23).
To reduce the external noises it’s necessary to use the following indication for the wires of measure of the Pt100:
to use probes with shielded wire connected at earth and wires twisted
to separate the wires of the probes from wires of power
to use wires with section higher than 0,5 mm2
to use wires with conductor with tin or silver-plated
OUTPUT RELAYS
For the connection of the output contacts of relays it’s necessary to follow the indication in the diagram.
The ALARM and TRIP relays commute when the threshold set are to get over. The FAULT relay is normally energized
and it commute in presence of an anomaly on the Pt100 or on device. During the normally functioning of the device the
contact 38-39 will be open while the 39-40 will be closed. The FAN relay is used to control the fun of cooler, in function of
the threshold set of switch on and switch off.

CTT8 instruction manual IM302-U v2.3 pag. 2 / 8
WIRING CONNECTION
Input thermometric probes Pt 100
Serial
output
Rs485
(option)
Relay outputs
*
Auxiliary power supply
U aux:
25 - 27: 24 ÷ 230V ca/cc
or
25 - 26: 115 Vca
25 - 27: 230 Vca
25 - 28: 400 Vca
white
red
red
Pt 100
view rear panel
of the instrument with terminals
for the connections
Analog
output
0-20mA
(4-20mA)
(option)
75869
14 10
211
312
25 2826 27 44 45 41 42 43
29 30 31 32 33 34 35 36 37 38 39 40
1917 2018 2113 16 2214 2315 24
Input thermometric probes Pt 100
Ch2 Ch3 Ch4
75869
1
Ch1
410211
312
38
39
40
41
42
43
44
45
25
26
27
28
B
A
gnd
U aux.
CTT8
*
+
-
Ch7 Ch6 Ch5
14
17
Ch8
131618 15192021222324
TRIPALARM
29
30
31
32
33
34
35
36
37

CTT8 instruction manual IM302-U v2.3 pag. 3 / 8
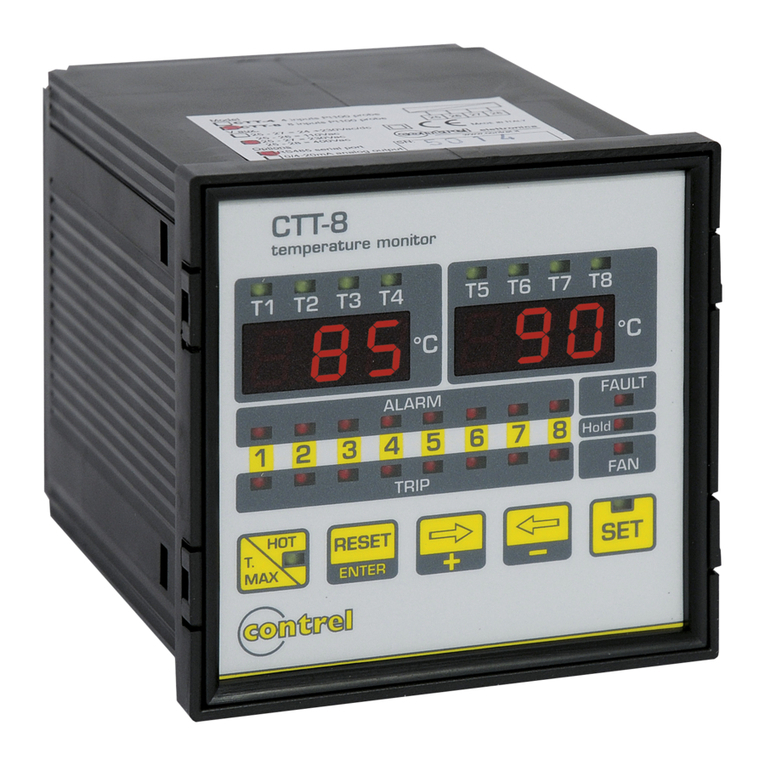
DESCRIPTION FRONT PANEL – OPERATORS
10
9
8
2
1
3
4
5
6
11
052 034
7
LEGEND:
1. LEDs T1-T2-T3-T4-T5-T6-T7-T8 of indication measure channel displayed
2. displays for the visualization of the values of temperature and settings
3. LEDs ALARM for the visualization of the status of alarm of the measure channels
4. LEDs TRIP for the visualization of the status of trip (2nd level of alarm) of the measure channels
5. LED FAULT of indication failure device or thermometric probes
6. LED HOLD of indication function of manual reset activated
7. LED FAN of indication activation output of ventilation
8. push - button HOT / T. MAX for selection visualization measure channel with higher temperature (with LED
indication activated) and visualization maximum temperatures achieve
9. push - button ENTER / RESET to confirm set of programming and manual reset alarm intervention
10. push - buttons + / -for selection measure of channel displayed and for changing parameter of programming
11. push - button SET with LED of status to accede at the programming of the instrument setting

CTT8 instruction manual IM302-U v2.3 pag. 4 / 8
PROGRAMMING OF THE DEVICE
When the device is switched on, on the display will flash the index of the internal software: later the device starts to
display the temperature read on the measure input.
To enter in the programming phase press the button SET for some second up to light the relative LED of signalling SET.
The settings are indicated in sequence like showed after; to go out of the programming phase without to modify the
values it’s necessary to press SET without to confirm with the ENTER key the data modified.
To modify the value or the status it’s necessary to use and keys and the ENTER key to store the modification.
The pressure of the ENTER key move automatically the programming at the successive function or value.
Selection of the HOLD function
This is the first function to set in the menu programming (SET): in this phase of programming the HOLD led switch on.
The Hold function allows to store the alarm condition that can be rearmed only manually with the RESET button when the
temperature are lower than the threshold set.
If this function is disabled it’s possible to rearm the ALARM with the RESET button even if the temperature is higher than
the threshold set, while the value of temperature come back under the threshold set the alarm will be automatically
deleted.
To set the Hold function it’s necessary to use the and keys:
OFF function disabled
ON function enabled
Press the ENTER key to confirm the operation.
Selection of the threshold of switch on and switch off ventilation
To program the threshold of enable and disable ventilation it’s necessary to select the modality of functioning ventilation.
Selection threshold of disable ventilation
The FAN led on, with fixed light indicates this phase of programming.
With and keys to select the value of temperature indicated on display.
Interval of programming: from -25°C up to the threshold of enable ventilation -1°C.
Confirm with ENTER.
Selection threshold of enable ventilation:
The fan led on, with flashing light indicates this phase of programming.
With and keys to select the value of temperature indicated on display.
Interval of programming: from disabling threshold +1°C up to 200 °C.
Confirm with ENTER.
Selection of the alarm and tripped threshold
The set phase of the alarm thresholds start from the programming for the measure channel number 1.
The ALARM led on indicates the programming of the alarm:
With and keys to select the value of temperature
Interval of programming: from -25°C up to the tripping threshold -1°C
Confirm with ENTER.
The TRIP led on indicates the programming phase of the tripping threshold.
With and keys to select the value of temperature
Interval of programming: from alarm threshold + 1°C up to 200°C.
Confirm with ENTER.
Selection of address network identification for the communication of the serial port (MODBUS-RTU protocol)
Note: This setting is not significant for the models without the serial interface installed.
This phase is indicated on displays where there is
value in definition on displays T1-T2-T3-T4,
ID on displays T5-T6-T7-T8
With and keys to select the number choice.
The range for value accepted is from 1 to 247.
Confirm with ENTER.
Selection of the baud rate
Note: This setting is not significant for the models without the serial interface installed.
This phase is indicated on displays where there is
BDR on displays T1-T2-T3-T4,
and the value to set on displays T5-T6-T7-T8.
With and keys to select the baud rate.
It’ possible to set the following values: 2,4 - 4,8 - 9,6 - 19,2 kbps.
Confirm with ENTER.
Set HOLD modality T1-T2-T3-T4 T5-T6-T7-T8
HOLD mode disabled HLD Off
HOLD mode enabled HlD ON
Set T1-T2-T3-T4 T5-T6-T7-T8
Set address network 001 ID
Set T1-T2-T3-T4 T5-T6-T7-T8
Baud rate: 19200 BDR 19.2
Baud rate: 9600 BDR 9.6
Baud rate: 4800 BDR 4.8
Baud rate: 2400 BDR 2.4

CTT8 instruction manual IM302-U v2.3 pag. 5 / 8
Selection data bit, parity and stop bit
Note: This setting is not significant for the models without the serial interface installed.
This phase is indicated on displays where there is
The type of parity on displays T1-T2-T3-T4;
number of data bit and stop bit on display T5-T6-T7-T8.
With and keys to select the set choice.
Confirm with ENTER.
Selection of the linked channel with the analogue output
Note: This setting is not significant for the models without
the analogue output installed.
This phase is indicated on displays where there is
AN on displays T1-T2-T3-T4,
the measure of the linked channel on displays T5-T6-T7-
T8 (CH 1/2/3/4/5/6/7/8 for measure channel 1 / 2 /
3 / 4 / 5 / 6 / 7 / 8, all to link the output on the measure
channel with the highest temperature).
With and keys to select the set choice.
Confirm with ENTER.
Configuration output signal
Note: This setting is not significant for the models without the analogue output installed.
In this phase it’s possible to define the type of signal of analogue output as 0 ÷ 20 mA or 4 ÷ 20 mA.
This phase is indicated on displays where there is
aN0 -20 to set the output as 0 ÷ 20 mA or
(0 mA = -30° ; 20 mA = 200°)
aN4 -20 to set the output as 4 ÷ 20 mA.
(4 mA = -30° ; 20 mA = 200°)
With and keys to select the options.
Confirm with ENTER.
Note: The maximum load for analogue output is 400 ohm.
Configuration diagnostic probes
This function allows to enable or to disable the control on the probes.
The function control the variation of the temperature in a
defined time. There is a problem if this variation is
higher than a set value.
It’s necessary to set the maximum variation
temperature:
FDC: min 5 °C– max 30 °C
and after the time in which to do the control:
FDC: min 10” – max 90” (period in seconds)
The +key is used to increase the values while the
-key to decrease.
Confirm with ENTER.
The exit of the programming phase
Press the SET key or wait for about 8 seconds without to press any key to come out of the programming phase.
MODALITY OF TRIPPING AND RESTORE
Alarm
Attheovercomingof1°C ofthevalue ofthresholdset onthe input, after5seconds,on thechannel where thethreshold value
has been exceeded, the ALARM relay is energized and the ALARM led is on. The restore from the alarm condition with relay
de-energizedand therelative ledoff, happenwhen thetemperature godown of2°C respectatthethresholdvalueset.
Trip
Atthe overcoming of1°C ofthevalue ofthresholdset onthe input, after5seconds,on thechannel where thethreshold value
has been exceeded, the TRIP relay is energized and the TRIP led is on. The restore from the alarm condition with relay de-
energizedand therelative ledoff, happenwhen thetemperature descendof 2°Crespect atthethresholdvalue set.
To silence alarm
If the Hold function is disabled it’s possible to silence the alarm condition that there is on the measure input.
When there is an alarm condition the ALARM relay and the “ALARM” optical signalling are enabled.
Pressing the Reset button the relay is de-energized while the optical signalling of the alarm condition become flash.
If the temperature increase up to reach the TRIP temperature minus 1°C, the relay and the optical signalling are enabled
another time. If after the reset, the temperature go down under the threshold value set, the flashing optical signalling will
be automatically deleted.
Set T1-T2-T3-T4 T5-T6-T7-T8
No parity / 8 data bit – 1stop bit NO 8-1
No parity / 8 data bit – 2stop bit NO 8-2
Odd parity / 8 data bit – 1stop bit ODD 8-1
Even parity / 8 data bit – 1stop bit EVE 8-1
Linked channel T1-T2-T3-T4 T5-T6-T7-T8
Channel with the highest temperature AN all
Measure channel CH 1 AN ch1
Measure channel CH 2 AN ch2
Measure channel CH 3 AN ch3
Measure channel CH 4 AN Ch4
Measure channel CH 5 AN Ch5
Measure channel CH 6 AN Ch6
Measure channel CH 7 AN Ch7
Measure channel CH 8 AN Ch8
Signal configuration T1-T2-T3-T4 T5-T6-T7-T8
Output proportionally 0 – 20 mA AN 0 -20
Output proportionally 4 – 20 mA AN 4 -20
Setting FDC modality T1-T2-T3-T4 T5-T6-T7-T8
FDC mode disabled FDC Off
FDC mode enabled FDC ON
Temperature configuration FDC T1-T2-T3-T4 T5-T6-T7-T8
Min °C FDC 5°
Max ° C FDC 30°
Period configuration FDC T1-T2-T3-T4 T5-T6-T7-T8
Min in seconds FDC 10’’
Max in seconds FDC 90’’

CTT8 instruction manual IM302-U v2.3 pag. 6 / 8
DIAGNOSTIC
The device is provided of the thermal probes diagnostic function.
The condition controlled on the measure input are:
Probe Pt100 interrupted signalling on the display of the message OPE (open)
Probe in short circuit signalling on the display of the message SHR (short circuit)
Fast variation of temperature signalling on the display of the message FDC (fast changing temperature)
When the device switch on the auto-diagnostic FAULT relay commute and it remain in the status of energized until one of
the conditions above described appears, for a failure of the device or if the power supply is absent.
The anomaly condition is signalled also by the FAULT led on.
Every time that a probe of a channel is out of order because it’s interrupted (OPE) or in short circuit (SHR) or the delta of
temperature is too much elevated (FDC), the led of the corresponding channel flash until stopping of the anomaly. The
alarm of interrupted probe (SHR) or open probe (OPE) will be reset automatically while the alarm for the delta of
temperature (FDC) disappears only pressing the ENTER key, and to keep it pressed, to press the +key at least 5
seconds.
The status of the contact of the relay (all available with exchange contact) is showed in the following table:
RELAY DISABLE STATUS ENABLE STATUS UNPOWERED STATUS
ALARM ALARM OFF: CLOSED 29-30 ALARM ON: CLOSED 29-31 CLOSED 29-30
TRIP TRIP OFF: CLOSED 32-33 TRIP ON: CLOSED 32-34 CLOSED 32-33
FAN FAN OFF: CLOSED 35-36 FAN ON: CLOSED 35-37 CLOSED 35-36
FAULT FAULT OFF: CLOSED 38-40 FAULT ON: CLOSED 38-39 CLOSED 38-39
VISUALIZATION OF THE MAXIMUM MEASURED VALUE OF TEMPERATURE
Pressing the Tmax key on displays appear, in modality flashing, the maximum measured value of temperature. To pass
from the visualization of the maximum temperature T1-T5 to T2-T6, T3-T7 and T4-T8 to use and keys. After an
interval of about 8 seconds without to press any key the device come back to display the value of measured temperature.
To reset the value of the maximum temperature it’s necessary to go in the visualization maximum values and after to
press at the same time Tmax and .
VISUALIZATION OF THE CHANNELS WITH THE HIGHER TEMPERATURE
Press the HOT key for same second up to switch on the HOT led.
On the display T1-T2-T3-T4 will appear the temperature of the measure channel hotter between the inputs 1, 2, 3, and 4.
On the display T5-T6-T7-T8 will appear the temperature of the measure channel hotter between the inputs 5, 6, 7 and 8.
To come back in the standard modality of measure visualization press the HOT key for some second up to switch off the
relative led of signalling.
TEST OF THE LIGHT SIGNALLING
Press at the same time and keys: all of the light signalling will start to flash for some seconds.
VISUALIZATION OF THE MEASURED TEMPERATURE
Onthe displayon theleft ofthe frontpanelappearsthe temperatureofthechannels T1T2 T3T4 inthe range-30°C÷+220°C.
On the display on the right on the front panel appears the temperature of the channel T5 T6 T7 T8 in the range -
30°C÷+220°C.
Use and keys to change the measure channels displayed.
EXCLUSION OF THE PROBE INPUTS NOT USED
If one or more inputs are not used, it’s need to connect a resistance of value included
between 100 and 120 ohm, 0.25W.
In the figure is showed the connection to disable the input Ch1. The same connection
can be used also for the other inputs.
Ch1
123
R = 100 ÷ 120 ohm
0,25W

CTT8 instruction manual IM302-U v2.3 pag. 7 / 8
TECHNICAL FEATURES
DIMENSIONS
149
90
106
92
92
R3
96
96
Contact the technical assistance or refer at specific document for application don’t described in this manual.
Auxiliary power supply 20÷250Vca/cc or 115-230-400 Vca 50-60Hz ±15%
Maximum consumption 4 VA
Measure inputs 8 inputs by RTD Pt100 (max wire resistance 20 ohm)
Interval of measure -30°C ÷ +200 °C / precision ± 2°C
Interval of visualization -30°C ÷ +220°C
Tripped delay - hysteresis 5 seconds – 2 °C
Measure visualization 2 displays with led 7 segments, 3 digit
Outputs 4 relay NO-C-NC, 5 A resistive load
Output functions alarm, trip, fan, auto-diagnostic (fault)
Functions programmable ALARM, TRIP, HOLD, FAN, T.MAX, HOT
Connection Extractible terminal with screws, section wires max 2,5 mm2
Insulation 2500 Vrms 50 hz per 60 sec :U aux - input Pt100 /
U aux - relay outputs / inputs Pt100 - relay outputs
Protection degree IP52 front panel (IP65 with optional protection cover), IP20 rear panel, as CEI-EN 60529
Dimensions – enclosure Flash mounting DIN 96x96mm, depth 120mm /
Enclosure thermoplastic self-extinguishing as UL94 V0
Working temperature -10°C ÷ +60°C, humidity max 95%
Storing temperature -25°C ÷ +70°C
Standards EMC: CEI-EN 50081-2 CEI-EN50082-2
security CEI 41.1 CEI-EN 60255-

CTT8 instruction manual IM302-U v2.3 pag. 8 / 8
Table of contents
Other Contrel Measuring Instrument manuals

Contrel
Contrel CTT8 User manual

Contrel
Contrel EMS-96 User manual

Contrel
Contrel EMU-3ea User manual

Contrel
Contrel EMA90 User manual

Contrel
Contrel EMM-D4h User manual

Contrel
Contrel RMS-12 User manual

Contrel
Contrel EMA-D9 User manual

Contrel
Contrel RI-SM User manual

Contrel
Contrel EMA-D6 User manual

Contrel
Contrel EMA-90N User manual
Popular Measuring Instrument manuals by other brands

Gossen MetraWatt
Gossen MetraWatt METRAFLEX 3000 operating instructions

Megger
Megger EGIL user manual

TR-Electronic
TR-Electronic CEH-110 Assembly instruction

Nortroll
Nortroll LineTrol R400D user manual

Rohde & Schwarz
Rohde & Schwarz FSVA3000 Getting started

Extech Instruments
Extech Instruments AN500 user manual