Corvette BLU-C5 Instruction Manual

Courtesy of:DiscountCarStereo.com
BLU-C5
Quick Start Audio Streaming Installation Guide
for select 1997-04 Corvette without 12-disc Changer
Created January 16, 2013
Revised September 21, 2019

Introduction
Many C5 owners will be pleased to know they can upgrade their audio system to
support Bluetooth music streaming without replacing the factory radio. The BLU-
C5 connects directly to Radio OR if vehicle is wired with 10-pin plug for optional
12-disc CD Changer in hatch or trunk; connection can be made there. If vehicle
has a 12-disc CD Changer, it must be disconnected or purchase our A2D-C5
which retains 12-Disc Changer operation. A Bluetooth wireless connection means
no wires, clutter or complicated setup. Pair Smartphone or Tablet and enjoy
navigation, internet music sites, audio books and more on the car system. This
guide covers the basic install steps for the BLU-C5 in 1997-04 Corvette without
12-disc Changer or if present if must be disconnected.
Alert: If your kit includes the black module, click here for installation
instructions.
See Frequently Asked question at the end of this guide.
Installation 1: (To Radio)
It is possible to install this module to the radio or CD Changer location in
trunk/hatch. (See installation 2 below)
Remove Radio from dashboard to gain access to the connectors. (
Click link
below for radio removal instruction video)
https://www.youtube.com/watch?v=Gcrlufo1ctc
https://www.youtube.com/watch?v=WTbWYNJTSDs
1. Disconnect factory 20-pin plug from Radio (See Fig. 1)
Fig. 1
C5 Radio connector
2. Connect vehicles 20-pin plug from step 1 to 20-pin connector (white)
on installation harness (See Fig. 2).
Fig. 2
Radio position install harness (PXHGM4)
3. Connect 20-pin plug (black/gray) from installation harness (See Fig. 2)
to 20-pin connector on Radio vacated in step 1
4. Ensure module dip-switches #3 and #8 are set to “ON” or down
(See Fig. 3)
Fig. 3

5. Connect 22-pin plug from installation harness (See Fig. 2) to mating
connector on Module (See Fig. 4)
Fig. 4
6. Connect (Tap) red wire from install harness to an ACC (Accessory or
switched) supply power source in vehicle.
1997-03 C5 Models: locate 3-pin plug under passenger toe board
near BCM (covered with black duct tape) See Fig. 3 --- tap yellow wire
OR if missing; use alternate accessory positions in fuse box.
Fig. 3
Note: The aforementioned 3-pin plug may not be present in all vehicles
Alternately we suggest fuse: #22, or 11 on interior fuse box. (See Fig. 5)
located under passenger toe board. Please test circuit with voltmeter of
test light for proper operation prior to final install.
To aid the install we include a mini-tap add-a-fuse circuit seen in Fig. 4
Fig. 4
Crimp accessory wire to add-a-fuse circuit and insert blade to fuse box (e.g.
fuse #22 etc.) If fuse position is occupied, remove fuse from fuse box and
insert to vacant slot on add-a-fuse circuit. Ensure proper crimp otherwise
module will not power up upon turning ignition/car to “ON” position.
Fig. 5
C5 interior fuse box (yours may be different)
Noteworthy: If streaming is interrupted when an accessory is turned on
(e.g. headlights, wipers, defroster, A/C etc.), please find an alternate
source for accessory wire or seek help from a professional. Module is not
faulty, but circuit to which it is connected is being drown down by
aforementioned accessory. If after installation no Bluetooth device
appears on phone, look through peephole on the bottom of the module

for a blue flashing LED. Otherwise check accessory wire crimp and
circuit has power.
Each module is assembled and tested by us prior to shipping and
expected to work if properly installed.
Tuck and secure any extra wires away from moving parts and test
operation.
Installation 2: (To factory 10-pin plug in trunk/hatch)
Alert! The 12-disc Changer (if present) must be disconnected
1. Locate factory 10-pin CD Changer plug in trunk/hatch or if vehicle has
12-disc CD Changer, disconnected 10-pin plug (See Fig. 7) from
Changer (See Fig. 6)
Fig. 6
Factory CD Changer
2. Connect factory 10-pin plug (See Fig. 7) to 10-pin connector (white) on
installation harness (See Fig. 8)
Fig. 7
10-pin plug
Fig. 8
10-pin connector
3. Proceed to step 4 on page 2 above to complete the rest of the
installation.

Pairing:
Pairing process varies among devices but the basic steps are the same. This
process is done upon initial install and will not have to be repeated.
1. Turn Ignition and Radio “ON”
Red LED inside adapter peephole will flash (pairing mode)
2. On A2DP device: Go to
Settings, Wireless & Networks, Bluetooth
Settings
3. Select
Bluetooth
and turn on.
4. Select Bluetooth settings
5. Tap
Scan (Search) for devices
.
6. Wait for Bluetooth device name to appear and select it.
Red LED inside adapter peephole will glow steady (paired)
Optional equipment: The following options are not required for
the module to work; however, these two options enhance user experience.
To add remote to order simply tick box on product page
1. Remote Control:
This wireless remote is not required for adapter to work, however instead
of fumbling audio device, you simply press the familiar remote control
buttons while also keeping your eyes on the road.
Optional remote control allows users to:
1. Control music wirelessly
2. Activate VR commands (Siri, Google play etc.)
3. Track up/down
4. Volume up/down
Pairing Bluetooth remote:

Remote Control Operation:
Use wireless remote to perform the following functions on any iOS7.0 and higher
or Android 4.4 and higher.
Contents:
2. USB Charging Kit
Optional USB kit provides up to 2.5 Amps of charging power -- which is more
than enough juice to charge today's energy hungry iPhones, iPads, tablets
and more. Custom install USB port in a convenient location and discover how
this charger is a massive improvement over cars built-in charging ports and
many anemic aftermarket cigar lighter chargers.
To add USB Charging kit simply select installation harness with USB port.
For example:
1. PXHGM4 (to radio) + USB, connects module at the radio and includes USB
charging port, extension cable and mounting plate
2. PXHGM4 (to radio) connect module at the radio but DOES NOT include
USB Charging Kit.
USB charging kit it not currently offered with the PXHGM2 (to trunk/hatch)
installation harness.
Optional USB Charging port

USB Charging Kit Installation
A. Flush to dash/panel requires drilling a ¾” hole in the dash
B. Flush with Support bracket (use this option to mount USB terminal without
drilling)
A. Flush to Dash or Panel (drilling required)
1. Drill a ¾” hole in the dash or panel using a step drill bit or equivalent
(See Fig. 9)
Fig. 9
Step drill bit
2. Insert 3ft. USB cable male terminal (See Fig. 10) through ¾” hole
created in step 1 and plug into USB port on harness (See Fig. 11)
Fig. 10
Flush mount 3 ft. USB cable
Fig. 11
3. Push USB head (See Fig. 12) until it snaps in place and flush with
mounting surface (See Fig. 13)
Fig. 12
Flush mount USB Terminal
Fig. 13
Flush mounted to dash

B. Bracket Mount (No drilling)
1. Locate a flat surface at location of choice within 3.2 ft. of radio to
mount USB support bracket (See Fig. 14) with tape backing or screws.
Fig. 14
mounting bracket
2. Insert USB male terminal through hole in bracket (See Fig. 15) and
connect to USB port on harness (See Fig. 12)
Fig. 15
3. Push USB head until it snaps in place and flush (See Fig. 16)
Or simply connect audio device charging cable directly to USB port on
harness (See Fig. 12) and route the plug to dash area or where audio device
will reside.
Test Operation:
1. Turn Radio “ON”
2. Press “TAPE/AUX” or “CD/AUX” button on radio
3. Launch Smartphone or tablet audio streaming application.
4. Turn volume up on phone and use radio volume control button to set
playback level.
Warning!
Playlist and Track selection is *NOT* possible from the
Radio. Use audio device built-in controls or optional wireless remote to
access and control the audio files.
5. If correct operation is confirmed go ahead and reinstall the Radio.
Product feature comparison:
Use chart below to learn what these products will or will not do. These Bluetooth
products are built exclusively for C5 Corvettes with original radio.
Noteworthy!! Hands-free kits are able to stream music and phone calls;
however, music streaming kits are not able to make phone calls.
Features/Requirements
A2D-C5
BLU-C5
C5CD-HF
C5-HF
Retains/requires changer
YES
NO
YES*
NO
Requires working CD changer
YES
NO
YES
NO
Audio input jack (Aux in)
NO
NO
YES*
YES
USB charging port
Optional**
Optional**
YES
YES
Supports Hands-free calls
NO
NO
YES
YES
Connect to radio (behind dash)
YES
YES
YES
YES
Connects to changer in trunk/hatch
YES
YES
NO
NO
Supports voice activation (e.g. Siri)
NO
NO
YES
YES
Optional wireless remote control
YES
YES
NO
NO
Controls music from radio buttons
NO
NO
NO
NO
*Aux input or retain CD changer playback
**Optional USB charging port available only on PXHGM4 harness (to radio)

Frequent asked questions
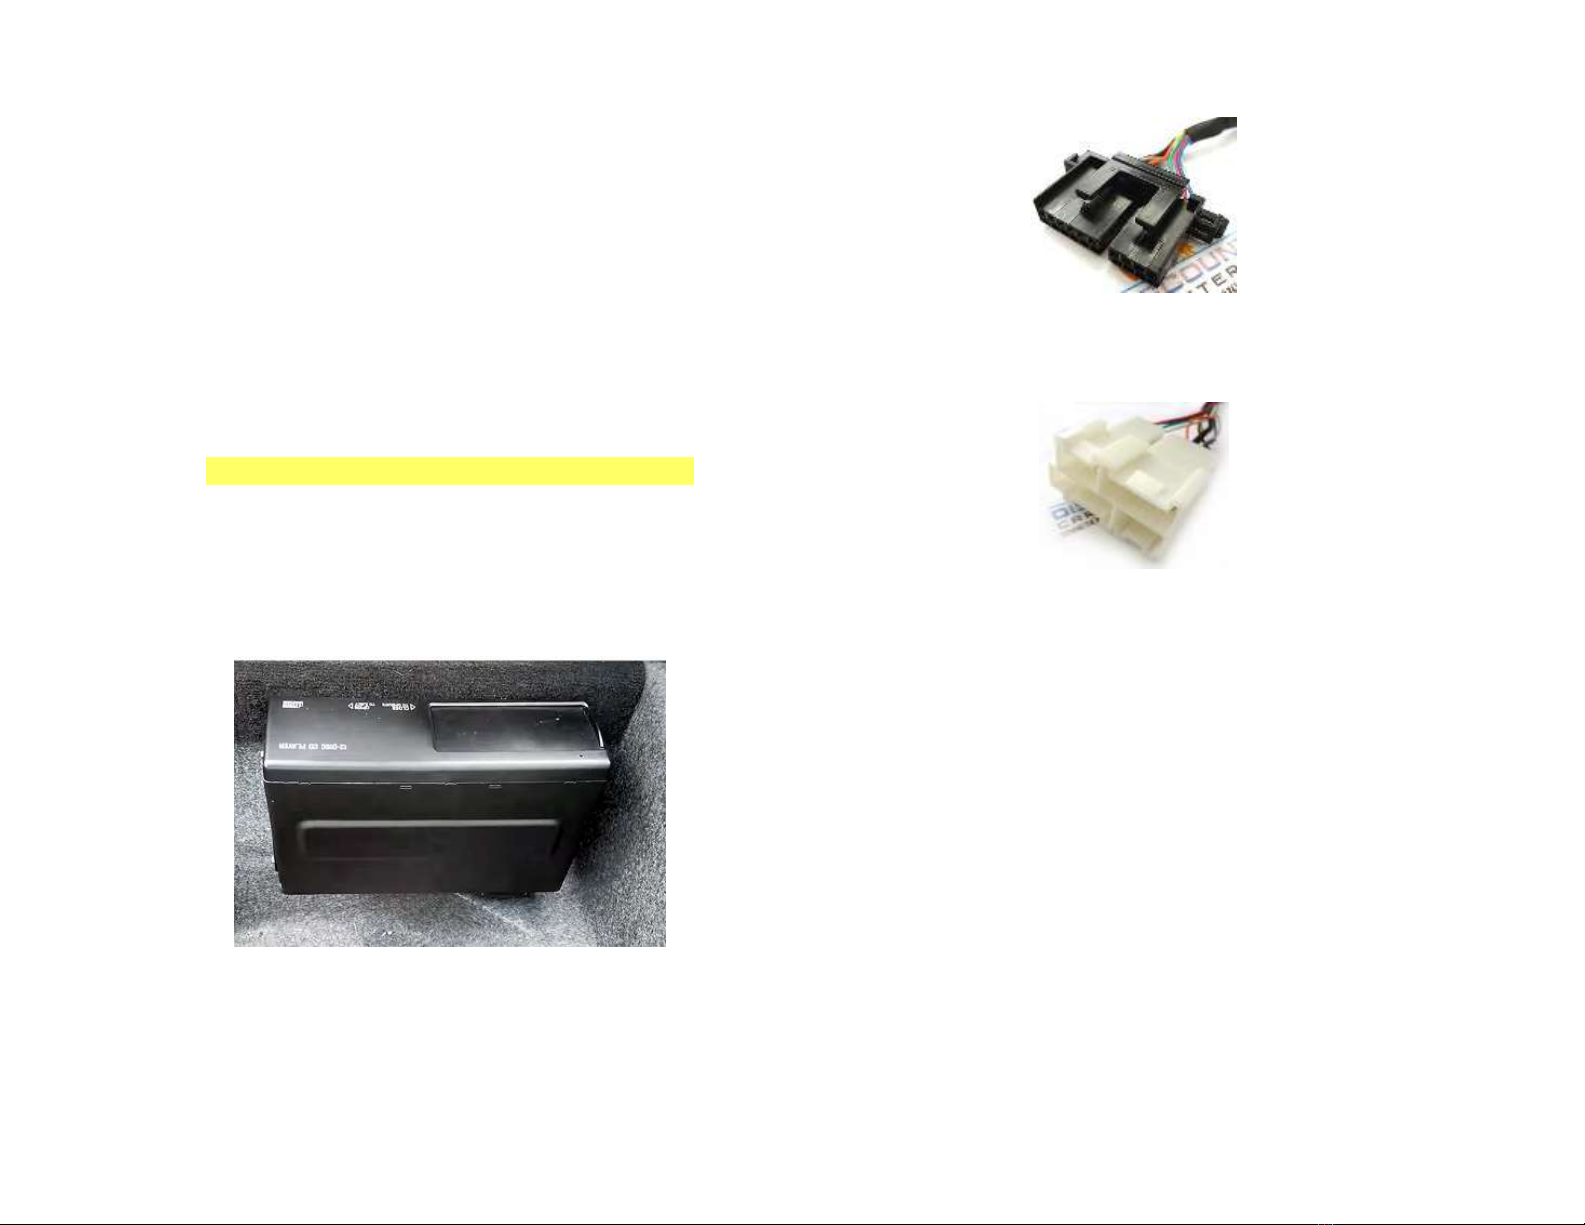
1. Does the BLU-C5 require a CD Changer to work?
NO;CD changer is not required and if present will require disconnecting. If
vehicle has cd changer and to retain CD Changer playback, purchase our
A2D-C5 instead.
2. Can I install the BLU-C5 at the radio instead of the trunk?
YES; select the PXHGM4 installation harness when placing order.
3. Can I install the BLU-C5 without removing radio?
YES; select PXHGM2 harness when ordering. This harness connects to the
factory pre-wired 10-pin plug in trunk/hatch (make sure your vehicle
has this plug prior to ordering)
4. Does this module support hands-free calls?
NO;The BLU-C5 does not support hands-free calls. Purchase our C5CD-HF
or A2DIY-C5 (if vehicle has the 12-disc CD Changer) or our C5-HF (if
vehicles does not have a 12-disc CD Changer or if changer malfunctions)
5. Does the BLU-C5 work on all Corvette Radios?
NO; works on 1997-04 Corvette (C5) Radios.
6. How do I remove the radio from dashboard?
Please click video link for help removing radio:
https://www.youtube.com/watch?v=Gcrlufo1ctc
https://www.youtube.com/watch?v=WTbWYNJTSDs
7. Bluetooth plays fine until turn signal, headlights or wipers are
switched on.
This issue has been reported by some C5 owners. This is due to vehicle
power supply (not a faulty module). If Bluetooth playback is interrupted
when an accessory (e.g. wiper motors etc.) is turned on, this indicates
vehicle has a wiring issue. Relocate accessory wire (RED) to a circuit that
does not get loaded down or seek professional help.
8. After installing everything, radio does not go into “AUX” mode. What
would cause this?
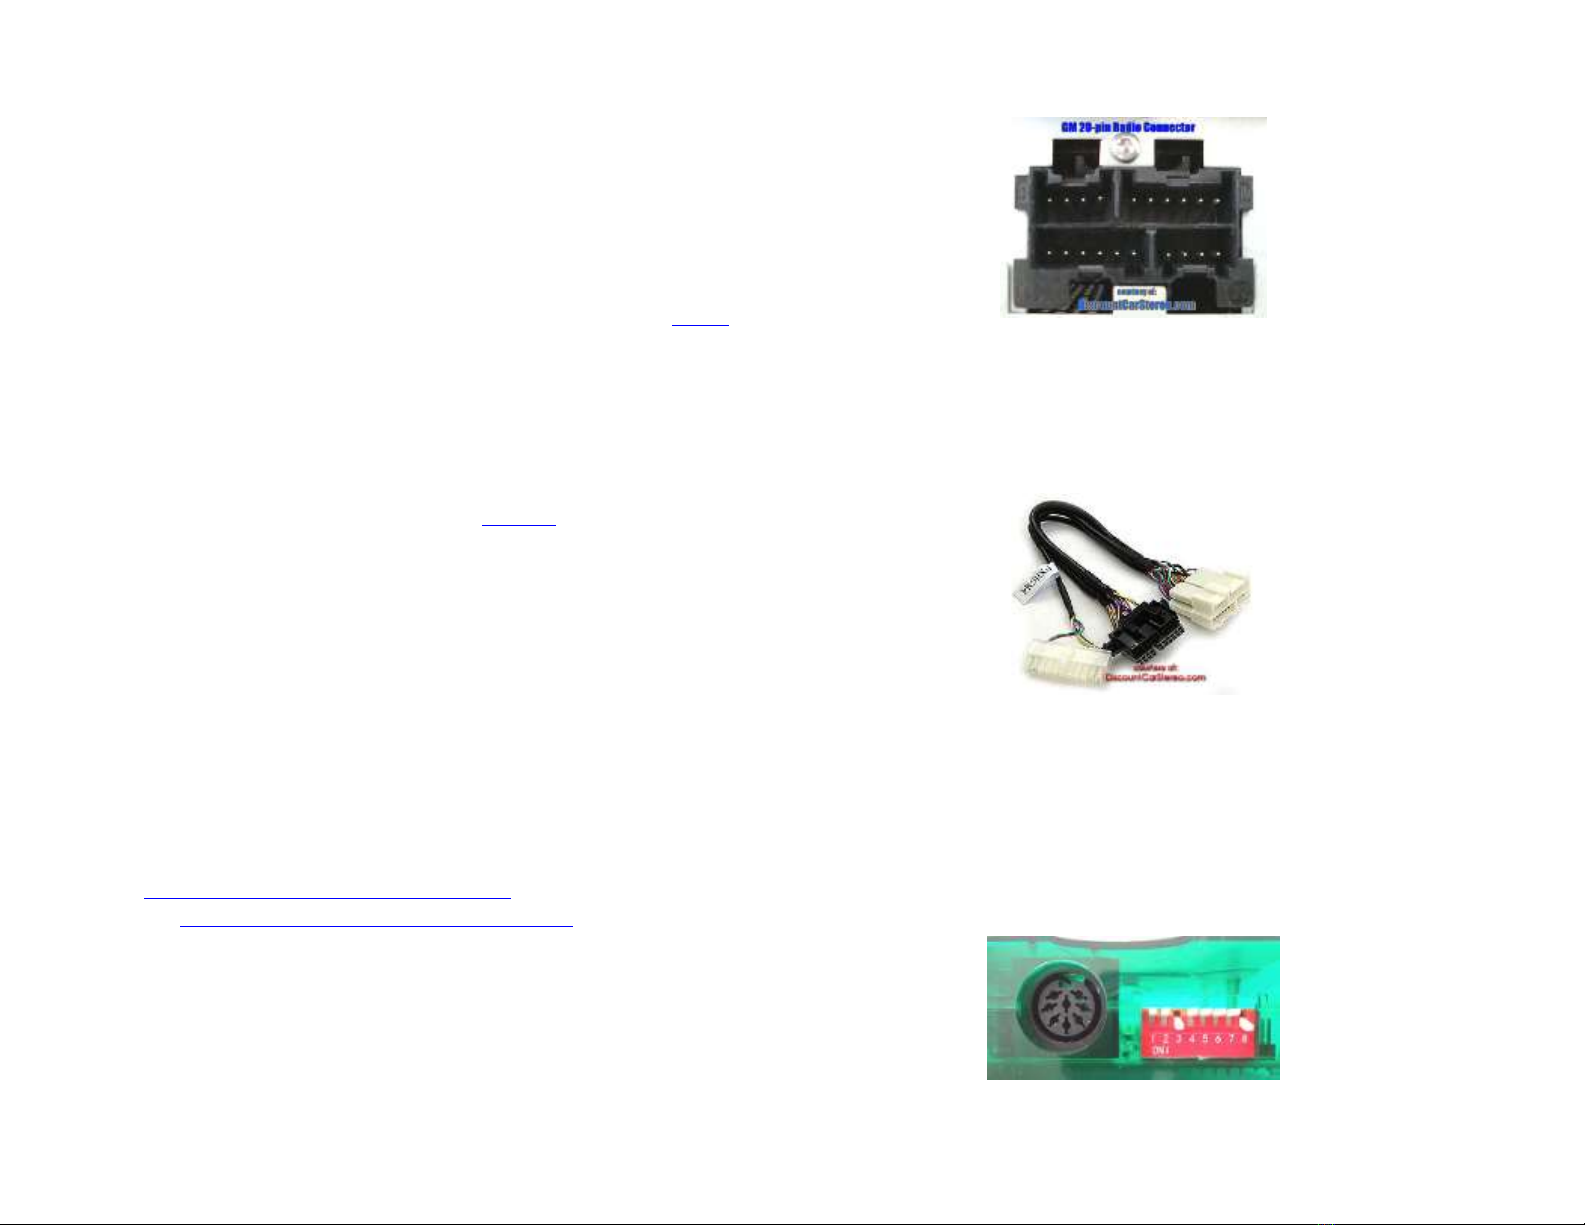
If module dip-switches 3 and 8 were already set; the module was tested
prior to shipping but if for some reason radio does not recognize the
module and does not enter “AUX” Mode, then a reset may have them “talk”
to each other. To reset radio/module follow these steps:
1. disconnect the PXHGM4 or PXHGM2 installation harness from radio/ CD
Changer or disconnect battery terminal
2. Move all 8-dip switches on module to “OFF” or Up
3. Module and radio must remain disconnected for 45-60 minutes
4. After time has expired, move dip-switches 3 and 8 to “ON or down
5. Reconnect PXHGM4 or PXHGM2 harness to radio/cd changer or
reconnect battery terminal
6. Turn ignition/radio “ON”, press CD AUX button on radio. If all went well,
radio should now enter AUX Mode.
Warning: Dip switches must be set prior to applying power. If power is
applied prior to setting dip-switches, repeat steps 1-6
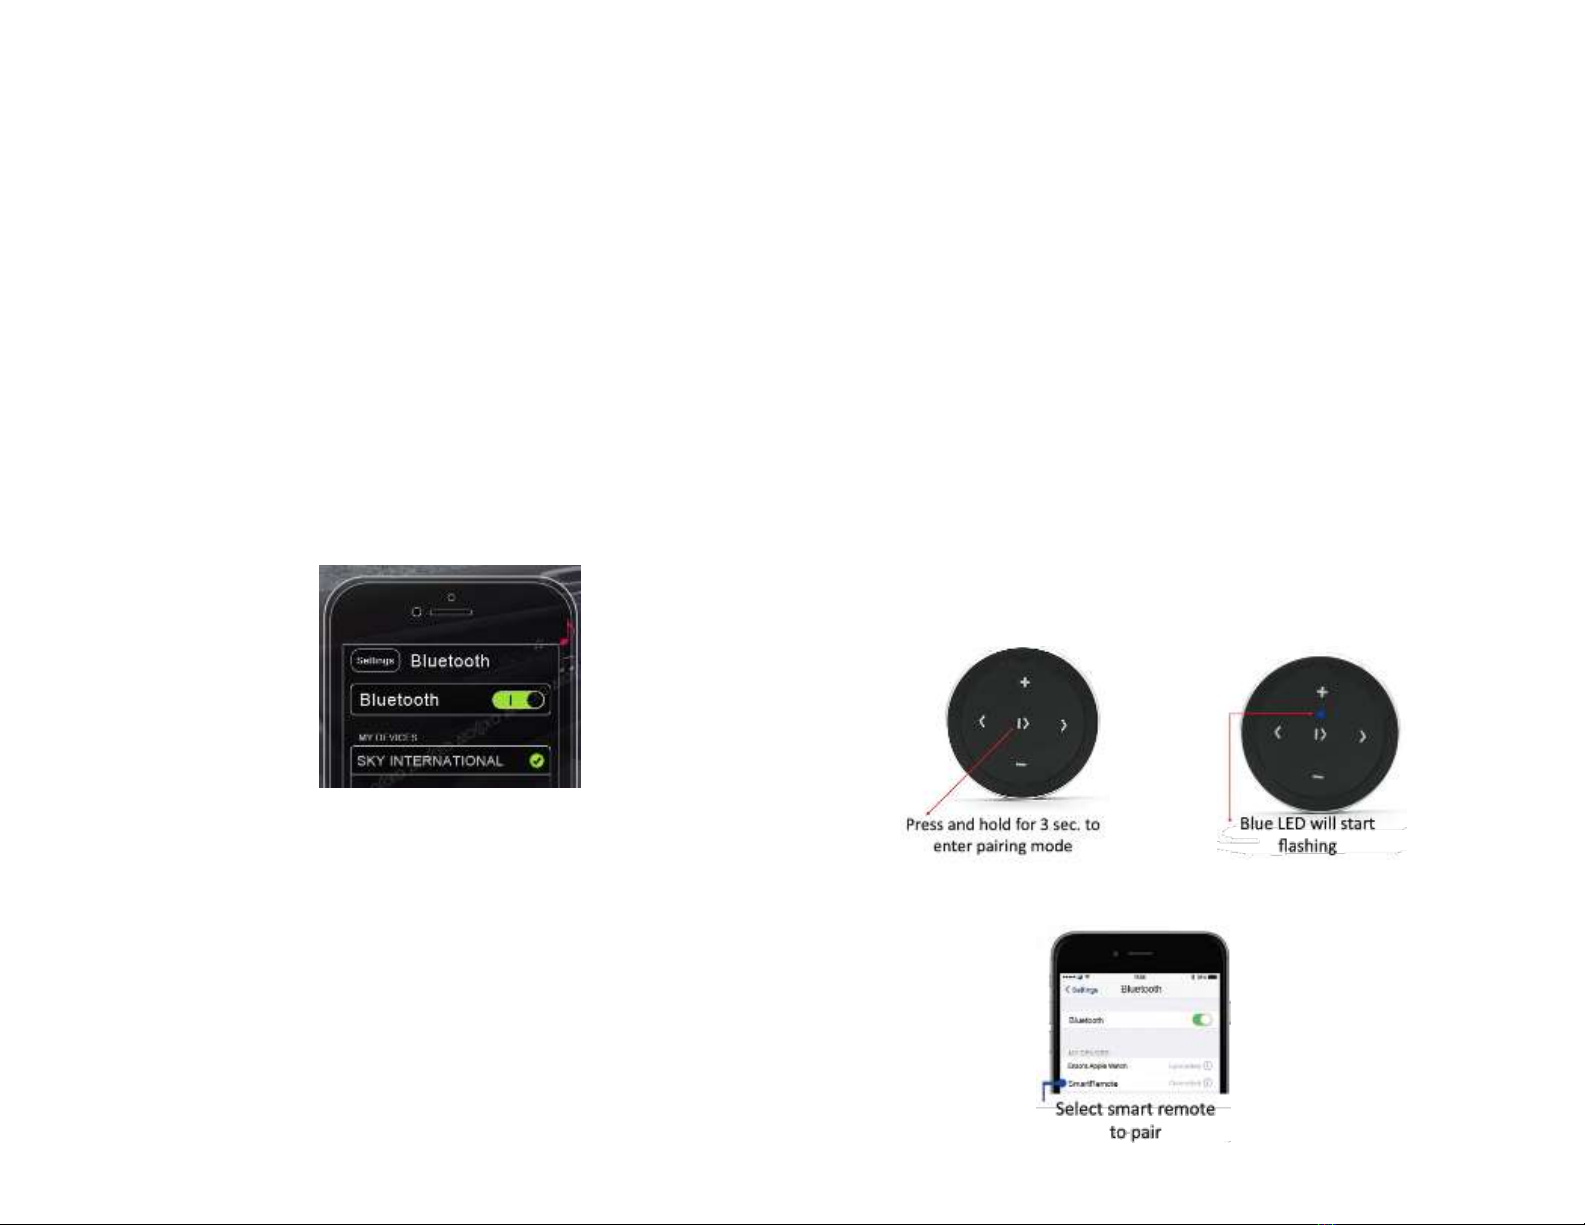
9. Radio enters AUX mode, but there is nothing listed to which to pair.
What would cause this?
Turn ignition “ON” and check module to see if blue LED is flashing. If not
flashing check red ACC wire (mentioned in step 6 above) for power. If using
the Add-a-fuse circuit, check crimp integrity; often times a bad crimp may
result in lack of power to module.
Disclaimer
• This product has no affiliation with GM
• When possible, professional installation is recommended
For additional questions, email support@discountcarstereo.com
© 1995-2019-09-21 Discount Car Stereo, Inc. All rights reserved. Information in this document is
subject to change without notice. Other products and companies referred to herein are
trademarks or registered trademarks of their respective companies or mark holders.
Other manuals for BLU-C5
1
Table of contents
Other Corvette Automobile Accessories manuals
Popular Automobile Accessories manuals by other brands

Axxess
Axxess AX-VL90032 installation instructions

Steinhof
Steinhof O-119 FITTING AND OPERATION MANUAL

Vehco
Vehco Connect5 Installation Guide and System diagnostics

Nokia
Nokia CARK-91 installation guide

Havis-Shields
Havis-Shields P-MFK-9 installation instructions

Safe Fleet
Safe Fleet Prime Design FBM-1019-BLK manual