Corvette C5-HF User manual

Courtesy of: DiscountCarStereo.com
Serving the internet community since 1995
Newest version (11/19/20)
C5-HF
QUICK START BLUETOOTH INSTALLATION GUIDE FOR SELECT 1997-04 CORVETTE WITHOUT 12-DISC CHANGER
Created Februa 19, 2013
Revised September 2, 2021

PRODUCT SAFETY & DISCLAIMER
READ ALL INSTRUCTIONS CAREFULLY BEFORE INSTALLING, FAILURE TO DO SO MAY CAUSE
PERSONAL INJURY OR DAMAGE TO PRODUCT AND/OR PROPERTY
This installation guide is provided as a GENERAL installation guide, some vehicles vary and
may require additional steps. We do not accept responsibility for third party labor charges
or modifications. Exercise due-diligence when installing this product.
We do not accept any responsibility for vehicle damage or personal injury resulting from
the installation of this product.
Careless installation and operation can result in equipment damage.
Requirements:
OEM radio with Tape/Aux or CD/Aux button
Introduction
Safety comes first when you’re on the road, so having an intuitive and easy to
use Bluetooth kit is essential to reducing driver distraction. The C5-HF kit is
compatible with virtually all Bluetooth phones, and sounds great for mobile
conversations, streaming music or AUX device. In addition, a USB “Fast charging”
port is included to keep devices charged while on the road. A push button with
built-in microphone conveniently installed on the dash is used to launch Voice
recognition applications (Siri, Google Now, Assistant etc.), initiate/end phone
calls, launch applications and more.
Note: This kit works in C5 without 12-disc changer (or if changer
malfunctions) Vehicles with functional 12-disc changers (or to retain CD
changer playback); purchase our C5CD-HF or A2DIY-C5CD instead.
See Frequently Asked question at the end of this guide for more details.
Installation
To install this kit, the factory radio must be removed to gain access to the radio
connector (
See FAQ section and the end of this guide for details) or click the
following link:
https://www.youtube.com/watch?v=WTbWYNJTSDs
1. Press release tab on 20-pin plug to disconnect from radio (See Fig. 1)
Fig. 1
Radio 20-pin connector
Warning: 32-pin connector (pictured above) is vehicle’s
climate control module and not relevant for this install.

2. Connect 20-pin plug from step 1 to installation harness 20-pin
connector (white) (See Fig. 2).
Fig. 2
installation harness
3. Connect installation harness 20-pin plug (black/gray) (See Fig. 2) to
radio 20-pin connector vacated in step 1
4. Connect included 3.5mm male-male cable (See Fig. 3) to “AUX” input
jack on module (See Fig. 4), Other end connects to AUX device (within
3 ft.)
Fig. 3
Fig. 4
5. Connect installation harness 22-pin plug (See Fig. 2) to module 22-pin
connector (See Fig. 5)
6. Connect push button with built-in microphone (See Fig. 6) to module
(MIC/CTR) input jack (See Fig. 4)
Fig. 5
Fig. 6
push button/Microphone

7. Consider install location for push button/microphone. Push button
must be within reach and facing driver for voice commands and phone
dialog (cable is 6ft. long). We recommend completing the rest of the
install prior to securing push button/mic to dashboard. When
ready to install simply remove tape backing and secure to surface
Fig. 7
Custom installed next to traction button
Ensure no ventilation duct is pointed towards the mic.
It is best to mount button facing driver
USB port installation
An updated “SMART” USB charging port has been added to module which charges
based on device current demands and used for charging only. (Not for thumb
drives etc.)
A. Flush to dash/panel requires drilling a ¾” hole in the dash
B. Flush with Support bracket (use this option to mount USB terminal
wherever your installation demands without drilling)
A. Flush to Dash or Panel (drilling required)
1. Drill a ¾” hole in the dash or panel using a step drill bit or equivalent
(See Fig. 10)
Fig. 10
Step drill bit
2. Insert the 3ft. USB cable male terminal (See Fig. 11) through the ¾”
hole created in step 1 and plug into USB port on Module (See Fig. 11)
Fig. 11
Flush mount 3 ft. USB cable

Fig. 12
Module USB port
3. Push USB (See Fig. 13) until it snaps in place and flush with mounting
surface (See Fig. 14)
Fig. 13
Flush mount USB Terminal
Fig. 14
Flush mounted to dash
4. Tuck and secure any extra wire from moving parts and test operation
B. USB with Bracket Mount (No drilling)
1. Locate a flat surface at location of choice within 3.2 ft. of radio and
mount USB support bracket (See Fig. 15) to surface with screws.
Fig. 15
USB mounting bracket
2. Insert USB male terminal through hole in bracket (See Fig. 16) and
connect to USB port on Module (See Fig. 4)
Fig. 16
3. Push USB head until it snaps in place and flush (See Fig. 17)
Fig. 17
4. Secure USB to dash with screws (included) or adhesive.
5. Tuck and secure any extra wire away from moving parts and test
operation (
See Bluetooth Pairing and Connection
)

Pairing
This process is required the first time you use the C5-HF. After initial pairing,
the C5-HF automatically reconnects with paired phone upon entering vehicle.
1. Turn ignition to “ACC” or “ON” position
2. Turn radio “ON”
3. Access Smartphone Bluetooth menu settings, and search (scan) for
devices.
4. Select device name (See Fig. 19) and tap “Connect”
Fig. 19
Note: Supports multiple phones but connects to only one phone at a time.
Warning: C5 radio does not display text or caller ID number. Operate Bluetooth
device by pressing push button or Voice Recognition application. Use factory
radio volume knob to control playback level.
Bluetooth operation
1. Press “AUX” button on radio to enter Bluetooth Mode.
2. Use radio volume knob to set playback level
Music Commands
Push button must be used for the following music commands:
To
Proceed this way
Pause a Song
Press and release button
Resume Play
Press and release button
Skip to next song
Press button twice
Skip to Previous Song
Press button 3 times
Activate AUX Playback*
Press button 4 times
Activate Voice Control
Press/hold button for 2 seconds
Switch out of XM Mode
Press and release button
Phone Commands
Push button must be used for the following phone commands:
To
Proceed this way
Answer call
Press and release button
End call
Press and release button
Reject incoming call
Press button twice (send call to Voice Mail)
Cancel outgoing call
Press button twice
Activate Voice Control
Press/hold button for 2 seconds
Notes:
1. To reset module, press and hold push button for 5 seconds
2. On incoming calls, ring tone plays on car speakers (radio in AUX mode)
3. Bluetooth range is approximately 30 ft.
4. Voice command compatible with Apple (Siri), Android (Google Now),
Blackberry (Assistant)
5. * push button does not control radio, CD, or aux functions.
If successful, proceed to reinstalling radio.

Feature comparison
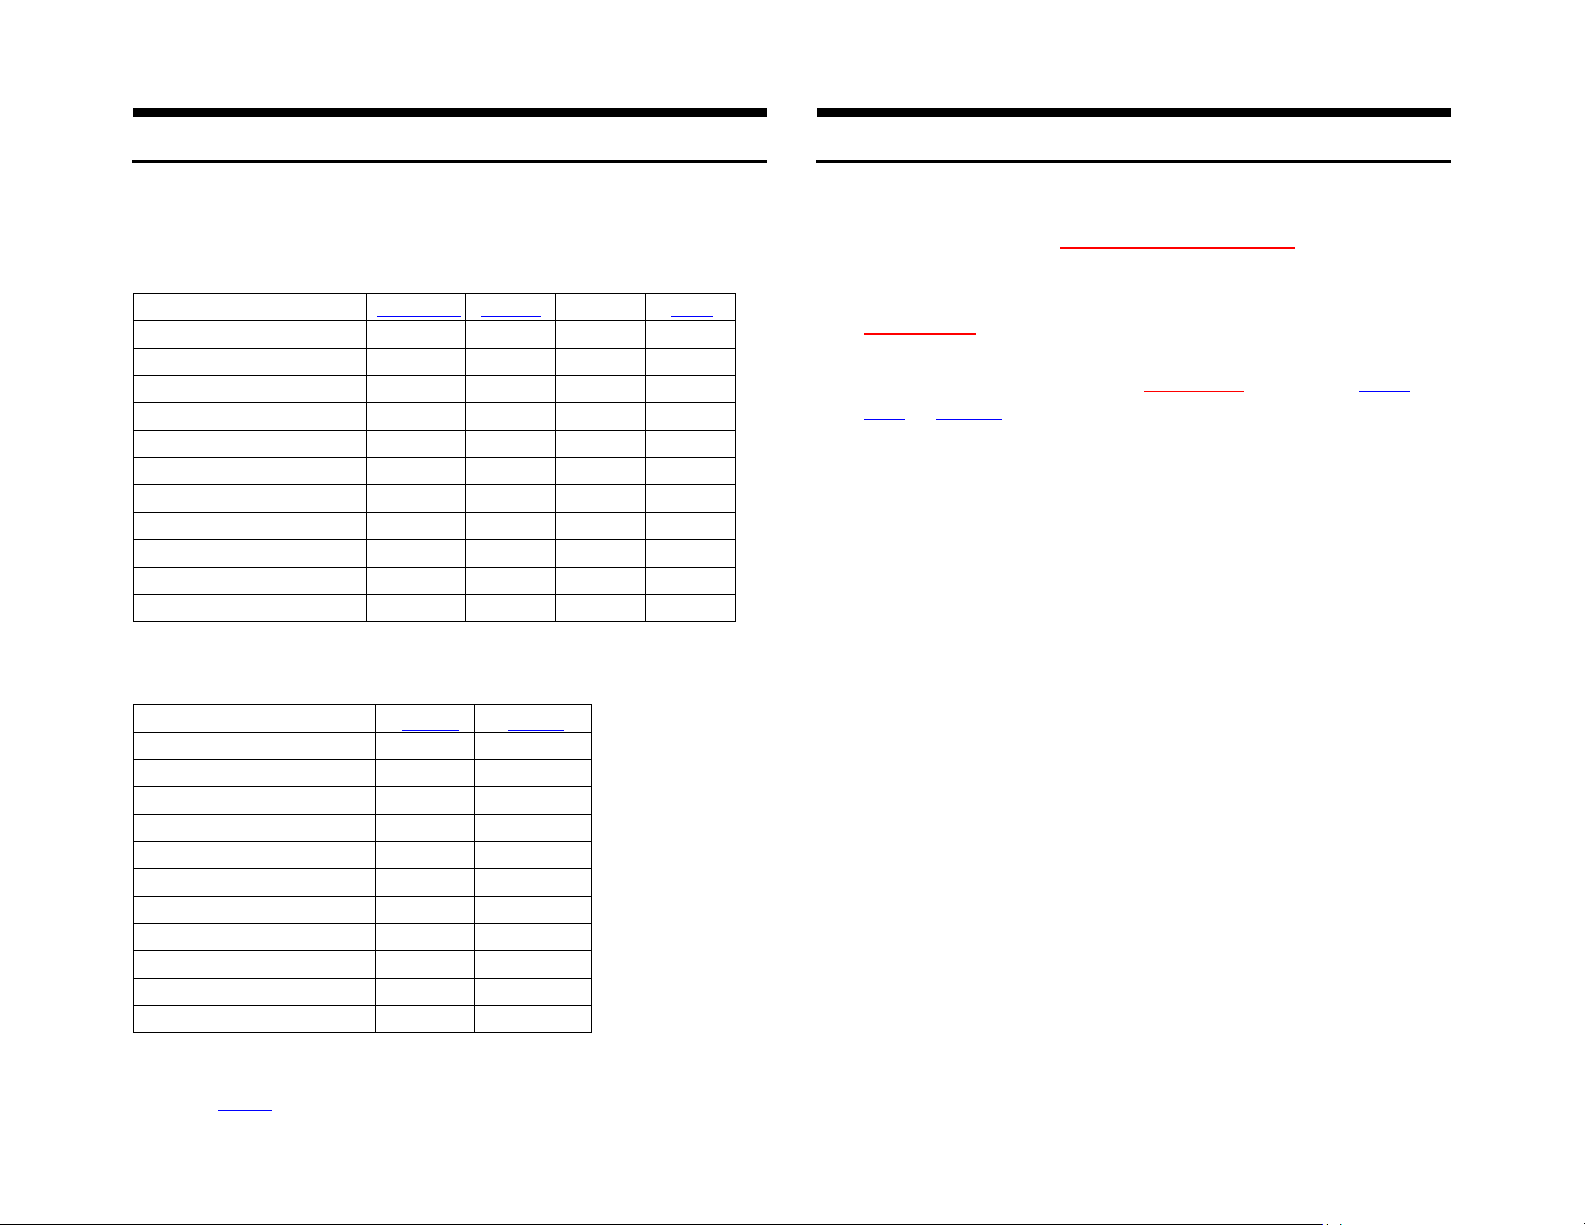
Bluetooth profiles; namely Hands-free calling (See Table 1) and music streaming
(A2DP). Music streaming kits (See Table2)
Table 1
Modules
A2DIY-C5CD
C5CD-HF
A2DIY-C5
C5-HF
Retains changer playback
YES
YES*
NO
NO
Requires working CD changer
YES
YES
NO
NO
Audio input jack (Aux in)
YES*
*
YES
YES
USB charging port
YES*
YES
YES*
YES
Hands-free calling (HPF)
YES
YES
YES
YES
Music Streaming (A2DP)
YES
YES
YES
YES
Connects behind radio
YES
YES
YES
YES
Connects in trunk/hatch
NO
NO
NO
NO
Voice recognition support
YES
YES
YES
YES
Remote control
YES
$
YES
$
Controls from radio buttons
NO
NO
NO
NO
Table 2
Modules
A2D-C5
BLU-C5
Retains changer playback
YES
NO
Requires working CD changer
YES
NO
Audio input jack (Aux in)
NO
NO
USB charging port
Optional
Optional
Hands-free calling (HPF)
NO
NO
Music Streaming (A2DP)
YES
YES
Connects behind radio
YES
YES
Connects in trunk/hatch
YES
NO
VR support (e.g., Siri)
YES**
YES**
Wireless remote control
Optional
Optional
Controls from radio buttons
NO
NO
*Optional (Select from product order page)
** Voice recognition possible with optional remote
$ Optional BLU-MB media button
Frequent ask questions & troubleshooting
1. What’s the difference between the C5-HF and C5CD-HF?
The only difference is the 12-disc changer requirement. The C5CD-HF
requires a functioning 12-disc changer and the C5-HF does not. The
C5-HF also works in vehicles with 12-disc changer but it must be
disconnected.
2. My C5 has a functioning 12-disc changer. Will the C5-HF work?
12-disc changer (if present) must be disconnected. Purchase our A2DIY-
C5CD or C5CD-HF to retain 12-disc changer operation.
3. Why is it necessary to run 12V Acc. wire to fuse panel?
Modules purchased after 8/31 no longer require this step.
4. Can I control Smartphone music selection etc. from radio buttons?
NO; you must use Smartphone built-in controls, push button and/or
voice commands to operate device. Radio volume knob is used to set
playback level.
5. Does radio display song, track or caller name/number?
NO; this is not possible on the C5 radio.
6. How to I reset Bluetooth module?
Press and hold push button for 5 seconds.
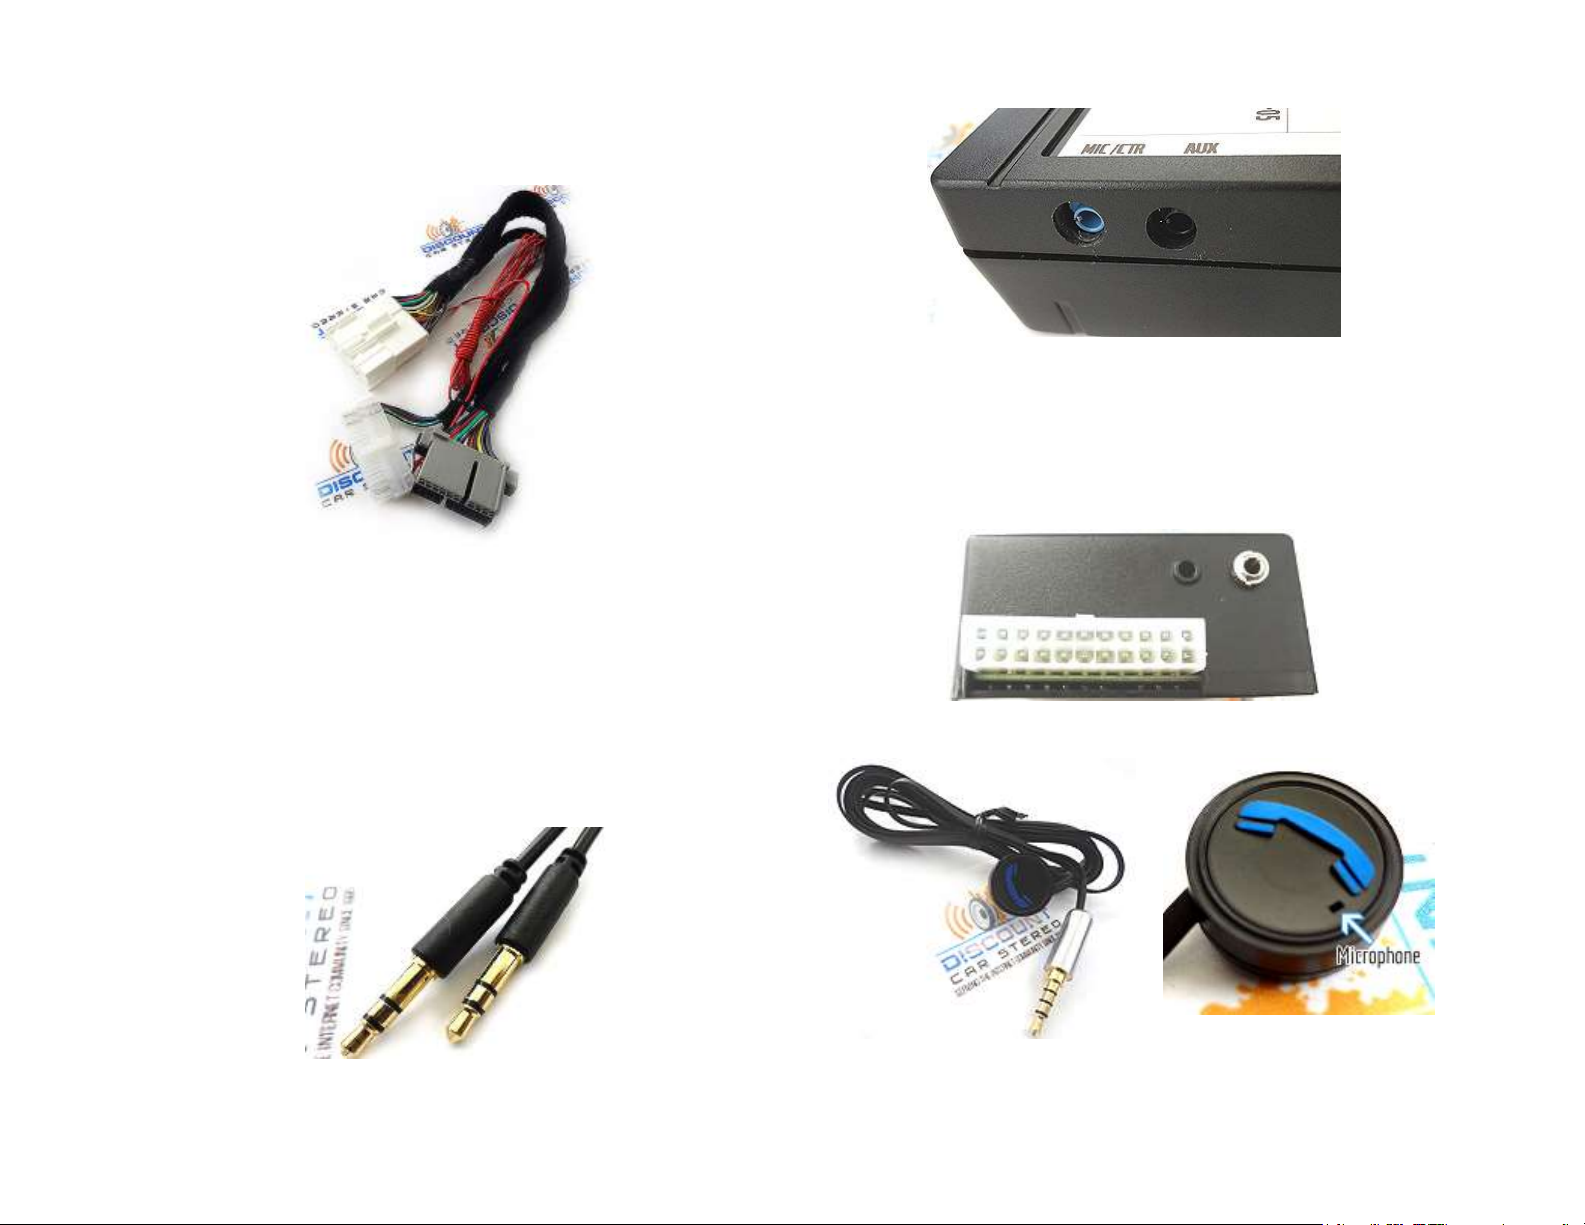
7. I connected a satellite radio kit to module “AUX” input jack, but unable
to hear it. Please help
Press AUX button on radio to enter Bluetooth mode, then press push
button 4 times. At this point XM should play. To return to music stream
press and release push button.
8. Where is the best place to install push button/microphone?
Having push button/mic mounted higher on the dash works best, but users
can experiment with different location and decide.
9. Will radio mute when I receive or make a phone call?
Muting is possible only if radio is in “AUX” (Bluetooth) mode. If in AM/FM or
CD/Tape mode, muting is not possible. To be connected with caller, press
AUX button on radio and single press push button
10. My second phone does not pair or find module?
In order to pair phone make sure no other phones are connected. Once
Bluetooth is turned off, the module will be ready for pairing.

11. Will I be able to connect flash drive etc. to the USB port?
NO. USB port is for charging only.
12. How to remove radio from dashboard
1. Pry out on the ride control switch and disconnect the wiring.
2. Unsnap the switch trim and remove (2) 10mm hex-head bolts exposed.
3. Open the center console door, remove (4) screws from the inner hinge
and remove the door.
4. Open the ashtray and remove (1) screw exposed.
5. Remove the ashtray and (1) screw exposed.
6. Unclip the small grill to the left of the ignition switch and remove (1)
screw exposed. Unclip the base of the radio trim bezel and remove or
copy and paste link below into browser:
https://www.youtube.com/watch?v=WTbWYNJTSDs
12. I have installed the kit as directed, but radio does not enter AUX mode.
What could be wrong?
We recommend resetting system as follows:
1. Disconnect car battery or 20-pin plug from radio (See Fig. 1)
2. After 10-15 minutes reconnect car battery or radio’s 20-pin plug
(whichever was initially disconnected)
3. Press AUX button on radio and if all went well radio should now enter
AUX mode.
Disclaimer
• This product has no affiliation with GM or Apple
• When possible, professional installation is recommended
Email support@discountcarstereo.com
© 1995-Sep-21 Discount Car Stereo, Inc. All rights reserved. Information in this document is
subject to change without notice. Other products and companies referred to herein are
trademarks or registered trademarks of their respective companies or mark holders.
Table of contents
Other Corvette Automobile Accessories manuals
Popular Automobile Accessories manuals by other brands

Coastal
Coastal MYGIG LOCKPICK PRO Installation and operation instructions

rockymounts
rockymounts HotRod installation instructions

Axxess
Axxess ASWC-TOY-LEX installation instructions

Bestop
Bestop Pavement Ends 56844 installation instructions

MAcarbon
MAcarbon Ferrari 360 Map Carbon Light installation instructions

HWH Corporation
HWH Corporation 625S Series Operator's manual