
www.costway.fr www.costway.fr
Contactez-nous !
Ne retournez pas cet article.
Contactez d’abord notre service à la clientèle amical pour l’aide.
E-mail
FR : cs.fr@costway.com
Avant de Commencer
Veuillez lire attentivement toutes les instructions.
Conservez les instructions pour la référence future.
Séparez et comptez toutes les pièces et les outils de matériel.
Lisez attentivement chaque étape et suivez le bon ordre.
Nous recommandons que, si possible, tous les éléments soient assemblés
à proximité de la zone dans laquelle ils seront utilisés, afin d'éviter de
déplacer inutilement le produit une fois assemblé.
Placez toujours le produit sur une surface plane, solide et stable.
Gardez toutes les petites pièces et le matériel d'emballage de ce produit
hors de portée des bébés et des enfants car ils pourraient provoquer un
risque grave d’étouffement.
Veuillez noter que tous les boulons doivent être verrouillés après que toutes les
pièces ont été vissées et installées conformément aux exigences suivantes.
Attention
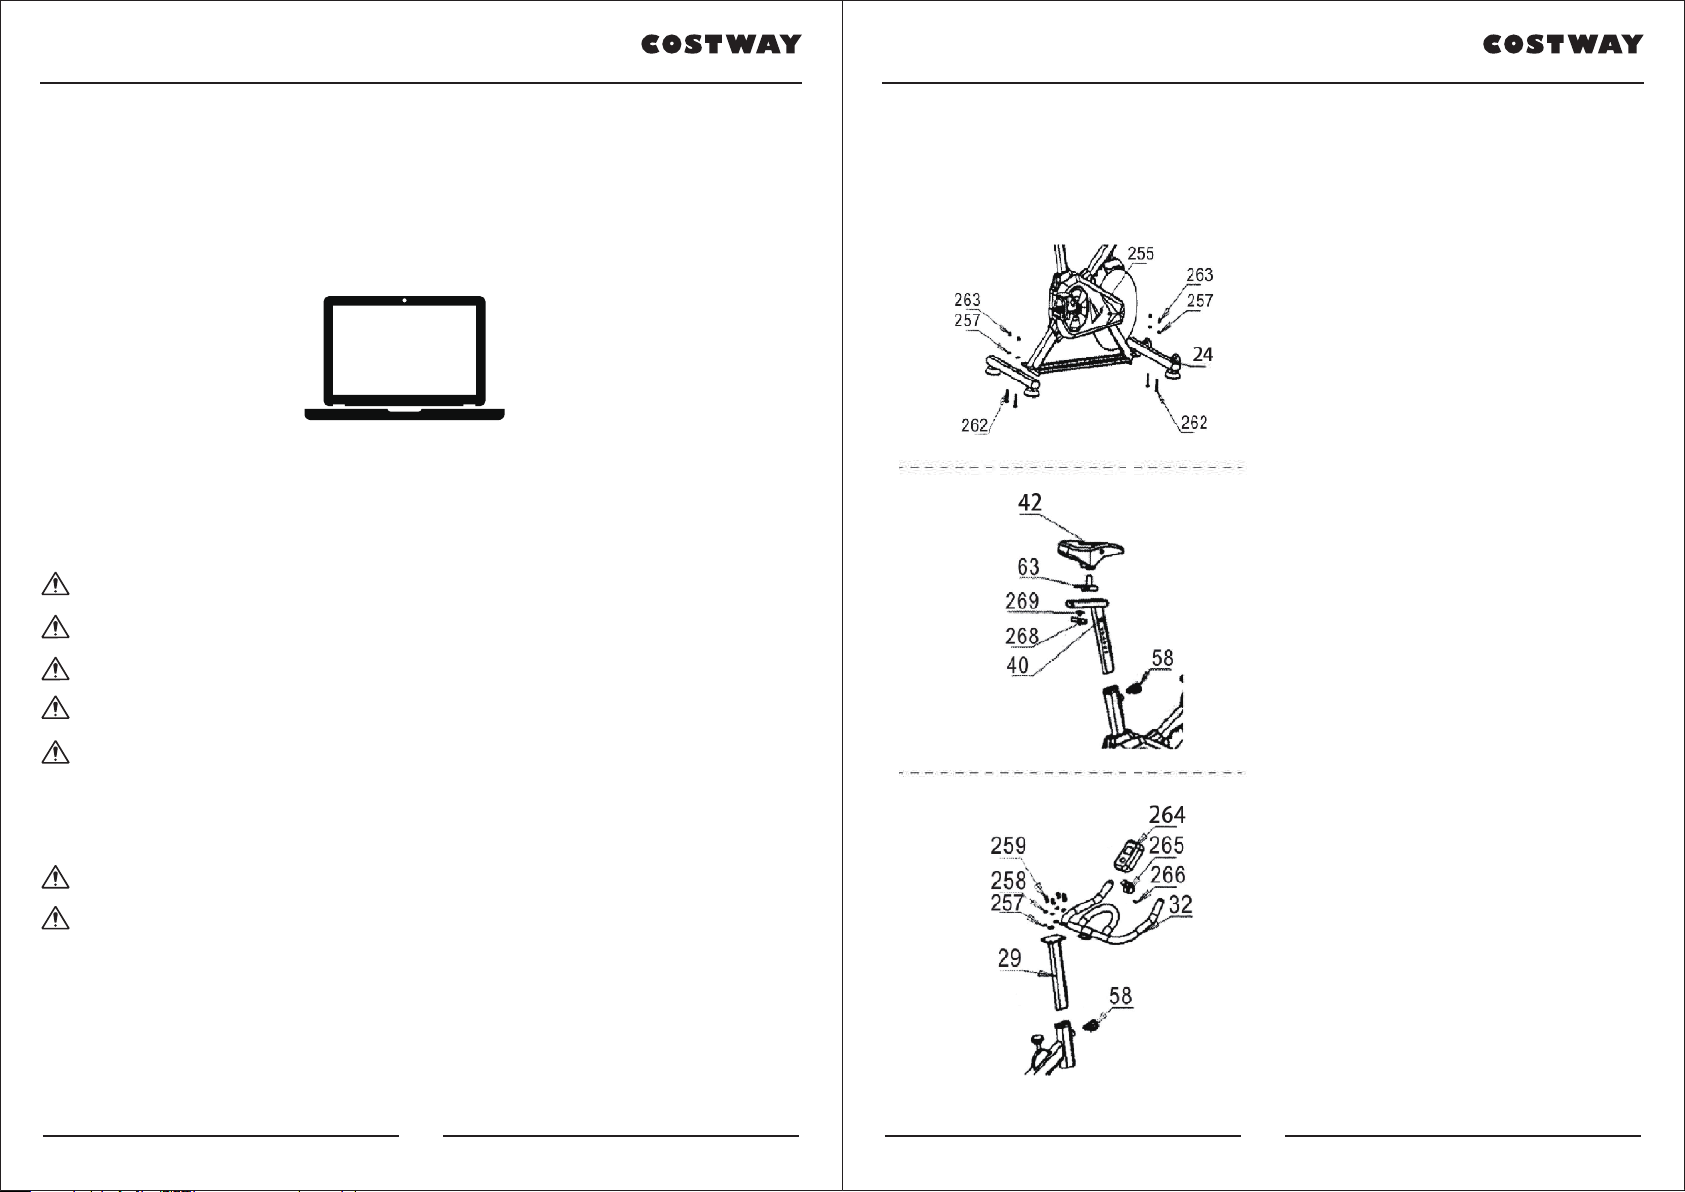
Étape 1 :
(1) Ouvrez le carton, retirez les pièces
ci-dessus du carton et posez le cadre principal
à plat sur le sol.
(2) Utilisez une clé plate, avec un boulon (262),
une rondelle (257) et un écrou borgne (263),
pour bloquer respectivement le tube du pied
avant (24) et le tube du pied arrière sur le
cadre principal (255).
Étape 2 :
(1) Insérez le tube de levage du coussin (40)
dans le cadre principal (255). Vissez le bouton
(58).
(2) Bloquez le coussin (42) sur la semelle du
coussin (63) et bloquez-le sur le tube de
levage du coussin (40) avec le bouton (268).
(3) Verrouillez les pédales gauche « L » et
droite « R » respectivement sur le cadre
principal (255). (Faites attention à la gauche et
à la droite, puis serrez dans le sens du
filetage)
Étape 3 :
(1) Insérez le tuyau de levage du guidon (29)
dans le cadre principal (255). Vissez le bouton
(58).
(2) Montez le tube du guidon (32) sur le tube
de levage du guidon (29) avec les boulons
(259), la rondelle élastique (258) et la rondelle
plate (257).
(3) Installez le compteur électronique (264) sur
la base du compteur électronique (265) et
verrouillez-le sur le guidon avec les boulons
(266).
16 17


 Service manual")


