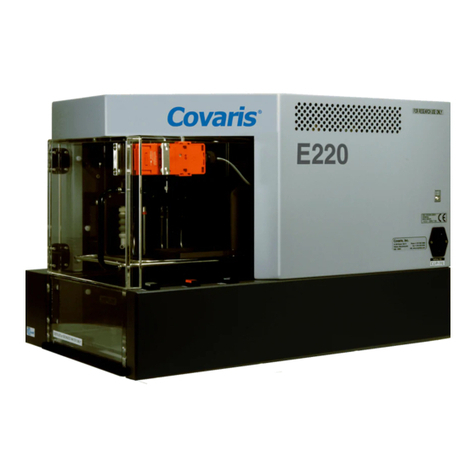
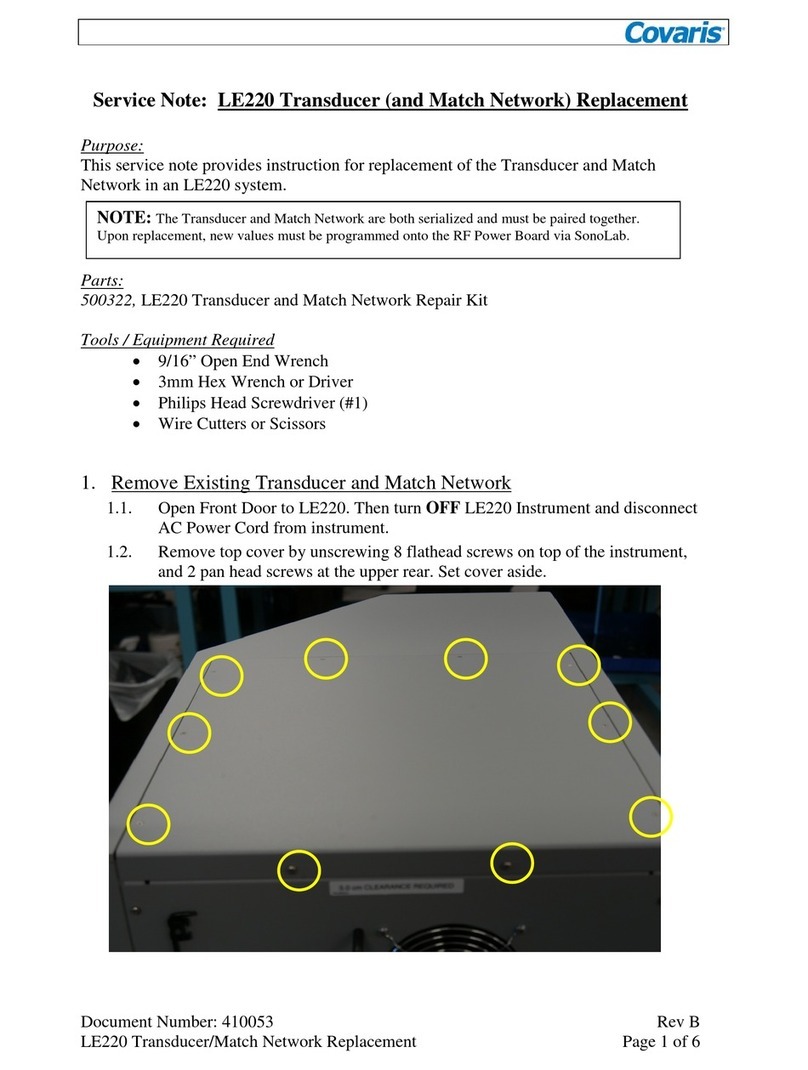
Covaris S Series User manual

For research use only
S Series
SERVICE MANUAL

S-Series Service Manual Page 2 410087 Rev. B
Trademarks
Patented or patent pending and registered or registration-pending are trademarks of Covaris.
Registered names and trademarks used in this document, even when not specifically marked as such, are
not to be considered unprotected by law.
Information subject to change without notice
For Research Use Only
Not for use in diagnostic procedures
Publication P/N 410087
May 2011
Product covered by Patent No. US6, 719,449, US6, 948,843, and other pending applications
Copyright © 2011 Covaris, all rights reserved.
Covaris, Inc.
14 Gill St, Unit H
Woburn, Massachusetts
01801-1721 USA Printed in U.S.A.
UNIVERSAL PRECAUTIONS
Universal Precautions should be followed on all specimen samples, regardless of whether a sample is known to contain
an infectious agent. Laboratories handling specimen samples are advised to comply with applicable parts of the following
governmental and clinical standards, or their equivalent in the country of use:
•Centers for Disease Control (CDC), Universal Precautions for Prevention of Transmission of HIV and Other
Bloodborne Infections, published 1987, updated 1996
•Clinical and Laboratory Standards Institute (CLSI), GP17-A2 Clinical Laboratory Safety; Approved Guideline -
Second Edition, published 2004, ISBN 1-56238-530-5
•Clinical and Laboratory Standards Institute (CLSI), M29-A3 Protection of Laboratory Workers from
Occupationally Acquired Infections; Approved Guideline, Third Edition, published 2005, ISBN 1-56238-5674
•Occupational Safety and Health Administration (OSHA), 29 CFR 1910.1030 Bloodborne Pathogens
•International Standards Organization (ISO) 15190:2003, Medical Laboratories –Requirements for Safety

S-Series Service Manual Page 3 410087 Rev. B
Warnings
For safety of operating personnel:
Make sure that the equipment is properly grounded. DO NOT operate if it is not properly grounded.
The unit is equipped with a power plug appropriate for the destination country. DO NOT, under any
circumstances, remove the grounding prong from the power cord.
DO NOT attempt to operate the equipment with the Acoustic Assembly and sample cover in the UP
position or without a water bath; the acoustic system will not work. If there is any indication that
the Safety System is not functioning properly, DO NOT operate the equipment and contact Covaris
immediately.
If the equipment is used in a manner not specified by the manufacturer, the protection provided by
the equipment may be impaired.
To prevent damage to the equipment:
The instruments are designed to operate in ambient laboratory conditions e.g., 15 to 32C (60 to
90F). DO NOT operate the instrument in a cold room environment; the system is designed to
operate with a water bath and re-circulating heater/chiller apparatus to control sample temperature.
NEVER run a method without a water bath; this could damage the transducer. The instrument is
equipped with a water level sensor to protect the transducer and degassing pump. The system will
not allow the degassing pump to operate or the acoustic wave treatment to start unless an
adequate volume of water is detected.
Distilled or deionized water should be used to fill the water bath.
Empty the water bath and wipe it dry EVERY day with a lint-free cloth. DO NOT leave water in the
tank for an extended time as there is no water filtration or water cleaning system with the
apparatus.
Do not employ isopropyl alcohol, ammonia-based or abrasive cleaners on the water tank, as these
will damage the acrylic surfaces.
The Acoustic Assembly should be left in the UP position when not in use.
DO NOT load third party software onto the system without consulting with Covaris.

S-Series Service Manual Page 4 410087 Rev. B
Covaris S-Series Service Manual
Covaris S-Series Service Manual........................................................................................ 4
1Scope of This Manual................................................................................................. 6
2Safety and EMC Compliance Information ................................................................. 6
2.1 General Instrument Safety.................................................................................... 6
2.1.1 Acoustic Safety............................................................................................. 6
2.1.2 Safety and Electromagnetic Compatibility (EMC) Standards...................... 6
3Introduction................................................................................................................. 7
3.1 Transducer............................................................................................................ 7
3.2 Interlock Subsystem............................................................................................. 7
3.3 Degassing System ................................................................................................ 7
3.4 Control Electronics System.................................................................................. 7
4Maintenance and Repair ............................................................................................. 8
4.1 Recommended Daily Maintenance ...................................................................... 8
4.2 Troubleshooting ................................................................................................... 8
4.3 Diagnosis.............................................................................................................. 9
4.3.1 Water Bath and Degassing Issues................................................................. 9
4.3.2 Interlock Errors........................................................................................... 11
4.3.3 Communication Errors................................................................................ 12
4.3.4 Other Indicators .......................................................................................... 12
4.4 Repair Procedures .............................................................................................. 12
4.4.1 General: Removing the Covers................................................................... 12
4.4.2 Pump Replacement ..................................................................................... 14
4.4.3 Replacing the Water Sensor........................................................................ 16
4.4.4 Replacing the Transducer Assembly: ......................................................... 18
4.5 Diagnosing and Replacing Printed Circuit Boards: S1 & S2............................. 21
4.5.1 RF Generator board: ................................................................................... 22
4.5.2 S-Tuning board:.......................................................................................... 25
4.6 Diagnosing and Replacing Printed Circuit Boards: S220 Series ....................... 26
4.6.1 RF Power Board.......................................................................................... 27
4.6.2 Controller Board:........................................................................................ 31
4.6.3 Capacitor Reserve Board ............................................................................ 35
4.6.4 Match Network PCBA and Transducer...................................................... 37
4.7 Power Supplies................................................................................................... 39

S-Series Service Manual Page 5 410087 Rev. B
4.7.1 S1 / S2 Series.............................................................................................. 39
4.7.2 S220 Series.................................................................................................. 39
4.8 SonoLabTM Service Menus / Access.................................................................. 44
4.8.1 S1 / S2 Series: SonoLab 2........................................................................... 44
4.8.2 S220 Series: SonoLab 7.............................................................................. 44
4.9 Other Repairs...................................................................................................... 48
5Acoustic Power Testing Procedure........................................................................... 49
5.1 S1 / S2 Series...................................................................................................... 49
5.2 S220 Series......................................................................................................... 50
6Tools and Fixtures..................................................................................................... 51
7Installing SonoLab Software (Subject to Change).................................................... 52
7.1 S1 / S2 Series: SonoLabTM (Version 2).............................................................. 52
7.2 S220 Series: SonoLabTM 7.................................................................................. 53
8Appendix A –Spare Parts......................................................................................... 54
9Appendix B –Service Notes..................................................................................... 56
10 System Wiring Diagram ........................................................................................... 57
10.1 S1, S2 Series................................................................................................... 57
10.2 S220 Series..................................................................................................... 58

S-Series Service Manual Page 6 410087 Rev. B
1 Scope of This Manual
This manual is intended to provide Covaris service personnel the necessary information to
perform effective fault finding and corrective actions for the Covaris S-series Sample Preparation
instruments. These include the S1, the S2, S2x, S220, and the S220x.
The S220 Series instruments are a second generation design that incorporates upgraded
electronic circuit boards and more user-friendly SonoLabTM software. Most of the S220
mechanical components are similar (or identical) to the 1st generation S1/S2 series so this
Service Manual includes instruction for both versions, denoting differences where applicable.
The following definitions apply in this manual:
NOTE: Inconvenience only if disregarded –no damage or personal injury
CAUTION: Equipment damage may occur, but not personal injury.
WARNING: Personal injury may occur –DO NOT DISREGARD.
2 Safety and EMC Compliance Information
2.1 General Instrument Safety
2.1.1 Acoustic Safety
The Covaris S-Series instruments generate a focused high-power acoustic field in the
water bath. Potentially hazardous acoustic energy exists in the water bath, the entire
sample vessel (above and below the water level) and in the sample vessel cap. Service
personnel who run the instrument with the safety system defeated must not touch the
water bath, the sample vessel or the sample vessel cap.
WARNING: Service personnel who run the instrument with the safety system defeated
must not touch the water bath or the sample vessel.
2.1.2 Safety and Electromagnetic Compatibility (EMC) Standards
Safety:Meets Low Voltage Directive 73/23/EEC with Amendment 93/68/EEC.
Tested to EN/UL/CSA 61010-1:2004 “Safety Requirements for Electrical Equipment for
Measurement, Control and Laboratory Use, Part 1: General Requirements”
EMC: Meets EMC Directive 2004/108/EC. Tested to EMI emissions requirements for
Industrial Scientific or Medical (ISM) equipment EN55011:1998 + A2:2002 Class A
Group1 and EMC requirements - Electrical Equipment for Measurement, Control, and
Laboratory Use EN 61326-1:2005 Table 2,
EN61000-3-2:2004 and EN61000-3-3:1995 +A1:2001.

S-Series Service Manual Page 7 410087 Rev. B
3 Introduction
The Covaris Adaptive Focused Acoustics process works by sending converging
acoustic energy wave packets from a dish-shaped transducer to a small, localized
area. Mechanical energy is thus applied to the sample, without directly contacting the
sample. At low energy intensities, gentle mixing is affected. At high energy
intensities, intense shock waves result in DNA shearing. The S-series accomplishes
this via the following subsystems, under the control of the Covaris SonoLab software.
3.1 Transducer
The transducer converts an electrical signal into an acoustic signal. Specifically,
a burst of electrical sine-waves is converted into a series of acoustic pressure
waves. The transducer is focused such that the pressure waves converge at a
focal point inside the treatment vessel. The primary mechanism to process a
sample or compound is the growth and collapse of cavitation bubbles within the
acoustic focal zone, inside the sample vessel. The collapse of the bubbles
results in an intense, localized jet of solute acting upon the sample.
3.2 Interlock Subsystem
Safety interlocks prevent energizing of the transducer when doing so might
result in damage to the transducer or injury to operators.
3.3 Degassing System
In order for the acoustic process to function properly, the level of dissolved gas
in the water bath must be reduced. A positive-displacement degassing pump
pulls vacuum on an inlet tube submerged in the water bath. This inlet tube has 6
small holes through which the bath water enters. The sudden pressure drop
inside the tube causes dissolved gasses to come out of solution and form
bubbles. The water and the bubbles flow through the pump to the outlet tube
before the gas can re-dissolve in the water. The bubbles float to the surface and
vent to atmosphere. Simple!
3.4 Control Electronics System
The control electronics are mounted at the rear of the instrument enclosure, and
connect to components located in the treatment area via bulkhead connectors.
Both the S and S220 instruments have a 24 volt DC power supply for low
voltage and digital components of the system circuit boards. In the S1 and S2
instruments, the S Tuning board interfaces between the computer, the various
sensors, interlocks, and the RF generator circuit board. The S220 family
contains an RF Controller board that provides similar functions. The S220 board
analogous to the S RF Controller board is called the S220 RF Module. The
circuit boards used in the S220 are a newer design and permit more functionality
compared to the older S series.
S-Series Service Manual Page 8 410087 Rev. B
4 Maintenance and Repair
4.1 Recommended Daily Maintenance
At the start of each day, fill the water bath as follows:
4.1.1 Raise the acoustic bracket, and remove the bath.
4.1.2 Fill the water bath tank with distilled or de-ionized water only.
4.1.3 Slide the bath into position in the instrument, and lower the acoustic bracket.
At the end of the day, the bath should be emptied. Wipe down the bath and
transducer with a soft cloth or sponge.
4.2 Troubleshooting
The following table summarizes problems and their solutions. Refer to the text following the table for
detailed discussion of the corrective actions.
Symptom
Possible Cause
Check / Corrective Action
No power to instrument
(indicator light fails to come
on)
Line cord missing or faulty
Fuse in line entry module
24 volt power supply
Verify line cord is connected.
Replace fuse
S1/S2: Check Green LED2
on tuning board
S220: Check Green D1 on
Controller Board
Ineffective treatment,
possibly with loud buzzing
noise
Bath temperature too high
Contaminated bath
Bath not sufficiently
degassed
Insufficient acoustic power
Verify chiller operation.
Clean bath, change water,
and degas.
Check oxygen level w/DO
meter.
Run acoustic power test (see
Section 5).
No degassing bubbles
Degas inlet nozzle clogged.
Degas pump not running.
Motor decoupled from pump
Clean bath and degas pickup
tube
Verify water level & pump
operation
Treatment selected from
menu instead of button (see
software note below).
Stop and restart degassing
pump.
Excessive degassing bubbles
Inlet tube not seated. Leak in
degas pump tubing or fitting.
Verify inlet tube is inserted
past O-ring. Verify integrity of
tubing & connections.
Water level error
Insufficient bath water
Contaminated level sensor
Ambient light hitting sensor
Faulty sensor
Fill bath to indicator line.
Clean bath and level sensor.
Shield sensor from stray light.
Replace sensor.
Safety Interlock Error
Bath interlock problem
Verify bath position & that lid
is acoustic bracket is fully
down.

S-Series Service Manual Page 9 410087 Rev. B
Communication Error
Corrupted USB drivers
Tuning board switch settings
Defective USB cable
USB cable too long
Reload drivers
Verify correct switch settings.
Replace USB cable.
Do not exceed 2 meters
length.
Table 1, Troubleshooting
4.3 Diagnosis
4.3.1 Water Bath and Degassing Issues
4.3.1.1 Buzzing Noise
A loud buzzing noise indicates that cavitation is occurring on the outside of the treatment
vessel rather than on the inside. Cavitation on the outside of the vessel prevents the
acoustic energy from getting through the vessel to the sample. In order for the water bath
to effectively conduct the energy to the sample it must be cold, degassed, and clean.
4.3.1.2 Degassing
Degassing takes a minimum of 20 minutes. Check the dissolved oxygen level with a
dissolved oxygen meter (see list of tools and equipment). The dissolved oxygen level
should be 3 parts per million or less in room temperature water, less than 4 ppm at
temperatures below 10 degrees C. While oxygen is not the only gas dissolved in the
bath, it is not practical to measure them all. Covaris has determined that a dissolved
oxygen reading within the limits described above indicates that the total dissolved gas is
sufficiently low to allow satisfactory operation of the acoustic process.
If the pump is running, but there are no bubbles coming from the outlet tube, the small
holes in the inlet tube may be clogged. Raise the transducer arm in the service position
and slide out the inlet tube. Unblock the holes by rinsing, or, if necessary, by using a fine
wire.
Figure: End of inlet tube showing small openings.
Once the tube is cleaned, slide it into the bracket, working it past the o-ring
seal until it bottoms. A tube that is not seated properly will result in excessive
bubbling.

S-Series Service Manual Page 10 410087 Rev. B
4.3.1.3 Contamination
The water bath can become contaminated from the growth of bio-film in the tank or from
debris on sample vessels. Contamination does not have to be visible to affect processing.
If there is any doubt about the cleanliness of the water bath, it should be changed. Wipe
down the inside of the tank and all submerged surfaces, including the transducer, with a
soft, lint-free cloth before refilling with distilled or de-ionized water.
4.3.1.4 Bath Temperature
A chiller is required to remove heat from the acoustic treatment and the degassing
system. For high-power operation, the bath temperature should be at or below 20
degrees C. To ensure this, we recommend that the chiller water temperature be 14
degrees C or lower. Covaris can supply or specify an appropriate chiller.
When developing a treatment in SonoLab (S1/S2 or S220), a maximum allowable water
bath temperature is programmed for each Method. If the water temperature exceeds this
value during operation, the acoustic treatment will automatically be disabled. Higher
power treatments will result in increased bath water temperature. If appropriate for a
given sample, this maximum bath temperature value can be increased by editing the
method in SonoLabTM.
Figure: Maximum Bath Temperature specified in SonoLabTM 7 for the S220 Series
4.3.1.5 Position of Treatment Vessel
Check to see that the 3 flat-head screws that attach the sample cover assembly are tight.
Tighten each a little at a time to evenly compress the O-ring under the cover assembly.
Check that the collar on the tube holder is at the proper height. Some tube holders have
a white line to show the correct collar position.
4.3.1.6 Water Level Errors
If water level errors are not resolved by cleaning the sensor and eliminating any sources
of stray ambient light, the sensor should be replaced. Follow the procedure indicated in
this manual.
4.3.1.7 Acoustic Power Issues
If acoustic activity is observed in the sample vessel, follow the acoustic power test
procedure described in Section 5 to verify that acoustic components are operating
properly.

S-Series Service Manual Page 11 410087 Rev. B
No Acoustic Power: No activity is observed in the treatment vessel. The instrument
operates otherwise (i.e. the water bath temperature updates, able to turn degas pump on
and off).
S1/S2
RF Board: The RF board may be damaged. Refer to section 4.4.11.
EEPROM calibration data incorrect: Perform power test in section 5, and set
cal factor to appropriate value.
Configuration file missing:The configuration file should be found at:
C:\Covaris\S-Series v2.xx\Program\Sonolab.cfg
Note: If the configuration file is missing, the system will create one.
However, most of the parameters will be 0.
Transducer:A mechanical or electrical failure of the transducer may cause
weak acoustic output. If the on-screen power meter shows high power but little
or no activity is observed in the treatment vessel, the transducer many have
failed.
S220
48V Power Supply: Acoustic treatments require the presence of +48V to the RF
Power Board. Ensure proper connections are in place between +48V supply and
Capacitor Reserve Board (J1), and between Capacitor Reserve Board (J2) and
RF Power Board (J4). Presence of +48V can also be verified on the RF Power
Board, Capacitor Reserve Board, and 48V Power Supply as indicated in
appropriate Service Manual sections.
RF Power Board: The RF Power board may be damaged. If power output is
less than 1-2 Watts for treatments with expected output greater than 10W, this
may indicate the RF Drive Circuitry is not functioning as intended. RF Board
replacement may be required.
Calibration Data Missing or Incorrect: Calibration for the S220 Series is
performed on each RF Board prior to installation in a device. Calibration values
can be reviewed in SonoLabTM by accessing the Maintenance > RF Power Board
menu location. Calibration data should be visible in a grid format. If calibration
values are not visible (or if values appear inaccurate) within this menu, Covaris
Technical Support should be contacted.
Transducer: A mechanical or electrical failure of the transducer may cause
weak acoustic output. If the on-screen power meter shows high power but little
or no activity is observed in the treatment vessel, the transducer many have
failed.
4.3.2 Interlock Errors
There are two magnetic safety interlock switches on the pivot assembly. One, at the front
edge, is actuated by a magnet in the cover assembly when the cover is lowered. The
other, under the left front edge of the pivot assembly is actuated by a magnet in the water
tank. The water tank has two magnets so that it will still work if installed backwards.

S-Series Service Manual Page 12 410087 Rev. B
A process will not run if the water bath is not installed straight on the base plate and a
switch has been actuated at least once since power up, guarding against the possibility
that a switch might stick closed.
4.3.3 Communication Errors
In the event of communication errors, verify that the problem is not a defective USB
cable. If the instrument’s electronics have been recently opened, verify that all the
switches on the S Tuning board are set correctly (S1/S2).
4.3.4 Other Indicators
S1 & S2
4.3.4.1 Power Supply
The green LED2 on the S Tuning Board indicates that the main 24 volt DC
supply, and the derived, on-board 12V, 5V, and 3.3V supplies, is functional.
4.3.4.2 Processor
The blinking yellow LED on the S Tuning board indicates normal operation of the
processor.
4.4 Repair Procedures
4.4.1 General: Removing the Covers
Note: Applicable for S1/S2 and S220 Series Models
Pump Cover

S-Series Service Manual Page 13 410087 Rev. B
Remove 4 button head cap screws with 2mm hex wrench
Caution: Do not cross-thread these small screws during reassembly.
Electronics Cover
Pump cover must be removed first.
Remove 5 screws in the front and 6 screws in the back using a #1 Phillips driver.
Pivot assembly cover
Remove 3 flat head screws that hold the sample cover assembly in place.
Lift off the sheet-metal pivot assembly cover.
Caution: When replacing the sample cover assembly, tighten the three flat head screws
evenly in stages to compress the O-ring underneath the cover. Failure to completely
tighten the screws will affect the tube holder position in the instrument.

S-Series Service Manual Page 14 410087 Rev. B
4.4.2 Pump Replacement
The Pump assembly is replaced as a kit, including the two hoses (P/N 500070). Do not
attempt to replace the pump head without replacing the motor.
•Remove pump cover by loosening and removing 4 hex screws. (See Above)
•Remove sample pivot cover (See Above) and slide acoustic cover off device.
•Remove upper skirt on S220 via 2 screws with Philips Screwdriver.
•Carefully disconnect 2 inner tubing connections between pump and manifold .
Acoustic Cover
Upper Skirt Screws

S-Series Service Manual Page 15 410087 Rev. B
•Disconnect 6-pin Pump connector from Connector Panel on front of device chassis.
•Unscrew 4 screws securing pump assembly to spacers and remove from the device.
•Re-install new Degas Pump by reversing steps indicated.
•Re-program new Pump Serial Number into device Flash memory using ‘Service’ login
access in SonoLab (Updating Unit Information after Repair).
•S220 ONLY:
oIf a ferrite clip is present on degas pump that was removed, unclip the ferrite and
install onto the degas pump wiring for the new pump.
oThe ferrite should be installed just above the tie wrap on the right side of the
chassis beneath the pump cover.

S-Series Service Manual Page 16 410087 Rev. B
Figure: Degas Cable with clip-on Ferrite installed
4.4.3 Replacing the Water Sensor
Remove the curved pump cover by removing the two button head cap screws on each side.
Disconnect the water level sensor cable from its jack on the left side of the bulkhead, and cut the
tie-wraps dressing the cable to the wire harness.
Raise the transducer bracket and lid assembly. The water level sensor is behind and retained by
the stainless steel light shield. See the figure below.
Figure: Light shield moved, showing water level sensor

S-Series Service Manual Page 17 410087 Rev. B
Remove the two button head cap screws which secure the light shield to the manifold, and lift the
water level sensor from the manifold. See the figure below. It is not necessary to remove the
manifold from the S Series Instrument. The manifold photo is for clarity.
Reverse the steps to install the new sensor.
Figure: Manifold Assembly Showing Light Shield and Water Sensor
Button head screws
Water level sensor

S-Series Service Manual Page 18 410087 Rev. B
4.4.4 Replacing the Transducer Assembly:
The transducer and matching network must be replaced as a set, and configuration
parameters for the new set must be entered into the system’s EEPROM.
4.4.4.1 Remove the pump cover and the pivot assembly cover.
4.4.4.2 Remove the upper and lower curved sheet-metal skirts (see figure below), noting
the cable routing, to prevent cable damage during reassembly.
Figure: Transducer bracket assembly showing curved skirts and cable routing
4.4.4.3 Cut the cable tie and disconnect the transducer cable from the BNC connector on
the bulkhead.
4.4.4.4 Remove the six flat-head nylon screws holding the transducer to the bracket.

S-Series Service Manual Page 19 410087 Rev. B
Figure: Removing nylon screws securing transducer to bracket
4.4.4.5 Remove the transducer and pull the cable through the bracket.
4.4.4.6 Insert the plastic insulator between the transducer and the bracket. This step is very
important to prevent corrosion of metal parts in the water bath.
Figure: Insulator to be placed between transducer and bracket
Plastic Insulator

S-Series Service Manual Page 20 410087 Rev. B
4.4.4.7 Attach the transducer with six flathead nylon screws. Be very careful not to over-
tighten and strip the screws.
4.4.4.8 Dress the cable and reinstall upper and lower curved skirts.
4.4.4.9 Remove the nut securing the bulkhead BNC connector, using a 9/16 inch
wrench.
4.4.4.10 Remove the electronics cover.
S220 Series: Continue to Replacement of Match Network PCBA and Transducer
S1/S2: Continue steps below
4.4.4.11 Remove the four screws securing the matching network to its mounting.
4.4.4.12 Unplug the network’s cable from the RF generator board (RF Power Board on
S220), and remove the matching network.
4.4.4.13 Reverse steps 4.4.10.10 through 4.4.10.13 to install the new matching network.
4.4.4.14 Replace the water bath, start the software, and degas the bath for thirty minutes.
4.4.4.15 Type “Ctrl-Shift-F2” to enter the configuration screen.
4.4.4.16 Click the “EEPROM” button, and enter the password “olympia” when prompted.
4.4.4.17 Enter the new transducer’s “Center Frequency” in the field provided.
4.4.4.18 Set the “Calibration Factor” to an initial value of 65.
4.4.4.19 Click the “Write EEPROM” button, then click the “Close” button to return to the
previous screen.
4.4.4.20 Click “Close” again to return to the main S2 screen.
4.4.4.21 Execute the field power test:
Duty Cycle = 20%
Intensity = 10
Cycles per Burst = 100
Time = 60 seconds
Perform the above using empty 13x65 tubes, with the water bath at
approximately 15 degrees C.
Run the test multiple times, with different tubes, or rotating one tube two or three
times. Note the power levels displayed in SonoLab and average these values.
4.4.4.22 Return to the EEPROM screen and adjust the “Calibration Factor” field to
achieve an average of 71 watts. Raising the calibration factor will increase the
displayed power. It may be necessary to repeat the test and adjustment steps a
few times to obtain the correct calibration factor.
This manual suits for next models
3
Table of contents
Other Covaris Laboratory Equipment manuals

Covaris
Covaris E220 evolution User manual

Covaris
Covaris AFA-TUBE 520292 User manual

Covaris
Covaris ML230 Manual

Covaris
Covaris M220 User manual

Covaris
Covaris microTUBE-500 User manual

Covaris
Covaris E Series User manual

Covaris
Covaris E220 evolution User manual

Covaris
Covaris M220 User manual

Covaris
Covaris tissueTUBE User manual

Covaris
Covaris E220 evolution User manual