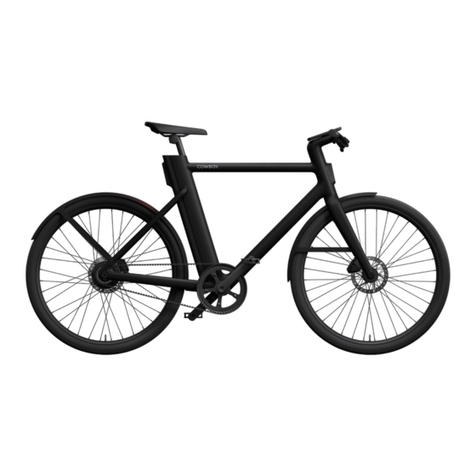
Cowboy Classic User manual

1
A guide
for riders
User Manual

2
Welcome to Cowboy.
Your new bike has arrived with
a new way to move in the city.
As you map your own path we’ll
be there to power you forward,
open to the road ahead.

3

Cowboy S.A.
67 Rue de la Régence
1000 Brussels, Belgium
cowboy.com

6

7
This guide will get your new
bike set up and ready to ride
The product you have might differ
from what is reflected in the images
in this manual
8
9–23
24–29
34–35
36–37
38–39
40–41
42–43
30–33
What’s in the box
The set-up
Know your bike
The app
Accessories
Before you ride
Battery care
Bike maintenance
Built for any season
Get Ready
Connect
Ride
Contents

00 What's in the box
Battery chargerBattery keys x2 Belt spanner x1
or
Pedals x2
L R
Allen key 5Allen key 3 Allen key 6Butterfly Allen key 4
8

9
The set-up
All the Cowboy essentials are in
your hands. Follow the instructions,
Classic
01
09
1112
05
10
04
02
03
07
08
06
and in just a few steps you'll
have your bike put together.

10
Cruiser ST
* Included with Performance model
08
01 09
11
12
05
10
04
02
03
07
06
The essentials
01 Rear light
02 Removable battery
03 Mudguards
04 Rear hub motor
05 Puncture-resistant tyres
06 Carbon belt drive*
04

11
07 Pedals
08 Hydraulic disc brakes
Cruiser
08
01 09
11
12
05
10
04
02
03
07
06
09 Front light
10 Cockpit
11 Frame
12 Adjustable saddle

12
01 Handlebar
90°
Allen key 3
01 Check
Your bike comes with the handlebar
parallel to the wheels and frame.
03 Secure
Use Allen key 3 to tighten the two
screws securely as shown.
This will keep your handlebar in
place. Be sure to use the short
end of the Allen key for the most
tightening force, then test it to
make sure it’s fully secure by
blocking the front wheel between
your legs and trying to move the
handlebar from left to right.
02 Rotate
Turn the handlebar 90° clockwise
until it’s at a right angle to the rest
of the bike. It’s important that the
front brake disc marked in the
diagram ends up on the left side
of the wheel.
If you see the disc brake is sitting
incorrectly on the right-hand side,
turn the fork in the anticlockwise
direction to rectify.
Front
brake disc
12

13

02 Brakes
14
Allen key 5
45°
Allen key 5
02 Turn up
Turn the brake handles and grips up
until the brake handles are at a 45°
angle. Hold them in place. Just as
you can set your brake handle posi-
tion, you can also rotate the grip
position to be more comfortable.
01 Loosen
When you ride, the brake levers
should be fixed on the handlebar
at a 45° angle from the ground.
Check the position of your brake
levers. If they are already at a 45°
angle, they do not need adjusting.
If the brake levers are pointed
down towards the ground as in the
illustration below, then first loosen
the screw under each brake using
Allen key 5 as shown.
03 Tighten
Tighten the screw as shown using
Allen key 5. Make sure it’s nice and
tight so that the brake levers don’t
rotate, taking care to not overtighten.
For brake maintenance see page 40.

15

16
03 Pedals
16
L R
01 Know right from left
The right and left pedals are
different. You can tell them apart
by their position in the box and
the three small grooves on the left
pedal axle only. You will also find
the stamped ‘R’ and ‘L’ on the end
of the axle.
03 Tighten up
Insert the shorter end of Allen key
6 into the screw head on the side
of the pedal closest to the frame.
Tighten firmly.
02 Screw in
Take the right pedal and screw it
in clockwise as far as you can by
hand. It should screw in easily. If
it doesn’t, stop right away as you
may be crossthreading the screw.
Make sure the pedal is properly
aligned before trying again.
Repeat these steps for the left pedal,
screwing anticlockwise this time.
Allen key 63 grooves indicate left pedal
16

17

04 Saddle
Butterfly Allen key 4
02 Take out the battery
To change the saddle height,
you’ll first need to take out the
battery using one of the battery
keys provided.
03 Adjust the height
Loosen the saddle by turning
the Butterfly Allen key 4 in the
two holes as shown. Then raise
or lower the saddle to where you
want it, being careful not to raise
it higher than the depth warning
mark indicated on the saddle post.
Use the Butterfly Allen key again
to secure it in place.
01 Find the right position
Let’s work out your perfect saddle
height. Sit on the bike and move the
pedal around with your foot until it’s
closest to the ground in the 6°clock
position. You’ll know the saddle is
the right height when your leg is just
slightly bent as shown.
18

19

20
05 Cockpit
20
45°
01 Dock your phone
Put a Quad Lock case on your
phone. You can buy one suitable
for your phone separately in the
Cowboy webshop. Position your
phone at 45° and slot the phone
over the mount, making sure the
two are aligned. Rotate the phone
so it’s upright at 0° as shown.
It should click right into place.
Always check that your phone has
clicked securely before you ride.
03 Undock your phone
To undock your phone, simply turn
it back to 45° and you can take it off
the mount. Be careful not to leave
your phone unattended on the bike
as anyone can detach and take it.
02 Charge up
The Performance model comes
with wireless charging. If your
phone is compatible, it will charge
automatically when docked with the
bike turned on.
Important note: Don't keep anything
metal such as coins and credit cards
between your phone and the charger.
Don't attempt to mount anything heavier
than a smartphone. Consult a physician
before using if you have an electrical
device (e.g. pacemaker).
Incorrect position
Correct position
45°
20
This manual suits for next models
2
Table of contents
Other Cowboy Bicycle manuals

