BH GENERAL BIKE User manual

ES Instrucciones de uso 001
EN
(UK) Instructions for use 030
FR Notice 056
PT Instruções de uso 082
DE Bedienungsanleitung 108
IT Istruzioni per l’utilizzo 134
BH Bike
manual_17_ES.indd 1 26/05/2017 11:39:49
INSTRUCTIONS FOR USE

30
DE
AR
ZH
ZH
DK
EN
(UK)
EN
(US)
FR
EN
(UK)
IT
JA
KO
NL
RU
SV
CE
UK
Frame:
Top tube
Down tube
Seat tube
Chain stay
Seat stay
Saddle
Seat post
Seat post
clamp
1
2
3
4
5
2
3
4
5
1
Rear shock
Rear brake rotor
Rear
cassette
Rear derailleur
Chain
Chain ring
Crank arm
Suspension fork:
Headset
Handle
Bar
Brake lever
Gear change lever
Brake rotor
Brake caliper
Wheel:
Quick-release
Tyre
Spoke
Rim
Hub
manual_17_EN.indd 30 26/05/2017 11:40:11

31
DE
AR
ZH
ZH
DK
EN
(UK)
EN
(US)
FR
EN
(UK)
IT
JA
KO
NL
RU
SV
CE
UK
Frame: Fork:
Top tube
Down tube
Seat tube
Chain stay
Seat stay
1
2
3
4
5
1
2
3
4
5
Saddle
Seat post
Seat post
clamp
Brake
Cassette
Front derailleur
Rear derailleur
Chain
Cam
Plate
Power
Brake lever
Gear change
Steering set
Brake
Rueda:
Quick-release
Tyre
Spoke
Wheel
Hub
manual_17_EN.indd 31 26/05/2017 11:40:13

32
DE
AR
ZH
ZH
DK
EN
(UK)
EN
(US)
FR
EN
(UK)
IT
JA
KO
NL
RU
SV
CE
UK
Frame: Suspension fork:
Saddle
Seat post
Seat post
clamp
Rack
Mudguard
Battery
Brake
Cassette
Rear derailleur
Chain
Motor / controller Unit
Cam
Plate
Power
Screen and control
unit
Brake lever
Gear change
Steering set
Disc brake
Brake clamp
Wheel:
Quick-release
Tyre
Spoke
Rim
Hub
Top tube
Down tube
Seat tube
Chain stay
Seat stay
1
2
3
4
5
1
2
3
5
4
manual_17_EN.indd 32 26/05/2017 11:40:13

33
DE
AR
ZH
ZH
DK
EN
(UK)
EN
(US)
FR
EN
(UK)
IT
JA
KO
NL
RU
SV
CE
UK
Frame:
Saddle
Seat post
Brake
Cassette
Rear derailleur
Chain
Plate
Cam
Pedal
Power
Handlebar
Brake lever
Gear change
Steering set
Brake
Fork
Wheel:
Safety nut
Tyre
Spoke
Wheel
Hub
Top tube
Down tube
Seat tube
Chain stay
Seat stay
1
2
3
4
5
1
2
3
4
5
Fork:
manual_17_EN.indd 33 26/05/2017 11:40:14

34
DE
AR
ZH
ZH
DK
EN
(UK)
EN
(US)
FR
EN
(UK)
IT
JA
KO
NL
RU
SV
CE
UK
INFORMATION.
Congratulations on the purchase of your new BH bicycle! This
instruction manual contains information about safe use, handling
and maintenance of your BH bicycle. In addition, there are warnings
about the hazards caused by inappropriate use..
We ask you to read these instructions carefully before using your
bike for the rst time.
For all maintenance and repair work, contact your local BH shop or
trusted cycle workshop.
Protocol for delivery and bicycle information
You should register the bicycle to request the guarantee (see
guarantee document that comes with the bicycle). So the
identication is easier, e.g. in the case of theft or loss, you should
also carefully include all the data about the bicycle in the delivery
protocol. You will nd the frame number of your BH bicycle on the
lower part of the bottom bracket.
We will respond to any questions via our customer service line:
Bike Service and BH customer service line
E-mail: [email protected]
With the purchase of our bicycle, you have decided for a high-quality
product. Experts using carefully developed components have
designed your new bicycle. Your BH workshop has assembled and
has checked that it functions correctly. This way, you will get on the
bicycle satised and in safety from the rst ride.
In this manual, we have compiled for you many suggestions about
the handling of your bicycle and a large amount of interesting ideas
about the technology of bicycles, their maintenance and their care.
We request that you carefully read this leaet. It is worth it, even
though you have been riding bicycles all your life. Over the last
years, bicycle technology has evolved in a great way. Before you get
started with your new bicycle for the rst time, you should carefully
read the chapter «Before making your FIRST trip».
To enjoy your ride, before sitting on the saddle, you should perform a
minimal operational check as described in the chapter called «Before
EACH trip». This manual cannot provide you with the knowledge of
a bicycle mechanic. Not even a manual as thick as dictionary can
contain all the possible combinations of bikes and parts available.
Therefore, this manual is focussed on the bicycle you have just
acquired and on the usual parts and shows you the most important
warnings and suggestions.
When performing maintenance work and thorough repairs, you
should take into account at all times that the instructions and
suggestions exclusively apply to this bicycle.
These suggestions are not applicable to all bikes. The work
described does not completely apply to a multitude of models
and variations. We ask you to take into account at all times the
instructions from the supplier of parts that your BH workshop has
provided.
Take into account that the instructions can be followed by anyone
with experience or that is somewhat talented. Some work can
require additional special tools or additional instructions.
In the interest of your own safety, you should not suppose too
much. If you are not completely sure or you have any doubts,
contact your local BH workshop!
Before getting started, we would like to indicate a few things that
are very important for us as cyclists: Never ride your bicycle without
an adequate helmet or without eye protection, always try to use
adequate clothing for cycling, or at least close-tting trousers, and
suitable shoes that allow your feet to grip the pedals or “clip-in”.
manual_17_EN.indd 34 26/05/2017 11:40:14

35
DE
AR
ZH
ZH
DK
EN
(UK)
EN
(US)
FR
EN
(UK)
IT
JA
KO
NL
RU
SV
CE
UK
On the road, always pay attention and take into account trafc
regulations to avoid putting yourself and others at danger.
This manual cannot teach you how to ride a bicycle. When you ride
a bicycle, you should be aware that this is a potentially hazardous
activity and that the cyclist should always beobservant and in
control.
Like all other sport, you can also suffer injury riding a bicycle. When
you get on a bicycle, you should be aware of this risk and accept
it. Always take into account that a bicycle is not equipped with
the typical safety devices as vehicles, like bodywork or airbags.
Therefore, you should cycle with precaution and respect those
around you, road users, pedestrians etc. Never cycle under the
effects of medicines, drugs or alcohol, or if you are tired. Never ride
at any time with someone else on the bicycle and always keep your
hands on the handlebar.
Consider the legal regulations regarding the use of bicycles when
not on the road. These regulations are different in each country.
Respect nature when riding through woods or elds. Always
exclusively ride on signposted and protected tracks and streets.
Firstly, we would like you to be familiarized with the parts of your
bicycle. To do that, unfold the cover of this instruction manual. Here
are three examples of bicycle describing all the important parts.
While you are reading the manual, leave this cover open. That way
you can rapidly nd the parts indicated in the text.
We wish you a good ride.
The BH team
www.bhbikes.com
We reserve the right to themodication of the technical information
related to the data and illustrations of this instruction manual. The
editor, writer and any other third party that has contributed to this
leaet are exempt of all responsibility and possible damages derived
from the same that may have been caused, whichever type they are.
© The reprinting, translation and reproduction or other economic
use, e.g. on electronic means, including summaries, without the
previous written consent of the author and the editor is prohibited.
March 2017 edition.
manual_17_EN.indd 35 26/05/2017 11:40:14

36
DE
AR
ZH
ZH
DK
EN
(UK)
EN
(US)
FR
EN
(UK)
IT
JA
KO
NL
RU
SV
CE
UK
Information. 433
1 Greetings. 437
1.1 Purpose of this manual . 437
1.2 Responsibility. 437
1.3 Safety requirements. 437
1.4 Table of maximum body weight permitted. 439
2 Ride safely. 440
2.1 Brake system. 440
2.2 Wear a helmet. 440
2.3 Regulation about riding bicycles. 441
2.4 Be prudent when cycling during low lighting levels. 444
2.5 Keep your bicycle in perfect condition. 445
3 Warning instructions for use. 442
3.1 Before making your rst trip. 442
3.2 Before each trip. 442
3.3 After a fall. 443
3.4 Normal maintenance. 444
3.5 Saddle height and adjustment. 444
3.6 Torque limits for threaded joints. 445
3.7 Correct gear changing technique. 555
3.7.1 Traditional gear change. 445
3.7.1 Internal gear change. 445
3.8 Cleaning. 445
4 Basicconguration. 446
4.1 Installation of the pedals. 446
4.2 Installation of the handlebar. 446
4.2.1 Aheadset® Steering set settings . 446
4.2.2 Adjustment of the handlebar with
adjustable stem. 447
4.3 Assembly and disassembly of the wheels . 447
4.3.1 Quick release wheel system. 444
4.3.2 Pass through axles wheel system . 444
4.3.3 Nut xed wheel system 444
4.4 Saddle adjustment . 447
5 Brake system. 448
5.1 Function and wear. 448
5.2 Rim braking systems. 448
5.3 Disc braking systems. 448
6 Gearsystem. 449
6.1 Assembly of the derailleur. 449
6.1.1 Lower limit adjustment . 449
6.1.2 Upper limit adjustment . 449
6.2 Gear cable tension adjustment. 449
6.3 Rear gear adjustment . 449
6.3.1 Gear movement adjustment . 449
6.3.2 Gear adjustment . 450
6.4 External gear system. 449
7 Tyres. 451
7.1 Tyre pressures. 451
8 Suspension. 451
8.1 Suspension forks. 451
8.2 Rear suspension. 452
9 Spareparts. 453
9.1 Replacement of parts subject to wear. 453
10 Maintenance and repairs schedule. 455
INDEX
manual_17_EN.indd 36 26/05/2017 11:40:14
37
DE
AR
ZH
ZH
DK
EN
(UK)
EN
(US)
FR
EN
(UK)
IT
JA
KO
NL
RU
SV
CE
UK
1 GREETINGS.
1.1 Purpose of this manual.
This manual should help you to carry out maintenance works and
adjust the settings of your bicycle. Read this manual before using
your bicycle for the rst time to assure its works in optimal fashion
and has a long useful life. If your bicycle is equipped with any
additional accessory whose operation and assembly is not described
in this manual, follow the instructions from the manufacturer of the
accessory supplied with your bicycle.
Especially take into account the texts indicated with these symbols:
This symbol means that your health or life may be at danger
if you do not comply with the instructions given or dened
processes.
This symbol refers to information that requires special
attention, such as adjustments or periodical maintenance.
When you come across this symbol, you should consult the
instructions from the manufacturer of the corresponding
part to avoid damage to your bike or to the environment.
1.2 Responsibility.
In the case of any doubt regarding the measures described in
this manual, contact your local BH dealer. The owner is solely
responsible for non-compliance of the instructions described in this
manual. We recommend that you allow your local BH dealer perform
the maintenance of your bicycle..
1.3 Safety requirements.
There is a sticker on the frame of your bicycle indicating the
applicable safety standards.
Depending on the type of bicycle, the standard indicated on the
mentioned sticker will be one of the following:
- Children’s’ bicycles: ISO 8098
- Touring, mountain, race and young adult’s bicycles ISO 4210
- Pedal-assist bicycles (PABs): EN 15194
- BMX Bicycles: EN 16054
ISO8098:Children’sbicycles
This international standard species safety and performance
requirements and test methods for the design; assembly and testing
of fully assembled bicycles and sub-assemblies for young children.
It also provides guidelines for instructions on the use and care of the
bicycles.
This regulation is applicable to bicycles with a maximum saddle
height of more than 435 mm and less than 635 mm, propelled by a
transmitted drive to the rear wheel.
This standard is not applicable to special bicycles intended for
performing stunts (e.g. BMX bicycles).
ISO4210Touring,mountain,raceandyoungadults’bicycles
This standard species terms and denitions related to safety and
performance requirements for the design, assembly, and testing of
bicycles and sub-assemblies having saddle height as given in the
attached Table.
manual_17_EN.indd 37 26/05/2017 11:40:14

38
DE
AR
ZH
ZH
DK
EN
(UK)
EN
(US)
FR
EN
(UK)
IT
JA
KO
NL
RU
SV
CE
UK
This standard does not apply to special types of bicycle, such as
delivery bicycles, special bicycles intended for performing stunts
carried out by specialists, tandems, BMX bicycles and bicycles
designed and equipped for severe use in competitions.
Dimensions in millimetres
EN15194:Electricallypowerassistedcycles.(EPACs)
This standard is intended to cover electrically power assisted cycles
with a maximum continuous rated power of 0,25 kW, of which the
output is progressively reduced and nally cut off as the vehicle
reaches a speed of 25 km/h, or sooner, if the cyclist stops pedalling.
This standard species requirements and test methods for the
design and assembly of electrically power assisted cycles and sub-
assemblies for systems having a voltage up to and including 48 VDC
or integrated a battery charger with a 230 V input.
It also species requirements and test methods for engine power
management systems, electrical circuits including the charging
system.
EN16054:BMXBicycles
This standard species safety and performance requirements
for the design, assembly and testing of BMX bicycles and sub-
assemblies intended for use in any type of location such
as roads and/or tracks and/or ramps. It applies to specialised types
of bicycle designed and equipped for activities such as acrobatic
ground manoeuvres, stunting and aerobatic manoeuvres and lays
down guidelines for instructions on their use and care.
It applies to BMX bicycles on which the saddle height can be
adjusted to provide a minimum saddle height of 435 mm or more.
It applies to:
a) Category 1: BMX designed for a rider mass of 45 kg or less
b) Category 2: BMX designed for a rider mass more than 45 kg
It does not apply to BMX bicycles for use in sanctioned competition
events.
Warning: Use of your bicycle for an intention other than that
for which it was designed can cause serious and even
mortal accidents. In the case of bicycle for children, make
sure that the children are well aware of how to handle a
bicycle, especially the braking system.
Warning: In some countries, like the United Kingdom, the
brake situated on the right of the handlebar activates the brake
of the front wheel and the brake situated on the left activates
the brake of the rear wheel. Before using the bicycle for the rst
time, check the relation between the brake levers and the
wheels.
Attention: Like all mechanical parts, the parts of your bicycle
are subject to wear. The different parts and materials can react
to wear and fatigue in different ways. When the useful life of a
part has passed, it can suddenly break and cause injury to the
cyclist. Cracks, scratches and wear of colours in the most used
areas indicate that the product has exceeded its useful life and
should be changed.
Type of
bicycle
Tou ri ng
bicycle
Bicycles for
young adults
Mountain
bicycle
Racing
bicycle
Maximum
saddle
height
635 or more 635 or more
and less
than 750
635 or more 635 o more
manual_17_EN.indd 38 26/05/2017 11:40:14

39
DE
AR
ZH
ZH
DK
EN
(UK)
EN
(US)
FR
EN
(UK)
IT
JA
KO
NL
RU
SV
CE
UK
1.4 Table of maximum body weight permitted.
Type of bicycle Maximum weight
allowed(Bicycle+
Cyclist+Equipment)
Maximum
equipment
weight
Touring bicycle 155 kg (341,7 lb)
Follow the
instructions
leaet of the
rack
Children’s bicycles
with dimensions of:
14” / 16” / 18”
20” / 24”
65 kg (143,31 lb)
95 kg (209,4 lb)
Mountain bicycle 155 kg (341 lb)
Racing bicycles 155 kg (341 lb)
Foldable bicycles 145 kg (319,6 Ib)
Electronically assisted
bicycles
165 kg (363,7 Ib)
2 RIDE SAFELY.
2.1 Brake system.
A bicycle should have at least two independent operational brakes,
one for the front wheel and another for the rear wheel. The type of
brake is not regulated; there are wheel brakes, drum brakes and disc
brakes.
2.2 Wear a helmet.
ALWAYS wear a HELMET and when you use your bicycle on public
roads ALWAYS use the LIGHTING SYSTEMS supplied with the
bicycle.
2.3 Regulation about riding bicycles.
The majority of States have specic regulations for cyclists. Your
cycling clubs, or territorial Cycling federation or trafc department
of your area, should be able to provide you with information in that
respect.
2.4 Be cautious when cycling during poor/ low
light conditions.
Your bicycle is fully equipped with reectors, keep them clean and in
their position. Although reectors are to let you be seen, they do not
illuminate. Use a light at the front and another rear one when there is
poor/low light condition.
2.5 Keep your bicycle in perfect conditions.
Las bicicletas no son indestructibles: como cualquier máquina, cada
Bicycles are destructible: like any other machine, each part of the
bicycle has a limited useful life.
High-level bicycles need greater care and inspections that are more
frequent.
manual_17_EN.indd 39 26/05/2017 11:40:15

40
DE
AR
ZH
ZH
DK
EN
(UK)
EN
(US)
FR
EN
(UK)
IT
JA
KO
NL
RU
SV
CE
UK
3 WARNINGINSTRUCTIONSFOR
USE.
3.1 Beforemakingyourrsttrip.
1. 1. Only use the bicycle for its designed intention, otherwise,
there is a risk that the bicycle is not sufcient and can fail. Falling
hazards!
2. 2. Are you familiarized with the braking system? Check that
the front wheel brake is activated with the same lever you are used
to (right or left). If that is not the case, you should be accustomed to
the new situation, because if you unwillingly activate the front wheel
brake, you could cause a fall. You can also ask your local BH dealer
to modify the brake lever.
Modern brakes are much improved with greater braking effect.
So try your brakes on a at anti-skid surface off the road to get
accustomed to them.
You will nd more information in the section denominated
«Brake system»
Take into account that the braking distance is greater when
cycling with a handlebar with couplings. This position
impedes clear activation of the brake levers.
3. 3. Do you know the transmission system well and how it
works? If necessary, get familiarized with the new system on a
trafc-free road.
You will nd more information in the section titled
«Traction»
4. Are the saddle and handlebar adjusted correctly (height and
reach)? Check that you can reach the oor with the tip of your toes
when sitting on the saddle. Your local BH workshop can help you if
are not satised with the position of the saddle.
Also, take into account that you have enough freedom of
movement, to avoid any injuries when trying to make a
quick dismount.
5. If the bike has clip type or automatic pedals, rstly get familiarized
with the locking and unlocking process while you are stopped.
Carefully read the instruction for use of the pedals as supplied by
your local BH workshop..
If movement is restricted and/or the settings of automatic
pedals is too rigid, you may not be able free yourself from
the pedals! Falling hazards!
6. IF you have acquired a bicycle with rear suspension, it is better that
your local BH workshop adjusts the frame at the time of delivery or if
the purchase was made from www.bhbikes.com, it should be done in
any cycled workshop you trust. Inadequate settings of the suspension
can cause a malfunction or damage to the suspension. In any case,
performance will drop and you will not attain maximum safety during
the cycle.
3.2 Before each trip.
Your bicycle will be inspected repeatedly during its manufacture
and then, a nal inspection by your local BH workshop. Because the
operation of the bicycle can be modied during transport or it could
be that third parties may have modied your bicycle during waiting
time, you should check the following before each trip:
manual_17_EN.indd 40 26/05/2017 11:40:15
41
DE
AR
ZH
ZH
DK
EN
(UK)
EN
(US)
FR
EN
(UK)
IT
JA
KO
NL
RU
SV
CE
UK
1. Are the quick release mechanisms of the front and rear wheels, the
saddle post and other parts completely closed?
2. Are the tyres in good condition and with sufcient pressure in
both of them? Check the pressure.
You will nd more information in the section titled «Tyres»
3. Let the wheels run freely to check the tracking. Also, check the
space between the brake pads and the wheel, as well as the space
between the frame and the tyre.
4. Check the brakes work before setting off, by activating the
brake lever with great force. The brake lever should not reach the
handlebar! There should not be any leaks of brake uid. Also, check
the conditions of the pads.
You will nd more information in the section titled «Brake
System»
5. Lift your bike a little off the ground then drop it on its wheels and
listen for any rattling to indicate if there are any loose nuts or bolts,
check the bearings and linkages for play.
6. If you decide to cycle on public roads, you should equip your bicycle
according to the legal requirements in your country. Riding without any
lights or reectors when visibility is low or when dark is very dangerous.
Other users of public roads will not see you or will not be aware of your
presence until it is too late. When riding on public roads, you will always
need the authorized lighting appliances. When it becomes dark, switch
on the lights.
7. In the case that your bicycle is equipped with suspension,
check the frame: Press down on your bicycle and checking if the
suspension operates normally.
8. If necessary, make sure that the foot-stand is always completely
folded before starting. Falling hazards!
Do not ride your bicycle if it does not comply with any
of these points! A defective bicycle can cause serious
accidents! If you are not completely sure or you have any
doubt, contact your local BH workshop!
The terrain and forces that affect the wheels, can submit
the bicycle to much strain. Faced with these dynamic
forces, different parts react with wear and fatigue.
Regularly check your bicycle looking for signs of wear,
scratches, twists, worn colours or signs of cracking. Parts
whose useful life has passed can suddenly fail. Regularly
take your bicycle to a BH workshop to change suspect
parts if necessary.
Do not forget to always carry a quality padlock/lock/chain
whenever using your bicycle. That is the only way to avoid
theft efciently.
3.3 After a fall.
1. Check that the wheels remained xed and the tyres remain centred
in the frame and the fork. Spin the wheels. If the space appears to have
been signicantly modied and you cannot re-centre it, you should
separate the brakes a little from the wheel so that this can turn freely.
Attention: In this case, take into account the braking efciency will be
reduced.
You will nd more information in the section titled «Brake
system»
manual_17_EN.indd 41 26/05/2017 11:40:15

42
DE
AR
ZH
ZH
DK
EN
(UK)
EN
(US)
FR
EN
(UK)
IT
JA
KO
NL
RU
SV
CE
UK
2. Check to see if the handlebar or the front part of the frame has
twisted or has broken. Check that the front part is rmly placed in
the fork, by holding the front wheel between your knees and trying
to twist the handlebar in regard to the front wheel.
3. 3. Check to see if the chain is correctly installed. If the bicycle
has fallen on the side of the transmission, check that it works correctly.
Ask someone to help you put the bicycle upside down on its saddle
and the change gears. When the chain moves to the largest gear,
check the distance between the derailleur and the spokes. In the case
that the gears or support have twisted, the rst gear may interfere
with the spokes. - Falling hazards! The gears, the rear wheel or the
frame can be damaged. Check the derailleur. If it has moved, the chain
may come off. The bicycle will lose the transmission (also see the
section titled «traction»).
4. Check the saddle, the top tube or the bottom bracket to make
sure there are no defects.
5. Lift the bicycle and drop it to the ground from a low height. If you
hear noises, inspect the bike searching for any loose nuts, bolts or
parts.
6. Re-examine the entire bicycle to see any possible twists, worn
colours or cracks.
Only if this inspection has been satisfactory continue your journey
slowly and carefully. When ascending a mountain, never, under any
circumstance, brake or accelerate abruptly. If you are not sure, wait
for a car to collect you, instead of taking risks. Once you are at your
base, you should carefully re-inspect the entire bicycle. If you are still
not completely sure or you have any doubt, contact your local BH
workshop!
Any aluminium parts that have become twisted should not be
straightened, that is to say, they should not be repaired. Evan
after, there is a great risk of breakage, especially of the fork, the
handlebar, the frame, the crank arms and the pedals. For complete
safety, change them.
3.4 Normal maintenance.
Your bicycle requires regular maintenance, as well as a minimum
amount of periodical adjustment. The frequency of the maintenance
operations depends on the type of bicycle (touring bike, racing bike,
mountain bike), as well as the frequency and conditions of use.
See the Maintenance and repairs calendar on age 454 of this
manual.chedule
IMPORTANT WARNING
We recommend that your retailer performs these services. The
frequency schedule is only a recmmended servicing schedule based
on normal uses. In the case of mountain bikes, the intervals are
reduced due to the intensive use.
3.5 Saddle height and adjustment on the
bicycle.
Height conguration of the saddle: This distance is calculated by
measuring the length of your leg including the footwear you use
when riding the bicycle. The length you measure will be multiplied
by the coefcient 0.885. You measure from the middle of the saddle
decoration to the middle of the pedal axle screw. To adjust your
saddle height, use the screws of the clamp that xes the saddle post
to the frame.
manual_17_EN.indd 42 26/05/2017 11:40:15

43
DE
AR
ZH
ZH
DK
EN
(UK)
EN
(US)
FR
EN
(UK)
IT
JA
KO
NL
RU
SV
CE
UK
IMPORTANT WARNING
For safety reasons, do not extend the saddle post beyond the
minimum insertion marks.
3.6 Torquelimitsfornutsandbolts.
The correct spanners should be used in any type of assembly with
the correct torque force. If when you are tightening or undoing
and you notice that the threads are damaged, the corresponding
screws or nuts should be changed. Then, apply the torque limits
corresponding to each size of thread.
Recommended
thread sizes
Torque limits
(inNm)
M4x0,7 3 - 4
M5x0,8 6 - 8
M6x1 10 - 14
M8x1,25 25 - 35
M8x1 27 - 38
M10x1,5 49 - 69
M10x1,25 52 - 73
3.7 Correctgearchangingtechnique.
BH bicycles can be equipped with two types of gear change
systems:
- The rst is when the chain moves from one gear to another.
- The other, the gear-change system is situated inside the rear hub.
Read the following instructions depending of the type of gear-
change you have:
3.7.1 External changeo
The left-hand gear-change lever controls the front derailleur, and the
right hand gear-change controls the rear gears. Choose the ratios for
greater pedalling comfort and maximum forward propulsion.
You can only change gears when the chain movement is forwards.
Never try to change gears when the chain is not moving or is moving
backwards. Each time you are going to change gear reduce the
force transmitted to the chain, otherwise, the change will be difcult
and the chain and gears will be subject to greater wear. Never
change gear on rough bumpy surfaces.
3.7.2 Internal change
You can change gear when the chain is moving forwards, although
it is also possible to change gear when the chain has stopped or
moving backwards. Each time you change gear reduce the force
transmitted to the chain to facilitate the change. Choose the ratios
for greater pedalling comfort and maximum forward propulsion.
manual_17_EN.indd 43 26/05/2017 11:40:15

44
DE
AR
ZH
ZH
DK
EN
(UK)
EN
(US)
FR
EN
(UK)
IT
JA
KO
NL
RU
SV
CE
UK
3.8 Cleaning.
To achieve good maintenance of the bicycle, we recommend that
you comply with the following basic preventive measures:
■Clean the dust and mud with a damp sponge and a neutral
cleaning product
■Plastic parts should only be cleaned with soapy water.
■Tyres can be cleaned with a sponge or brush and soapy water.
■After cleaning the bicycle, completely dry it using an absorbent
cloth.
■After each cleaning, you should lubricate the transmission
components.
IMPORTANT WARNING
At all times avoid using pressurized cleaning devices, power washers
and never use steam jet cleaning devices.
4 BASICCONFIGURATION.
4.1 Installation of the pedalss.
Right pedal: ‘R’ stamped on its
axel indicates the right pedal.
Tighten the screws in clockwise
direction.
Left pedal: ‘L’ stamped on its
axel indicates the left pedal.
Tighten the screws in anti-
clockwise direction. Grease the
threads of the pedals.
4.2 Installation of the handlebar.
4.2.1 Aheadset® Steering set settings®.
(Aheadset® is the brand logo of threadless systems made by
DiaCompe).
This steering set system stands out because the front part does not
t into the fork tube, but it is xed from the outside (a). The front part
also is an important part of the steering bearing. Its locking xes the
fork assembly. To assemble the Aheadset®, you will need one or two
Allen keys and a torque spanner. Undo the two side torque screw/s
two or three turns of the head stem. Tighten the upper top screw with
an Allen key, e.g. a quarter of a turn (b).
manual_17_EN.indd 44 26/05/2017 11:40:15

abc
O
P
E
N
C
L
O
SE
b
a
45
DE
AR
ZH
ZH
DK
EN
(UK)
EN
(US)
FR
EN
(UK)
IT
JA
KO
NL
RU
SV
CE
UK
Do not tighten the upper part screw; only use them to eliminate
play!
Adjust the front part so the handlebar is inclined. Also examine
the upper tube and the front part of the front tyre. Tighten the
torque screws of the front part (c). Use a torque spanner that does
not exceed the maximum torque limits! You will nd information in
«Recommended torque limits» chapter, about the components
and/or the instructions from the manufacturer of the components.
Take into account that the fork tube can be squashed if the
screws are over-tightened.
Carry out the previously indicated controls. The steering set should
not be over-tightened, because it can be easily damaged.
If the steering set is not adjusted correctly this can be caused
by many reasons. If you are not completely sure or you have
any doubts, contact your local BH workshop!
Make sure of the correct adjustment of the steering stem.
Place the front wheel between your knees and try to turn the
handlebar if it moves then it is not correctly adjusted, you may
suffer falls.
4.2.2 Adjustment of the handlebar with adjustable stem.
La potencia regulable permite la optimización de la posición del
The adjustable stem allows optimal positioning of the assembly by
adjusting the inclination of the axis within a range of -10º (lowest
position) to 10º (highest position).
The stem angles can be slightly adjusted following these steps:
■Loosen the lateral screw (right side) (a) until the axis moves freely
■Adjust the inclination of the stem until obtaining the desired
angle.
■Tighten the lateral screw taking into account the recommended
torque indicated on the stem.
4.3 Assembly and disassembly of the wheels
4.3.1 Quick release wheel system
Disassembly: Pull the blocking lever and change it from the
«CLOSE» to the «OPEN» position (b). Loosen the adjustment thread
by hand and release the wheel.
manual_17_EN.indd 45 26/05/2017 11:40:17

46
DE
AR
ZH
ZH
DK
EN
(UK)
EN
(US)
FR
EN
(UK)
IT
JA
KO
NL
RU
SV
CE
UK
Assembly: Introduce the axle of the wheel into the fork leg (front
wheel) or into the frame stays (rear wheel) and maintain the locking
lever in open position. Slightly tighten the adjustment nut. Close the
lever; that is to say, change it to the «CLOSE» position.
ORTANT WARNING
Closing this lever requires a certain effort. If the lever can be
closed easily, this means the nut is not tight enough and should be
tightened until it requires some effort to close.
4.3.2 Pass through axles wheel system
Make sure the closing lever is in the open position. Place the wheel
in the tips of the fork in the case of the front wheel, and on the frame
tips in the case of the rear wheel, simultaneously positioning the
Disc brake if your bicycle uses this type of braking system. From the
left, push the open quick-close E-Thru lever through the frame / fork
tip and the hub.
When the tread of the axle ts into the right hand thread, turn the
axle clockwise. The through axle should move freely for the rst
turns.
If the lever does not completely drop, open it again and turn it
anticlockwise a little. Try to close the quick-close lever again.
After closing the quick-close lever, now it should not turn, make sure
that the quick-close lever does not stick out forwards or outwards.
To position the quick-close lever so it is the least exposed
possible, consult the manual from the manufacturer of the fork.
4.3.3Nutxedwheelsystem
Disassembly: Loosen the safety nuts at both sides of the wheel
using the correct size spanner.
Assembly: Introduce the axle of the wheel into the fork legs (front
wheel) or into the frame stays (rear wheel). Slightly tighten the xing
nuts over the safety washers. Finally tighten the nuts using the
correct size spanner.
manual_17_EN.indd 46 26/05/2017 11:40:18

c
47
DE
AR
ZH
ZH
DK
EN
(UK)
EN
(US)
FR
EN
(UK)
IT
JA
KO
NL
RU
SV
CE
UK
4.4 Saddle adjustment.
Height conguration of the saddle: Place the saddle post into the
saddle tube.
After establishing the desired height, retighten the adjusting screw.
IMPORTANT WARNING
The minimum insertion mark should not be visible at any time (c).
You should introduce the saddle post to the necessary minimum into
the saddle tube.
5 BRAKE SYSTEM.
5.1 Function and wear.
Pulling a brake lever a xed pad presses on a rotating braking
surface. The friction caused reduces the speed of the wheel. The
force applied by the pad on the braking surface produces a friction
force, which is affected by the friction coefcient. If the contact
surfaces are covered with dirty water or oil, the friction coefcient
lessens and therefore the braking effect is worse. In Disc braking
systems, both the disc pads and the Discs wear due to friction, just
as if the brake pads and the braking surfaces wear in the wheel
braking system.
With any braking system, a failure in the settings, maintenance, or
use of the brakes can cause loss of control of the bicycle with all
the consequences that can produce. If you are not sure about the
settings of your brakes, or suspect a problem, do not use the bicycle
and take it to your authorized dealer.
It is important that the brake Discs and pads are completely
clean of dirt, grease and oil. Once they are contaminated by oil,
the pads cannot be cleaned and will have to be replaced.
Only use spare parts that are compatible with the brake and
suitable with the original brand.
manual_17_EN.indd 47 26/05/2017 11:40:18
48
DE
AR
ZH
ZH
DK
EN
(UK)
EN
(US)
FR
EN
(UK)
IT
JA
KO
NL
RU
SV
CE
UK
5.2 Rim braking systems.
Different types of brake families like Cantilever, V-Brake and
Horseshoe form this system. In these types of systems, the brake
levers are connected to the brakes by means of cables or hydraulic
systems. By pulling on the brake, the pads rub on the wheel rim
braking its movement, this reduces the speed of the bicycle.
Before using the bicycle rmly pull on the brake levers. The brake
levers should not reach the handlebar. If the brake levers touch the
handlebar, its travel should be adjusted. In the case of having an
hydraulic system, this should be purged/bled. This should be done
by an authorized dealer, because it requires specic materials and
knowledge.
When the brakes are not activated, the pads should be at 1.2 mm
from the wheel. The pads should be aligned with the rim surface. If
your brakes are loose rubbing or not aligned with the wheel when
not pulled adjust them before using the bicycle.
Angular alignment of the pad should be taken into account to
prevent the brakes from squealing. Used pads and some new types
of V-brake may not require this alignment.
Check the condition of the pads once a month. The pads have small
marks on the friction surface If these marks are less than 2 mm deep
or 1 mm deep on the V-Brake, then they should be replaced. If your
original pads did not have these marks, then replace them when the
end of the rubber pad is at only 3 mm from the metal support.
Once a month, check the brake cables to see if they are twisted,
rusted, have broken wires and no unthreaded ends and check to see
if the sleeves are not bent, cut or worn. Replace any component that
does not pass the inspection.
5.3 Disc braking systems.
Disc brakes have much better response and much greater braking
effect than the rim brakes. In addition, they do not require much
maintenance and do not wear the rims; likewise, adjustment of the
hydraulic Disc brake requires specic knowledge and tools.
Periodically check that there are no leaks in the tubes or the
couplings by maintaining the handle pressed. If you notice a
hydraulic oil or uid leak, immediately take the appropriate measures,
because this could mean that the brakes become inoperative, in this
case contact your nearest dealer if you nd any leaks inmediately.
Check before each use that both the front and rear brakes are
working correctly.
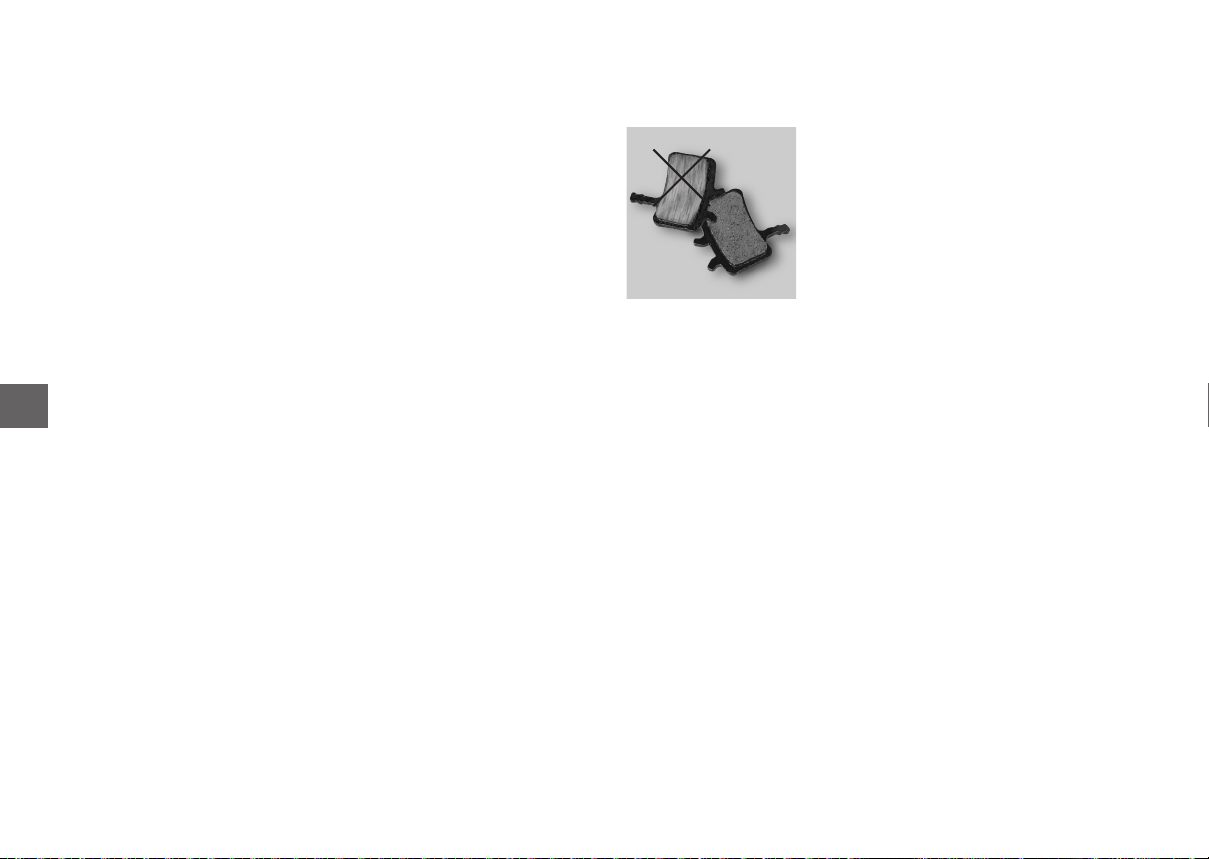
Check the condition of the pads, brake rotor, brake caliper for wear
or any damage. In some models of the brake Disc, wear of the pads
is automatically adjusted, others you will have to disassemble the
pads according to the instruction from the manufacturer, carefully
check them for wear and if necessary replace them.
manual_17_EN.indd 48 26/05/2017 11:40:18
Table of contents
Other BH Bicycle manuals


