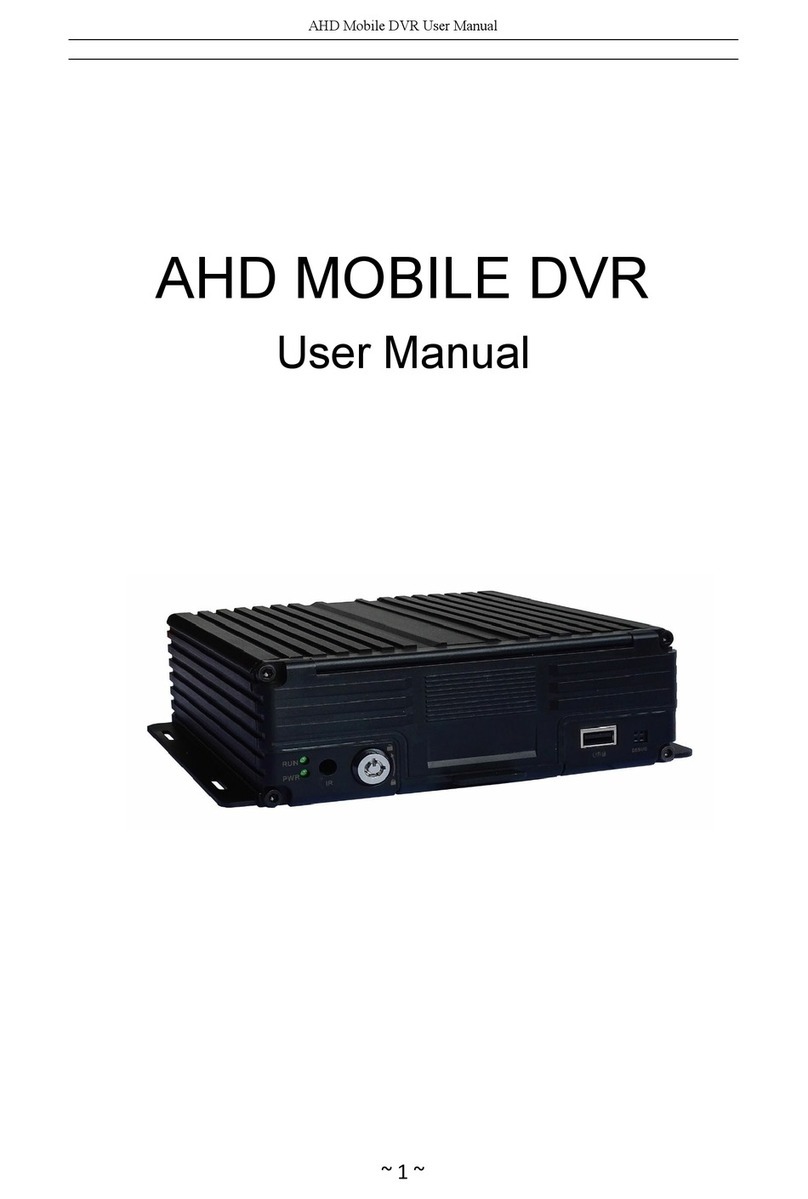
Crest Electronics CDVS-7000 User manual

CDVS-7000 Series
S2 DVR Setup And
User’s Manual
Crest Electronics, Inc.
Version 02.01.0
8

II
Table Of Contents
Important Safeguards
. . . . . . . . . . . . . . . . . . . . . . . . . . . . . . .
VII
I
Chapter
1
Overview of the Main Screen
. . . . . . . . . . . . . . . . . . . . . . . . . . . . . . . . . . .
2
Current Date and Time
. . . . . . . . . . . . . . . . . . . . . . . . . . . . . . . . . . . . . .
3
System Status
. . . . . . . . . . . . . . . . . . . . . . . . . . . . . . . . . . . . . . . . . . .
4
System Status
. . . . . . . . . . . . . . . . . . . . . . . . . . . . . . . . . . . . . . . . . . .
4
Alarm Status
. . . . . . . . . . . . . . . . . . . . . . . . . . . . . . . . . . . . . . . . . . .
4
Network Status
. . . . . . . . . . . . . . . . . . . . . . . . . . . . . . . . . . . . . . . . . .
5
Search Screen
. . . . . . . . . . . . . . . . . . . . . . . . . . . . . . . . . . . . . . . . . . .
5
Quick Search
. . . . . . . . . . . . . . . . . . . . . . . . . . . . . . . . . . . . . . . . . . . .
5
Setup Function
. . . . . . . . . . . . . . . . . . . . . . . . . . . . . . . . . . . . . . . . . .
6
Emergency Record
. . . . . . . . . . . . . . . . . . . . . . . . . . . . . . . . . . . . . . . .
6
E-Map Function
. . . . . . . . . . . . . . . . . . . . . . . . . . . . . . . . . . . . . . . . . .
6
PTZ Controller
. . . . . . . . . . . . . . . . . . . . . . . . . . . . . . . . . . . . . . . . . .
6
Controlling e PTZ Camera
. . . . . . . . . . . . . . . . . . . . . . . . . . . . . . . . . .
7
Setting Presets
. . . . . . . . . . . . . . . . . . . . . . . . . . . . . . . . . . . . . . . . . . .
7
Calling a Preset
. . . . . . . . . . . . . . . . . . . . . . . . . . . . . . . . . . . . . . . . . .
8
Audio and Alarm Indicator
. . . . . . . . . . . . . . . . . . . . . . . . . . . . . . . . . . . .
8
Screen Division and Control Function
. . . . . . . . . . . . . . . . . . . . . . . . . . . .
9
Single Camera Display Button
. . . . . . . . . . . . . . . . . . . . . . . . . . . . . . . . . .
9
Four Camera Display Button
. . . . . . . . . . . . . . . . . . . . . . . . . . . . . . . . . . .
9
Six Camera Display Button
. . . . . . . . . . . . . . . . . . . . . . . . . . . . . . . . . . . .
9
Nine Camera Display Button
. . . . . . . . . . . . . . . . . . . . . . . . . . . . . . . . . .
1
0
Ten Camera Display Button
. . . . . . . . . . . . . . . . . . . . . . . . . . . . . . . . . . .
1
0
irteen Camera Display Button
. . . . . . . . . . . . . . . . . . . . . . . . . . . . . . . .
1
0
Sixteen Camera Display Button
. . . . . . . . . . . . . . . . . . . . . . . . . . . . . . . . .
1
0
Display Next Screen Button
. . . . . . . . . . . . . . . . . . . . . . . . . . . . . . . . . . .
1
0
Screen Sequencing (Auto Rotation)
. . . . . . . . . . . . . . . . . . . . . . . . . . . . . . .
1
0
Full Screen Mode
. . . . . . . . . . . . . . . . . . . . . . . . . . . . . . . . . . . . . . . . .
1
1
Snapshot
. . . . . . . . . . . . . . . . . . . . . . . . . . . . . . . . . . . . . . . . . . . . . .
1
1
Snapshot File Menu
. . . . . . . . . . . . . . . . . . . . . . . . . . . . . . . . . . . . . . . .
1
2
Print Preview
. . . . . . . . . . . . . . . . . . . . . . . . . . . . . . . . . . . . . . . . . . .
1
2
Snapshot Tool Popup Menu
. . . . . . . . . . . . . . . . . . . . . . . . . . . . . . . . . . .
1
3
Camera Selection Function
. . . . . . . . . . . . . . . . . . . . . . . . . . . . . . . . . . . .
1
4
System Shutdown
. . . . . . . . . . . . . . . . . . . . . . . . . . . . . . . . . . . . . . . . . . .
1
4
Quick Search
. . . . . . . . . . . . . . . . . . . . . . . . . . . . . . . . . . . . . . . . . . . . . .
1
5
Main Screen Pop up Menu
. . . . . . . . . . . . . . . . . . . . . . . . . . . . . . . . . . . .
1
5
Auto Sequencing
. . . . . . . . . . . . . . . . . . . . . . . . . . . . . . . . . . . . . . . . .
1
6
Emergency Record
. . . . . . . . . . . . . . . . . . . . . . . . . . . . . . . . . . . . . . . .
1
6
Full Screen / Normal Screen
. . . . . . . . . . . . . . . . . . . . . . . . . . . . . . . . . . .
1
6
“Next” Screen
. . . . . . . . . . . . . . . . . . . . . . . . . . . . . . . . . . . . . . . . . . .
1
7
DIV Mode
. . . . . . . . . . . . . . . . . . . . . . . . . . . . . . . . . . . . . . . . . . . . .
1
7

III
View Settings
. . . . . . . . . . . . . . . . . . . . . . . . . . . . . . . . . . . . . . . . . . .
1
7
Default Order
. . . . . . . . . . . . . . . . . . . . . . . . . . . . . . . . . . . . . . . . . . .
1
7
Chapter
2
Overview of
System Setup
. . . . . . . . . . . . . . . . . . . . . . . . . . . . . . . . . . . . . .
1
9
Camera Settings
. . . . . . . . . . . . . . . . . . . . . . . . . . . . . . . . . . . . . . . . . . .
1
9
Camera Selection
. . . . . . . . . . . . . . . . . . . . . . . . . . . . . . . . . . . . . . . . .
2
0
Select Camera for Use
. . . . . . . . . . . . . . . . . . . . . . . . . . . . . . . . . . . . . . .
2
0
Camera Name
. . . . . . . . . . . . . . . . . . . . . . . . . . . . . . . . . . . . . . . . . . .
2
1
Covert
. . . . . . . . . . . . . . . . . . . . . . . . . . . . . . . . . . . . . . . . . . . . . . .
2
1
Camera Pop Up
. . . . . . . . . . . . . . . . . . . . . . . . . . . . . . . . . . . . . . . . . .
2
1
Image Quality
. . . . . . . . . . . . . . . . . . . . . . . . . . . . . . . . . . . . . . . . . . .
2
2
Recording Type
. . . . . . . . . . . . . . . . . . . . . . . . . . . . . . . . . . . . . . . . . .
2
2
Color
. . . . . . . . . . . . . . . . . . . . . . . . . . . . . . . . . . . . . . . . . . . . . . . .
2
2
Motion Area Selection
. . . . . . . . . . . . . . . . . . . . . . . . . . . . . . . . . . . . . .
2
3
Relay Operation On Motion Event
. . . . . . . . . . . . . . . . . . . . . . . . . . . . . . .
2
3
FPS Settings
. . . . . . . . . . . . . . . . . . . . . . . . . . . . . . . . . . . . . . . . . . . . . .
2
4
Adjusting FPS
. . . . . . . . . . . . . . . . . . . . . . . . . . . . . . . . . . . . . . . . . . .
2
4
Intensive Recording
. . . . . . . . . . . . . . . . . . . . . . . . . . . . . . . . . . . . . . . .
2
5
PTZ Setup
. . . . . . . . . . . . . . . . . . . . . . . . . . . . . . . . . . . . . . . . . . . . . . . .
2
6
Camera Selection
. . . . . . . . . . . . . . . . . . . . . . . . . . . . . . . . . . . . . . . . .
2
6
PTZ Use
. . . . . . . . . . . . . . . . . . . . . . . . . . . . . . . . . . . . . . . . . . . . . .
2
6
PTZ Driver Protocol
. . . . . . . . . . . . . . . . . . . . . . . . . . . . . . . . . . . . . . .
2
6
PTZ Communication Setting
. . . . . . . . . . . . . . . . . . . . . . . . . . . . . . . . . .
2
7
PTZ Address
. . . . . . . . . . . . . . . . . . . . . . . . . . . . . . . . . . . . . . . . . . . .
2
7
PTZ Test
. . . . . . . . . . . . . . . . . . . . . . . . . . . . . . . . . . . . . . . . . . . . . .
2
7
Aux Name Settings
. . . . . . . . . . . . . . . . . . . . . . . . . . . . . . . . . . . . . . . .
2
7
Preset Tour Setup
. . . . . . . . . . . . . . . . . . . . . . . . . . . . . . . . . . . . . . . . .
2
8
Joystick Setting
. . . . . . . . . . . . . . . . . . . . . . . . . . . . . . . . . . . . . . . . . .
2
8
Add PTZ Driver
. . . . . . . . . . . . . . . . . . . . . . . . . . . . . . . . . . . . . . . . . .
2
8
PTZ Function
. . . . . . . . . . . . . . . . . . . . . . . . . . . . . . . . . . . . . . . . . . .
3
0
PTZ connection
. . . . . . . . . . . . . . . . . . . . . . . . . . . . . . . . . . . . . . . . . .
3
0
Network Settings
. . . . . . . . . . . . . . . . . . . . . . . . . . . . . . . . . . . . . . . . . . .
3
1
Network Type
. . . . . . . . . . . . . . . . . . . . . . . . . . . . . . . . . . . . . . . . . . .
3
2
Use Web
. . . . . . . . . . . . . . . . . . . . . . . . . . . . . . . . . . . . . . . . . . . . . .
3
2
Anonymous Connection
. . . . . . . . . . . . . . . . . . . . . . . . . . . . . . . . . . . . .
3
2
E-Mail Notification
. . . . . . . . . . . . . . . . . . . . . . . . . . . . . . . . . . . . . . . .
3
3
Alarm Setup
. . . . . . . . . . . . . . . . . . . . . . . . . . . . . . . . . . . . . . . . . . . . . .
3
4
Pre/Post Alarm
. . . . . . . . . . . . . . . . . . . . . . . . . . . . . . . . . . . . . . . . . .
3
4
Sensor Setup
. . . . . . . . . . . . . . . . . . . . . . . . . . . . . . . . . . . . . . . . . . . .
3
5
Relay Settings
. . . . . . . . . . . . . . . . . . . . . . . . . . . . . . . . . . . . . . . . . . .
3
6
User Setup
. . . . . . . . . . . . . . . . . . . . . . . . . . . . . . . . . . . . . . . . . . . . . . .
3
7
Add User
. . . . . . . . . . . . . . . . . . . . . . . . . . . . . . . . . . . . . . . . . . . . . .
3
8
Edit User
. . . . . . . . . . . . . . . . . . . . . . . . . . . . . . . . . . . . . . . . . . . . . .
3
8
Delete User
. . . . . . . . . . . . . . . . . . . . . . . . . . . . . . . . . . . . . . . . . . . . .
3
8
Detail Authority
. . . . . . . . . . . . . . . . . . . . . . . . . . . . . . . . . . . . . . . . . .
Detail Authority . . . . . . . . . . . . . . . . . . . . . . . . . . . . . . . . . . . . . . . . . . Detail Authority
3
9
Schedule Setup
. . . . . . . . . . . . . . . . . . . . . . . . . . . . . . . . . . . . . . . . . . . .
4
0
Sensor Recording
. . . . . . . . . . . . . . . . . . . . . . . . . . . . . . . . . . . . . . . . .
4
1

IV
Continuous Mode Recording
. . . . . . . . . . . . . . . . . . . . . . . . . . . . . . . . . .
4
1
Motion Recording
. . . . . . . . . . . . . . . . . . . . . . . . . . . . . . . . . . . . . . . . .
4
2
Motion and Sensor Recording
. . . . . . . . . . . . . . . . . . . . . . . . . . . . . . . . . .
4
2
Schedule Recording Example:
. . . . . . . . . . . . . . . . . . . . . . . . . . . . . . . . . .
4
3
Relay Schedule
. . . . . . . . . . . . . . . . . . . . . . . . . . . . . . . . . . . . . . . . . . .
4
5
Event Notification Schedule Setup Window
. . . . . . . . . . . . . . . . . . . . . . . . . .
4
5
Holiday Schedule
. . . . . . . . . . . . . . . . . . . . . . . . . . . . . . . . . . . . . . . . .
4
6
System Settings Window
. . . . . . . . . . . . . . . . . . . . . . . . . . . . . . . . . . . . . .
System Settings Window . . . . . . . . . . . . . . . . . . . . . . . . . . . . . . . . . . . . . . System Settings Window
4
7
System Name
. . . . . . . . . . . . . . . . . . . . . . . . . . . . . . . . . . . . . . . . . . .
4
7
Date Display
. . . . . . . . . . . . . . . . . . . . . . . . . . . . . . . . . . . . . . . . . . . .
4
7
Automatic Rebooting
. . . . . . . . . . . . . . . . . . . . . . . . . . . . . . . . . . . . . . .
4
7
VDB Overwrite
. . . . . . . . . . . . . . . . . . . . . . . . . . . . . . . . . . . . . . . . . .
4
7
Main Screen Sequence Dwell Time
. . . . . . . . . . . . . . . . . . . . . . . . . . . . . . .
4
8
Spot Out Sequen
ce
. . . . . . . . . . . . . . . . . . . . . . . . . . . . . . . . . . . . . . . .
4
8
Pop-up Release Time
. . . . . . . . . . . . . . . . . . . . . . . . . . . . . . . . . . . . . . .
4
8
Alarm Event Sound Effect
. . . . . . . . . . . . . . . . . . . . . . . . . . . . . . . . . . . .
4
8
Information Screen
. . . . . . . . . . . . . . . . . . . . . . . . . . . . . . . . . . . . . . . . .
4
9
Product Information
. . . . . . . . . . . . . . . . . . . . . . . . . . . . . . . . . . . . . . .
4
9
Network Information
. . . . . . . . . . . . . . . . . . . . . . . . . . . . . . . . . . . . . . .
4
9
VDB Information
. . . . . . . . . . . . . . . . . . . . . . . . . . . . . . . . . . . . . . . . .
4
9
System Information
. . . . . . . . . . . . . . . . . . . . . . . . . . . . . . . . . . . . . . . .
4
9
Memo
. . . . . . . . . . . . . . . . . . . . . . . . . . . . . . . . . . . . . . . . . . . . . . . .
4
9
Chapter
3
System Environment Setup
. . . . . . . . . . . . . . . . . . . . . . . . . . . . . .
5
0
Entering the Environment Desktop
. . . . . . . . . . . . . . . . . . . . . . . . . . . . . . .
5
1
Overview of Environment Setup Functions
. . . . . . . . . . . . . . . . . . . . . . . . . .
5
2
TCP/IP Settings
. . . . . . . . . . . . . . . . . . . . . . . . . . . . . . . . . . . . . . . . . . . .
5
3
IP Address Setup
. . . . . . . . . . . . . . . . . . . . . . . . . . . . . . . . . . . . . . . . . . .
5
4
Setting Up DDNS
. . . . . . . . . . . . . . . . . . . . . . . . . . . . . . . . . . . . . . . . .
5
5
Time Sync
.
. . . . . . . . . . . . . . . . . . . . . . . . . . . . . . . . . . . . . . . . . . . . . . . .
5
7
Matrix Setting
. . . . . . . . . . . . . . . . . . . . . . . . . . . . . . . . . . . . . . . . . . . . .
5
8
Audio Setting
. . . . . . . . . . . . . . . . . . . . . . . . . . . . . . . . . . . . . . . . . . .
5
9
Make VDB
. . . . . . . . . . . . . . . . . . . . . . . . . . . . . . . . . . . . . . . . . . . . . . . .
5
9
Select Language
. . . . . . . . . . . . . . . . . . . . . . . . . . . . . . . . . . . . . . . . . . . . .
6
0
Select Video Type
. . . . . . . . . . . . . . . . . . . . . . . . . . . . . . . . . . . . . . . . . . .
6
0
Watermark Setting
. . . . . . . . . . . . . . . . . . . . . . . . . . . . . . . . . . . . . . . . . . .
Watermark Setting . . . . . . . . . . . . . . . . . . . . . . . . . . . . . . . . . . . . . . . . . . . Watermark Setting
6
0
Setting Import / Export
. . . . . . . . . . . . . . . . . . . . . . . . . . . . . . . . . . . . . . . .
6
1
Run....
. . . . . . . . . . . . . . . . . . . . . . . . . . . . . . . . . . . . . . . . . . . . . . . . . . .
6
1
Chapter
4
Overview of
Search Screen Functions
. . . . . . . . . . . . . . . . . . . . . . . . . . . . .
6
3
Using the Search Screen
. . . . . . . . . . . . . . . . . . . . . . . . . . . . . . . . . . . . .
6
4
Playback Screen
. . . . . . . . . . . . . . . . . . . . . . . . . . . . . . . . . . . . . . . . . . . .
6
4
Screen Swapping
. . . . . . . . . . . . . . . . . . . . . . . . . . . . . . . . . . . . . . . . . .
6
4
Search Screen Calendar
. . . . . . . . . . . . . . . . . . . . . . . . . . . . . . . . . . . . . .
6
5

V
Video Search Timetable
. . . . . . . . . . . . . . . . . . . . . . . . . . . . . . . . . . . . .
6
5
Video Playback Control
. . . . . . . . . . . . . . . . . . . . . . . . . . . . . . . . . . . . .
6
6
Screen Division Buttons
. . . . . . . . . . . . . . . . . . . . . . . . . . . . . . . . . . . . .
6
7
Listening To Audio
. . . . . . . . . . . . . . . . . . . . . . . . . . . . . . . . . . . . . . . .
6
7
Zoom In/Out Button
. . . . . . . . . . . . . . . . . . . . . . . . . . . . . . . . . . . . . . .
6
7
Search Screen Popup Menu
. . . . . . . . . . . . . . . . . . . . . . . . . . . . . . . . . . . .
6
8
Deinterlace
. . . . . . . . . . . . . . . . . . . . . . . . . . . . . . . . . . . . . . . . . . . . .
6
8
Live
View
. . . . . . . . . . . . . . . . . . . . . . . . . . . . . . . . . . . . . . . . . . . . . .
View . . . . . . . . . . . . . . . . . . . . . . . . . . . . . . . . . . . . . . . . . . . . . . View
6
8
Panorama
. . . . . . . . . . . . . . . . . . . . . . . . . . . . . . . . . . . . . . . . . . . . .
6
9
Display Information Enable
. . . . . . . . . . . . . . . . . . . . . . . . . . . . . . . . . . .
6
9
Full
screen
. . . . . . . . . . . . . . . . . . . . . . . . . . . . . . . . . . . . . . . . . . . . .
7
0
Next
. . . . . . . . . . . . . . . . . . . . . . . . . . . . . . . . . . . . . . . . . . . . . . . . .
7
0
Div Mode
. . . . . . . . . . . . . . . . . . . . . . . . . . . . . . . . . . . . . . . . . . . . . .
7
0
Default Order
. . . . . . . . . . . . . . . . . . . . . . . . . . . . . . . . . . . . . . . . . . .
7
0
Advance Search
. . . . . . . . . . . . . . . . . . . . . . . . . . . . . . . . . . . . . . . . . . . .
7
1
B
asic Feature of Advance Search
. . . . . . . . . . . . . . . . . . . . . . . . . . . . . . . . .
7
1
Using the Bookmark Feature with Ad
vance Search
. . . . . . . . . . . . . . . . . . . . . .
7
2
umbnail
Preview
. . . . . . . . . . . . . . . . . . . . . . . . . . . . . . . . . . . . . . . . .
Preview . . . . . . . . . . . . . . . . . . . . . . . . . . . . . . . . . . . . . . . . . Preview
7
3
Search Screen Menus
. . . . . . . . . . . . . . . . . . . . . . . . . . . . . . . . . . . . . . . .
7
4
Event Search
. . . . . . . . . . . . . . . . . . . . . . . . . . . . . . . . . . . . . . . . . . . .
7
4
Select log
. . . . . . . . . . . . . . . . . . . . . . . . . . . . . . . . . . . . . . . . . . . . . .
7
5
Select Log Time
. . . . . . . . . . . . . . . . . . . . . . . . . . . . . . . . . . . . . . . . . .
7
5
Device type
. . . . . . . . . . . . . . . . . . . . . . . . . . . . . . . . . . . . . . . . . . . . .
7
6
User ID
. . . . . . . . . . . . . . . . . . . . . . . . . . . . . . . . . . . . . . . . . . . . . . .
7
6
Bookmark
. . . . . . . . . . . . . . . . . . . . . . . . . . . . . . . . . . . . . . . . . . . . .
7
7
Backup
. . . . . . . . . . . . . . . . . . . . . . . . . . . . . . . . . . . . . . . . . . . . . . .
7
8
Making a VD2 Backup
. . . . . . . . . . . . . . . . . . . . . . . . . . . . . . . . . . . . . .
7
9
Making an AVI File Backup
. . . . . . . . . . . . . . . . . . . . . . . . . . . . . . . . . . .
8
1
Color Control
. . . . . . . . . . . . . . . . . . . . . . . . . . . . . . . . . . . . . . . . . . .
8
1
External Search
. . . . . . . . . . . . . . . . . . . . . . . . . . . . . . . . . . . . . . . . . .
8
2
Snapshot
. . . . . . . . . . . . . . . . . . . . . . . . . . . . . . . . . . . . . . . . . . . . . .
8
4
Chapter
5
Overview of the E-Map screen
. . . . . . . . . . . . . . . . . . . . . . . . . . . . . . . . . .
8
8
Setting Up E-Map
. . . . . . . . . . . . . . . . . . . . . . . . . . . . . . . . . . . . . . . . .
8
9
Using E-Map
. . . . . . . . . . . . . . . . . . . . . . . . . . . . . . . . . . . . . . . . . . . .
9
1
E-
Map
Dual Monitor Function Support
. . . . . . . . . . . . . . . . . . . . . . . . . . . .
9
4

VI
Caution
This installation should be performed by qualified service personnel and should con form to all Federal, State
and local laws.
WARNING:
This equipment has been tested and found to comply with the limits for a Class B digital
device, pursuant to Part 15 of the FCC rules. These limits are designed to provide reasonable protec-
tion against harmful interference in a resi den tial installation. This equipment generates and uses radio
fre quency energy, and if not installed and used in accordance with in structions, may cause harmful
interference to radio communications. However, there is no guarantee that the interference will not occur in
a particular installation. If this equipment does cause harmful interference to radio or television reception,
which can be determined by turning the equipment off and on, the user is en couraged to try to correct the
interference by one of the following methods:
- Relocate the receiving antenna.
- Increase the amount of space between the equipment and the receiver.
- Connect the equipment to an outlet which is on a separate circuit than that of the
receiver.
- Consult the dealer or an experienced radio/TV technician for help.
CAUTION:
Changes or modifications not expressly approved by the party responsible for compliance
with the FCC Rules could void the user’s authority to operate this equipment.
RISK OF ELEC TRIC SHOCK
DO NOT OPEN
CAUTION
CAUTION: TO REDUCE THE RISK OF ELECTRIC
SHOCK. DO NOT REMOVE COVER. NO
USER-SER VICEABLE PARTS INSIDE. REFER
SERVICING TO QUALIFIED SERVICE
PER SONNEL.
The lightning flash with arrowhead symbol, within an
equilateral triangle is intended to alert the user to the
presence of uninsulated dangerous voltage within the
product’s enclosure that may be of sufficient mag ni tude
to constitute a risk of electric shock to persons.
The exclamation point within an equilateral triangle is
intended to alert the user to the presence of important
operating and maintenance (servicing) instructions in
the literature accompanying the appliance.
WARNING:
TO REDUCE THE RISK OF ELECTRICAL SHOCK, DO NOT EXPOSE THIS
APPLIANCE TO RAIN OR MOISTU
RE

VII
Important Safeguards
Warning
1. Turn off power to the unit prior to changing the battery.
2. Check the polarity of the lithium battery while changing.
3. When changing battery use the same type as original or similar type recommended by your vendor.
4. Dispose of old battery in accordance with the manufacturer of the battery.
General Warning
Warning
1. Use the power cord, which is supplied or recommended by the manufacturer. Failure to do so could cause
a fire.
2. Use the power transformer, which is supplied or recommended by the manufacturer. Failure to do so
could cause a fire.
3. Do not dismantle or assemble the product. Doing so could cause malfunction or fire.
4. Service should only be done by manufacturer or authorized vendor. Electrical shock or fire could result if
repair is not done properly.
5. Do not touch product with wet hands as electric shock may occour.
6. Product must be installed by a qualified professional. Failure to do so could result in malfunction,
electrical shock or fire.
7. Consult the place of purchase if the need for installation arises. Poor installation could cause
malfunction, electric shock or fire.
8. Ground applies to video products equipped with a 3-wire grounding type plug having a third (grounding)
pin. This plug only fits into a grounding type power outlet. If grounding is not done, equipment malfunc
tion or electric shock may occur.
9. Ground connection must not touch gas pipe, water pipe or telephone lines.
10.Prevent foreign metallic substance from going inside the product. Failure to do so could result in mal
function or electric shock.
11. Prevent water or other liquids from entering inside the product. Use damp cloth to clean outside of
product. Failure to do so could result in malfunction or electric shock.

VIII
Caution
1. Use the power cord and power transformer supplied by the manufacturer or one recommended by the
manu fac turer.
2. The internal fan rotates at high speed and may cause injury.
3. Do not drop, give unit strong vibration or shock to the product; doing so will cause malfunction.
4. Slots and openings in the front and back of the cabinet are provided for ventilation, to ensure reliable
operation of the unit, and to protect it from overheating. These openings must not be blocked or covered.
The openings should never be blocked by placing the unit on a bed, sofa, rug or similar surface. The unit
should never be placed near or over a ra diator or heat source. This unit should not be placed in a built-
in installation such as a bookcase or rack unless proper ventilation is provided and/or the manufacturer’s
instructions are adhered to.
5. Do not install the product near or on top of heating source. The internal temperature of the product would
be greater than the allowable and could cause malfunction or fire.
6. Do not install the product on inclined or unstable locations such as an unstable cart, slant tripod, bracket,
or table. The unit may fall, causing serious injury, and serious damage to the unit.
Cautions about the Power
Warning
1. This unit should be operated only from the type of power indicated on the power plate. If you are not
sure of the type of power supply at your location, consult your dealer or local power company. For units
intended to operate from battery power, or other sources, refer to the operating instructions.
2. Power supply cords should be routed so that they are not likely to be walked on or pinched by items
placed upon or against them, paying particular attention to the cord at plugs, convenience receptacles,
and the point where they exit from the appliance.
3. Do not cut power cord to connect in the middle of the power cord or use extension cord. Doing so could
generate heat or cause fire.
4. Do not touch power cord in wet area or with wet hands.
5. Hold the body of the plug when removing the power cord. Do not pull cord as doing so may generate
heat or cause fire.
6. Remove the power cord from the outlet when not in use for long periods of time. This will prevent
damage to unit due to lightning and power line surges.

1
Chapter 1
Overview of Main Screen

2
Overview of the Main Screen
is section describes the main screen and its’ menu buttons. e image below details the name of the but-
tons.
Screen Di vision and Con trols
Current Date and Time
Search
Setup
Camera / Relay Selection
Emer gency record
PTZ con trol
E-Map
Quick Search
Audio on/off
Mute Alarm
System Exit
Image Display Area
Image Display Area
e image display area displays live images of the current cameras. is display can be changed by clicking
on the screen division buttons (see screen division section for the different views available). To change the
screen from multi camera view to single camera view, double click the le mouse button in the image you
want to bring up in single view, or click in the image making it the selected camera (will be highlighted in
red), then click the single camera di vision button. To change back, double click within the image. Each image
displays the camera name and the recording mode in use at the top of every image. e various modes are: C
- Con tinuous re cording, S - Sensor recording ( screen will not display <S> unless there is an alarm event), M
- Motion recording or E - Emergency recording (To change these settings please see Scheduling in Chapter 2,
System Setup).
Log in / log out
System Status
Recording Type
C : Continuous Recording
M : Motion Recording
S : Sensor Recording
E : Emergency Recording
Camera Name

3
Current Date and Time
is displays the current date and time. e date is displayed in 24 hour format. e date is displayed in year/
month/day format by default. (See Chapter 2 System Setup to change the date format).
Date and Time Display
Current Date
Current Time
User Login
is button is used to login or logout a user. It also displays which user is currently logged into the sys-
tem. If no one is logged into the system, click the Lock icon to display the user login screen. If someone is
logged on, the lock will display the user’s name. Clicking the lock again will log the user off.
To login the first time, use the factory default username and password. e factory default user ID and
password are
system
/
manager. e maximum user id and password are limited to 7 characters.
Auto Logoff Function
If there is no activity for 10 minutes (fixed) the system will automatically logoff the current user. e user
will have to login to regain system functions. e user name will indicate “Locked” to show that the user
has been logged off the system.
Click the lock icon to display
the login popup.
Factory default user id and password are:
system / manager
Aer anAdmin user has been registered, user login by factory default will be disabled
and login can only be done by registered users. Factory default login can be reinstated
by deleting all registered users.
CAUTION

4
System Status
ere are three system status buttons. ese display information about active alarms/relays, system status
and network status.
Alarm/Relay
Status
Network
Status
System
Status
Alarm Status
Select the icon and alarm status window will open. Sensor alarm and relay on status will be shown. When the
alarm and/or relay is over, message will disappear. Icon will turn bright red indicating an alarm.
System Status
Select icon and system status window will open displaying the system error. e icon will display a smiley
face when in normal state and an exclamation mark when in an abnormal state.

5
Network Status
Select the icon and the network status window will open. Window will show connected network client
information. e information will disappear when the network client has disconnected from the DVR.
Search Screen
e search screen is used to search previously recorded video. e search function is only allowed when
the user has been granted search function authority by the DVR administrator. e function will be re-
stricted when the user has not been granted search rights. Please refer to Chapter 3 Search Function for
search details. For details on setting up user rights, please refer to Chapter 2 System Setup.
Quick Search
Quick Search allows the user to review video from the selected camera without leaving the live screen.
Please refer to Chapter 3 Search Functions for details on Quick Search.

6
Setup Function
Click the setup icon and the setup windows appear. Here the user can do such things as set the recording
function for the cameras, set the recording frame rate, name the cameras, set the motion grid for a camera,
set up PTZ cameras, set the networking functions for the DVR, set the alarm functions just to name a few.
Please see chapter 2 System Setup for more details.
Emergency Record
e Emergency Record button provides an efficient way to record all channels in an emergency situation.
By clicking this button the system will record all channels until emergency record is turned off. To turn off
Emergency Record, click the Emergency Record button a second time. To use emergency record on a single
channel please read the section titled Main Screen Pop-up Menu later in this chapter.
E-Map Function
Provides an electronic map showing the location of cameras and sensors. e system provides several default
maps or a custom map can be designed and imported into the e-map function. For details on setting up and
using the E-Map Function please refer to Chapter 5 E-Map Function.
PTZ Controller
Click the PTZ button to open the PTZ controller. With the PTZ controller the user can control the PTZ cam-
era. Please refer to Chapter 2 System Setup - PTZ Setup for details on setting up the PTZ camera..

7
Controlling e PTZ Camera
In order to control the PTZ camera the PTZ controller must be on screen. To activate the PTZ controller
click the PTZ button on the main DVR screen. Click anywhere in the PTZ camera’s image, this will select the
PTZ camera as the active image. e PTZ controller will display the number of the selected camera. See im-
age below.
Move PTZ up
Move PTZ
le
Move PTZ
down
Move PTZ
right
Move PTZ diagonally
Selected camera
e system also allows the user to control the PTZ camera with the mouse. To use the mouse controls double
click the live image of the PTZ camera so the only camera showing is the PTZ camera. Click the PTZ button
to bring up the PTZ controller. Click the le mouse button and hold it down, the control arrows appear (see
image below). Click and drag the controller in the direction you wish to move the PTZ camera. Release the
mouse button to stop the camera. To zoom in and out use the mouse scroll wheel. Scroll the wheel forward to
zoom in, backward to zoom out. On screen guides will appear as a guide (see image below).
Click and drag mouse icon to move camera
Scroll mouse wheel
to zoom camera
Setting Presets
e 7000 series allows up to 64 presets. (See PTZ camera documentation for number allowed by camera). To
set a preset move the camera to the desired location, click the down arrow button on the “Set Preset box. Se-
lect the preset number you wish to associate this camera location with. e image below displays the set pre-
set box.
Caution:
M
any PTZ camera manufacturer
Many PTZ camera manufacturerM
s program their cameras using 0 as the beginning
any PTZ camera manufacturers program their cameras using 0 as the beginning any PTZ camera manufacturer
preset
number
. Other
number. Othernumber
s, suc
. Others, suc. Other
h as Pelco
begin
preset numbering with 1
. e CDVS
-7000 preset number 1 relates to
the number 0, which means that preset number 1 will not work with a
PTZ camera that uses Pelco P or D
protocol.
ere is a patch available from Crest Electronics w
hich will renumber based on the Pelco protocol,
but the system will then only support 63 presets.

8
Audio and Alarm Indicator
Use these buttons to listen to live audio and audible alarm. Please see Chapter 3 Audio Setting for setting up
audio and Chapter 2 Alarm Event Sound Effect for setting up audible alarm.
Click Button to hear selected channel live audio. Blue indicates that audio is on.
Click again to turn off.
Click Button to hear audible alarm. Blue indicates that audible alarm is on.
Click again to turn off.
Calling a Preset
To move the PTZ camera to a preset, click the down arrow button in the call preset window. Click the
number of the preset you set the camera to and the camera moves to the location set. Image below displays
the call preset function.
Select a number for the
preset location
Call Preset window
Click the set preset button
Select number for preset

9
Screen Division and Control Function
16 Channel Screen Division Buttons
e different screen modes are as follows 1, 4, 6, 8, 9, 10, 13, 16.
All screen divisions will allow for sequencing through all 16
cameras. See chapter 2 Setup Function for details on setting the
sequencing dwell time.
Single Camera Display Button
is will allow the user to view only one camera at a time. To view a single camera, le click highlighting the
desired camera in a red outline. Next, le click the single camera display button. e selected camera will re-
place the current view with a single camera view. To have the system rotate from one camera to another, click
the Next button. To have the system automatically change from one camera to another, click the Auto Rotate
button
(see below).
Four Camera Display Button
is will allow the user to view four cameras at a time. e system displays the cameras in the following
configurations: cameras 1,2,3,4, cameras 5,6,7,8, cameras 9,10,11,12, cameras 13,14,15,16. To have the system
rotate from one 4 camera view to another, click the Next button. To have the system au to matically change
from one 4 camera view to another, click the Auto Rotate button (see below).
Six Camera Display Button
is will allow the user to display six cameras at a time. e different configurations are: cameras 1 - 6, 7 - 12,
and 11 - 16. To view, click on one of the cameras you want to view and click the 6 cam era display button. To
have the system rotate from one 6 camera view to another, click the Next button. To have the system auto-
matically change from one 6 camera view to another, click the Auto Rotate button (see below).

10
Nine Camera Display Button
is will allow the user to display nine cameras at a time. e different configurations are: cameras 1 - 9, and
8 - 16. To view, click on one of the cameras you want to view and click the 9 camera dis play button. To have
the system rotate from one 9 camera view to another, click the Next button. To have the system automatically
change from one 9 camera view to another, click the Auto Rotate button (see below).
Ten Camera Display Button
is will allow the user to display ten cameras at a time. e different configurations are: cameras 1 - 10, and
7 - 16. To view, click on one of the cameras you want to view and click the 10 camera dis play button. To have
the system rotate from one 10 camera view to another, click the Next button. To have the system automati-
cally change from one 10 camera view to another, click the Auto Rotate button (see below).
irteen Camera Display Button
is will allow the user to display thirteen cameras at a time. e different configurations are: cameras 1 - 13,
and 4 - 16. To view, click on one of the cameras you want to view, and click the 13 camera dis play button. To
have the system rotate from one 13 camera view to another, click the Next button. To have the system auto-
matically change from one 13 camera view to another, click the Auto Rotate button(see below).
Sixteen Camera Display Button
is will allow the user to display 16 cameras at a time. On the 32 channel system, click the Next button to
sequence to cameras 17-32.
Display Next Screen Button
If you are in any other screen display mode other than 16 camera display, use this button to go to the next
display configuration. By repeatedly clicking this button you will rotate through all the available display
screens for the currently selected screen division.
Screen Sequencing (Auto Rotation)
is button is used to have the
surveillance screen rotate in order according to the sequencing interval value
set on the environment setting.
(See Chapter 2 System Setup for more details).

11
Full Screen Mode
Click this button to change the display to full screen. Use this mode to minimize the screen’s GUI menu to
the bottom of the screen. Click the right mouse button to display Main Screen pop-up menu and click Nor-
mal Screen to change back to the original screen. (See Image below).
Click Normal to change screen back to default
screen with GUI.
Snapshot
is function allows the user to capture a snapshot of the live screen. Click this button to take a snapshot of
the current live screen. Aer clicking, the snapshot window will come up as shown below. Snapshot allows
you to flip or mirror the image, and
manipulate the contrast and brightness
. You can save or print the image.
Printing requires that you have a printer connected and set up on the DVR.
GUI Minimized when in full screen mode

12
Snapshot File Menu
is menu controls the opening, saving and printing functions for the snapshot image.
Open
image file saved as snapshot. (JPG, BMP)
Save snapshot as image file (JPG, BMP)
Print Snapshot screen.
Preview snapshot printed image before printing.
Open Print setup window.
Exit Snapshot window.
Print Preview
Previews what the printed snapshot will look like. Displays the system name, user name, capture time and
camera name.
Other manuals for CDVS-7000
2
Table of contents
Other Crest Electronics DVR manuals

Crest Electronics
Crest Electronics CDR-1104 User manual
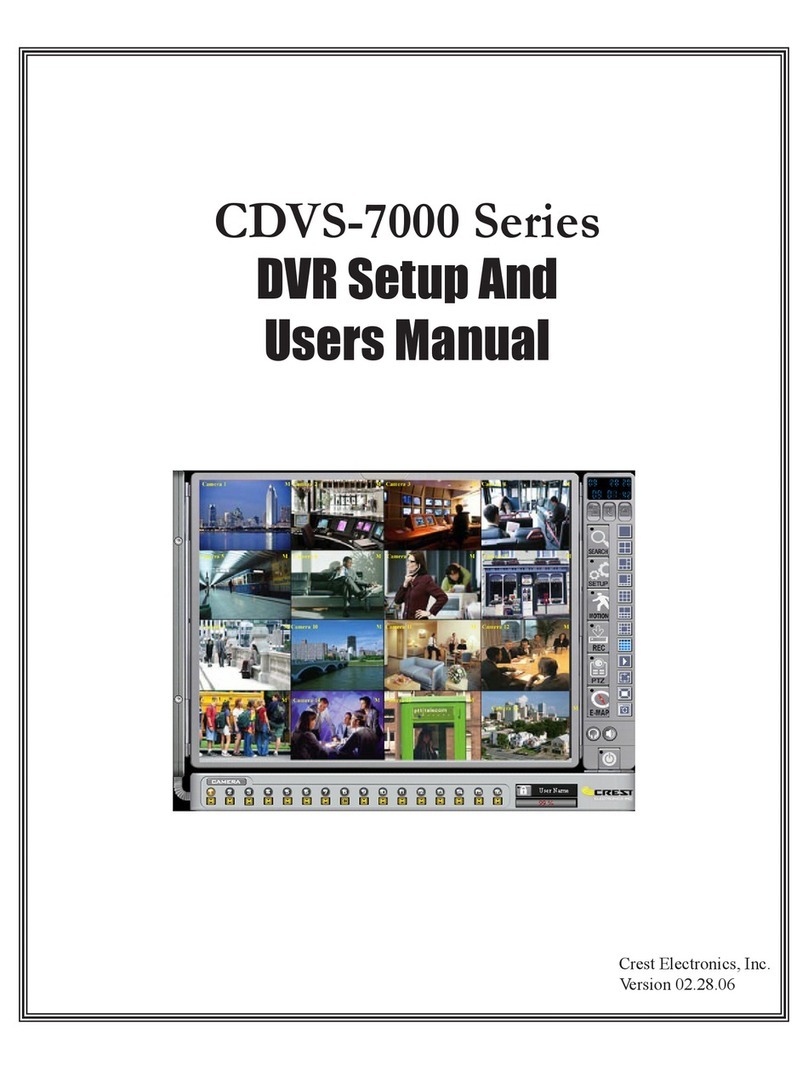
Crest Electronics
Crest Electronics CDVS-7000 User manual

Crest Electronics
Crest Electronics CDVS-5400 SERIES User manual
Crest Electronics
Crest Electronics CDVS-4100 Series User manual

Crest Electronics
Crest Electronics CDR-1104 User manual

Crest Electronics
Crest Electronics CDVS-7000 User manual
Crest Electronics
Crest Electronics CDVS-5000 Series User manual

