manuals.online logo
Brands
  1. Home
  2. •
  3. Brands
  4. •
  5. Crestron
  6. •
  7. Control Unit
  8. •
  9. Crestron FT2A-PWR-UN-1-C14 User manual

Crestron FT2A-PWR-UN-1-C14 User manual

FT2A-PWR-UN-1-C14
AC Power Outlet Module for FT2 Series, Universal, C14 Inlet
Installation Guide
Description
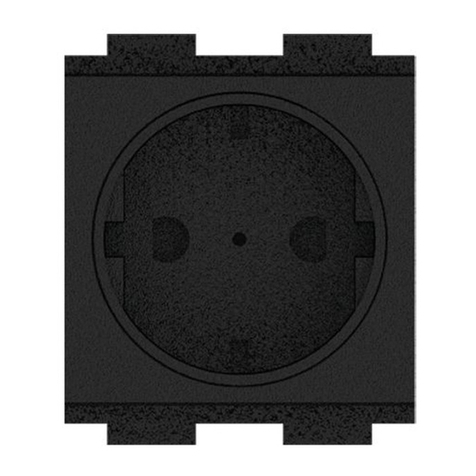
The Crestron®FT2A-PWR-UN-1-C14 module provides one universal ac power outlet for
use with the FT2 series of FlipTop™ cable managment devices. The module may be used
to power laptops and other ac-powered devices at the table.
The FT2A-PWR-UN-1-C14 module is suitable for use in the United States, Canada,
Mexico, Europe, United Kingdom, Japan, Korea, Singapore, Saudi Arabia, Australia, New
Zealand, China, and other countries or regions where Plug Types B, F, G, or I power
outlets are used.
Additional Resources
Visit the product page on the Crestron website (www.crestron.com)
for additional information and the latest rmware updates. Use a QR
reader application on your mobile device to scan the QR image.
inNET EX logo only needed for inNET
EX products. The mere mention of
inNET EX in a document is not cause to
use the logo.
Overview
The FT2A-PWR-UN-1-C14 has the following specications:
• Each FT2A-PWR-UN-1-C14 module provides one universal ac power outlet that is
rated for 10 A (total) at 100–240 Vac, 50/60 Hz.
• An IEC C-14 socket is provided on the bottom of each module, which is used to
connect the module to a power source via an IEC power cord rated for 10 A or better
(not included).
• One blank plate is provided with the FT2A-PWR-UN-1-C14 module for use with
low-prole power cords. Refer to the note below.
Installation
Use the following procedure to install the FT2A-PWR-UN-1-C14 module into an FT2 series
assembly.
If the FT2A-PWR-UN-1-C14 module is being installed as part of a new FT2 series FlipTop
device installation, proceed to step 3 below.
Install the FT2A-PWR-UN-1-C14 Module
1. Remove the magnetic bezel from the FT2 series assembly by grasping the inside of
the bezel and pulling it up and away rmly from the assembly until the magnetic hold
is broken.
2. Unscrew and remove the two locking bars that secure the module row required for
installation.
For example, if installing the FT2A-PWR-UN-1-C14 module in the front row of an
FT2-700 series FlipTop device, remove the front and center locking bars.
Low-prole power
cord must clear top
of FT2 series bezel
FT2A-PWR-UN-1-C14
module
Blank plate
NOTE: If low-prole power cords are expected to be used with the
FT2A-PWR-UN-1-C14 module, ensure that the provided blank plate is installed to the
right of the module.
Each module is 1.97 x 1.97 in (50 x 50 mm) and occupies two empty module spaces in an
FT2 series assembly.
3. Connect an IEC power cord (rated for 10 A or better) to the IEC C-14 socket on the
bottom of the FT2A-PWR-UN-1-C14 module.
FT2A-PWR-UN-1-C14
module (bottom view)
IEC C-14
socket
Locking bar
(center)
Locking bar
(rear)
Locking bar
(front)
As of the date of manufacture, the product has been tested and found to comply with specications
for CE marking.
The product warranty may be found at www.crestron.com/legal/sales-terms-conditions-warranties.
The specic patents that cover Crestron products are listed at www.crestron.com/legal/patents.
Certain Crestron products contain open source software. For specic information, please visit
www.crestron.com/legal/open-source-software.
Crestron, the Crestron logo, and FlipTop are either trademarks or registered trademarks of Crestron
Electronics, Inc. in the United States and/or other countries. Other trademarks, registered trademarks,
and trade names may be used in this document to refer to either the entities claiming the marks and
names or their products. Crestron disclaims any proprietary interest in the marks and names of others.
Crestron is not responsible for errors in typography or photography.
This document was written by the Technical Publications department at Crestron.
©2018 Crestron Electronics, Inc.
Crestron Electronics, Inc. Installation Guide - DOC. 8344A
15 Volvo Drive, Rockleigh, NJ 07647 (2052164)
Tel: 888.CRESTRON 07.18
Fax: 201.767.7576 Specications subject to
www.crestron.com change without notice.
4. Orient the module so that it is facing toward the front of the FT2 series assembly as
shown in the illustration below.
5. Feed the IEC power cord attached to the module down through the appropriate
module spaces in the FT2 series assembly.
6. Slide the module into the appropriate module spaces in the FT2 series assembly.
Use the guide ribs on the front and rear of the module to help position the module in
the assembly.
Complete the Installation
1. Once all modules and plates are installed and level with their surroundings, place the
removed locking bars back into position so that the screws attached to either side of
each locking bar engage their screw holes in the FT2 series assembly.
2. Using a manual torque screwdriver set to its lowest possible setting, hand tighten
the locking bar screws until the locking bars are secured to the assembly.
CAUTION: Do not overtighten the locking bar screws.
3. Hold the magnetic bezel over the FT2 series assembly so that the lid retraction
button on the bezel is aligned with the front of the assembly.
4. Lower the bezel onto the assembly so that the lowered retractable lid ts inside the
rear opening in the bezel and the magnets snap into place against the assembly.
Refer to the illustration below.
Bezel
opening for
retractable lid
Retractable lid
Lid retraction
button
Retractable lid
(located in rear
of assembly)
FT2 series
assembly (front)
FT2A-PWR-UN-1-C14
module
IEC power
cord
FT2A-PWR-UN-1-C14
module

Other Crestron Control Unit manuals

Crestron TS-1542-IMCW User manual

Crestron

Crestron TS-1542-IMCW User manual

Crestron C2N-VEQ4 User manual

Crestron

Crestron C2N-VEQ4 User manual

Crestron FT2A-PWR 1-C14 Series User manual

Crestron

Crestron FT2A-PWR 1-C14 Series User manual

Crestron GLS-EM-MCU User manual

Crestron

Crestron GLS-EM-MCU User manual

Crestron FT2A-CHGR-USBA/C User manual

Crestron

Crestron FT2A-CHGR-USBA/C User manual

Crestron DIN-AO8 Original operating instructions

Crestron

Crestron DIN-AO8 Original operating instructions

Crestron GLS-SIM Operating instructions

Crestron

Crestron GLS-SIM Operating instructions

Crestron CEN-IO-COM-102 User manual

Crestron

Crestron CEN-IO-COM-102 User manual

Crestron FlipTop FT2 Series User manual

Crestron

Crestron FlipTop FT2 Series User manual

Crestron FT2A-PWR-UK-1-C14 User manual

Crestron

Crestron FT2A-PWR-UK-1-C14 User manual

Crestron C2N-IO User manual

Crestron

Crestron C2N-IO User manual

Crestron C2N-FT-TPS4 How to use

Crestron

Crestron C2N-FT-TPS4 How to use

Crestron C2N-VEQ4 User manual

Crestron

Crestron C2N-VEQ4 User manual

Crestron CLTI-2DIMU8 User manual

Crestron

Crestron CLTI-2DIMU8 User manual

Crestron CWD6790R1 User manual

Crestron

Crestron CWD6790R1 User manual

Crestron CGEIB-IP How to use

Crestron

Crestron CGEIB-IP How to use

Crestron C2N-FTB How to use

Crestron

Crestron C2N-FTB How to use

Crestron SFP-10G-S-U Dimensional drawing

Crestron

Crestron SFP-10G-S-U Dimensional drawing

Crestron APAD User manual

Crestron

Crestron APAD User manual

Crestron APAD User instructions

Crestron

Crestron APAD User instructions

Crestron FT2A-PWR US Series User manual

Crestron

Crestron FT2A-PWR US Series User manual

Crestron BiAmp AudiaFlex User manual

Crestron

Crestron BiAmp AudiaFlex User manual

Crestron FT2A-PWR-UK Series User manual

Crestron

Crestron FT2A-PWR-UK Series User manual

Crestron FlipTop FT2 Series User manual

Crestron

Crestron FlipTop FT2 Series User manual

Popular Control Unit manuals by other brands

Maker Factory MAKEVMA308 user manual

Maker Factory

Maker Factory MAKEVMA308 user manual

Flexball 4500 CPP manual

Flexball

Flexball 4500 CPP manual

Baso B Series installation instructions

Baso

Baso B Series installation instructions

Rockwell Automation Micro800 2080-MEMBAK-RTC quick start guide

Rockwell Automation

Rockwell Automation Micro800 2080-MEMBAK-RTC quick start guide

Lumel SM4 user manual

Lumel

Lumel SM4 user manual

Danfoss MSV-C instructions

Danfoss

Danfoss MSV-C instructions

M-system R7ML-YV2-R instruction manual

M-system

M-system R7ML-YV2-R instruction manual

Niles VCS50R Specifications

Niles

Niles VCS50R Specifications

janitza 96-PA-RCM installation instructions

janitza

janitza 96-PA-RCM installation instructions

HBX ECO-0600 installation manual

HBX

HBX ECO-0600 installation manual

Biamp Qt X300 manual

Biamp

Biamp Qt X300 manual

H3C NSQ1FAB04B0 manual

H3C

H3C NSQ1FAB04B0 manual

Vimar BY-ALARM PLUS quick start guide

Vimar

Vimar BY-ALARM PLUS quick start guide

Gantner Q Series manual

Gantner

Gantner Q Series manual

EOS Emotec D Installation and operating instructions

EOS

EOS Emotec D Installation and operating instructions

Portabellabz VCS3 manual

Portabellabz

Portabellabz VCS3 manual

Vixen Horns VXA7164 installation guide

Vixen Horns

Vixen Horns VXA7164 installation guide

Metso AS series operating instructions

Metso

Metso AS series operating instructions

manuals.online logo
manuals.online logoBrands
  • About & Mission
  • Contact us
  • Privacy Policy
  • Terms and Conditions

Copyright 2025 Manuals.Online. All Rights Reserved.