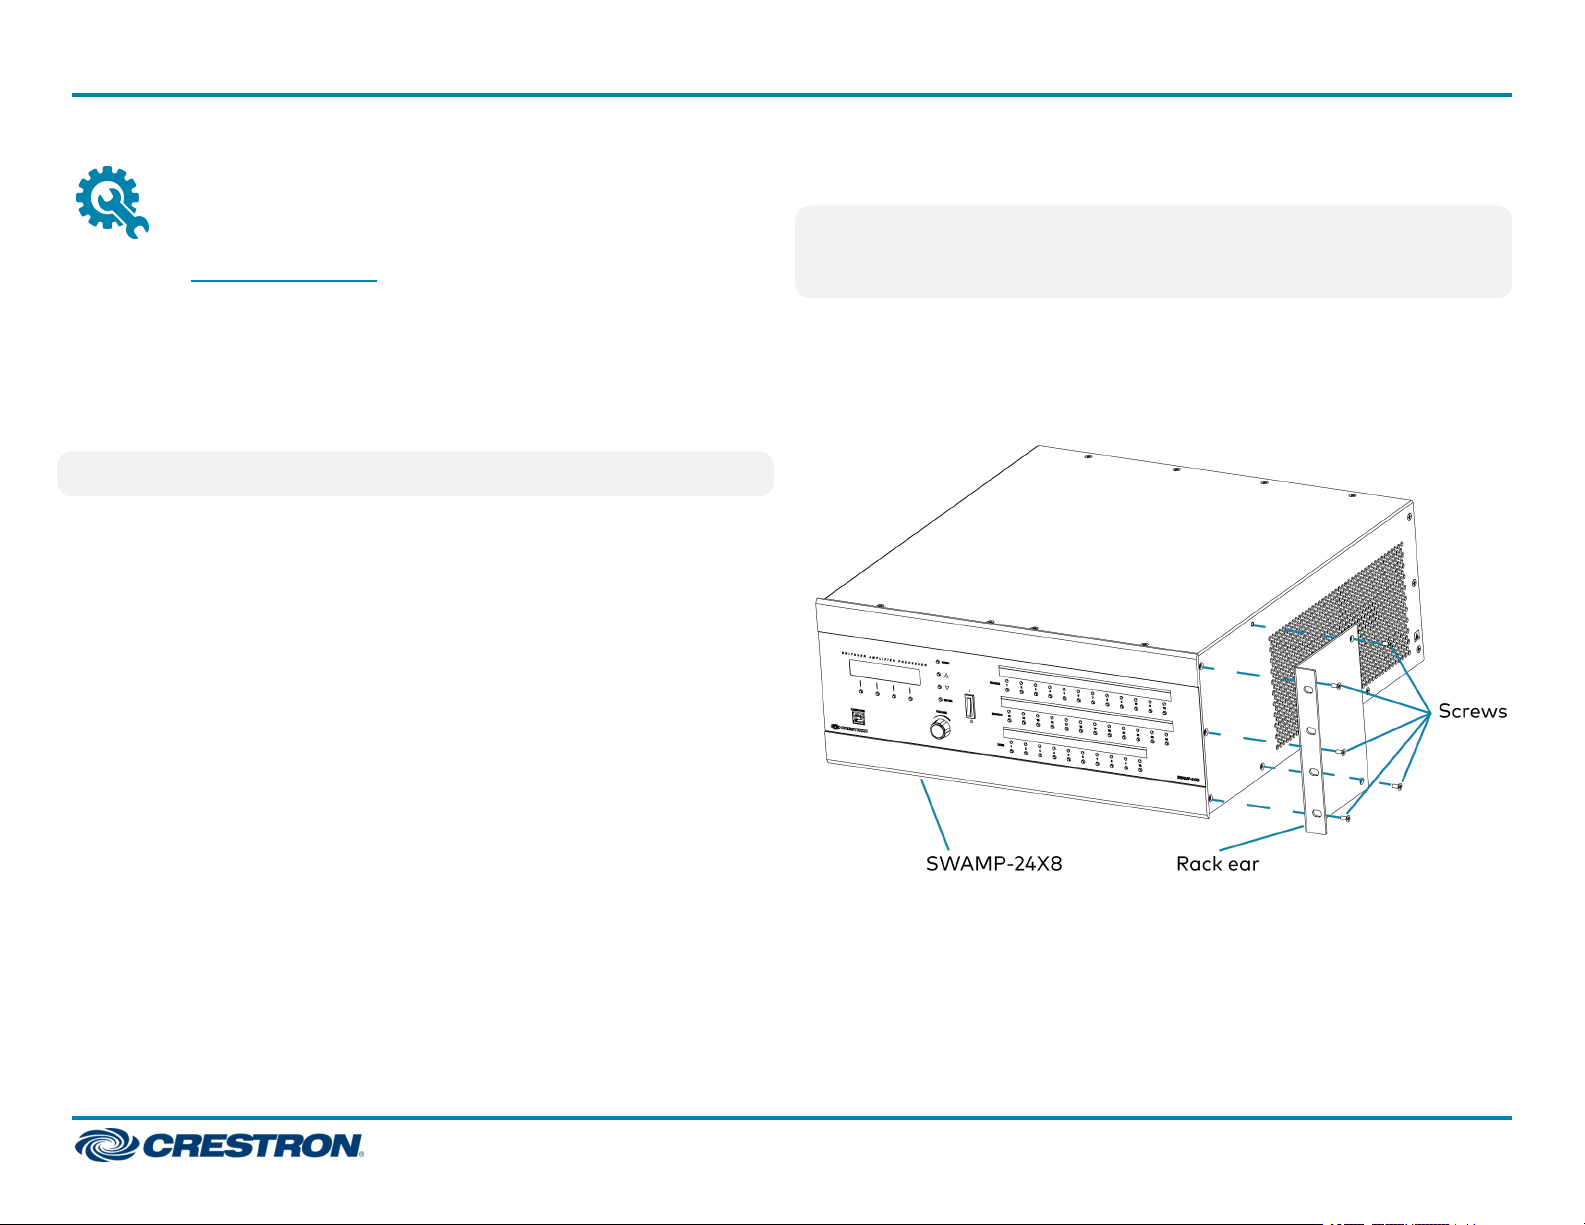
Rack Mounting Safety Precautions
Elevated Operating Ambient Temperature: If installed in a closed or multi-
unit rack assembly, the operating ambient temperature of the rack
environment may be greater than room ambient temperature. Therefore,
consideration should be given to installing the equipment in an
environment compatible with the maximum ambient temperature (Tma)
specified by the manufacturer.
Reduced Airflow: Installation of the equipment in a rack should be such
that the amount of airflow required for safe operation of the equipment
is not compromised.
Mechanical Loading: Mounting of the equipment in the rack should be
such that a hazardous condition is not achieved due to uneven mechanical
loading.
Circuit Overloading: Consideration should be given to the connection of
the equipment to the supply circuit and the effect that overloading of the
circuits might have on overcurrent protection and supply wiring.
Appropriate consideration of equipment nameplate ratings should be
used when addressing this concern.
Reliable Earthing: Reliable earthing of rack-mounted equipment should be
maintained. Particular attention should be given to supply connections
other than direct connections to the branch circuit (e.g., use of power
strips).
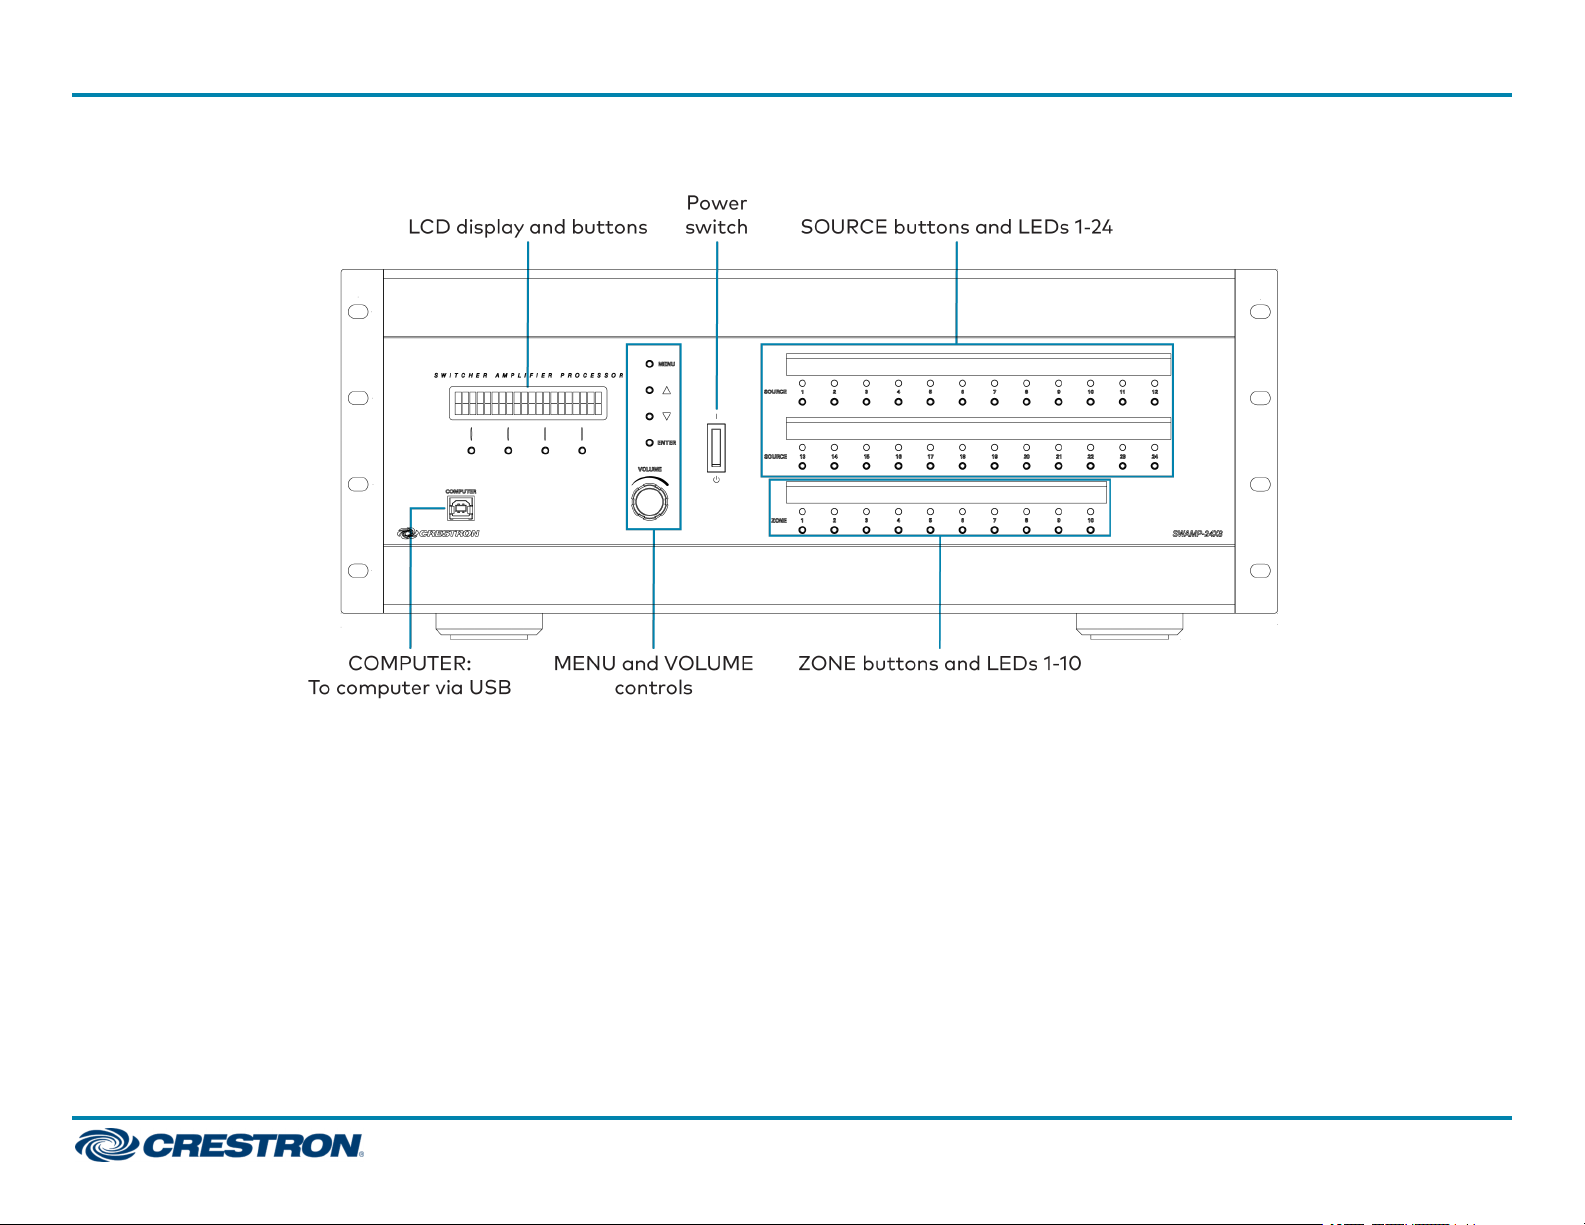
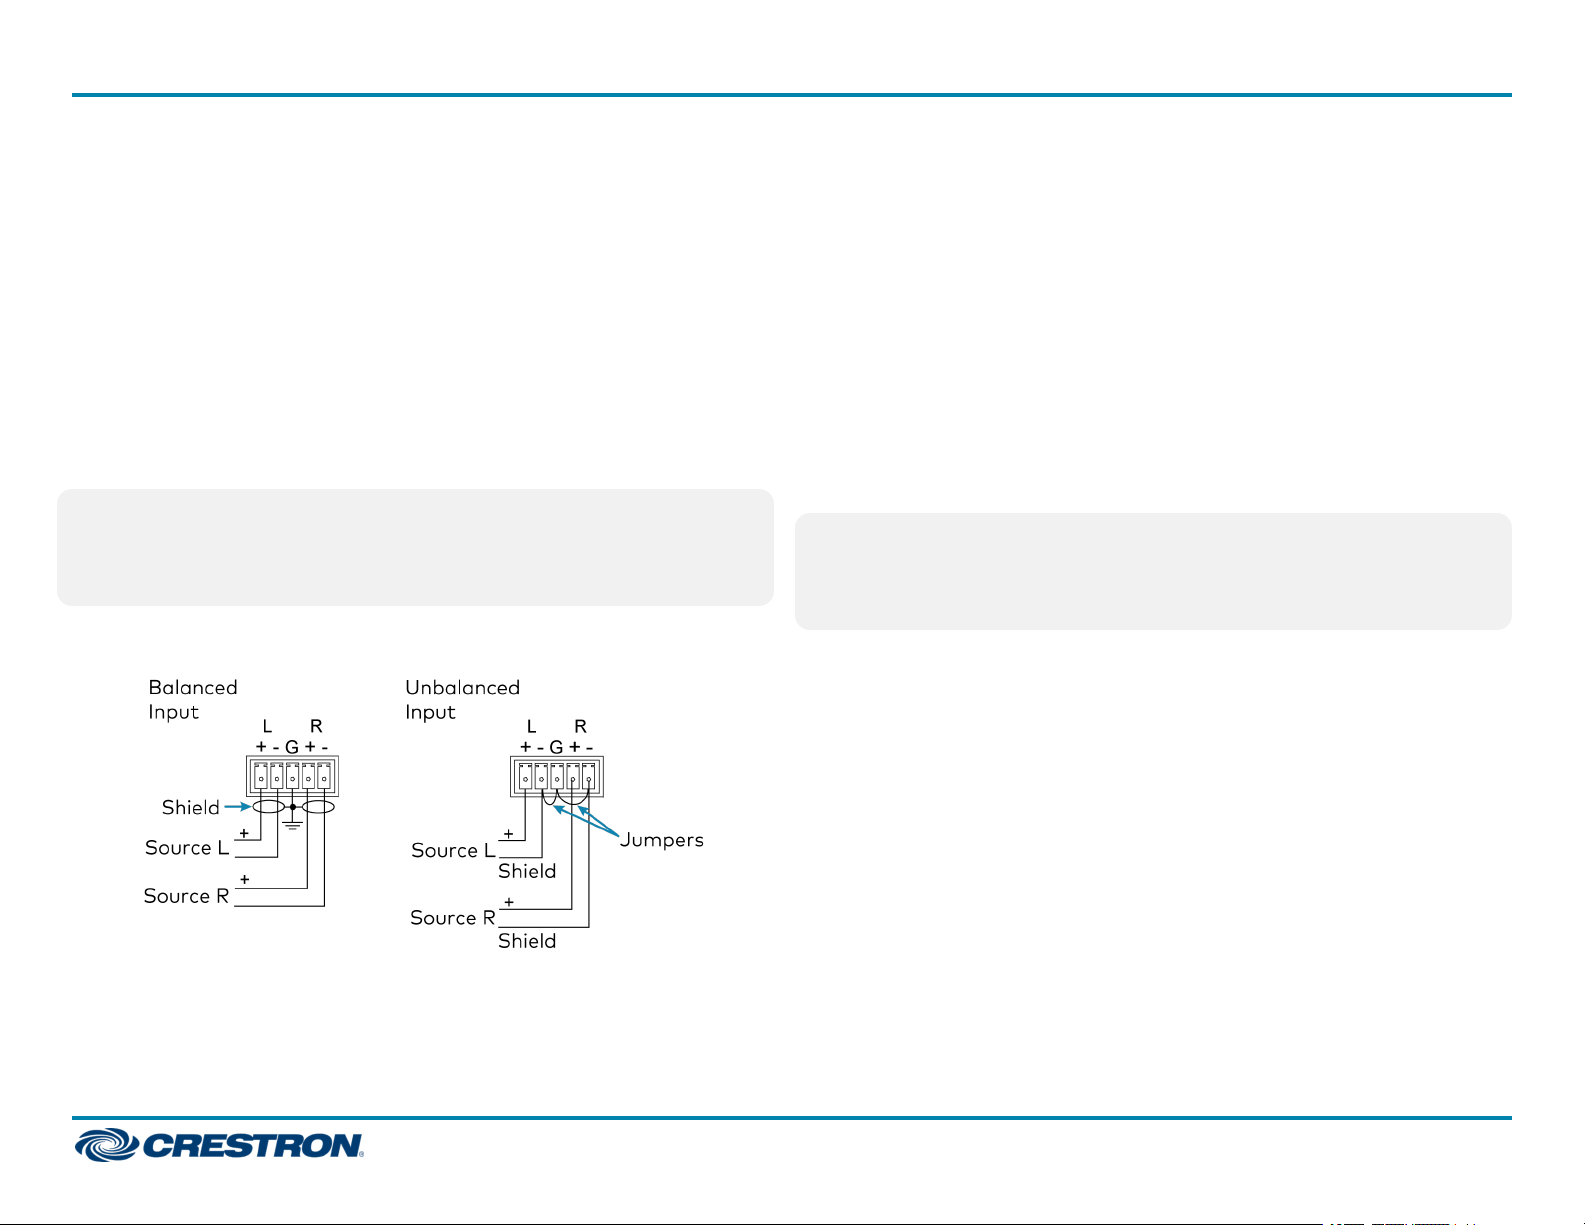
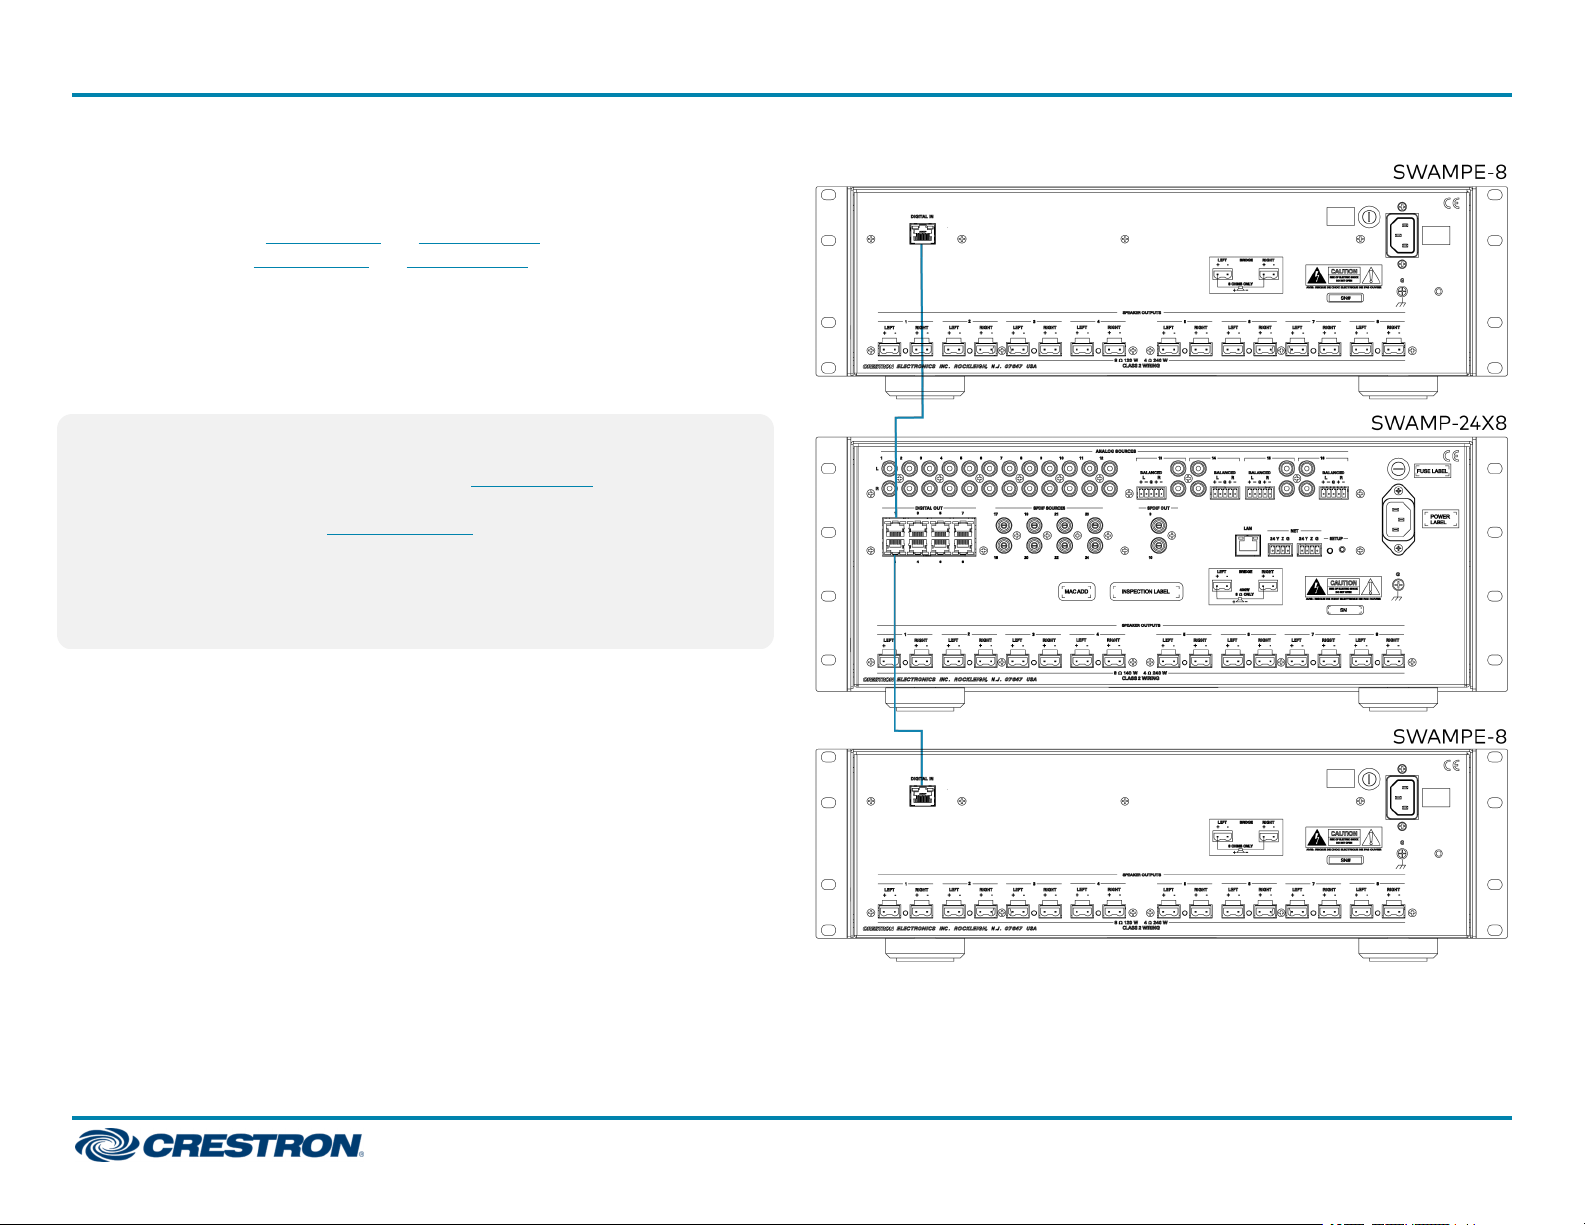
Connect
Connect the device as called out in the following illustrations. Connect
power last.
WARNING: This amplifier is capable of delivering immense amounts of
undistorted power to the loudspeakers. Please use caution and
adequate ear protection if listening to content at high volume levels as
continued exposure to high sound pressure levels can cause permanent
hearing impairment or loss.
CAUTION:
lKeep the device unplugged until all of the input, network, and speaker
wiring is complete.
lCheck the speaker cables for shorts and frayed wiring around the
SPEAKER OUTPUTS connectors.
NOTE: When installing the SWAMP24X8, a dedicated 15 amp circuit is
strongly recommended. When installing the SWAMPI-24X8, a dedicated
10 amp circuit is strongly recommended.
3
SWAMP(I)-24X8 QuickStart
Sonnex® Multiroom Audio System


-24X8 User manual")


-AMP-4X100 User manual")