manuals.online logo
Brands
  1. Home
  2. •
  3. Brands
  4. •
  5. CristalRecord
  6. •
  7. Fan
  8. •
  9. CristalRecord Slice User manual

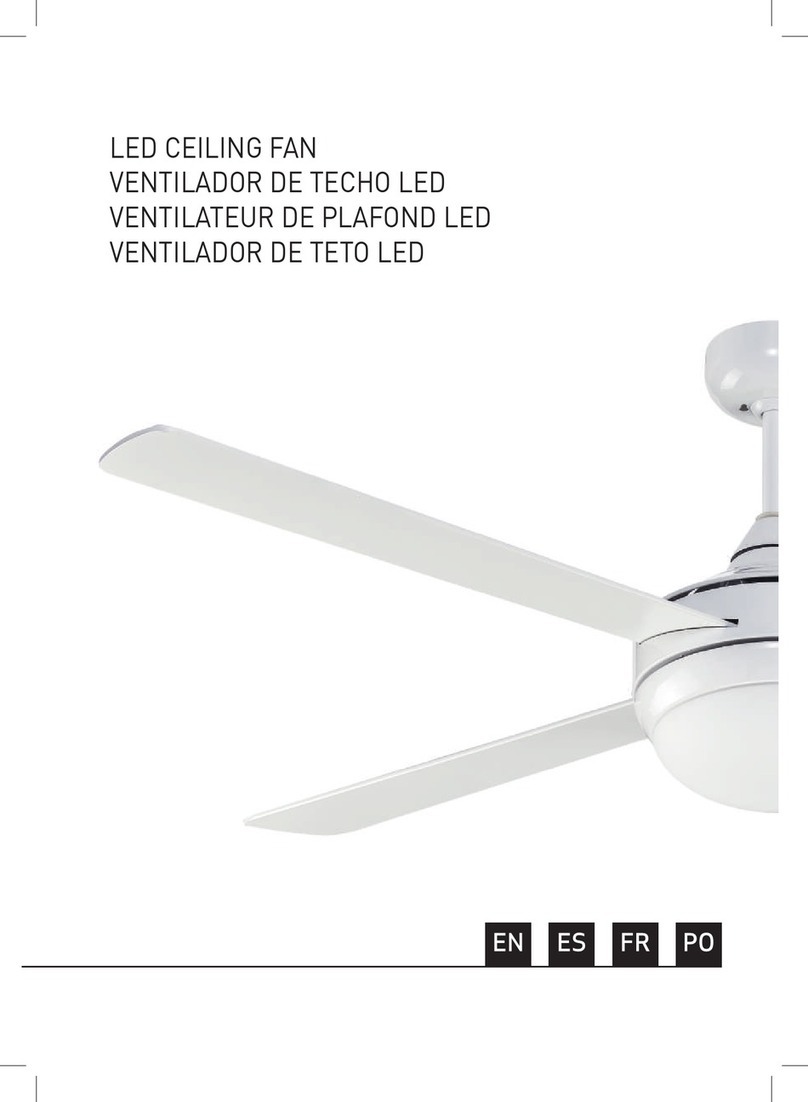
CristalRecord Slice User manual

Slice
Ventilador de techo LED
Ventilador de teto LED
LED Ceiling fan
Ventilateur de plafond LED
Carefully read these instructions before mounting the fan. Keep original carton and Styrofoam as warran-
ty repair and service will not be carried out unless the fan is returned in complete original packaging.
The fan must be installed by qualified personnel.
SAFETY PRECAUTIONS
IMPORTANT: PLEASE READ BEFORE INSTALLATION
1. Installation must be carried out by a qualified installer.
2. Turn off the main switch in the fuse box.
3. The power supply must be AC 220-240V 50/60Hz
4. When mounting the fan, ensure the safety cable is loop across the ceiling mounting “J” hook.
5. The ceiling mount hook must be able to support the weight of the fan.
6. The ceiling fan must be mounted at a min. height of 2.3 meters above the floor.
7. Do not operate the reverse function when the fan is still moving.
Wait for it to come to a complete stop before changing the function.
8. Do not insert any objects in the path of the blades.
9. When all electrical connections are done, store all wires neatly.
10. Make sure all screws and connections are tightly screwed and secured.
11. The supply wires live and neutral must be connected to a double pole switch having a contact
of at least 3mm in all poles.
WARNING
TO REDUCE THE RISK OF PERSONAL INJURY, DO NOT BEND THE BLADES BRACKETS DURING ASSEM-
BLY OR AFTER INSTALLATION. DO NOT INSERT ANY OBJECT IN THE PATH OF THE BLADES.
TO REDUCE THE RISK OF SHOCK, THIS FAN MUST BE INSTALLED WITH AN INSOLATION WALL
CONTROL / SWITCH.
Lea atentamente estas instrucciones antes de montar el ventilador. Guarde la caja original del ventilador
ya que la garantía no se hará efectiva en caso de no devolver el ventilador en su embalaje original.
El ventilador debe ser instalado por personal cualificado.
PRECAUCIONES DE SEGURIDAD
IMPORTANTE: POR FAVOR LEA ANTES DE LA INSTALACIÓN
1. La instalación debe ser realizada por un instalador cualificado.
2. Apague el interruptor principal de la caja de fusibles.
3. La alimentación debe ser AC 220-240V 50/60Hz
4. Cuando monte el ventilador, asegúrese de que el cable de seguridad esté en bucle a través
del gancho “J” de montaje en el techo.
5. El gancho de montaje en el techo debe ser capaz de soportar el peso del ventilador.
6. El ventilador de techo debe montarse a una altura mínima de 2,3 metros del suelo.
7. No accione la función inversa cuando el ventilador esté todavía en movimiento.
Espere a que se detenga completamente antes de cambiar la función.
8. No introduzca ningún objeto en el recorrido de las aspas.
9. Una vez realizadas todas las conexiones eléctricas, guarde todos los cables de forma ordenada.
10. Asegúrese de que todos los tornillos y conexiones estén bien atornillados y asegurados.
11. Los cables de alimentación con corriente y neutro deben conectarse a un interruptor de doble polo
que tenga un contacto de al menos 3mm en todos los polos.
ADVERTENCIA
PARA REDUCIR EL RIESGO DE LESIONES PERSONALES, NO DOBLE LOS SOPORTES DE LAS PALAS
DURANTE EL MONTAJE O DESPUÉS DE LA INSTALACIÓN. NO INTRODUZCA NINGÚN OBJETO EN LA
TRAYECTORIA DE LAS CUCHILLAS.
PARA REDUCIR EL RIESGO DE DESCARGAS ELÉCTRICAS, ESTE VENTILADOR DEBE INSTALARSE CON UN
CONTROL / INTERRUPTOR DE PARED DE INSOLACIÓN.
Lisez attentivement ces instructions avant de monter le ventilateur. Conservez la boîte de ventilateur d’origine
car la garantie ne sera pas effective si vous ne retournez pas le ventilateur dans son emballage d’origine.
L’installation du ventilateur doit être effectuée par un personnel qualifié.
LES PRÉCAUTIONS DE SÉCURITÉ
IMPORTANT : À LIRE AVANT L’INSTALLATION
1. L’installation doit être effectuée par un installateur qualifié.
2. Coupez l’interrupteur principal dans la boîte à fusibles.
3. L’alimentation électrique doit être de type AC 220-240V 50/60Hz
4. Lorsque vous installez le ventilateur, assurez-vous que le câble de sécurité est passé par le crochet
en “J” du support de plafond.
5. Le crochet de fixation au plafond doit être capable de supporter le poids du ventilateur.
6. Le ventilateur de plafond doit être monté à au moins 2,3 mètres au-dessus du sol.
7. N’utilisez pas la fonction de marche arrière lorsque le ventilateur est encore en marche.
Attendez qu’il s’arrête complètement avant de changer de fonction.
8. N’insérez aucun objet dans le chemin des lames.
9. Lorsque tous les branchements électriques ont été effectués, rangez tous les câbles
de manière ordonnée.
10. Assurez-vous que toutes les vis et tous les raccords sont bien en place.
11. Les câbles d’alimentation et de neutre doivent être connectés à un interrupteur bipolaire qui
a un contact d’au moins 3 mm sur tous les pôles.
AVERTISSEMENT
POUR RÉDUIRE LE RISQUE DE BLESSURE, NE PAS PLIER LES SUPPORTS DE LAMES PENDANT OU
APRÈS L’INSTALLATION N’INSÉREZ AUCUN OBJET DANS LA TRAJECTOIRE DES LAMES.
POUR RÉDUIRE LE RISQUE DE CHOC ÉLECTRIQUE, CE VENTILATEUR DOIT ÊTRE INSTALLÉ AVEC UN
INTERRUPTEUR/CONTRÔLE MURAL À ÉCRAN THERMIQUE.
Leia estas instruções cuidadosamente antes de instalar o ventilador. Guarde a caixa do ventilador origi-
nal, pois a garantia não será efetiva se o ventilador não for devolvido em sua embalagem original.
O ventilador deve ser instalado por pessoal qualificado.
PRECAUÇÕES DE SEGURANÇA
IMPORTANTE: POR FAVOR LEIA ANTES DA INSTALAÇÃO
1. A instalação deve ser efectuada por um instalador qualificado.
2. Desligar o interruptor principal na caixa de fusíveis.
3. A fonte de alimentação deve ser AC 220-240V 50/60Hz
4. Ao montar o ventilador, certifique-se de que o cabo de segurança está ligado através do gancho
de montagem no tecto “J”.
5. Gancho de montagem no tecto deve ser capaz de suportar o peso do ventilador.
6. Ventilador de teto deve ser montado pelo menos 2,3 metros acima do chão.
7. Não utilize a função inversa quando o ventilador ainda está em movimento. Aguarde que pare
completamente antes de alterar a função.
8. Não inserir quaisquer objectos no caminho das lâminas.
9. Quando todas as ligações eléctricas tiverem sido efectuadas, armazenar todos os cabos de
forma ordenada.
10. Certifique-se de que todos os parafusos e conexões estão firmemente aparafusados no lugar.
11. Os cabos eléctricos e neutros devem ser ligados a um interruptor de dois pólos que tenha um contacto
de pelo menos 3 mm em todos os pólos.
ADVERTÊNCIA
PARA REDUZIR O RISCO DE FERIMENTOS PESSOAIS, NÃO DOBRAR OS SUPORTES DAS LÂMINAS DU-
RANTE OU APÓS A INSTALAÇÃO NÃO INSERIR NENHUM OBJECTO NA TRAJECTÓRIA DAS LÂMINAS.
PARA REDUZIR O RISCO DE CHOQUE ELÉCTRICO, ESTE VENTILADOR DEVE SER INSTALADO COM UM
INTERRUPTOR/CONTROLO DE PAREDE COM BLINDAGEM TÉRMICA.
1
3
2
4
5
6
7
11 12
8
10
9
CONTENIDO DE LA CAJA
BOX CONTENTS
CONTENU DE LA BOITE
CONTEÚDO DA CAIXA
3
1
2
3
4
95
106
117
128
Mounting bracket
Soporte de montaje
Support de montage
Suporte de montagem
Canopy
Embellecedor
Embellissement
Embelezamento
Downrod and hanger ball
Tija y bola de suspension
Tige et boule de suspension
Esfera de suspensão e haste
Cubierta del embellecedor
Canopy cover
Couverture d’ embellissement
Cobertura do embelezamento
Decorative cover
Cubierta decorativa
Couverture décorative
Cobertura decorativa
Pin
Pasador
Pin
Alfinete
Bolt
Perno
Goupille
Parafuso
Motor
Motor
Moteur
Motor
Lihgtkit
Kit de luz
Kit d’éclairage
Kit de luz
Lamp shade
Difusor
Diffuseur
Difusor
Screws bag
Bolsa de tornillos
Sac de vis
Saco de parafusos
Connector (x4)
Conectores (x4)
Connecteurs (x4)
Conectores (x4)
TOOLS REQUIRED
HERRAMIENTAS NECESARIAS
OUTILS NÉCESSAIRES
FERRAMENTAS NECESSÁRIAS
Phillips screwdriver
Destornillador estrella
Tournevis cruciforme
Chave fendas estrela
Flat Blade screwdriver
Destornillador plano
Tournevis plat
Chave fendas plana
Wrench
Llave inglesa
Clé
Chave mestra
Step lader
Escalera
Échelle
Escada
Drill
Taladro
Exercice
Broca
INSTALLING THE ROOF SUPPORT
INSTALAR EL SOPORTE AL TECHO
L’INSTALLATION DU SUPPORT DE TOIT
INSTALAÇÃO DO SUPORTE DO TELHADO
Ensure that the mounting allows for 2.13m clearance to the floor
and a distance of 1m to any wall or obstruction.
Asegurar que el montaje permite un espacio libre de 2.13m hasta
el suelo y una distancia de 1m a cualquier pared u objeto.
Assurez-vous que le montage permet un dégagement de 2,13 m
par rapport au sol et une distance de 1 m par rapport à tout mur
ou obstacle.
Assegurar que a montagem permite uma distância de 2,13 m até
ao chão e uma distância de 1 m até qualquer parede ou obstrução.
INSTALLATION WITH DOWNROD
INSTALACIÓN CON TIJA
INSTALLATION AVEC TIGE
INSTALAÇÃO COM HASTE
FOR WOODEN CEILING
PARA TECHO DE MADERA
POUR PLAFOND EN BOIS
PARA TECTO DE MADEIRA
1. To use four screws to install the mounting bracket firmly.
2. Pass the wood screes with washer trough the safety cable, fasten the
safety cable onto the wooden ceiling.
1. Usar cuatro tornillos para instalar el soporte de montaje con firmeza.
2. Pasar los tornillos de madera con arandela por el cable de seguridad,
fijar el cable de seguridad en el techo de madera.
1. Utiliser quatre vis pour installer fermement le support de montage.
2. Faire passer les vis en bois avec rondelle à travers le câble de sécurité,
fixer le câble de sécurité sur le plafond en bois.
1. Utilizar quatro parafusos para instalar o suporte de montagem com firmeza.
2. Passar os parafusos de madeira com arruela através do cabo de segurança,
fixar o cabo de segurança ao tecto de madeira.
FOR CONCRETE CEILING
PARA TECHO DE HORMIGON
POUR PLAFOND EN BÉTON
PARA TECTO DE BETÃO
1. To use two expansion screws to install the bracket firmly.
2. Install the “J” hook onto the concrete ceiling and fasten firmly.
Note the place of “j” hook as fig 4.
1. Utilice dos tornillos de expansión para instalar el soporte con firmeza.
2. Instale el gancho en “J” en el techo de hormigón y sujételo firmemente.
Vea el lugar del gancho en “J” en la figura 4.
1. Utilisez deux vis d’expansion pour installer le support fermement.
2. Installez le crochet en “J” sur le plafond en béton et fixez-le fermement.
Notez l’emplacement du crochet en “J” comme indiqué sur la figure 4.
1. Utilize dois parafusos de expansão para instalar o suporte com firmeza.
2. Instalar o gancho “J” no tecto de betão e fixá-lo firmemente.
Note o lugar do gancho “j” como figura 4.
DOWNROD AND HANGER BALL MOUNTING
MONTAJE DE LA TIJA Y LA BOLA DE SUSPENSIÓN
MONTAGE DE LA TIGE ET BOULE DE SUSPENSION
MONTAGEM ESFERA DE SUSPENSÃO E HASTE
Remove the bolt and pin from the bottom of the downrod.
Quitar el perno y el pasador de la parte inferior de la tija.
Retirez la goupille et le pin du bas de la tige.
Retirar o parafuso e o pino do inferior extremo do haste.
Slide the ball down.
Desliza la bola hacia abajo.
Glissez la balle dans la tige vers le bas.
Deslize a bola para baixo
Remove the bolt.
Quitar el perno.
Retirez le goupille.
Retirar o parafuso.
Loosen the screws on the hanger ball.
Aflojar los tornillos que hay en la bola de suspensión.
Desserrer les vis de la boule de suspension.
Desaperte os parafusos da esfera de suspensão.
1 3
2 4
Insert the canopy, the cover and pass the motor cables through the downrod.
Introducir en la tija el embellecedor, la cubierta y pasar los cables del motor.
Insérez le embellissement, le canopy et faites passer les câbles du moteur à travers le tige.
Inserir a cobertura, o revestimento e passar os cabos do motor através do haste.
Replace the bolt that holds the ball to the downrod.
Vuelva a colocar el perno que sujeta la bola a la tija.
Replacez le goupille qui maintient la boule sur la tige.
Coloque o parafuso que prende a bola à haste.
Put the suspension ball in place and put the pin in.
Poner la bola de suspensión en su lugar y ponga el pasador.
Mettez la boule de suspension en place et placez la goupille.
Colocar a bola de suspensão no lugar e colocar o pino.
Attach the downrod frame to the motor. Loosen the screws in the
bracket, place the downrod and fasten it with the bolt through the brac-
ket and downrod. Then tighten the two screws and slide the cover until
it covers the base.
Sujete la estructura de la tija al motor. Afloje los tornillos que hay en
el soporte, coloque la tija y sujétela con el perno atravesando el soporte
y la tija. Después apriete los dos tornillos y deslice la cubierta por la tija
hasta que tape la base.
Fixez le cadre de la tige au moteur. Desserrez les vis du support, pla-
cez la tige et fixez-la avec le goupille à travers le support et la tige. Se-
rrez ensuite les deux vis et faites glisser le couvercle sur la tige jusqu’à
ce qu’il recouvre la base.
Fixar o estrutura do haste ao motor. Desaperte os parafusos no su-
porte, coloque o haste e fixe-o com o parafuso através do suporte e do
haste. Em continuação, apertar os dois parafusos e deslizar a capa até
cobrir a base.
5
6
7
8
CHANDE THE DOWNROD
CAMBIAR LA TIJA
CHANGER LE TIGE
SUBSTITUIR O HASTE
The fan is supplied with a standard downrod
pre-mounted to the suspension ball. A longer downrod
of 25cm has been added in case you have a higher roof
that requires it.
El ventilador viene con una tija estándar montada pre-
viamente a la bola de suspensión. En la caja encontrará
una tija más larga de 25cm en caso de que se tenga un
techo más alto que lo requiera.
Le ventilateur est fourni avec une tige standard
prémontée sur la boule de suspension. Une plus longue
tige de selle de 25 cm a été ajoutée au cas où vous
auriez un toit plus haut qui l’exigerait.
O ventilador é fornecido com uma haste standard
pré-montada na bola de suspensão. Foi adicionada
uma haste mais longa de 25cm para o caso de ter um
telhado mais alto que o requeira.
Remove the suspension ball from the down-
rod after unscrewing the screws that hold it.
Quite la bola de suspensión de la tija aflojando
los tornillos que la sujetan.
Retirez la boule de suspension de la tige après
avoir desserré les vis qui la maintiennent.
Retirar a esfera de suspensão do haste depois
de desapertar os parafusos que a seguram.
Insert the bolt into the new downrod and slide
the ball up to the top of the seat post.
Inserte el perno en la tija nueva y desliza la
bola hasta arriba de la tija.
Insérez la goupille dans la nouvelle tige et
glisser la boule jusqu’au sommet de la tige.
Inserir o parafuso no novo haste e deslizar a
bola até à parte superior do haste.
Slide the ball through the downrod and remove the bolt.
Deslice la bola por la tija hasta sacarla y quita el perno.
Glissez la balle dans la tige et retirez la goupille.
Deslize a bola através da haste e retire o parafuso.
Put the screws back in the ball.
Vuelva a poner los tornillos en la bola.
Remettez les vis dans la boule.
Coloque os parafusos de volta na bola.
1
3
2
4
HANG THE FAN
COLGAR EL VENTILADOR
ACCROCHER LE VENTILATEUR
DESLIGAR O VENTILADOR
Hang the fan on the hanger bracket. Raise the fan until the suspension ball is positioned in the bracket
and turn it until the slot in the ball fits into the lug of the bracket.
Cuelgue el ventilador del soporte del techo. Suba el ventilador hasta colocar la bola de suspensión en el
soporte y gírela hasta que encaje la ranura de la bola en la orejeta del soporte.
Accrochez le ventilateur au support de plafond. Soulevez le ventilateur jusqu’à ce que la boule soit posi-
tionnée dans le support et tournez-le jusqu’à ce que la fente de la boule s’emboîte dans l’ergot du support.
Pendurar o ventilador na montagem no tecto. Levante o ventilador até que a bola de suspensão esteja
posicionada no suporte e vire-a até que a ranhura da bola encaixe na argola do suporte.
Attach the safet wire to the expansion J
hook for safety purposes. Tighten the nut
firmly.
Conecte el cable de seguridad al gancho
J de expansión por razones de seguridad.
Apriete la tuerca firmemente.
Pour des raisons de sécurité, attachez le
fil de sécurité au crochet d’expansion en
J. Serrez fermement l’écrou.
Fixar o fio de segurança ao gancho de
expansão J por razões de segurança.
1
2
ELECTRICAL CONNECTIONS
CONEXIONES ELECTRICAS
LES CONNEXIONS ÉLECTRIQUES
LIGAÇÕES ELÉCTRICAS.
SETTING THE CANOPY
COLOCACIÓN DEL EMBELLECEDOR
MONTAGE DE L’ EMBELLISSEMENT
MONTAGEM DO MBELEZAMENTO
Make the connections as shown in the diagram.
Hacer las conexiones tal y como se muestra en el esquema.
Effectuez les connexions comme indiqué sur le schéma.
Faça as ligações como mostra o diagrama.
Pull the canopy up to the ceiling and secure it to the bracket
with the two screws. The two screws will be protruded with
some allowance to receive the canopy cover.
Suba el embellecedor hasta el techo y sujételo al soporte
con los dostornillos. Los dos tornillos saldrán con un poco de
holgura para poder alojar la cubierta del embellecedor.
Soulevez le embellesiment jusqu’au plafond et fixez-le au
support à l’aide des vis. Les deux vis seront saillantes avec
une certaine marge pour recevoir le couvercle de l’embelle-
siment.
Levantar o embelezamento até ao tecto e fixá-lo ao suporte
com dos parafusos. Os dois parafusos serão salientes com
algum subsídio para receber a cobertura do embelezamento
Move the canopy cover towards the canopy and attach it
with the screws and twist anticlockwise until its installed
tightly.
Mueva la cubierta hacia el embellecedor y sujétela con los
tornillos y gire en sentido contrario a las agujas del reloj
hasta que se quede instalada.
Déplacez le couvercle et fixez-le avec les vis, puis tournez
dans le sens inverse des aiguilles d’une montre jusqu’à ce
qu’il soit installé.
Mova a cobertura em direcção ao embelezamento e fixe-o
com os parafusos e rode no sentido contrário ao dos pontei-
ros do relógio até à sua instalação.
1
2
INSTALLATION OF LIGHTKIT
INSTALACIÓN DEL KIT DE LUZ
INSTALLATION KIT D’ÉCLAIRAGE
INSTALAÇÃO DO KIT DE LUZ
Remove one screw from the motor round piece, uns-
crew the other two screws out by 3-4mm. Attach the
lightkit to the fan, fix first screw back to the hole and
tighten all the three screws firmly.
Quita un tornillo de la pieza redonda del motor,
destornilla los otros dos tornillos 3-4mm. Fije el kit de
luz al ventilador, fije el primer tornillo en el agujero y
apriete los tres tornillos firmemente.
Retirez une vis de la pièce ronde du moteur, dévissez
les deux autres vis de 3-4mm. Fixez le kit d’éclairage
au ventilateur, remettez la première vis dans le trou et
serrez fermement les trois vis.
Retire um parafuso da peça redonda do motor, desa-
perte os outros dois parafusos em 3-4mm. Fixar o kit
de luz ao ventilador, fixar o primeiro parafuso nova-
mente no furo e apertar firmemente os três parafusos.
Attach the lamp shade to the light kit and twist
clockwise until its secured tightly.
Coloque la pantalla de la lámpara en el kit de luz y
gírela en el sentido de las agujas del reloj hasta que
esté bien asegurada.
Fixez l’abat-jour au kit d’éclairage et tournez-le
dans le sens des aiguilles d’une montre jusqu’à ce
qu’il soit bien fixé.
Fixar a sombra da lâmpada ao conjunto de luzes e
rodar no sentido dos ponteiros do relógio até ficar
bem fixo.
Connect the wires (following the colours)
.
Conectar los cables (Siguiendo los colores).
Connecter les câbles (en suivant les couleurs).
Ligar os cabos (seguindo as cores).
1
3
2
INSTALLATION WITHOUT DOWNROD
INSTALACIÓN SIN TIJA
INSTALLATION SANS TIGE
INSTALAÇÃO SEM HASTE
INSTALLATION OF BRACKET PLATE
INSTALACIÓN DE LA PLACA DE SOPORTE
INSTALLATION DE LA PLAQUE DE SUPPORT
INSTALAÇÃO DA PLACA DE SUPORTE
To use four expansion screws to install the brac-
ket plate firmly. The wire must be pass trough the
hanging plate in the middle.
Usar cuatro tornillos de expansión para instalar
la placa de soporte con firmeza. El cable debe
pasar a través de la placa colgante por el centro.
Utiliser quatre vis d’expansion pour installer la
plaque de support fermement. Le fil doit passer à
travers le centre de la plaque de suspension.
Utilizar quatro parafusos de expansão para
instalar firmemente a placa de suporte. O fio deve
passar através no meio da placa de suporte.
1
CHANGING THE CANOPY
CAMBIAR EL EMBELLECEDOR
CHANGER L’ EMBELLESSEMENT
ALTERAR O EMBELEZAMENTO
Remove the six screws and the reinforcement
piece as in the photo.
Quita los seis tornillos y la pieza de refuerzo
como en la foto.
Retirez les six vis et la pièce de renforcement
comme sur la photo.
Retire os seis parafusos e a peça de reforço,
como na foto.
Install the cover with the reinforcement piece and
fasten them to the motor with the six screws.
Instale el embellecedor con la pieza de refuerzo y
sujételos al motor con los seis tornillos.
Installez le embellesement avec la pièce de ren-
forcement et fixez-les au moteur avec les six vis.
Instale o embelezamento com a peça de reforço e
fixe-os ao motor com os seis parafusos.
1
2
1
PRE-FIX THE CEILING FAN
PREFIJAR EL VENTILADOR
PRÉFIXER LE VENTILATEUR DE PLAFOND
PRÉ-FIXAR O VENTILADOR DE TECTO
Take out the two opposite screws on the bracket pla-
te. Fix the safety steel cable to the bracket plate hook.
Saca los dos tornillos opuestos de la placa de
soporte. Fija el cable de acero de seguridad en el
gancho de la placa de soporte.
Retirez les deux vis opposées de la plaque de
support. Fixez le câble en acier de sécurité au
crochet de la plaque de support.
Retire os dois parafusos opostos da placa de su-
porte. Fixar o cabo de aço de segurança ao gancho
da chapa de suporte.
ELECTRICAL CONNECTIONS
CONEXIONES ELECTRICAS
LES CONNEXIONS ÉLECTRIQUES
LIGAÇÕES ELÉCTRICAS
INSTALLATION THE FAN
INSTALACIÓN DEL VENTILADOR
INSTALLATION DE LE VENTILATEUR
INSTALAÇÃO O VENTILADOR
Make the connections as shown
in the diagram.
Hacer las conexiones tal y como
se muestra en el esquema.
Effectuez les connexions comme
indiqué sur le schéma.
Faça as ligações como mostra
o diagrama.
Remove the two screws which are on the bracking plate. Align the “L” shaped slot on the motor with the
screw on the bracket plate, insert the two screws into the slot until it is held. Re-attach the two screws you
removed in step “Pre-mount the ceiling fan” to the hole in the bracket plate, tighten all four screws firmly.
Quita los dos tornillos que están en la placa de soporte. Alinee la ranura en forma de “L” del motor con
el tornillo de la placa colgante, inserte los dos tornillos en la ranura hasta que se sostenga. Vuelva a fijar
los dos tornillos que quitó en el paso “Prefijar el ventilador de techo” en el agujero de la placa de soporte,
apriete los cuatro tornillos con firmeza.
Retirez les deux vis de la plaque de support. Alignez la fente en forme de “L” du moteur avec la vis de la
plaque de suspension, insérez les deux vis dans la fente jusqu’à ce qu’elle soit maintenue. Remettez les
deux vis que vous avez retirées à l’étape “Prémonter le ventilateur de plafond” dans le trou de la plaque de
base, puis serrez fermement les quatre vis.
Retirar os dois parafusos da placa de apoio. Alinhar a ranhura em “L” do motor com o parafuso da placa
do suporte, inserir os dois parafusos na ranhura até que esta seja mantida. Volte a apertar os dois parafu-
sos que retirou no passo “Pré-montar o ventilador de teto” no furo da placa de suporte, aperte firmemente
os quatro parafusos.
1
1
The remote control comes pre-paired from the factory. If the remote
control loses its pairing, you can pair it again by turning on the power
and within 30 seconds press the button, followed by the button.
You will hear a long beep if the pairing has been carried out correctly.
If pairing has failed, turn off the power for at least 10 seconds before
trying again.
The Ifell function allows the fan to regulate its speed according to the
temperature of the room.
El mando viene preparado de fábrica. Si el mando a distancia pierde
su emparejamiento, puede volver a emparejarlo encendiendo la
alimentación y en 30 segundos pulse el botón ON/OFF , y seguido
el botón “temporizador on/off” . Se oirá un largo pitido si el empa-
rejamiento se ha realizado correctamente. Si el emparejamiento ha
fallado, apague la alimentación durante al menos 10 segundos antes
de volver a intentarlo.
La función Ifell, permite al ventilador regular su velocidad en función
de la temperatura de la habitación.
La télécommande est préréglée à l’usine. Si la télécommande perd
son appairage, vous pouvez l’appairer à nouveau en mettant l’appareil
sous tension et en appuyant dans les 30 secondes sur le bouton ON/
OFF , suivi du bouton . Vous entendrez un long bip si l’appairage a
été effectué correctement. Si l’appairage a échoué, coupez l’alimen-
tation pendant au moins 10 secondes avant d’essayer à nouveau.
La fonction Ifell permet au ventilateur de réguler sa vitesse en fonc-
tion de la température de la pièce.
O controle remoto vem pré-preparado da fábrica. Se o telecomando
perder o emparelhamento, pode voltar a emparelhá-lo ligando a ali-
mentação e, em 30 segundos, premir o botão ON/OFF , seguido do
botão . Se o emparelhamento tiver sido efectuado correctamente,
ouvirá um bip longo. Se o emparelhamento falhar, desligue a alimen-
tação durante pelo menos 10 segundos antes de tentar novamente.
A função Ifell permite ao ventilador regular a sua velocidade de
acordo com a temperatura da sala.
Display
Light
Fan switch
Speeds
Natural wind
Light switch
Dimming
ON/OFF
Timing
Ifeel
1,5 V x 2
Pantalla
Luz
Interruptor del ventilador
Velocidades
Aire natural
Interruptor de la luz
Regulación de intensidad de luz
ON/OFF
Temporizador
Ifeel
Écran
Lumière
Interrupteur du ventilateur
Vitesses
L’air naturel
Interrupteur d’éclairage
Contrôle de l’intensité lumineuse
ON/OFF
Timer
Ifeel
Ecrã
Luz
Interruptor do ventilador
Velocidades
Ar natural
Interruptor de luz
Controlo da intensidade luminosa
ON/OFF
Temporizador
Ifeel
1
1
2
3
4
5
6
7
8
9
10
6
2
7
3
4
5
8
9
10
REMOTE CONTROL
MANDO
TÉLÉCOMMANDE
CONTROLO REMOTO
MAINTENANCE TIPS
IMPORTANT: PLEASE READ BEFORE INSTALLATION
1. Because of the fan’s natural movement, some connections may be loose. To check the support
connections, brackets and blades attachments 2 times a year. Make sure they are all secured (it is not
necessary to dismantle the entire fan from ceiling)
2. Clean your fan periodically to help maintain its appearance. Do not use water when cleaning, use
only a soft brush or lint-free cloth to avoid scratching the finish. The plating is coated with a lacquer
to minimize the discoloration.
3. There is no need to oil your fan. The motor is created with lubricated sealed ball bearings.
4. A regular examination of the fan suspension system is recommended at least once in two years.
WARNING
MAKE SURE THE POWER IS OFF BEFORE STARTING INSTALLATION OR MAKING ANY REPAIRS.
CONSEJOS DE MANTENIMIENTO
IMPORTANTE: POR FAVOR LEA ANTES DE LA INSTALACIÓN
1. Debido al movimiento natural del ventilador, algunas conexiones pueden soltarse. Compruebe las
conexiones del soporte, soportes y accesorios de las aspas 2 veces al año. Asegurarse de que están
todos asegurados (no es necesario desmontar todo el ventilador del techo)
2. Limpie su ventilador periódicamente para ayudar a mantener su apariencia. No use agua para la
limpieza, use sólo un cepillo suave o un paño sin pelusa para evitar rayar el acabado. El revestimiento
está cubierto con una laca para minimizar la decoloración.
3. No hay necesidad de engrasar su ventilador. El motor se crea con cojinetes de bolas sellados
y lubricados.
4. Se aconseja realizar un examen regular del sistema de suspensión del ventilador al menos una vez cada
dos años.
ADVERTENCIA
ASEGÚRESE DE QUE LA CORRIENTE ESTÉ DESCONECTADA ANTES DE COMENZAR LA INSTALACIÓN O
REALIZAR CUALQUIER REPARACIÓN.

Other CristalRecord Fan manuals

CristalRecord Bell User manual

CristalRecord

CristalRecord Bell User manual

CristalRecord Terre 85-908-42-115 User manual

CristalRecord

CristalRecord Terre 85-908-42-115 User manual

CristalRecord B50631175 User manual

CristalRecord

CristalRecord B50631175 User manual

CristalRecord Louis 85-109-50-100 User manual

CristalRecord

CristalRecord Louis 85-109-50-100 User manual

CristalRecord Areca 85-298-48-100 User manual

CristalRecord

CristalRecord Areca 85-298-48-100 User manual

CristalRecord CIMIO User manual

CristalRecord

CristalRecord CIMIO User manual

CristalRecord Yenbig 85-060-03-002 User manual

CristalRecord

CristalRecord Yenbig 85-060-03-002 User manual

CristalRecord Agra User manual

CristalRecord

CristalRecord Agra User manual

CristalRecord 85-160-25-100 User manual

CristalRecord

CristalRecord 85-160-25-100 User manual

Popular Fan manuals by other brands

Beper P206VEN430 Use instruction

Beper

Beper P206VEN430 Use instruction

Westinghouse WSFSFC92 instruction manual

Westinghouse

Westinghouse WSFSFC92 instruction manual

Aardee AARF-30 user guide

Aardee

Aardee AARF-30 user guide

Greenheck VersiVent VER-45 Installation, operation and maintenance manual

Greenheck

Greenheck VersiVent VER-45 Installation, operation and maintenance manual

Hunter 54017 owner's guide

Hunter

Hunter 54017 owner's guide

Kendal Lighting AC-23856 installation instructions

Kendal Lighting

Kendal Lighting AC-23856 installation instructions

Tesco PF16GM user guide

Tesco

Tesco PF16GM user guide

Broan 510 installation instructions

Broan

Broan 510 installation instructions

Schaefer TW30W Operator's manual

Schaefer

Schaefer TW30W Operator's manual

Big Air ICF72 Installation, operation and maintenance

Big Air

Big Air ICF72 Installation, operation and maintenance

Perel EFANF45MS user manual

Perel

Perel EFANF45MS user manual

Euromatic PF45-JE instruction manual

Euromatic

Euromatic PF45-JE instruction manual

Hunter Pacific Attitude installation manual

Hunter Pacific

Hunter Pacific Attitude installation manual

Pro-Elec PEL00301 instructions

Pro-Elec

Pro-Elec PEL00301 instructions

Mitsubishi Electric LGH-100RX3-CAN Technical manual

Mitsubishi Electric

Mitsubishi Electric LGH-100RX3-CAN Technical manual

Noaton VEGA Instructions for use

Noaton

Noaton VEGA Instructions for use

iLiving ILG8M24-60DC owner's manual

iLiving

iLiving ILG8M24-60DC owner's manual

Dometic Fan-Tastic 3300 Installation and operation manual

Dometic

Dometic Fan-Tastic 3300 Installation and operation manual

manuals.online logo
manuals.online logoBrands
  • About & Mission
  • Contact us
  • Privacy Policy
  • Terms and Conditions

Copyright 2025 Manuals.Online. All Rights Reserved.