manuals.online logo
Brands
  1. Home
  2. •
  3. Brands
  4. •
  5. Curt Group
  6. •
  7. Automobile Accessories
  8. •
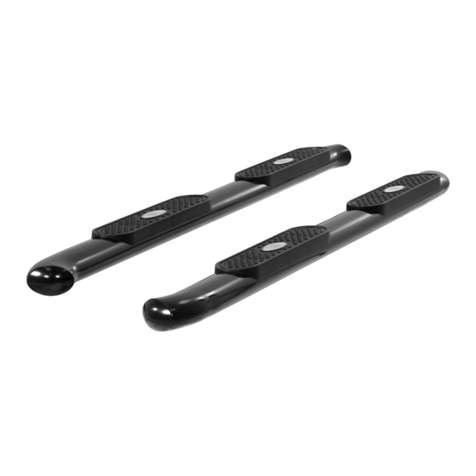
  9. Curt Group ARIES 2051132 User manual

Curt Group ARIES 2051132 User manual

PAGE 1 • 2051132-INS-RD• 877.287.8634 • NEED ASSISTANCE? • ARIESAUTOMOTIVE.COM
Level of Difficulty
Easy
INSTALLATION MANUAL 2051132
Scan
for helpful
install tips
Product Image
Front
Front
Middle
Front
Rear
Rear
Rear
Tools Required
Ratchet Socket, 10mm
Torque wrench Socket, 13mm
Flathead screwdriver Socket, 17mm
Wrench, 17mm Socket, 18mm
Parts List
1Driver / left running board
1Passenger / right running board
2Mounting bracket, front
2Mounting bracket, middle
2Mounting bracket, rear
2Hanger bracket, front
2Hanger bracket, middle
2Hanger bracket, rear
6Hex bolt, M8
6Flat washer, M8
6Lock washer, M8
6Handle nut, M8
6Hex bolt, M10
12 Flat washer, M10
6Lock washer, M10
6Hex nut, M10
2T-bolt, M12
2Flat washer, M12
2Lock washer, M12
2Hex nut, M12
2Plastic bolt retainer, M12
Additional Hardware*
12 Hex bolt, M8
12 Flat washer, M8
12 Lock washer, M8
12 Hex nut, M8
* Running boards are supplied
with additional hardware.
Quantities listed are in addition
to the standard supplied hardware.
Torque Specifications
METRIC
M6 bolt 3 ft.-lbs.
SAE
1/4" bolt 3 ft.-lbs.
M8 bolt 7 ft.-lbs. 5/16" bolt 7 ft.-lbs.
M12 bolt 16 ft.-lbs. 3/8" bolt 16 ft.-lbs.
M12 bolt 28 ft.-lbs. 7/16" bolt 20 ft.-lbs.
-- -- 1/2" bolt 28 ft.-lbs.
Use above torque setting unless otherwise noted
Notes and Maintenance
Before you begin installation, read all instructions thoroughly.
Proper tools will improve the quality of installation and reduce the time required.
To protect the product, wax after installing. Regular waxing is recommended
to add a protective layer over the finish. Do not use any type of polish or wax
that may contain abrasives that could damage the finish.
For polished, gloss and other smooth finishes,
polish may be used to clear small scratches and scuffs on the finish.
Mild automotive detergent may be used to clean the product.
Do not use dish detergent, abrasive cleaners, abrasive pads,
wire brushes or other similar products that may damage the finish.
Refer to the table to the left when securing hardware during the
installation process to help prevent damage to the product or vehicle.

ARIESAUTOMOTIVE.COM • NEED ASSISTANCE? • 877.287.8634 • 2051132-INS-RD• PAGE 2
Step 1
Starting on the driver side, locate
the three mounting locations
underneath the vehicle.
Note: Each bracket is specific
to a mounting location and is
stamped accordingly.
Step 2
Locate the fasteners along the side
of the vehicle and rocker panel and
remove them.
Step 3
Remove the factory hex bolts on the
front and rear end of the rocker panel.
Remove the plastic trim
along the edge of the vehicle.
Step 4
Locate the front hanger bracket mounting
point and remove the tape plug. Insert an
M8 handle nut into the opening.
PAGE 3 • 2051132-INS-RD• 877.287.8634 • NEED ASSISTANCE? • ARIESAUTOMOTIVE.COM
Step 6
Remove the factory nut. Place the front
mounting bracket onto the vehicle and
secure with the removed factory hardware.
Secure the front mounting bracket to
the hanger bracket by inserting an M10
hex bolt and an M10 flat washer through
the outside of the hanger bracket and
securing with an M10 flat washer, M10
lock washer and M10 hex nut on the
inside of the bracket.
Snug the hardware,
but do not fully tighten.
Step 7
Locate the middle mounting point
and remove the factory hex bolt.
Place the middle driver-side bracket
onto the vehicle and secure with the
previously removed factory hex bolt.
Secure the middle mounting bracket to
the hanger bracket by inserting an M10
hex bolt and an M10 flat washer through
the outside of the hanger bracket and
securing with an M10 flat washer, M10
lock washer and M10 hex nut on the
inside of the bracket.
Snug the hardware,
but do not fully tighten.
Step 5
Place the front hanger bracket
onto the vehicle and secure with
an M8 flat washer, M8 lock
washer and M8 hex bolt.
Snug the hardware,
but do not fully tighten.
Repeat this process to install the
middle and rear hanger brackets.
With the hanger brackets installed,
reinstall the plastic trim.
ARIESAUTOMOTIVE.COM • NEED ASSISTANCE? • 877.287.8634 • 2051132-INS-RD• PAGE 4
Step 8
Locate and remove the rear hole plug.
Insert an M12 T-bolt plate into the
opening. Slide a plastic bolt retainer
over the thread of the bolt to hold the
bolt in place.
Step 9
Place the rear driver-side bracket
onto the vehicle and secure with
an M12 flat washer, M12 lock washer
and M12 hex nut.
Secure the rear mounting bracket to
the hanger bracket by inserting an M10
hex bolt and an M10 flat washer through
the outside of the hanger bracket and
securing with an M10 flat washer, M10
lock washer and M10 hex nut on the
inside of the bracket.
Snug the hardware,
but do not fully tighten.
Step 11
Attach the running board to the
brackets using six M8 bolts,
lock washers, flat washers and nuts.
Snug the hardware,
but do not fully tighten.
Step 10
Remove the M8 nuts, M8 lock
washers and M8 flat washers
from the running board.
Place the running board onto the
brackets and align the M8 bolts with the
slots in the brackets on the vehicle.
PAGE 5 • 2051132-INS-RD• 877.287.8634 • NEED ASSISTANCE? • ARIESAUTOMOTIVE.COM
Step 12
Adjust and level the running board,
centering it between the front and
rear wheel wells.
With the running board in position, it is
recommended to tighten all brackets to
the vehicle first, followed by the running
board connections.
Step 13
Repeat steps 1 through 12 on
the passenger side of the vehicle.
Congratulations on the installation
of your new ARIES AeroTread™
running boards.
With the running boards installed, periodic
inspections should be performed to ensure
all mounting hardware remains tight.
To protect your investment, see the
'Notes and Maintenance' section on
the first page of this instruction manual.

Other Curt Group Automobile Accessories manuals

Curt Group 51189 User manual

Curt Group

Curt Group 51189 User manual

Curt Group 19279 User manual

Curt Group

Curt Group 19279 User manual

Curt Group 40247 User manual

Curt Group

Curt Group 40247 User manual

Curt Group Aries AL235045 User manual

Curt Group

Curt Group Aries AL235045 User manual

Curt Group ARIES S225045 User manual

Curt Group

Curt Group ARIES S225045 User manual

Curt Group Aries S224046-2 User manual

Curt Group

Curt Group Aries S224046-2 User manual

Curt Group 13387 User manual

Curt Group

Curt Group 13387 User manual

Curt Group 70105 User manual

Curt Group

Curt Group 70105 User manual

Curt Group Aries 2055115 User manual

Curt Group

Curt Group Aries 2055115 User manual

Curt Group Aries S225045-2 User manual

Curt Group

Curt Group Aries S225045-2 User manual

Curt Group ARIES AL234046 User manual

Curt Group

Curt Group ARIES AL234046 User manual

Curt Group Betterweigh User manual

Curt Group

Curt Group Betterweigh User manual

Curt Group Liverne 401801 User manual

Curt Group

Curt Group Liverne 401801 User manual

Curt Group 18151 User manual

Curt Group

Curt Group 18151 User manual

Curt Group 45144 User manual

Curt Group

Curt Group 45144 User manual

Curt Group 3025101 User manual

Curt Group

Curt Group 3025101 User manual

Curt Group Aries 3025175 User manual

Curt Group

Curt Group Aries 3025175 User manual

Curt Group 19750 User manual

Curt Group

Curt Group 19750 User manual

Curt Group Retrac 206820 User manual

Curt Group

Curt Group Retrac 206820 User manual

Curt Group ARIES S224046 User manual

Curt Group

Curt Group ARIES S224046 User manual

Curt Group 48411 User manual

Curt Group

Curt Group 48411 User manual

Curt Group 3025121 User manual

Curt Group

Curt Group 3025121 User manual

Curt Group 18113 User manual

Curt Group

Curt Group 18113 User manual

Curt Group 13415 User manual

Curt Group

Curt Group 13415 User manual

Popular Automobile Accessories manuals by other brands

Safe Fleet Prime Design VBB TC21B Assembly instructions

Safe Fleet

Safe Fleet Prime Design VBB TC21B Assembly instructions

Go Rhino GRH-4412B instructions

Go Rhino

Go Rhino GRH-4412B instructions

VEAP SHIELD UNITED FT Series Mounting instruction

VEAP SHIELD UNITED

VEAP SHIELD UNITED FT Series Mounting instruction

Honeywell Thor VM2 reference guide

Honeywell

Honeywell Thor VM2 reference guide

Unitech SU-V1B user manual

Unitech

Unitech SU-V1B user manual

Yakima 8007144 instructions

Yakima

Yakima 8007144 instructions

Diode Dynamics DD0442 installation guide

Diode Dynamics

Diode Dynamics DD0442 installation guide

BGS technic 1052 installation instructions

BGS technic

BGS technic 1052 installation instructions

Webasto London installation manual

Webasto

Webasto London installation manual

Thule XSPORTER PRO manual

Thule

Thule XSPORTER PRO manual

Pyle view PLCM35R manual

Pyle view

Pyle view PLCM35R manual

ACEFAST MG3 user manual

ACEFAST

ACEFAST MG3 user manual

Metra Electronics 71-6522 installation instructions

Metra Electronics

Metra Electronics 71-6522 installation instructions

Midtronics GRX-5100 L Quick training guide

Midtronics

Midtronics GRX-5100 L Quick training guide

Fiamma 98655A007 Installation and usage instructions

Fiamma

Fiamma 98655A007 Installation and usage instructions

SportRack Frontier A21002S installation manual

SportRack

SportRack Frontier A21002S installation manual

Dometic FreshJet FJX Short Operating Manual

Dometic

Dometic FreshJet FJX Short Operating Manual

Touratech 01-048-0431-0 Installation instruction

Touratech

Touratech 01-048-0431-0 Installation instruction

manuals.online logo
manuals.online logoBrands
  • About & Mission
  • Contact us
  • Privacy Policy
  • Terms and Conditions

Copyright 2025 Manuals.Online. All Rights Reserved.