manuals.online logo
Brands
  1. Home
  2. •
  3. Brands
  4. •
  5. CyberData
  6. •
  7. Intercom System
  8. •
  9. CyberData #011123 Manual

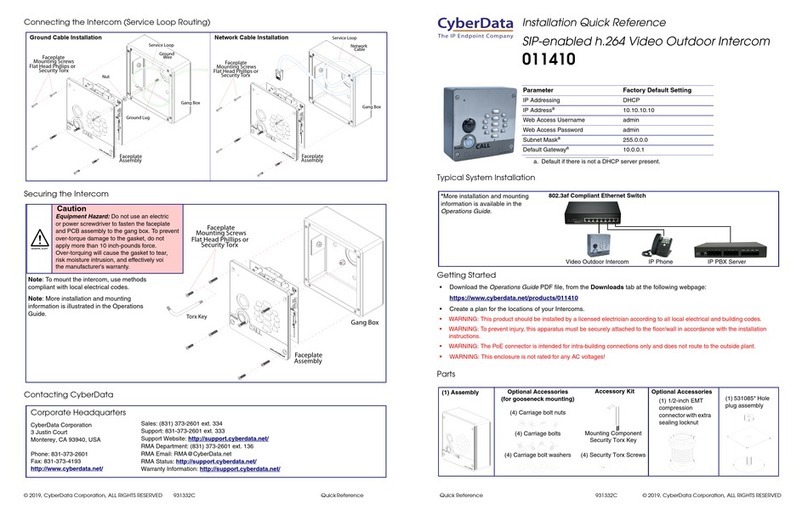
CyberData #011123 Manual

Quick Reference 930818D © 2014, CyberData Corporation, ALL RIGHTS RESERVED© 2014, CyberData Corporation, ALL RIGHTS RESERVED 930818D Quick Reference
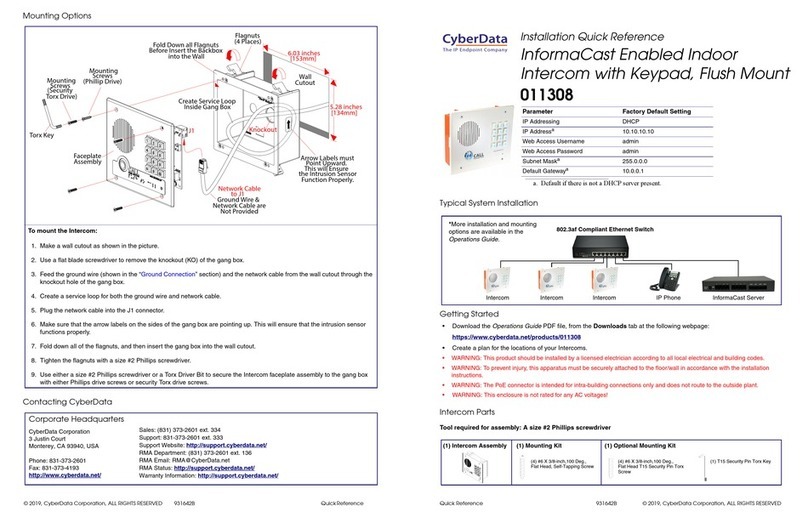
Mounting Options
Contacting CyberData
Fold Down all Flagnuts (4 Places)
before Inserting into Wall Cutout
Cutout
Network Cable
are Not Provided
Screws
Faceplate
Custom
Torx Drive)
Assembly
Ground Wire &
Point Upward.
Arrow Labels must
This will Ensure that
the Intrusion Sensor
Functions Properly.
Wall
Inside Custom Enclosure
Create Service Loop
Torx Key
(Phillip Drive)
(Security
Mounting
Screws
Mounting
Flagnuts
(4 Places)
4
5
Enclosure
K.O.
to J1
6.03 inches
[153mm]
5.28 inches
[134mm]
Network Cable
J1
Intrusion
Sensor
2
3
6
7
8
9
9
1
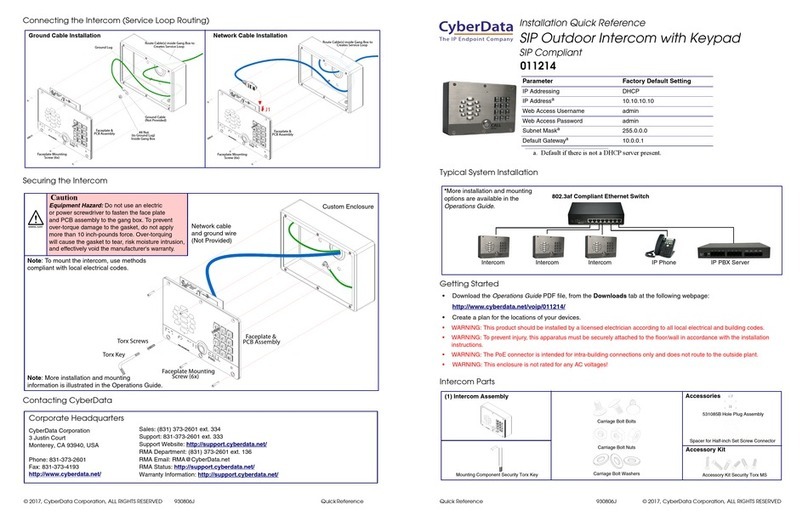
To mount the Intercom:
1. Make a wall cutout as shown in the picture.
2. Use a flat blade screwdriver to remove the knockout (KO) of the gang box.
3. Feed the ground wire (shown in the “Ground Connection” section) and the network cable from the wall cutout through the
knockout hole of the gang box.
4. Create a service loop for both the ground wire and network cable.
5. Plug the network cable into the J1 connector.
6. Make sure that the arrow labels on the sides of the gang box are pointing up. This will ensure that the intrusion sensor
functions properly.
7. Fold down all of the flagnuts, and then insert the gang box into the wall cutout.
8. Tighten the flagnuts with a size #2 Phillips screwdriver.
9. Use a size #2 Phillips screwdriver to secure the Intercom faceplate assembly to the gang box with either Phillips drive
screws or security Torx drive screws.
Sales: (831) 373-2601 ext. 334
Support: 831-373-2601 ext. 333
Web: http://www.cyberdata.net/support/contactsupportvoip.php
RMA Dept: (831) 373-2601 ext. 136
Email: [email protected]
RMA Status: http://www.cyberdata.net/support/rmastatus.html
Warranty and RMA information is available at the following website:
http://www.cyberdata.net/support/warranty/index.html
Corporate Headquarters
CyberData Corporation
3 Justin Court
Monterey, CA 93940, USA
Phone: 831-373-2601
Fax: 831-373-4193
www.CyberData.net
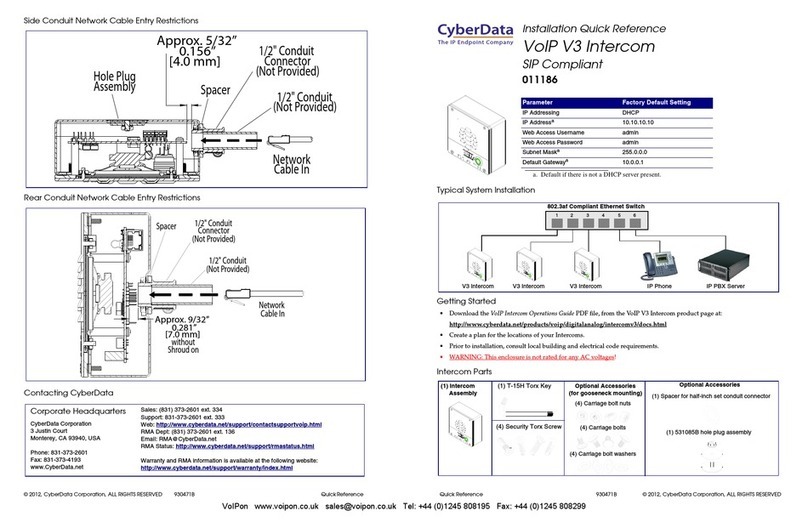
Typical System Installation
Getting Started
• Download the Operations Guide PDF file from the Documentation page at:
http://www.cyberdata.net/products/voip/digitalanalog/intercomkeypadflushv3/docs.html
• Create a plan for the locations of your Intercoms.
• WARNING: This product should be installed by a licensed electrician according to all local electrical and building codes.
• WARNING: To prevent injury, this apparatus must be securely attached to the floor/wall in accordance with the installation
instructions.
• WARNING: The PoE connector is intended for intra-building connections only and does not route to the outside plant.
• WARNING: This enclosure is not rated for any AC voltages!
Intercom Parts
Tool required for assembly: A size #2 Phillips screwdriver
Parameter Factory Default Setting
IP Addressing DHCP
IP Addressa10.10.10.10
Web Access Username admin
Web Access Password admin
Subnet Maska255.0.0.0
Default Gatewaya10.0.0.1
a. Default if there is not a DHCP server present.
Door Strike VoIP Intercom IP Phone IP PBX Server
Generic PoE Switch
12 34 56
VoIP Intercom
(4) #6 X 3/8-inch,100 Deg.,
Flat Head, Self-Tapping Screw
(1) Intercom Assembly (1) Mounting Kit
(4) #6 X 3/8-inch,100 Deg.,
Flat Head T15 Security Pin Torx
Screw
(1) T15 Security Pin Torx Key
(1) Optional Mounting Kit
The IP Endpoint Company
Installation Quick Reference
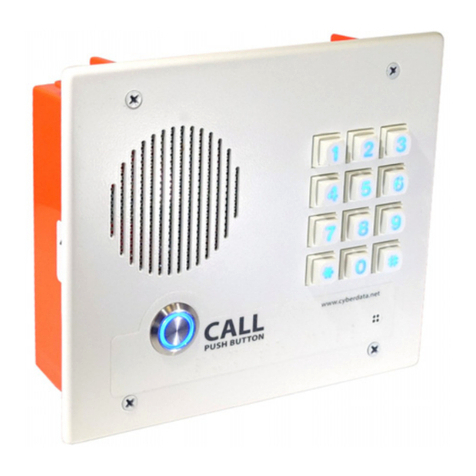
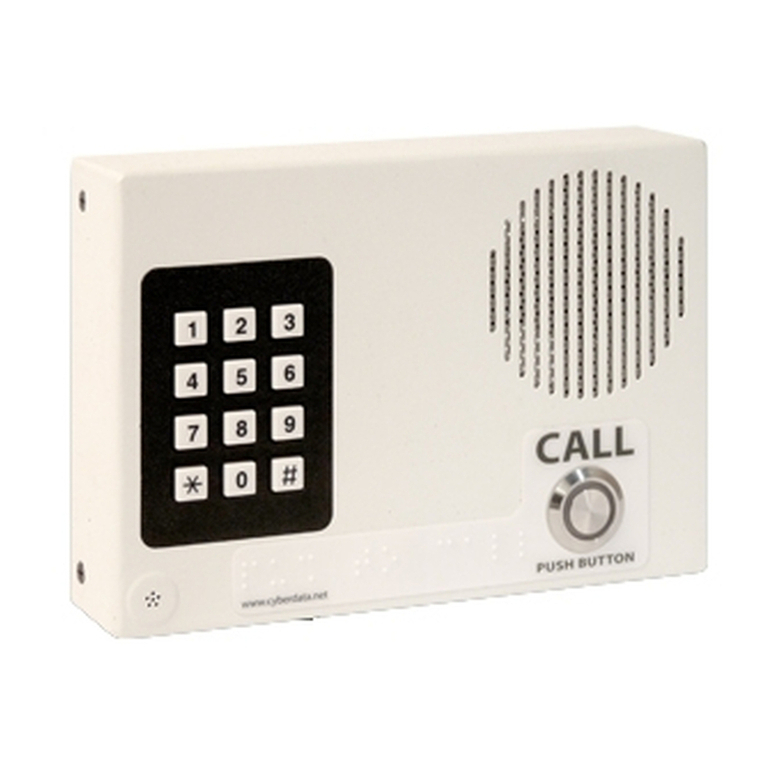
VoIP Indoor Intercom with Keypad
(Flush-Mount)
SIP Compliant
011123
© 2014, CyberData Corporation, ALL RIGHTS RESERVED 930818D Quick Reference Quick Reference 930818D © 2014, CyberData Corporation, ALL RIGHTS RESERVED
RTFM Button
Ground Connection
RTFM
When the device is operational and linked to a network,
you can use the Reset Test Function Management
(RTFM) button (SW1 [see picture]) to announce the
device’s IP address or restore the device to the factory
default settings.
To announce the device’s current IP address:
• Press and release the RTFM button within a five
second window.
Note The device will use DHCP to obtain the new IP
address (DHCP-assigned address or default to
10.10.10.10 if a DHCP server is not present).
To restore the device to factory default settings:
• Press and hold the RTFM button for longer than five
seconds until you hear the device announce that it is
restoring the factory default settings.
Star Washer
#6 Ring Terminal
Nut
inside Gang Box
Create Service Loop
Knock Out (Not Provided)
Ground Wire
Dimensions
Terminal Block Connections
6.840 [173.7]
Dimensions are in Inches [Millimeter]
5.860 [148.8]
0.170 [4.3]
2.579 [65.5]
J3 Terminal Block
Wire (IN)
can accept 16 AWG wire
*Contacts 1 and 2 on the J3 terminal block are only for
powering the Intercom from a non-PoE 12VDC power
source as an alternative to Network PoE power. Use of
these contacts for any other purpose will damage the
Intercom and void the product warranty.
Relay Contact:
(1 A at 30 VDC for continuous loads)
3 = Relay Common
4 = Relay Normally Open Contact
5 = Sense Input
6 = Sense Ground
2 = Power Ground*
1 = 8 to 12 VDC at 1000 mA*
34
Alternate Power Input:
7 = Reserved for Future Use
8 = Reserved for Future Use
1
8
Use a 3.17 mm (1/8-inch) flat blade
screwdriver for the terminal block screws

Other manuals for #011123

4

Other CyberData Intercom System manuals

CyberData 011214 Manual

CyberData

CyberData 011214 Manual

CyberData 11272 User manual

CyberData

CyberData 11272 User manual

CyberData 11214 User manual

CyberData

CyberData 11214 User manual

CyberData 11186 User manual

CyberData

CyberData 11186 User manual

CyberData 11035 User manual

CyberData

CyberData 11035 User manual

CyberData VoIP Intercom 010935F User manual

CyberData

CyberData VoIP Intercom 010935F User manual

CyberData 11209 Manual

CyberData

CyberData 11209 Manual

CyberData 11305 Manual

CyberData

CyberData 11305 Manual

CyberData #011123 Manual

CyberData

CyberData #011123 Manual

CyberData 11035 User manual

CyberData

CyberData 11035 User manual

CyberData 11308 Manual

CyberData

CyberData 11308 Manual

CyberData 011211 series Manual

CyberData

CyberData 011211 series Manual

CyberData #011123 User manual

CyberData

CyberData #011123 User manual

CyberData 11113 User manual

CyberData

CyberData 11113 User manual

CyberData 011211x User manual

CyberData

CyberData 011211x User manual

CyberData VoIP Indoor Intercom 011030 User manual

CyberData

CyberData VoIP Indoor Intercom 011030 User manual

CyberData 11111 User manual

CyberData

CyberData 11111 User manual

CyberData 10935 User manual

CyberData

CyberData 10935 User manual

CyberData #011123 Manual

CyberData

CyberData #011123 Manual

CyberData 011478 User manual

CyberData

CyberData 011478 User manual

CyberData RAL 9003 User manual

CyberData

CyberData RAL 9003 User manual

CyberData 11035 User manual

CyberData

CyberData 11035 User manual

CyberData VoIP Indoor Intercom 011030 User manual

CyberData

CyberData VoIP Indoor Intercom 011030 User manual

CyberData 011309 Manual

CyberData

CyberData 011309 Manual

Popular Intercom System manuals by other brands

Toa VS-900AL Specifications

Toa

Toa VS-900AL Specifications

urmet domus micro IP Installation handbook

urmet domus

urmet domus micro IP Installation handbook

Intelligent Home 7Avro610C Installation and user manual

Intelligent Home

Intelligent Home 7Avro610C Installation and user manual

2N OMEGA Lite user manual

2N

2N OMEGA Lite user manual

Extel WESV 87052 Installation and user guide

Extel

Extel WESV 87052 Installation and user guide

Somogyi Elektronic Home DPV WIFI instruction manual

Somogyi Elektronic

Somogyi Elektronic Home DPV WIFI instruction manual

ELRO DCV040IP manual

ELRO

ELRO DCV040IP manual

TCS ECOOS:FIVE instruction manual

TCS

TCS ECOOS:FIVE instruction manual

LOXONE 100484 quick start guide

LOXONE

LOXONE 100484 quick start guide

Zennio GetFace IP ZVP-WOCAM user manual

Zennio

Zennio GetFace IP ZVP-WOCAM user manual

Aiphone MY-1BD instructions

Aiphone

Aiphone MY-1BD instructions

DKS RJ71 instructions

DKS

DKS RJ71 instructions

NuTone IM-3204 Series installation instructions

NuTone

NuTone IM-3204 Series installation instructions

golmar 50122528 instruction manual

golmar

golmar 50122528 instruction manual

Bticino 343081 quick start guide

Bticino

Bticino 343081 quick start guide

Supra KeyAdvantage user manual

Supra

Supra KeyAdvantage user manual

Fanvil i30 user manual

Fanvil

Fanvil i30 user manual

NuTone IM-3103 Service manual

NuTone

NuTone IM-3103 Service manual

manuals.online logo
manuals.online logoBrands
  • About & Mission
  • Contact us
  • Privacy Policy
  • Terms and Conditions

Copyright 2025 Manuals.Online. All Rights Reserved.