manuals.online logo
Brands
  1. Home
  2. •
  3. Brands
  4. •
  5. CyberData
  6. •
  7. Intercom System
  8. •
  9. CyberData 11304 Manual

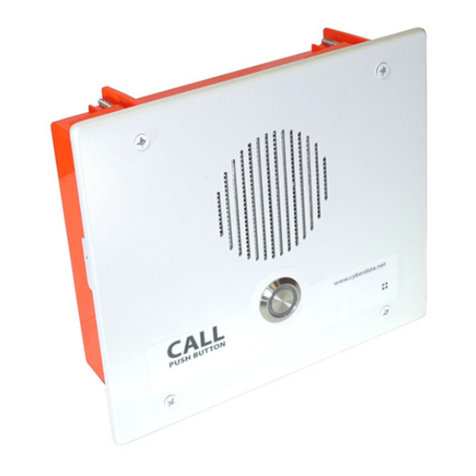
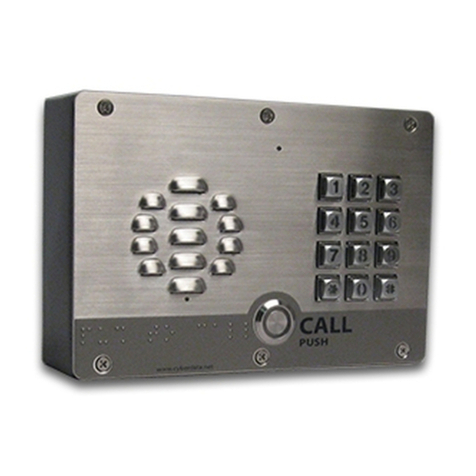
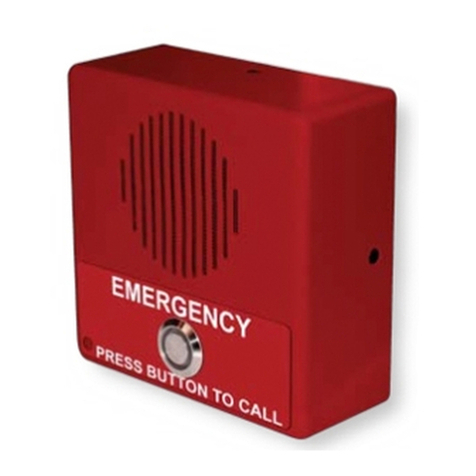
CyberData 11304 Manual

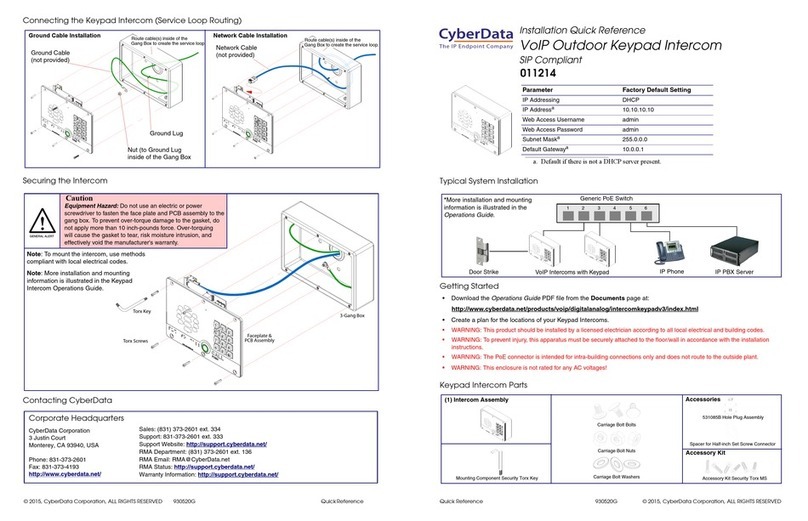
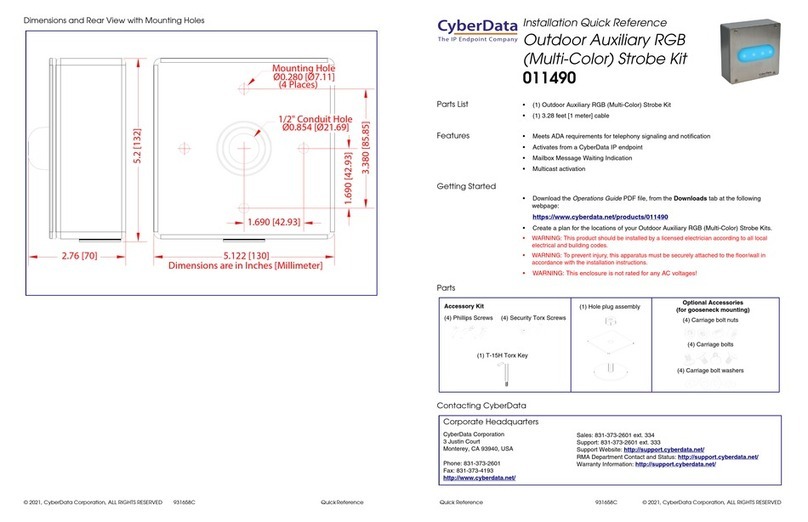
Quick Reference 930945A © 2014, CyberData Corporation, ALL RIGHTS RESERVED© 2014, CyberData Corporation, ALL RIGHTS RESERVED 930945A Quick Reference
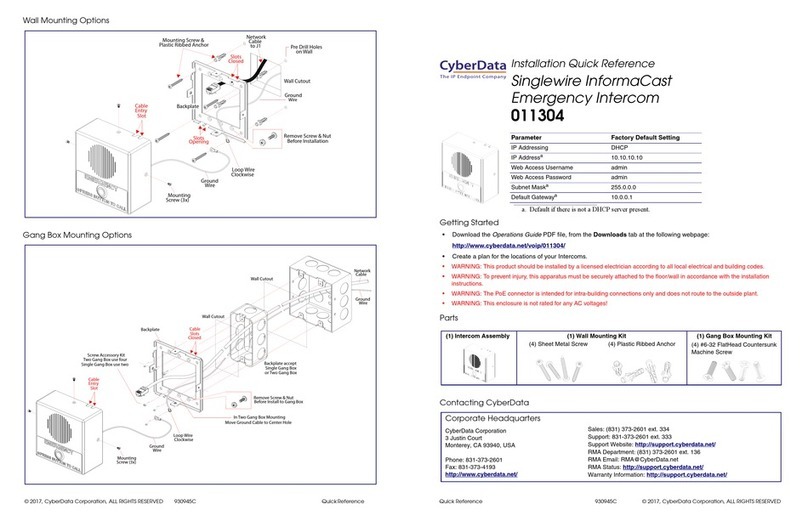
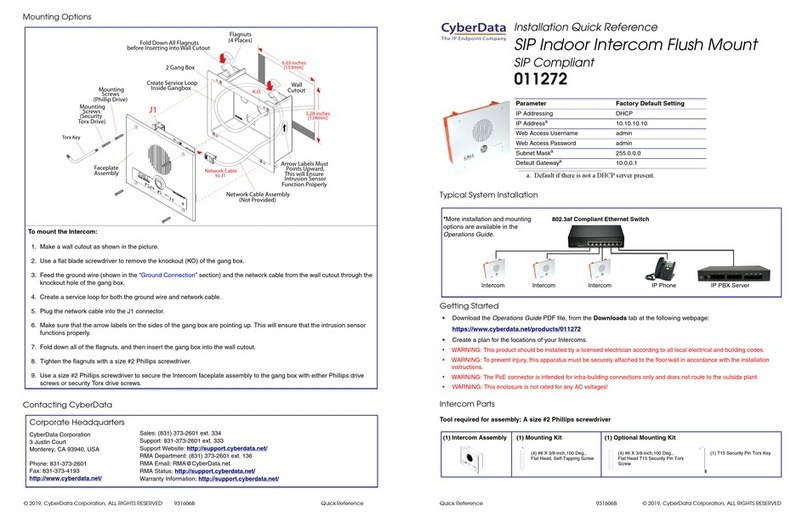
Wall Mounting Options
Gang Box Mounting Options
Backplate
Wall
(Not Provided)
Network Cable &
Screw
121001A
Accessory Kit
(4 Places) on Wall
Pre Drill Holes
Ground Wire
Cutout
for Ground Wire Connection
Pick One of Four Mounting Hole
Mounting
Screw (3x)
Slot
Entry
Cable
Closed
Slots
Cable
Two Gang Box use four
Wall Cutout
or Two Gang Box
Backplate accept
Single Gang Box
Single Gang Box use two
Backplate
Wall Cutout
121002B
Screw Accessory Kit
Mounting
Screw (3x)
(Not Provided)
Ground Wire
Any Available Mounting Hole
Ground Wire Connect to
(Not Provided)
Network Cable
Slot
Entry
Cable
Closed
Slots
Cable
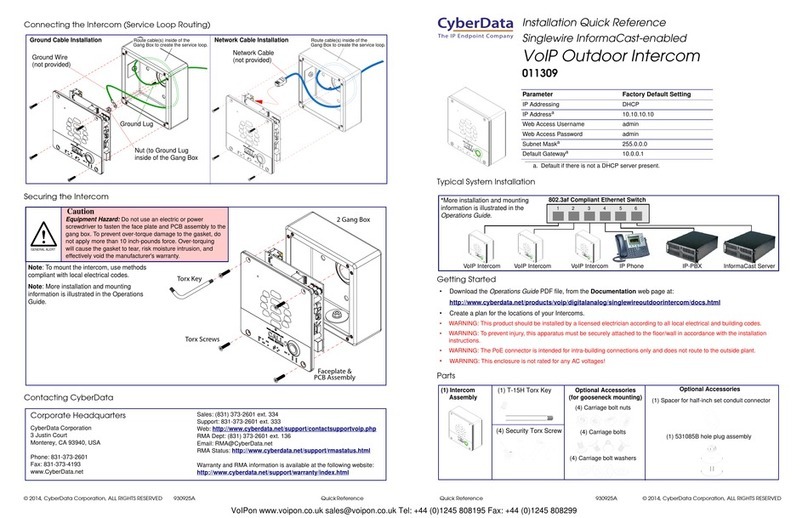
Getting Started
• Download the Operations Guide PDF file from the following web page:
http://www.cyberdata.net/products/voip/digitalanalog/singlewireemergencyintercom/docs.html
• Create a plan for the locations of your Intercoms.
• WARNING: This product should be installed by a licensed electrician according to all local electrical and building codes.
• WARNING: To prevent injury, this apparatus must be securely attached to the floor/wall in accordance with the installation
instructions.
• WARNING: The PoE connector is intended for intra-building connections only and does not route to the outside plant.
• WARNING: This enclosure is not rated for any AC voltages!
Parts
Contacting CyberData
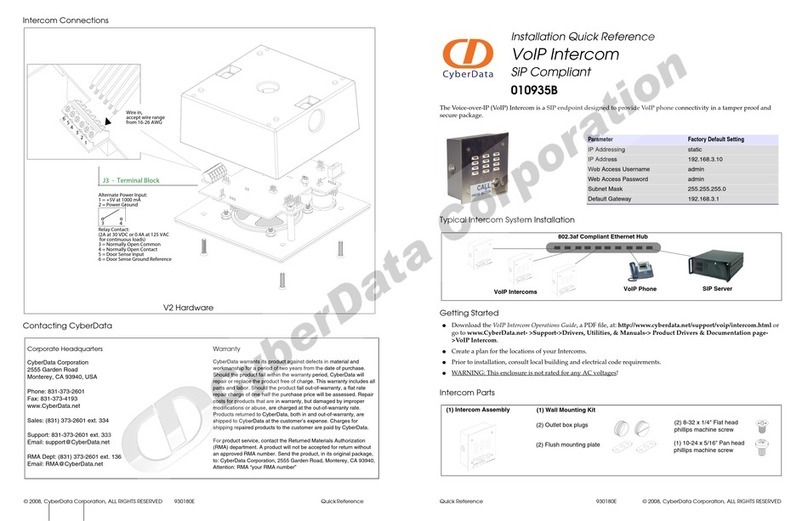
Parameter Factory Default Setting
IP Addressing DHCP
IP Addressa
a. Default if there is not a DHCP server present.
10.10.10.10
Web Access Username admin
Web Access Password admin
Subnet Maska255.0.0.0
Default Gatewaya10.0.0.1
(4) Plastic Ribbed Anchor (4) #6-32 FlatHead Countersunk
Machine Screw
(1) Wall Mounting Kit(1) Intercom Assembly (1) Gang Box Mounting Kit
(4) Sheet Metal Screw
The IP Endpoint Company
Installation Quick Reference
Singlewire-enabled
VoIP Emergency Intercom
011304
VoIPon www.voipon.co.uk [email protected] Tel: +44 (0)1245 808195 Fax: +44 (0)1245 808299
© 2014, CyberData Corporation, ALL RIGHTS RESERVED 930945A Quick Reference Quick Reference 930945A © 2014, CyberData Corporation, ALL RIGHTS RESERVED
RTFM Button
Dimensions
Maximum Recommended Wall Cutout Dimensions
RTFM
When the device is operational and linked to a network, you can
use the Reset Test Function Management (RTFM) button (SW1
[see picture]) to announce the device’s IP address or restore the
device to the factory
default settings.
To announce the device’s current IP address:
• Press and release the RTFM button within a five second
window.
Note The device will use DHCP to obtain the new IP
address (DHCP-assigned address or default to
10.10.10.10 if a DHCP server is not present).
To restore the device to factory default settings:
• Press and hold the RTFM button for longer than five
seconds until you hear the device announce that it is
restoring the factory default settings.
4.53[115.0]
4.53[115.0]
2.22 [56.3]
DIMENSIONS ARE IN INCHES [MILLIMETER]
3.40 [86.4]
ø0.19 [ø4.8]
2.39 [60.8]
3.40 [86.4]
2.65 [67.3]
0.50 [12.8]
0.38 [9.5]
(4 Places)
Cable Connections
Terminal Block Connections
Mounting
PCB Assembly
Microphone to J6
Backplate
J2
J6
J7
Button to J2
Screw (3x)
Speaker to J7
PCBA Mounting
Screw (4x)
Network Cable
(Not Provided)
to
Rotate Backplate 90° (One Open Slot)
for Network Cable Coming from Top
Rotate Backplate 180° (Two Open Slot)
J1
J1
= Cable Slot Open
= Cable Slot Close
J3 Terminal Block
Wire (IN)
can accept 16 AWG wire
*Contacts 1 and 2 on the J3 terminal block are only for
powering the Intercom from a non-PoE 12VDC power
source as an alternative to Network PoE power. Use of
these contacts for any other purpose will damage the
Intercom and void the product warranty.
Relay Contact:
(1 A at 30 VDC for continuous loads)
3 = Relay Common
4 = Relay Normally Open Contact
5 = Sense Input
6 = Sense Ground
2 = Power Ground*
1 = 8 to 12 VDC at 1000 mA*
34
Alternate Power Input:
7 = Reserved for Future Use
8 = Reserved for Future Use
1
8
Use a 3.17 mm (1/8-inch) flat blade
screwdriver for the terminal block screws
VoIPon www.voipon.co.uk [email protected] Tel: +44 (0)1245 808195 Fax: +44 (0)1245 808299
Other manuals for 11304

3

Other CyberData Intercom System manuals

CyberData 11214 User manual

CyberData

CyberData 11214 User manual

CyberData 11214 User manual

CyberData

CyberData 11214 User manual

CyberData 11305 Manual

CyberData

CyberData 11305 Manual

CyberData 011311 Manual

CyberData

CyberData 011311 Manual

CyberData 011214 Manual

CyberData

CyberData 011214 Manual

CyberData 11272 User manual

CyberData

CyberData 11272 User manual

CyberData #011123 User manual

CyberData

CyberData #011123 User manual

CyberData 3COM VCX PBX Server User manual

CyberData

CyberData 3COM VCX PBX Server User manual

CyberData 11307 User manual

CyberData

CyberData 11307 User manual

CyberData 11304 User manual

CyberData

CyberData 11304 User manual

CyberData 11272 User manual

CyberData

CyberData 11272 User manual

CyberData 011478 Manual

CyberData

CyberData 011478 Manual

CyberData 11214 Manual

CyberData

CyberData 11214 Manual

CyberData 11186 Manual

CyberData

CyberData 11186 Manual

CyberData 011530 Manual

CyberData

CyberData 011530 Manual

CyberData 011211 series Manual

CyberData

CyberData 011211 series Manual

CyberData 11272 Manual

CyberData

CyberData 11272 Manual

CyberData 11310 User manual

CyberData

CyberData 11310 User manual

CyberData 11307 User manual

CyberData

CyberData 11307 User manual

CyberData 11111 User manual

CyberData

CyberData 11111 User manual

CyberData 11308 Manual

CyberData

CyberData 11308 Manual

CyberData 11272 Manual

CyberData

CyberData 11272 Manual

CyberData 011035 Manual

CyberData

CyberData 011035 Manual

CyberData 011490 Manual

CyberData

CyberData 011490 Manual

Popular Intercom System manuals by other brands

Algo 3008 installation guide

Algo

Algo 3008 installation guide

2N Clip user manual

2N

2N Clip user manual

Comelit 6722W user manual

Comelit

Comelit 6722W user manual

Hollyland Solidcom C1 Pro user manual

Hollyland

Hollyland Solidcom C1 Pro user manual

Aiphone IS SERIES Quik start programming guide

Aiphone

Aiphone IS SERIES Quik start programming guide

RDM 481 BB D-20 installation instructions

RDM

RDM 481 BB D-20 installation instructions

Alpha Communications TekTone Tek-COM PK724 Series installation instructions

Alpha Communications

Alpha Communications TekTone Tek-COM PK724 Series installation instructions

Aiphone IP-EWST Quick setup instructions

Aiphone

Aiphone IP-EWST Quick setup instructions

Aristel AN1808-08 Quick installation guide

Aristel

Aristel AN1808-08 Quick installation guide

Commax DP-LA01M user manual

Commax

Commax DP-LA01M user manual

Fermax CITY LINE manual

Fermax

Fermax CITY LINE manual

Akuvox SDP-R29 user manual

Akuvox

Akuvox SDP-R29 user manual

Algo 8028 SIP Doorphone Installation and user guide

Algo

Algo 8028 SIP Doorphone Installation and user guide

Easydoor DJ 1T user manual

Easydoor

Easydoor DJ 1T user manual

Bticino 363511 installation manual

Bticino

Bticino 363511 installation manual

Guardian Telecom ExP-TBA Installation & operation

Guardian Telecom

Guardian Telecom ExP-TBA Installation & operation

Aiphone AP-10AS/C instructions

Aiphone

Aiphone AP-10AS/C instructions

RTS SAP612 user manual

RTS

RTS SAP612 user manual

manuals.online logo
manuals.online logoBrands
  • About & Mission
  • Contact us
  • Privacy Policy
  • Terms and Conditions

Copyright 2025 Manuals.Online. All Rights Reserved.