4
APRECIADO CLIENTE!
MUCHAS GRACIAS POR COMPRAR LA CYBEX JUNO-FIX. LE
ASEGURAMOS QUE EN EL DESARROLLO DE LA CYBEX JUNO-FIX SE HAN
TENIDO EN CUENTA LA SEGURIDAD, EL CONFORT Y LA PRACTICIDAD.
EL PRODUCTO SE HA DESARROLLADO BAJO UN ESTRICTO CONTROL
DE CALIDAD Y TENIENDO EN CUENTA TODOS LOS ESTÁNDARES DE
SEGURIDAD.
CARO CLIENTE!
MUITO OBRIGADO PELA DECISÃO DE COMPRAR A JUNO-FIX DA CYBEX.
ASSEGURAMOS QUE NA ELABORAÇÃO DESTA CADEIRA, A SEGURANÇA,
O CONFORTO E O FÁCIL MANUSEAMENTO FORAM O FOCO PRINCIPAL.
O PRODUTO FOI DESENVOLVIDO SOB UM CONTROLO DE QUALIDADE
SUPERIOR QUE CUMPRE TODAS AS NORMAS DE SEGURANÇA
STANDARD.
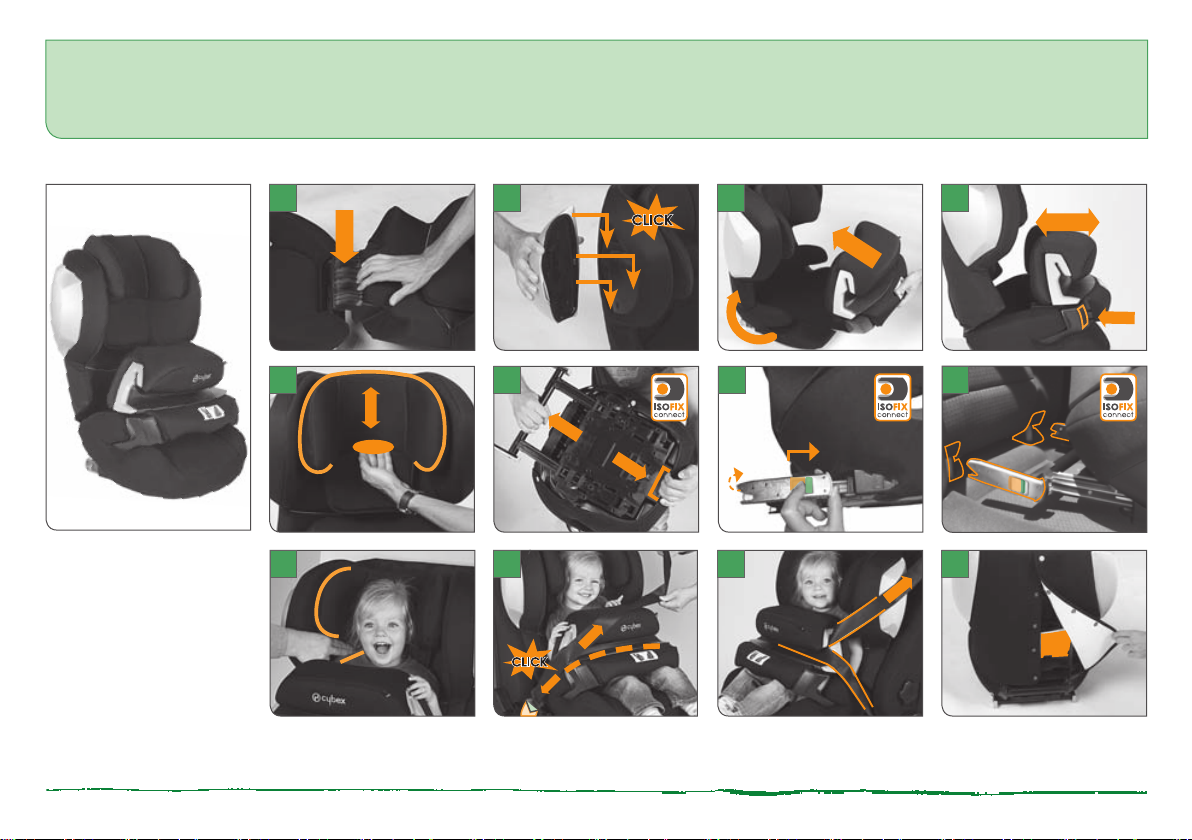
MANUAL ABREVIADO ....................................................................................... 1
HOMOLOGACIÓN ...............................................................................................3
PRIMERA INSTALACIÓN....................................................................................6
AJUSTE DE ALTURA...........................................................................................8
LA MEJOR POSICIÓN EN EL COCHE .............................................................10
INSTALACIÓN DE LA SILLA CON EL SISTEMA DE CONECTORES ISOFIX ..12
EXTRAER LOS CONECTORES ISOFIX........................................................... 14
COLOCAR LA SILLA EN EL VEHÍCULO .......................................................... 14
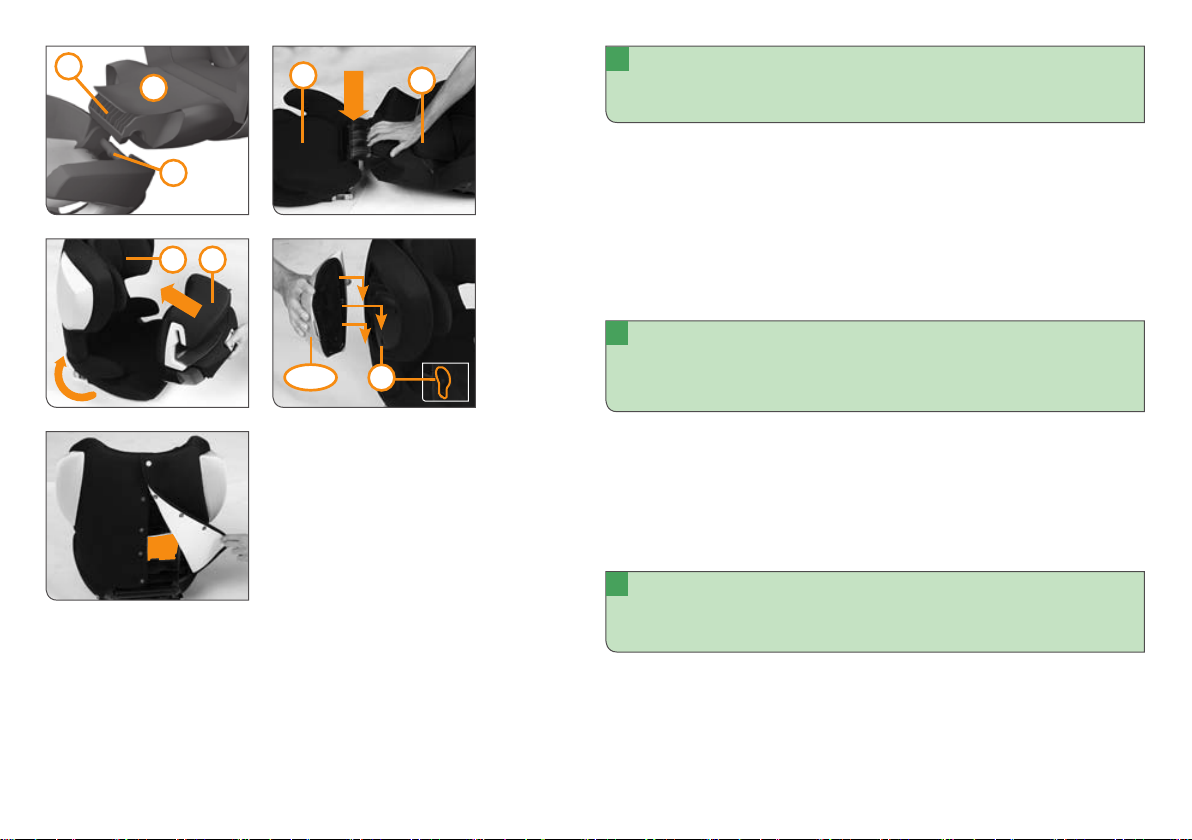
POSICIÓN DE SENTADO Y RECLINADO........................................................ 16
AJUSTAR EL COJÍN DE SEGURIDAD.............................................................. 16
ASEGURAR AL NIÑO........................................................................................18
¿ESTÁ SU HIJO ADECUADAMENTE ASEGURADO? ..................................... 18
CUIDADO DEL PRODUCTO .............................................................................20
LIMPIEZA ...........................................................................................................20
EXTRAER LA VESTIDURA...............................................................................20
QUÉ HACER TRAS UN ACCIDENTE ...............................................................22
VIDA ÚTIL DEL PRODUCTO.............................................................................22
RECICLADO.......................................................................................................22
GARANTÍA .........................................................................................................24
MANUAL ABREVIADO ....................................................................................... 1
HOMOLOGAÇÃO.................................................................................................3
PRIMEIRA INSTALAÇÃO ....................................................................................6
REGULAÇÃO À ESTATURA DO CORPO...........................................................8
O LUGAR CORRECTO NO AUTOMÓVEL........................................................10
INSTALAÇÃO DA CADEIRA COM O SISTEMA DE FIXAÇÃO ISOFIX ........... 12
RETIRAR OS FIXADORES ISOFIX .................................................................. 14
COLOCAR A CADEIRA NO VEÍCULO.............................................................. 14
POSIÇÃO SENTADA E RECLINADA ................................................................ 16
REGULAÇÃO DA ALMOFADA DE SEGURANÇA............................................16
POSICIONAR A CRIANÇA ................................................................................18
A SUA CRIANÇA ESTÁ SEGURA? ...................................................................18
MANUTENÇÃO DO PRODUTO ........................................................................20
LIMPEZA ............................................................................................................20
REMOVER O FORRO........................................................................................20
COMO PROCEDER DEPOIS DE UM ACIDENTE ............................................22
DURABILIDADE DO PRODUTO .......................................................................22
RECICLAGEM....................................................................................................22
GARANTIA .........................................................................................................24
CONTENIDO CONTÉM
ENESPT