manuals.online logo
Brands
  1. Home
  2. •
  3. Brands
  4. •
  5. CYBEX
  6. •
  7. Fitness Equipment
  8. •
  9. CYBEX Arc Trainer 600A Service manual

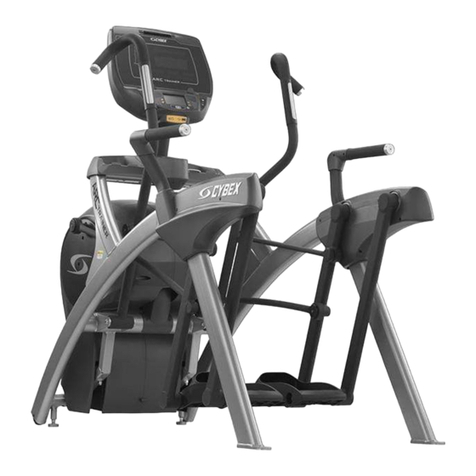
CYBEX Arc Trainer 600A Service manual

Arc Trainer®600A/610A Primary Drive 16 Rib Belt
Kit No. 600AK020 Installation Instructions
1.Read and understand all instructions thoroughly
before installing this kit.
2.Verify kit contents.See Figure 1.
Figure 1
A.Primary Drive 16 Rib Belt (1), 600A-343
B.Hex Nut .312-18 (2), HN664000
C.Split Lockwasher .312 (2), HS328300
D.Washer .312 (2), HS327600
E.Hex Head Cap Screw (HHCS) .312-18 x
3.75 (2), HC661240
F.Loctite #242, YA000201
3.Disconnect the power source.
A.Turn the main power switch to the off (0)
position and unplug the power cord from
the power outlet.
A
4.Remove the access cover.
A.Using a Phillips head screwdriver, remove the
four screws and four washers securing the
access cover. See Figure 2.
B.Remove the access cover.
Figure 2
Screw (4)
NOTE:This instruction sheet describes how to replace
the primary drive 16 rib belt on the Arc Trainer
600A/610A.
TOOLS REQUIRED
• Cloth or rag (2) • 1/2” Socket wrench
• Phillips screwdriver • 1/2” Open end wrench
• 3/16” Allen wrench • 9/16” Socket wrench
• 7/16” Socket wrench • 9/16” Open end wrench
• 3” Socket wrench extension
• 600AK012 (not supplied with this kit)
E
5.Detach the linkage arms.
A.Using a 3/16” Allen wrench, remove the
SHCS, washer, cap and spacer securing the
linkage arm. See Figure 3. NOTE:Figure 3
shows the contents of the linkage cap kit
that will be installed in step 19A.
B.Lay the linkage arm down on the frame.
NOTE:Place a cloth in between the linkage
arm and the frame to prevent scratches.
Figure 3
SHCS
Washer
Cap
Spacer
Linkage Arm
B
C
D
!WARNING:Disconnect the power cord before
continuing this procedure.Keep wet
items away from inside parts of the
unit.Electrical shock could occur
even if the unit is unplugged.
F
9.Remove HHCS on lower pulley.
A.Using a 7/16” socket wrench with a 3”
extension, remove the two HHCS, two
lock washers and two flat washers from
the lower pivot shaft. See Figure 8.
Figure 8
HHCS
Lock Washer
FlatWasher Lower
Pivot
Shaft
Drive
Belts
8.Remove the Idler Pulley.
A.Using a 9/16” socket wrench, remove the two
bolts and washers from the idler pulley.
B.Remove the idler pulley from frame. See
Figure 7. NOTE:Idler pulley is not needed
with self-tensioning belt.
Figure 7
Idler
Pulley
Washer/Bolt
6.Remove the
side covers.
A.Remove
the six
screws and
six washers
securing
each side
cover in
place. See
Figure 4.
B.Remove
both side
covers.
NOTE:The
gasket
will come
off with one
of the side
covers.
Figure 4
Washer
Screw
Side
Cover
Gasket
7.Remove the crank covers and the crank arm
disk supports.
A.Using a Phillips screwdriver, remove the three
screws securing each crank cover (and remove
the crank covers). See Figure 5.
B.Using a Phillips screwdriver, remove the screw
securing each crank arm disk support. See
Figure 6.
Figure 5 Figure 6
Crank
Cover
Screw
(3)
Screw
Crank
Arm Disk
Support
10.Remove the lower pivot shaft.
A.Remove the lower pivot shaft and
spacers. Set them aside, they will be
reinstalled in step 15B.
B.Reinstall the HHCS that was removed in
step 9 and turn in at least 5 turns.
C.Strike the HHCS head with a metal
hammer to brake the pem nut free from
the bracket and discard. See Figure 8.
Pem Nuts
Straight Edge Pulley
Pulley
Touch
Straight
Edge Here
(two places)
NOTE:The
straight
edge must
be no
more than
1/16” from
pulley
edge.
NOTE:The
straight
edge must
be no
more than
1/16” from
pulley
edge.
Touch
Straight
Edge Here
(two places)
Figure 10
12.Remove old primary drive belt.
A.While pulling back on the left side of the crank
shaft assembly, slide the belt past the pillow
block.
13.Installing new primary drive belt.
A.Install new primary drive belt by pulling back on
the left side of crank shaft assembly and at the
same time slide the belt past the pillow block.
14.Attach the crank shaft pillow block bolts.
A.Slide alignment pin on pillow block into hole on
frame
B.Using a 9/16” socket wrench and a 9/16” open
wrench, secure the two bolts, four washers and
two nuts (removed in step 10A) to the left pillow
block. See Figure 9.
C.Secure bolts on the right pillow block that were
loosened in step 11B.
15.Attach the lower pivot assembly.
A.Place the two belts on the lower pivot shaft.
B.Reinstall the two spacers that go under the
lower pivot shaft (removed in step 10A).
C.Attach the two new HHCS, two lockwashers,
two washers and two hex nuts.
D.Turn each HHCS in a couple of turns by hand.
E.Place secondary drive belt on the (secondary
pulley and then on the lower pulley.
F.Place primary drive belt on the lower pulley
and then stretch onto crank shaft pulley.
G.Using a 1/2” socket wrench with a 3”
extension tighten one of the HHCS a few
turns then tighten the other HHCS a few
turns. Alternate until both HHCS are secure.
H.Using a straight edge, verify that both pulleys
are aligned properly. See Figure 10. NOTE:
The straight edge must be no more than 1/16”
from pulley edge.
16.Attach the crank arm disk supports.
A.Using a Phillips head screwdriver, attach the
screw securing each crank arm disk support
in place. See Figure 6.
17.Attach the crank covers.
A.Place each crank cover in position.
B.Using a Phillips head screwdriver, attach the
three screws securing each crank cover in
place. See Figure 5.
18.Attach the side covers.
A.Place each side cover in position in the rubber
gasket.
11.Crank shaft assembly pillow block bolts.
A.Using a 9/16” socket wrench and a 9/16” open
wrench remove the two bolts, four washers and
two nuts from the left pillow block. See Figure 9.
Nut (2)
Washer
(4)
Bolt (2)
Left
Pillow
Block
Figure 9
B.Loosen the two bolts on the right pillow
block. NOTE:Do not remove bolts.

B.Using a Phillips head screwdriver, tighten
the six screws and six washers securing
each side cover. See Figure 4.
19.Secure the linkage arms.
A.Attach each linkage arm to each crank
(removed in step 5). NOTE:If you need
a new linkage cap then order kit number
600AK012.
B.Place a drop of loctite (F) to threads on
SHCS and into the shaft where the SHCS
will be tightened into.
C.Using a 3/16” Allen wrench, reinstall the
SHCS, washer, cap and spacer (removed
in step 5A). See Figure 3
20.Attach the access cover.
A.While being sure not to pinch any cables,
hold the access cover in place. See Figure 2.
B.Using a Phillips head screwdriver, tighten the
four screws and washers securing the access
cover. See Figure 2.
21.Test unit for proper operation.
Cybex®and the Cybex logo are registered trademarks of Cybex International, Inc.
Arc Trainer®and its mark are registered trademarks of Cybex International, Inc.
10 Trotter Drive Medway, MA 02053 • 508-533-4300 • FAX 508-533-5183 • www.cybexinternational.com • [email protected]
[email protected] • Copyright © 2008, Cybex International, Inc. All rights reserved • 600A-342 C • March 2008

Other manuals for Arc Trainer 600A

2

This manual suits for next models

1

Other CYBEX Fitness Equipment manuals

CYBEX Jungle Gym Accessory Rack User manual

CYBEX

CYBEX Jungle Gym Accessory Rack User manual

CYBEX Prestige Row User manual

CYBEX

CYBEX Prestige Row User manual

CYBEX 13265-999-4 AD User manual

CYBEX

CYBEX 13265-999-4 AD User manual

CYBEX Jungle Gym 17001 User manual

CYBEX

CYBEX Jungle Gym 17001 User manual

CYBEX VR3 Arm Curl User manual

CYBEX

CYBEX VR3 Arm Curl User manual

CYBEX 16150-999-4 B Instruction Manual

CYBEX

CYBEX 16150-999-4 B Instruction Manual

CYBEX Bravo Press User manual

CYBEX

CYBEX Bravo Press User manual

CYBEX FT 360 Instruction Manual

CYBEX

CYBEX FT 360 Instruction Manual

CYBEX 600H HIKER User manual

CYBEX

CYBEX 600H HIKER User manual

CYBEX Arc Trainer 770A User manual

CYBEX

CYBEX Arc Trainer 770A User manual

CYBEX Arc Trainer 626A User manual

CYBEX

CYBEX Arc Trainer 626A User manual

CYBEX 772A User manual

CYBEX

CYBEX 772A User manual

CYBEX BRAVO 8840 User manual

CYBEX

CYBEX BRAVO 8840 User manual

CYBEX VR1 Lat/Row User manual

CYBEX

CYBEX VR1 Lat/Row User manual

CYBEX 12170 User manual

CYBEX

CYBEX 12170 User manual

CYBEX Eagle Hip Abduction/Adduction User manual

CYBEX

CYBEX Eagle Hip Abduction/Adduction User manual

CYBEX 16250-999-4 AC User manual

CYBEX

CYBEX 16250-999-4 AC User manual

CYBEX 771A User manual

CYBEX

CYBEX 771A User manual

CYBEX Eagle 11010 User manual

CYBEX

CYBEX Eagle 11010 User manual

CYBEX Eagle Incline Pull 11020 User manual

CYBEX

CYBEX Eagle Incline Pull 11020 User manual

CYBEX FT-360S Instruction Manual

CYBEX

CYBEX FT-360S Instruction Manual

CYBEX 16110-999-4 A Instruction Manual

CYBEX

CYBEX 16110-999-4 A Instruction Manual

CYBEX VR3 Lat Pull User manual

CYBEX

CYBEX VR3 Lat Pull User manual

CYBEX 16190 User manual

CYBEX

CYBEX 16190 User manual

Popular Fitness Equipment manuals by other brands

Precor Pacific FITNESS Solana Assembly and maintenance guide

Precor

Precor Pacific FITNESS Solana Assembly and maintenance guide

Bison BA803 instruction manual

Bison

Bison BA803 instruction manual

Master AB Ring Pro user manual

Master

Master AB Ring Pro user manual

Vision Fitness ST200 owner's guide

Vision Fitness

Vision Fitness ST200 owner's guide

Weider 130 Bench user manual

Weider

Weider 130 Bench user manual

Kettler SKYLON 5 07655-350 Assembly instructions

Kettler

Kettler SKYLON 5 07655-350 Assembly instructions

BluMill KMS005M manual

BluMill

BluMill KMS005M manual

Pulseroll VIBRATING FOAM ROLLER PRO manual

Pulseroll

Pulseroll VIBRATING FOAM ROLLER PRO manual

ParaBody GS6-LP5A-101 user guide

ParaBody

ParaBody GS6-LP5A-101 user guide

Matrix G7-S34 owner's manual

Matrix

Matrix G7-S34 owner's manual

Skandika Fitness VIBRATIONSPLATTE V1 Assembly instructions

Skandika Fitness

Skandika Fitness VIBRATIONSPLATTE V1 Assembly instructions

Domyos Fitness Cube operating instructions

Domyos

Domyos Fitness Cube operating instructions

Progression Fitness X-plode PFX-1000 owner's manual

Progression Fitness

Progression Fitness X-plode PFX-1000 owner's manual

Fortis FSFITNSBNHA Assembly instructions

Fortis

Fortis FSFITNSBNHA Assembly instructions

SportsArt Fitness DF-108 manual

SportsArt Fitness

SportsArt Fitness DF-108 manual

Pro-Form 510 EX user manual

Pro-Form

Pro-Form 510 EX user manual

Star Trac Inspiration Strenght IP-S5308 installation instructions

Star Trac

Star Trac Inspiration Strenght IP-S5308 installation instructions

Life Span CORTEX PR-2 owner's manual

Life Span

Life Span CORTEX PR-2 owner's manual

manuals.online logo
manuals.online logoBrands
  • About & Mission
  • Contact us
  • Privacy Policy
  • Terms and Conditions

Copyright 2025 Manuals.Online. All Rights Reserved.