Cyclops Marine smarttune User manual

info@cyclopsmarine.com smarttune guide issue 9 EN
smarttune guide
For load display, see ‘App Instructions’, ‘Gateway Install Guide’ and ‘Gateway Instructions’ before sensor installation.
Product Description
smarttune is an innovative solution for accurate, live measurement of rigging load. Simple to retro-fit at the dock, smarttune
makes repeatable standing rigging load data available through precision-designed, wireless technology. Designed to replace
existing double acting turnscrews, it allows you to record and repeat your fast rig settings, creating the optimum sail shape
and the best racing performance, in all conditions.
How it works…
Simply unthread the existing turnscrew and screw on smarttune. Easily connect the sensor to your phone via the latest
smartphone app or to marine electronics via optional NMEA2000 Gateway for immediate load data.
Installation
smarttune
+
2x
Or similar
1. If installing smarttune with a gateway, follow ‘Gateway install guide’ before installing smarttune.
2. Release backstay & mainsheet completely, remove any mast shims and de-jack mast (if applicable).
3. Secure a halyard to a hardpoint near the chain-plate. Tension halyard until stay sag visible. Secure halyard and attach
another halyard near chainplate as a safety.
4. Remove split pins/Velcro from turnscrew studs.
2
3

info@cyclopsmarine.com smarttune guide issue 9 EN
5. Measure a reference stay length using ruler or verniers. e.g. distance between stud ends inside the turnscrew.
6. Use rope to secure stay to a hardpoint.
7. Unscrew existing turnscrew using the spanners. Ensure that stay is secure before completely disconnecting turnscrew.
Once the turnscrew is free from the upper and the lower threads stay will hang.
8. Apply anti-corrosion paste to threads.
9. Locate smarttune turnscrew and correctly orientate to chain-plate. The model/serial numbers should be the right way
up when correctly oriented.
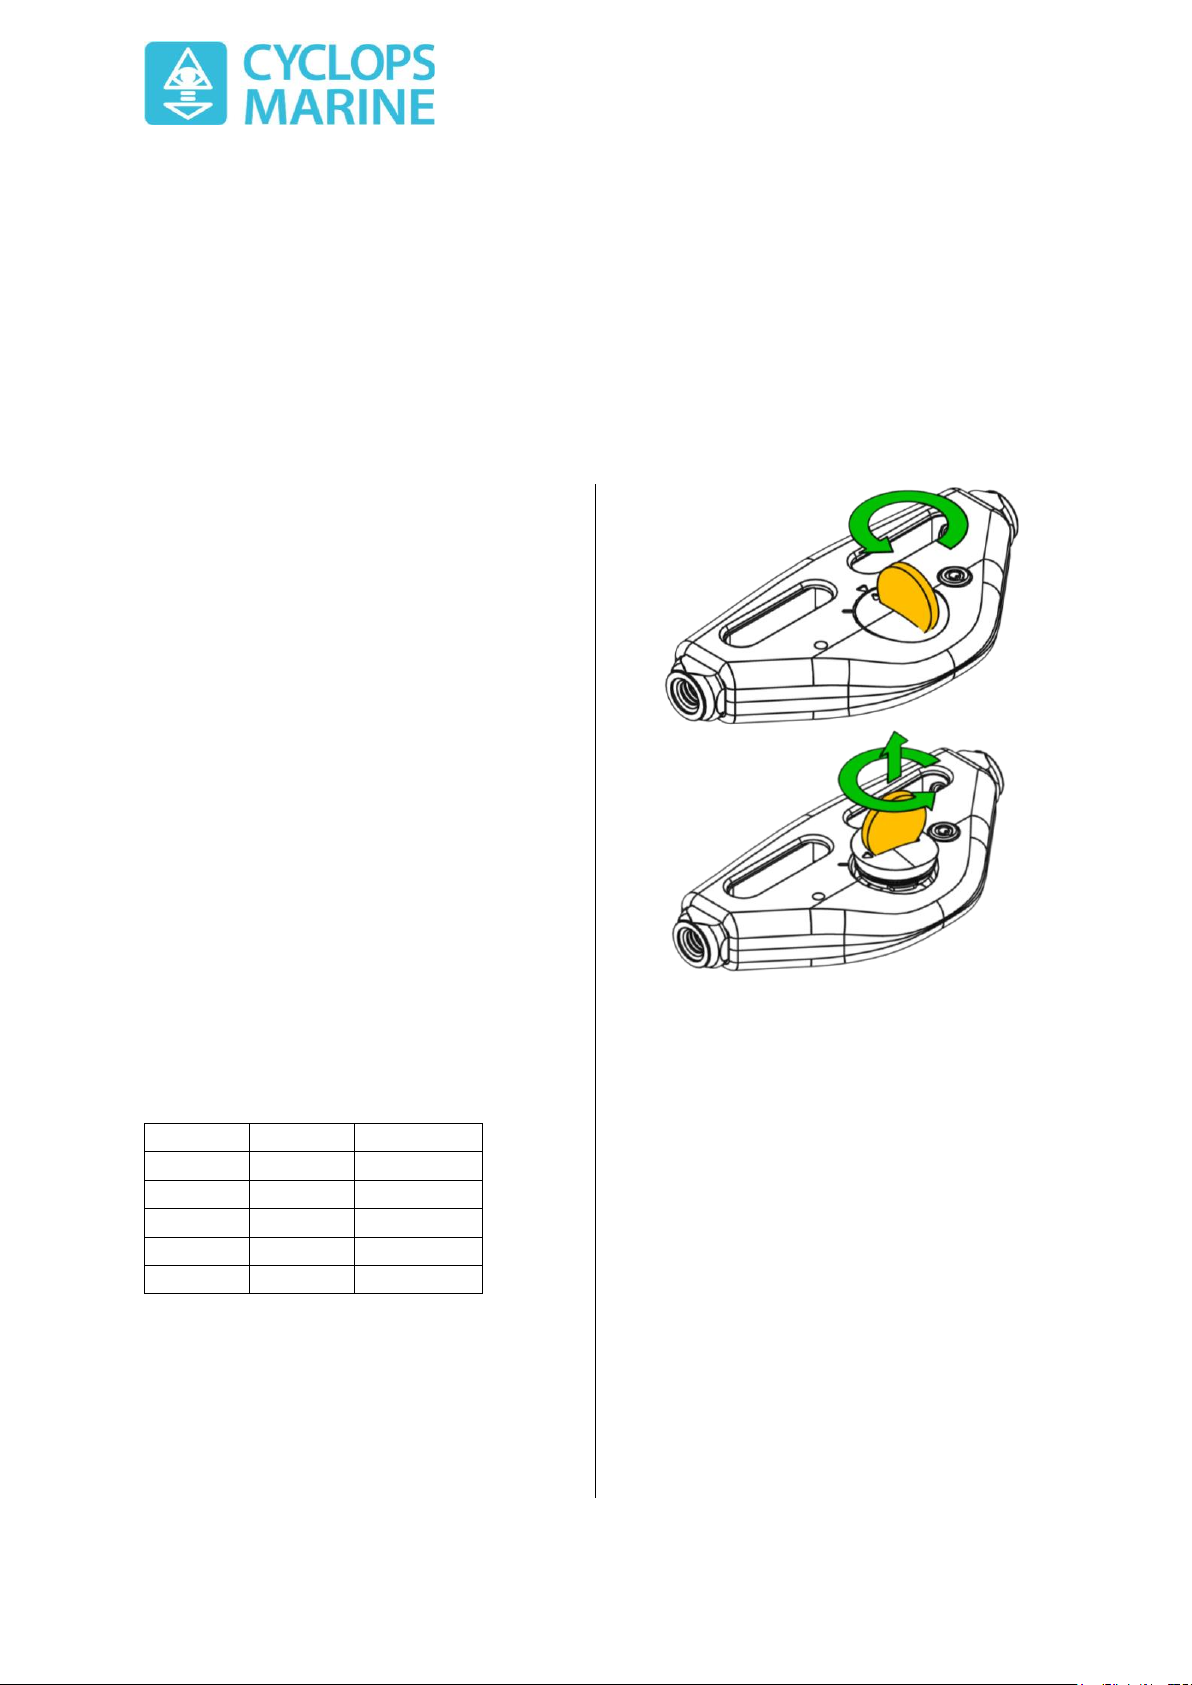
10. Looking down, rotate smarttune anti-clockwise onto stay stud. Take 3 complete turns onto stud.
11. Offer smarttune turnscrew up to chainplate stud and continue winding anti-clockwise to thread. Use one spanner to hold
stay stud still, and the other to rotate turnscrew.
12. Thread turnscrew on until reference measurement taken in step 5 is reached.
13. Reinstall any split pins/Velcro.
14. Remove rope securing the stay and halyards.
15. Return rig to dock tune as desired. Go sailing!
Changing Batteries
It is highly recommended that the batteries are changed
in a dry, enclosed location e.g. below decks where
possible. Cyclops recommends removal of the battery
from the device and storage of the sensor in a cool, dry
place away from direct sunlight during extended periods
of time where it is not expected to be used.
FAILURE TO MAINTAIN THE BATTERY COVER SEAL WILL
RESULT INWATER INGRESS & PERMANENT DAMAGE NOT
COVERED UNDER WARRANTY.
The sensor will show 0.00 as the load (even when under
load) when the batteries need to be replaced.
Please dispose of used batteries responsibly.
5/16” Only
smartpower button
To maximise battery life, the sensor will be powered on
for different lengths of time depending on how many
times the power button is pressed. A single firm button
press will result in a single light flash.
Press button:
Light flashes
Powered on for:
Once
Once
30 sec
Twice
Twice
20 min
3 times
3 times
2 hrs
4 times
4 times
8 hrs
5 times
5 times
Continuous
If the sensor is on, press the button once to power it
down after 30 seconds.
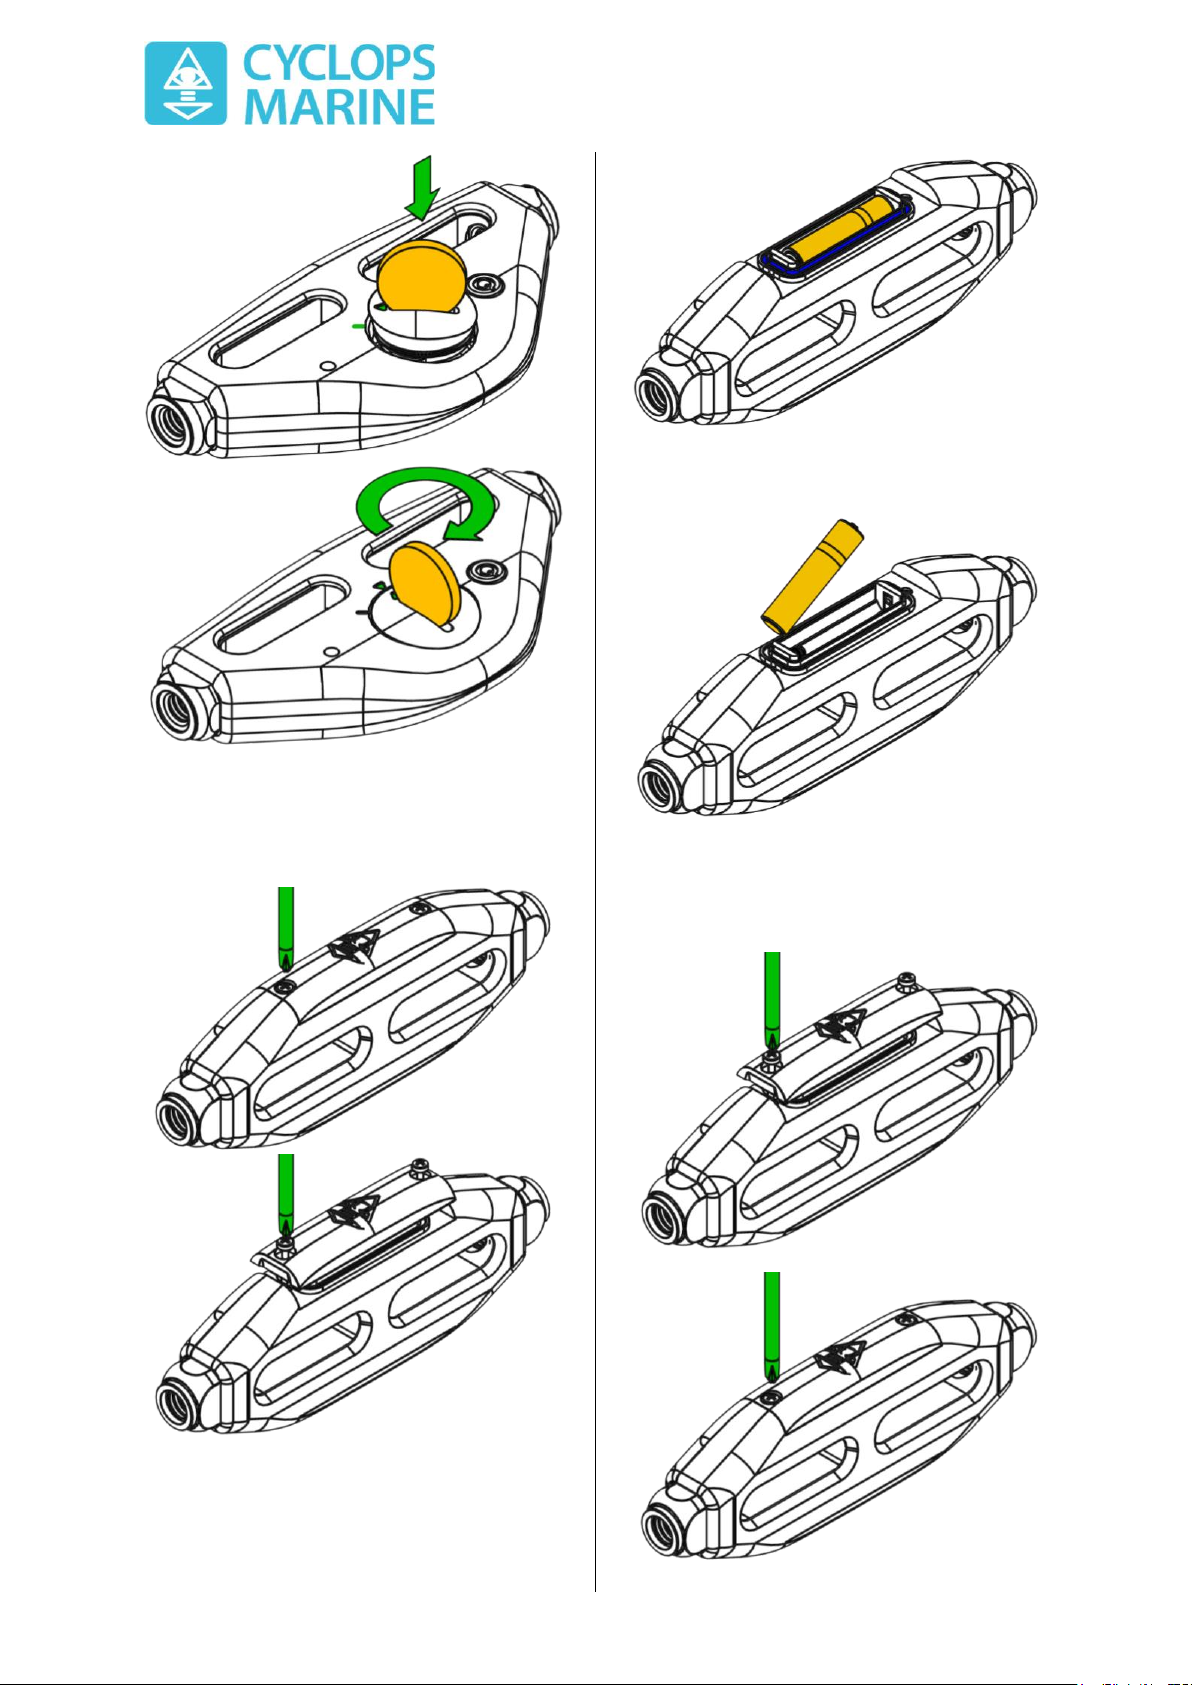
Removing battery & cover
Use a coin that fills the battery cover slot and twist until
the cover pops out and comes completely free. If
necessary, free the battery with a gentle tap to the
opposite face of the sensor.
Replace the CR2032 battery with equivalent. Do not use
non-standard batteries or other sizes, as this can cause
damage.
Cyclops recommends Renata CR2032 batteries for
maximum battery life and performance.
Replacing battery & cover
To reinstall the battery & cover, install battery +ve side
up, insert cover, line up the arrow on the cover with the
diagonal dash on the housing. Press firmly so the cover is
flush with the housing. Use a coin to twist the cover until
the arrows in the cover are aligned, and the battery cover
is flush with the housing.

info@cyclopsmarine.com smarttune guide issue 9 EN
7/16” and above
Carefully remove each of the battery covers on the side
of the sensor by unscrewing 2x Phillips head screws with
a small Phillips screwdriver.
Lift off the plastic battery cover and place down without
disturbing the seal on the body.
Check the ‘O’ ring seal (shown in blue) is seated properly
and re-lubricate if dry.
Remove the old batteries and replace with 2x new AAA.
Replace the plastic battery cover and carefully locate the
2 screws, tightening until the battery cover and screws
are flush. DO NOT OVER TIGHTEN THE SCREWS.

info@cyclopsmarine.com smarttune guide issue 9 EN
Safety
Please read all instructions before using smarttune to
measure loads. Always perform a safety evaluation
before use to ensure that use of the sensor is not
dangerous to nearby people or property.
Overload
The Maximum Working Load (MWL) of a smarttune must
not be exceeded, as this may cause damage to the
internal instrumentation and will invalidate the warranty.
OVERLOADING TO 150% OF MWL WILL RESULT IN
PERMANENT DAMAGE TO THE SENSOR THAT WILL
REQUIRE RECALIBRATION.
Calibration
If smarttune has been under load for a significant length
of time, the sensor may take 1-2 minutes to return to zero
when the load is removed. This is to be expected.
Operation of sensor
Please note that smarttune is designed to work in tension
only, with the load applied by studs threaded into the
turnscrew.
Any loads applied to the plastic body (e.g. squeezing due
to sails furled tightly around the sensor), may result in
unexpected or incorrect reported loads, including
negative loads. This is to be expected, and provided the
sails do not cause physical damage to the plastic body,
the sensor will continue to report the loads correctly
when the squeezing is removed (i.e. when the sail is
unfurled).
Technical Data
Frequency 1Hz (custom available on request)
Accuracy ±1% of MWL within 0-40ºC
Body Material SS 316L, Brass threaded inserts
Housing Material Acetal, IP67 rated
Battery life 200 hours, 1x CR2032 (5/16”)
life 6 months, 2x AAA (7/16” & above)
Thread
Dimensions
mm
Mass
g
MWL
tonnes
Accuracy
range*
kg
5/16”
112x55x18
180
1.0
±10
7/16”
165x61x26
390
1.9
±19
1/2"
165x61x26
390
2.4
±24
5/8”
83x66x22
620
3.8
±38
3/4”
93x74x25
1000
5.0
±50
smarttunes are not warranted to be accurate for the
purposes of buying/selling products by weight.
Other Cyclops Marine Marine Equipment manuals
Popular Marine Equipment manuals by other brands

Sailor
Sailor RT5022 VHF DSC Operation manual

Taco Marine
Taco Marine GS-312 Installation instruction guide

Ocean Signal
Ocean Signal EPIRB2 user manual

Simpson Lawrence
Simpson Lawrence Pacific C1250 Installation, operation & maintenance instructions

Skipper
Skipper IR301 Operation and installation manual

Quick
Quick DYLAN DH user manual