Copyright ©2013 D-Link Corporation/D-Link Systems, Inc. All rights reserved. D-Link and the D-Link
logo are registered trademarks of D-Link Corporation or its subsidiaries in the United States and other
countries. iPhone, iPad, and iPod touch are registered trademarks of Apple Inc. Android is a trademark
of Google, Inc. Other trademarks are the property of their respective owners. Maximum wireless signal
rate derived from IEEE Standard 802.11n and 802.11g specications. Actual data throughput will vary.
Network conditions and environmental factors, including volume of network trac, building materials
and construction, and network overhead, lower actual data throughput rate. Environmental factors
will adversely aect wireless signal range. Product specications, size and shape are subject to change
without notice, and actual product appearance may dier from that depicted on the packaging. Visit
www.dlink.com for more details.
Having trouble installing your new product? D-Link’s website
contains the latest user documentation and software updates
for D-Link products. U.S. and Canadian customers can contact
D-Link Technical Support through our website.
United States
http://support.dlink.com
Canada
http://support.dlink.ca
Technical Support
Version 1.3 | October 16, 2013
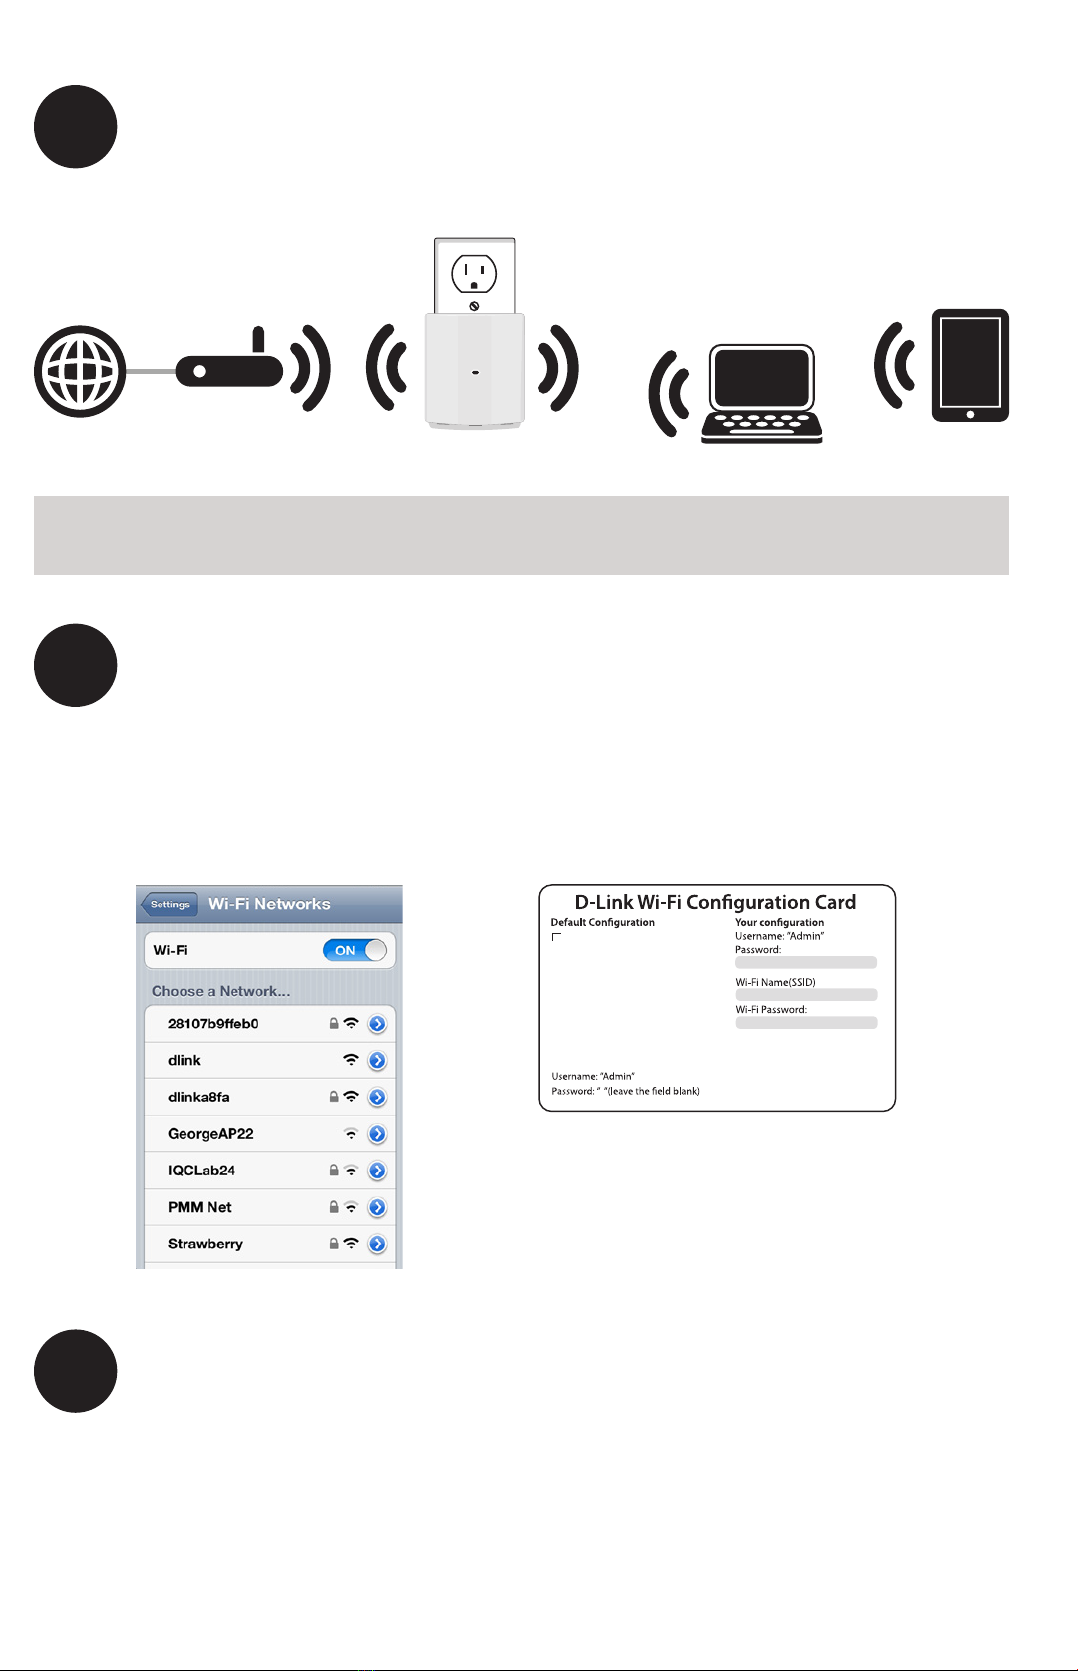
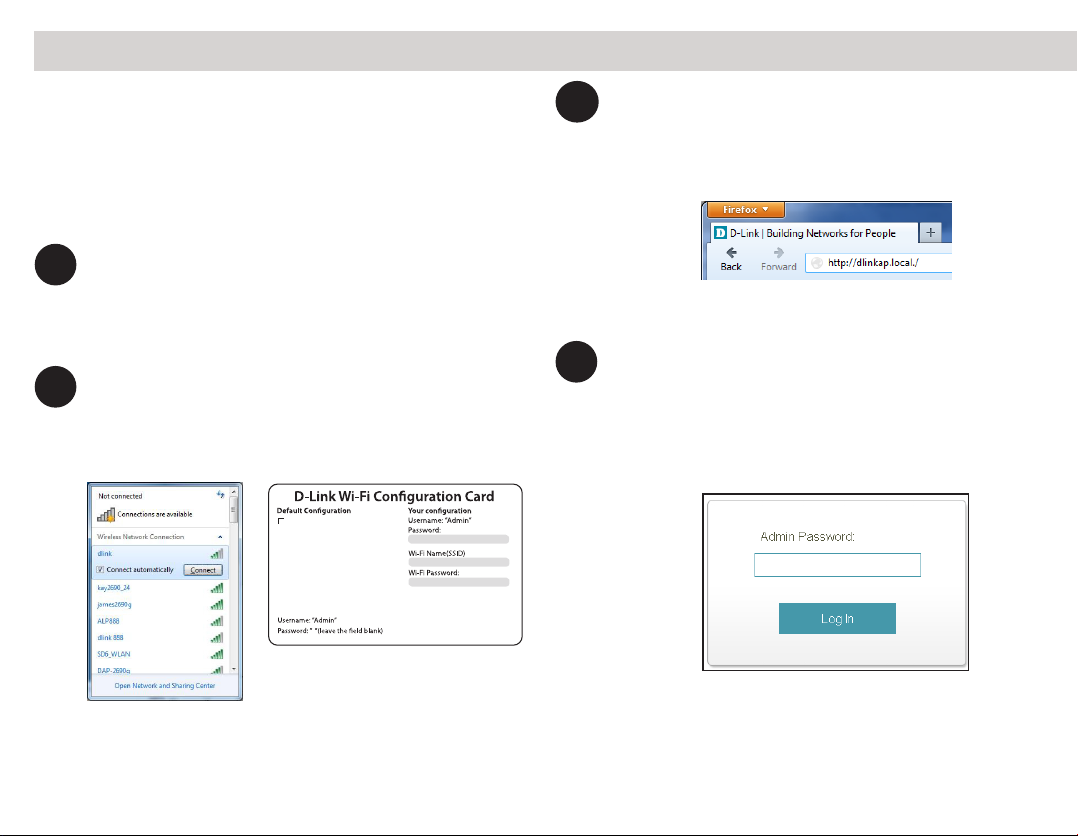
Open the wireless utility on your wireless device or computer.
Select the Wi-Fi Network name (from the Wi-Fi Conguration
Card) and enter the password.
Open a web browser (e.g., Internet Explorer, Firefox, Safari, or
Chrome) and enter http://dlinkap.local./.You may also enter the
IP address* of the DAP-1320. Windows XP users can enter
http://dlinkap.
2
3Why can’t I connect to my wireless router or my wireless connection
drops?
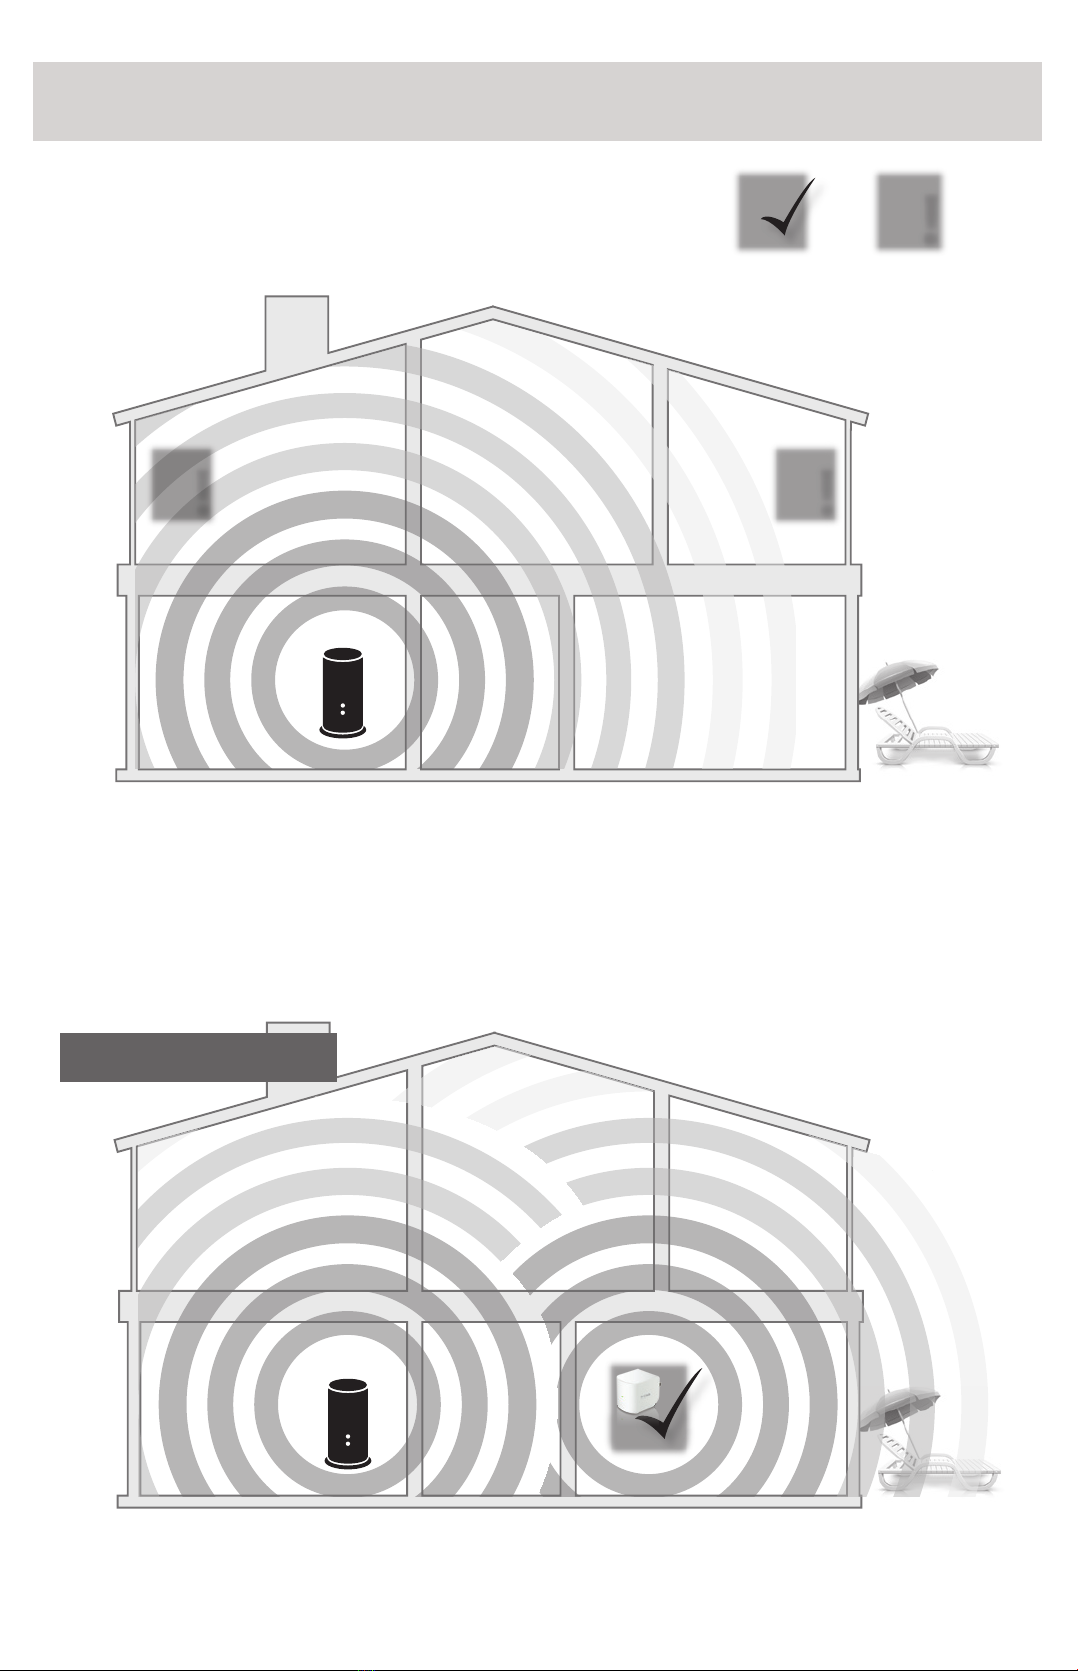
1. Verify that the DAP-1320 is within range of your wireless router. Try
plugging it into a location closer to the router and verify the LED is
solid green.
2. Note that when repeating a wireless signal from a router or access
point, devices connected to the extender will not get the same
speed/throughput as when connected directly to the router.
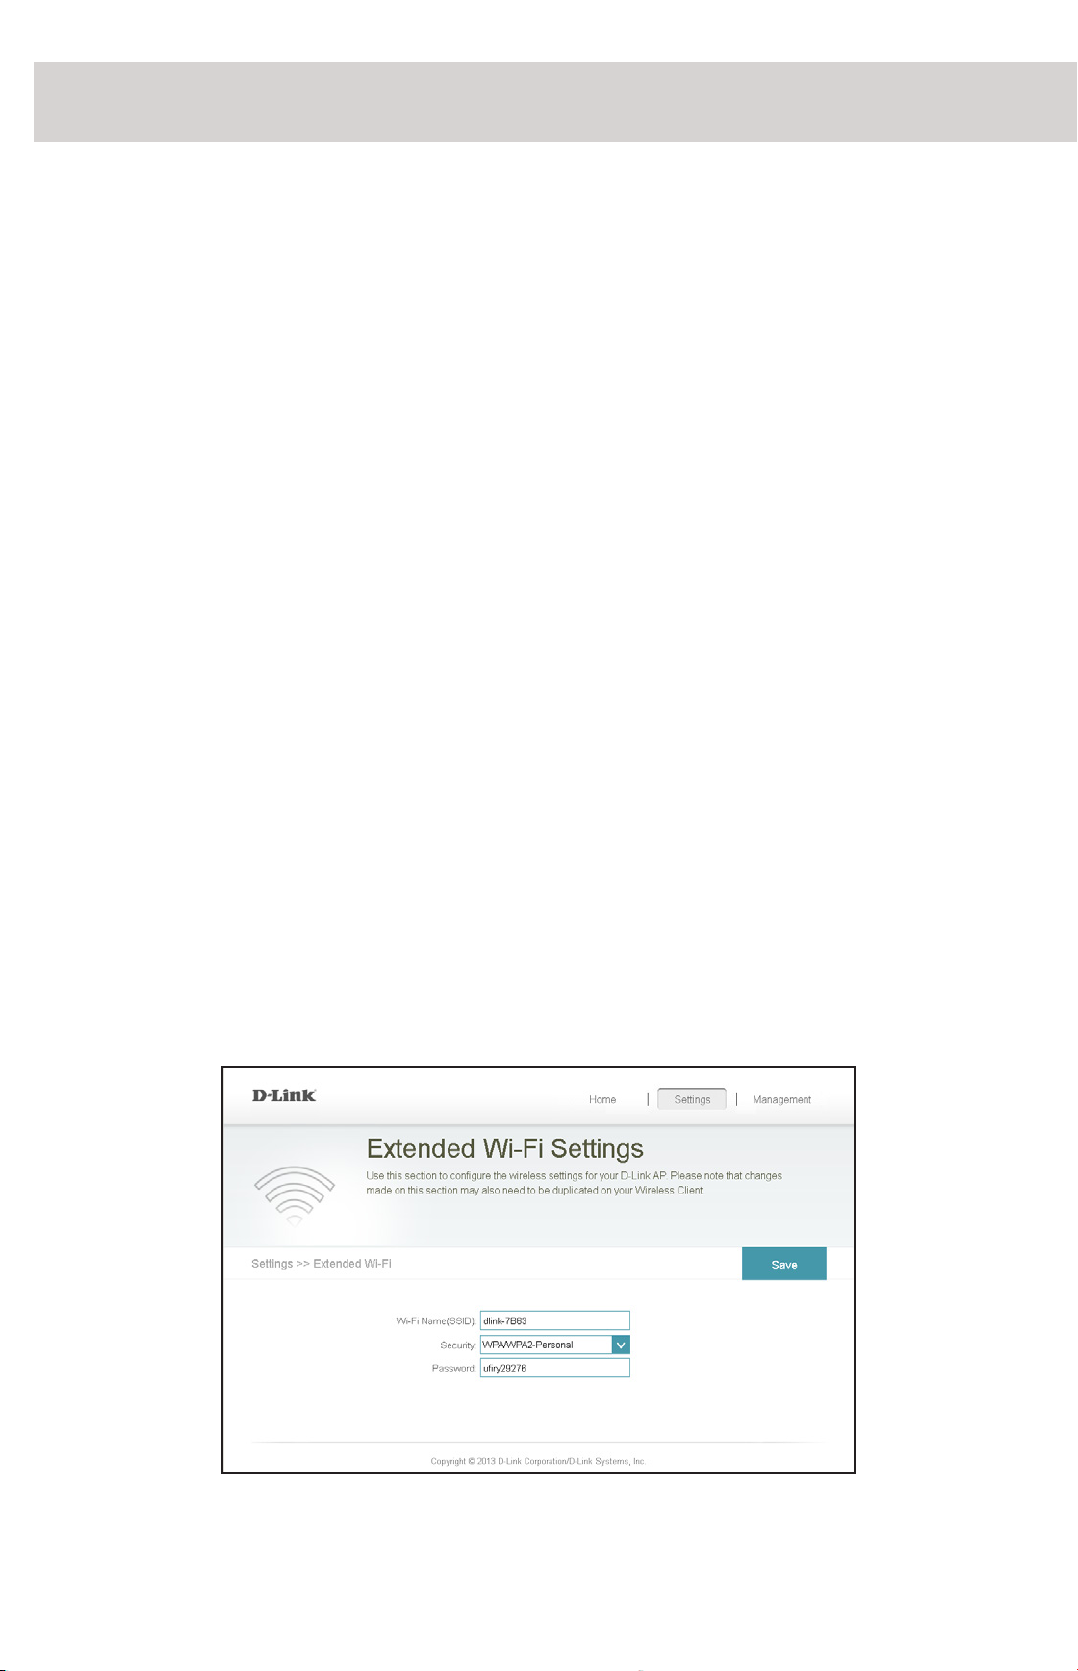
How do I change the wireless settings on the DAP-1320?
1. Open a web browser (e.g., Internet Explorer, Firefox, Safari, or Chrome)
and go to http://dlinkap.local./ (or http://dlinkap on Windows XP).
2. At the login screen, click or press the Log in button (no password by
default).
3. Go to Settings > Extended Wi-Fi Settings.
4. Enter a new wireless name (SSID) and password.
Troubleshooting
Documentation available at http://www.dlink.com/DAP-1320.
5. Click or press Save.
Note: If you have changed the Wi-Fi Network name, the device you are
currently using to connect to the DAP-1320 will drop. You will need to
open your wireless utility and connect to the DAP-1320 using the new
network name and password.
What if I forgot my DAP-1320 password?
1. If you forgot your password or want to reset the DAP-1320 back to
the factory default settings, press and hold the reset button using
a paper clip and release after 10 seconds.
Warning: This process will erase all your settings.
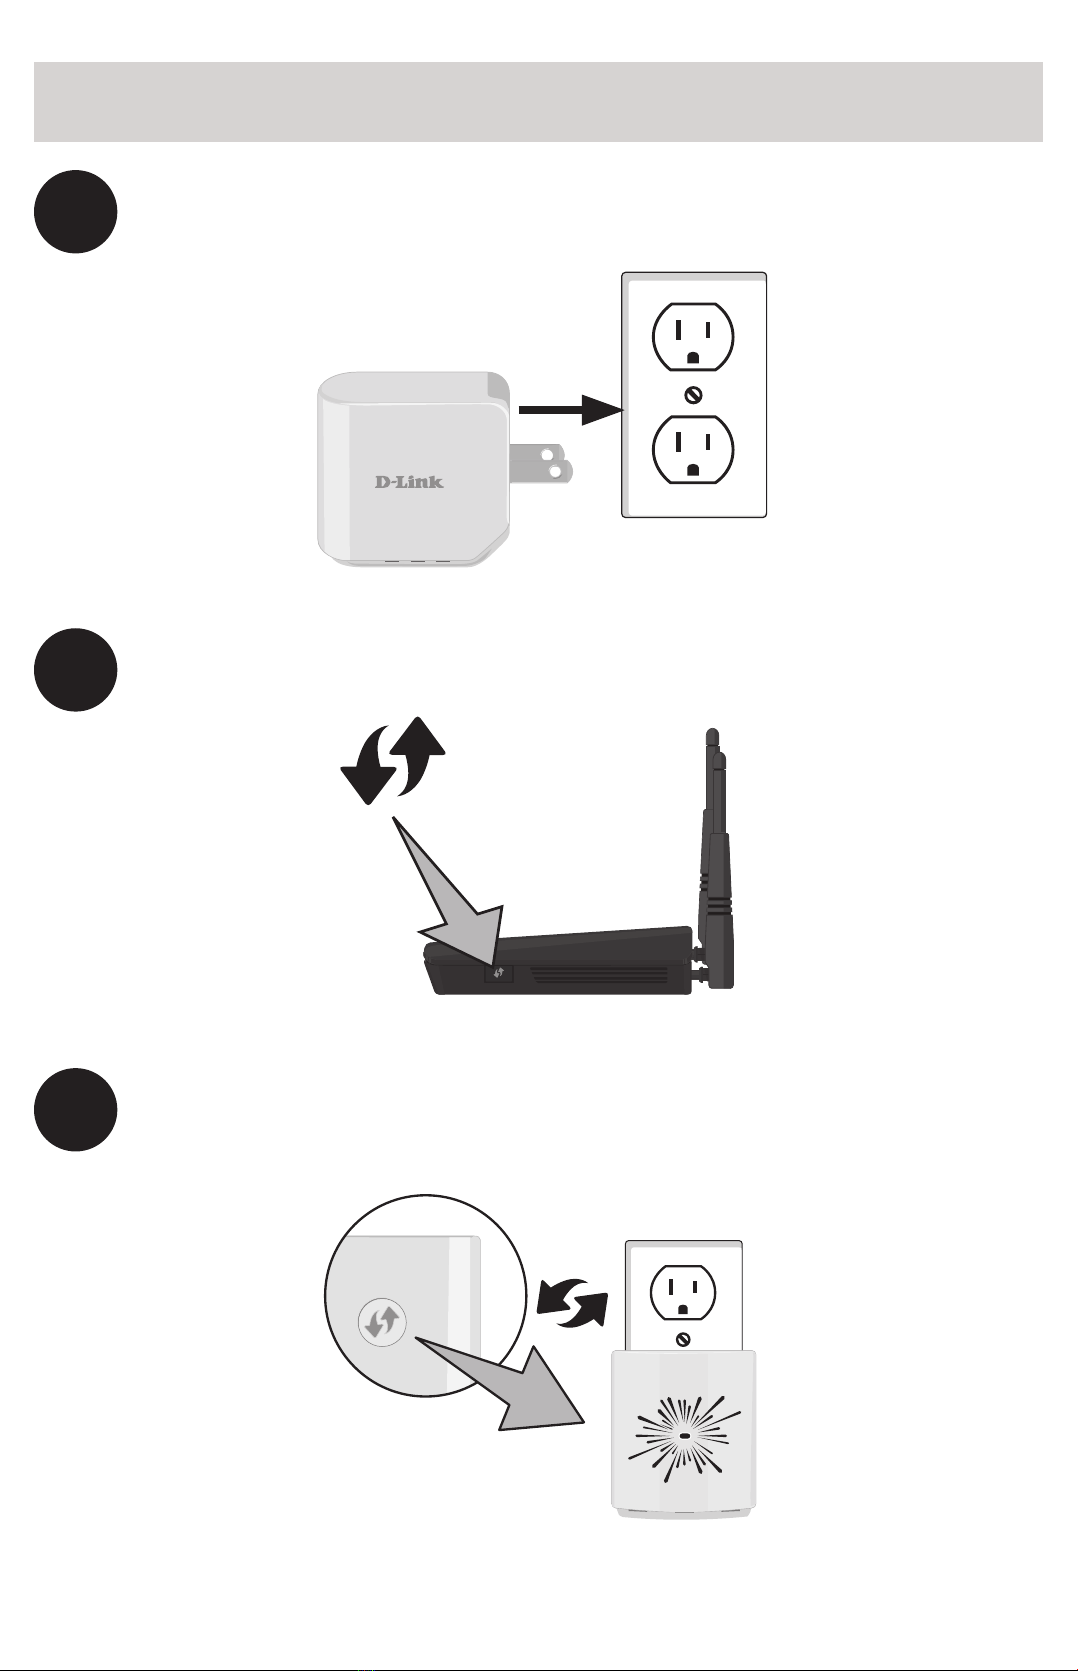
2. You may repeat the WPS process on the other side of this QIG or
log in and run the Setup Wizard. Follow the steps under Congure
the DAP-1320.
Congure the DAP-1320 Using a Web Browser
You may log into the web-based conguration utility on the DAP-1320
to perform the following tasks:
• Run the setup wizard
• Upgrade rmware
• Change wireless and network settings
Wi-Fi Name(SSID):
dlink-2c19
Wi-Fi Password:
gccnu80856
Web browser link:
http://dlinkap2c19.local.
Onceyouconnect,the loginpagewillappear. Enteryourpassword
and click Log in. By default the password is blank.
Note: If this is the rst time logging in the DAP-1320, you will be
directed to the setup wizard automatically.
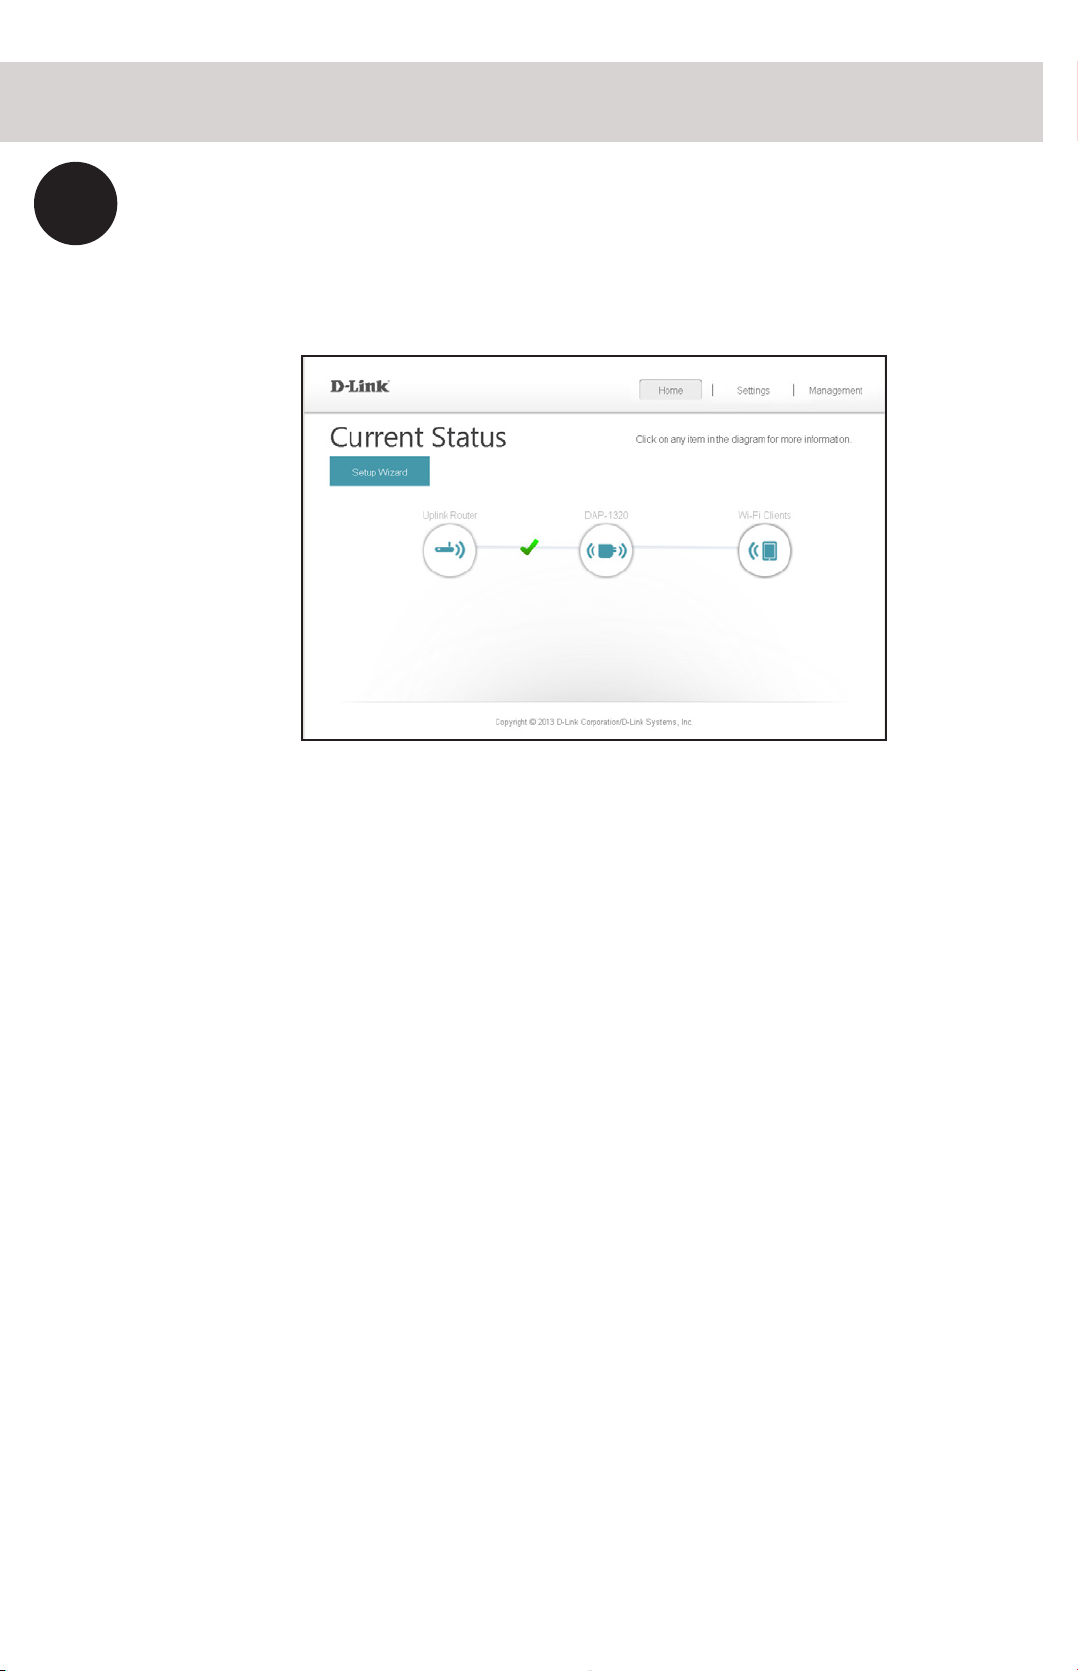
4
The home page will display your current status. A green check
mark represents a successful connection to your wireless router
or Access Point (AP).
5
If the check mark is red, you may connect to your wireless router
or AP by clicking on the Uplink Router icon.
Visit http://www.dlink.com/DAP-1320 to download the user
manual for more information.
* The default IP address is 192.168.0.50. Once the DAP-1320 connects to your
router, it will get assigned a new IP address based on your router/network’s
DHCP settings. You will need to log in to your router and view the DHCP table
to see what IP address was assigned to the DAP-1320. The MAC address is
printed on the label on the DAP-1320.
1Plug the DAP-1320 in an available outlet near your router. You
may move it to a more suitable location after conguration.